Oh, cookie decorating! It’s the best, right up until the icing starts acting up. I cannot tell you how many flooded cookies I’ve ruined because my glaze decided to behave more like soup than a sturdy coating. It’s so frustrating when you spend hours making those delicate sugar cookies only to watch your beautiful borders melt away. Forget all that guesswork, because I’ve finally landed on the royal icing recipe that never fails me. This is the one that dries rock-hard, stays smooth, and actually looks professional, even when I’m rushing before a holiday sale. Seriously, this batch is foolproof, and it was the game-changer that finally made me confident in my decorating skills!
Why This is the Best Royal Icing Recipe for Cookies (E-E-A-T Focus)
You know how frustrating a sticky cookie surface is after hours of work? That won’t happen here, trust me. This isn’t your basic powdered sugar glaze; this is the best royal icing for cookies because of what’s inside—namely, the meringue powder! That ingredient is what stabilizes everything.
When you use this recipe, you’re locking in density. It resists humidity so much better than simple water-and-sugar glazes, which means your holiday cookies actually stay pristine until you eat them. This icing dries incredibly hard, which is essential whether you’re doing intricate piping or trying to get that perfect flooded base layer. Honestly, mastering this stability is what separated my early attempts from the cookies I felt proud handing out.
It’s all about structure, which is why so many professionals swear by royal icing. You can even check out my guide on why certain icing recipes work better for firm finishes.
- It dries reliably hard, so stacking or packaging is a breeze.
- The high sugar content gives it that signature glossy finish.
- It holds its shape beautifully for outlining work without bleeding.
Quick Facts for Your Royal Icing Recipe
This is a super fast recipe! Prep time is only about 10 minutes total, and we aren’t even baking, so that’s your total time invested. This batch yields enough icing that dries hard to cover roughly three dozen standard-sized cookies. Happy decorating!
Ingredients for Your Foolproof Royal Icing Recipe
The magic of this royal icing recipe starts with getting your ingredients prepped just right. We’re keeping things simple here, but precision matters with this kind of decoration! You need four things, and you need to treat the sugar right.
First up is four cups of confectioners’ sugar—and this is non-negotiable—it must be sifted! If you don’t sift it, you end up fighting lumps the entire time you’re trying to make your flood consistency. Then, we need three tablespoons of meringue powder. This is the key player for stability, and we’ll talk more about why in a second, but have it measured out and ready to go.
For liquids, we just need six tablespoons of warm water and one teaspoon of clear vanilla extract. I say clear vanilla because you want that sweet vanilla flavor without adding any brown color to your pristine white icing base. We’ll be adding those liquids to the dry stuff to bring it all together into a beautiful, smooth icing recipe!
If you look at the ingredients and think, “Oh no, I don’t have meringue powder,” don’t panic just yet! We’ll cover the fresh egg white swap later, but for this specific, reliable recipe, the powder is what I insist on for consistency.
Meringue Powder vs. Egg Whites: Making Your Royal Icing Recipe
When you see royal icing with meringue powder in a recipe, sometimes people get nervous because they think they need fresh eggs. But honestly, I stick with the powder because it’s just so much easier and more reliable for a beginner royal icing journey. The powder is pasteurized, so there’s less worry, and it always whips up the exact same way every single time.
The instructions I gave you use the meringue powder, and that’s my go-to for creating that super glossy, stiff icing we need for outlining. Now, if you absolutely must skip the powder, my grandmother’s way was always with fresh egg whites. If you go that route, you need two large, fresh egg whites. Just make sure they are slightly frothy—I mean, just foamy—before you slowly beat in that sifted powdered sugar. It works, but you have to be extra careful with the temperature of your kitchen when using fresh whites!
How to Make Royal Icing: Step-by-Step Instructions
Okay, let’s get this mixer going! This is where the transformation happens. First, even though we talked about prepping them, give your sifted confectioners’ sugar and meringue powder a quick whisk together in the bowl to distribute everything evenly. Then, pour in the warm water and your clear vanilla extract.
Start your electric mixer on low speed—don’t go high yet, or you’ll end up with a sugar cloud in your kitchen, which nobody wants! Mix on low just until everything looks combined and scraped down the sides nicely. Now, put your game face on! Increase that speed to medium-high and let that mixer run for a full 5 to 7 minutes. Don’t cheat this step! This long, high-speed beating is what incorporates the air slowly, giving you that trademark stiffness and the amazing glossy sheen that says, “Yes, I made this!”
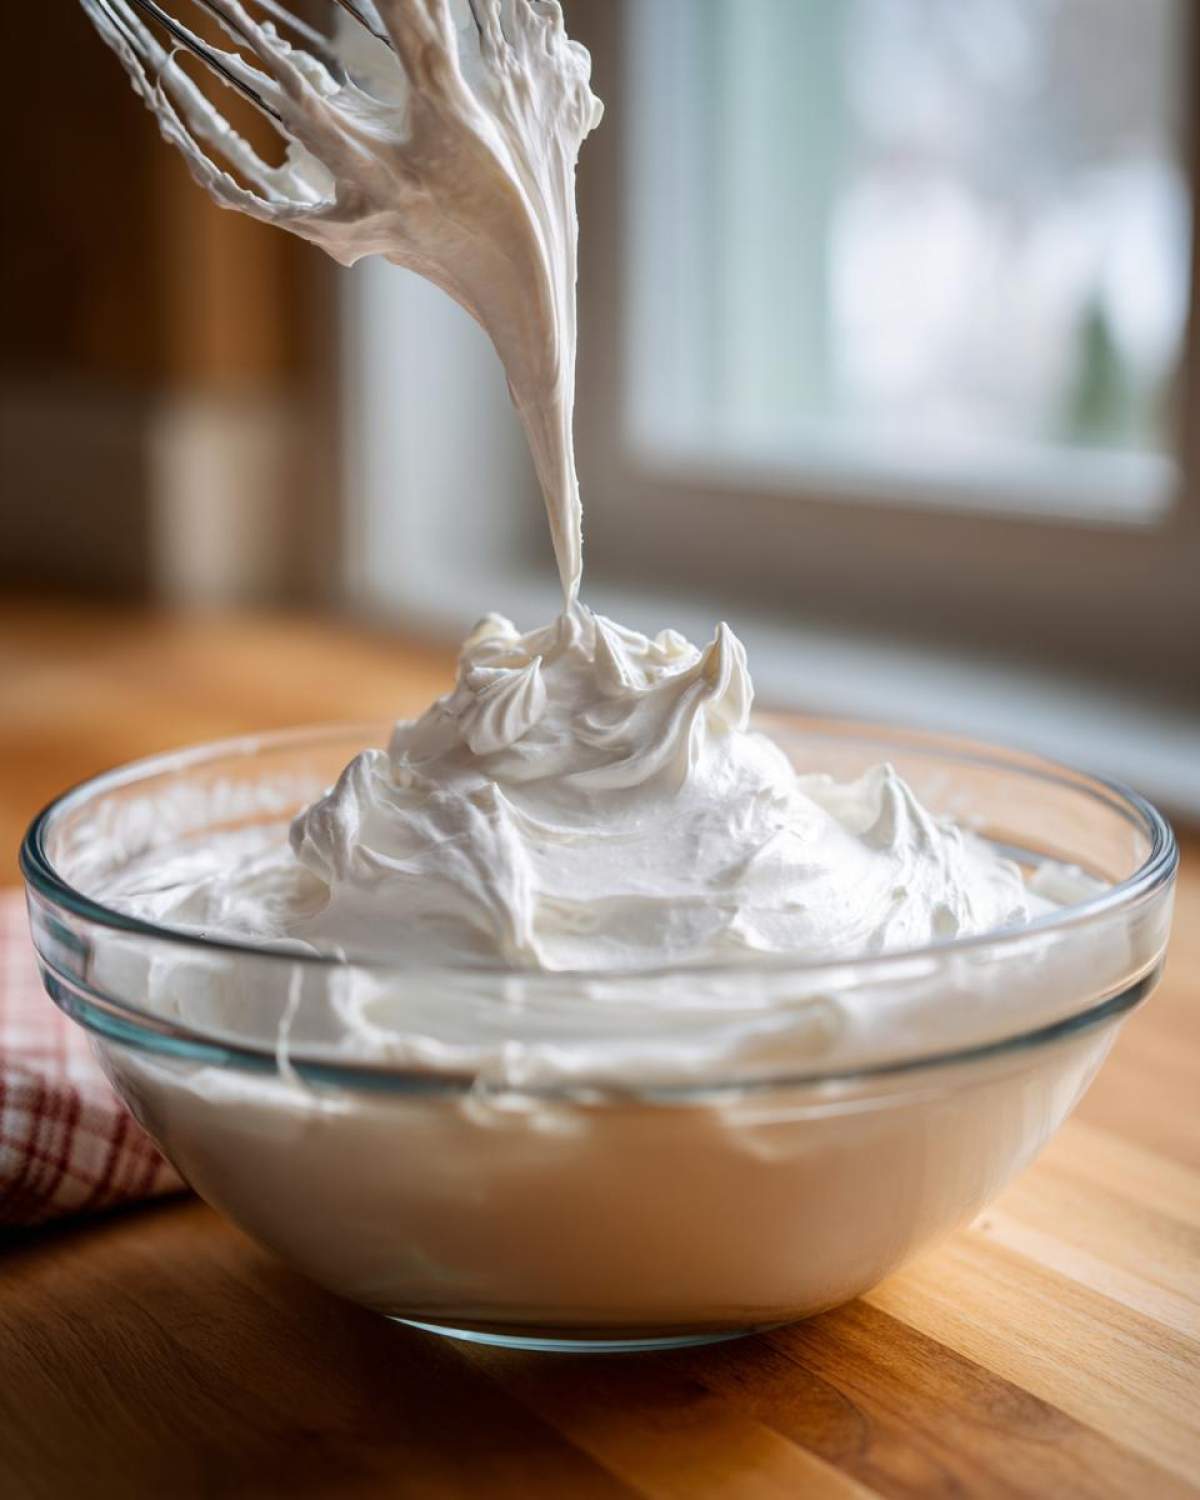
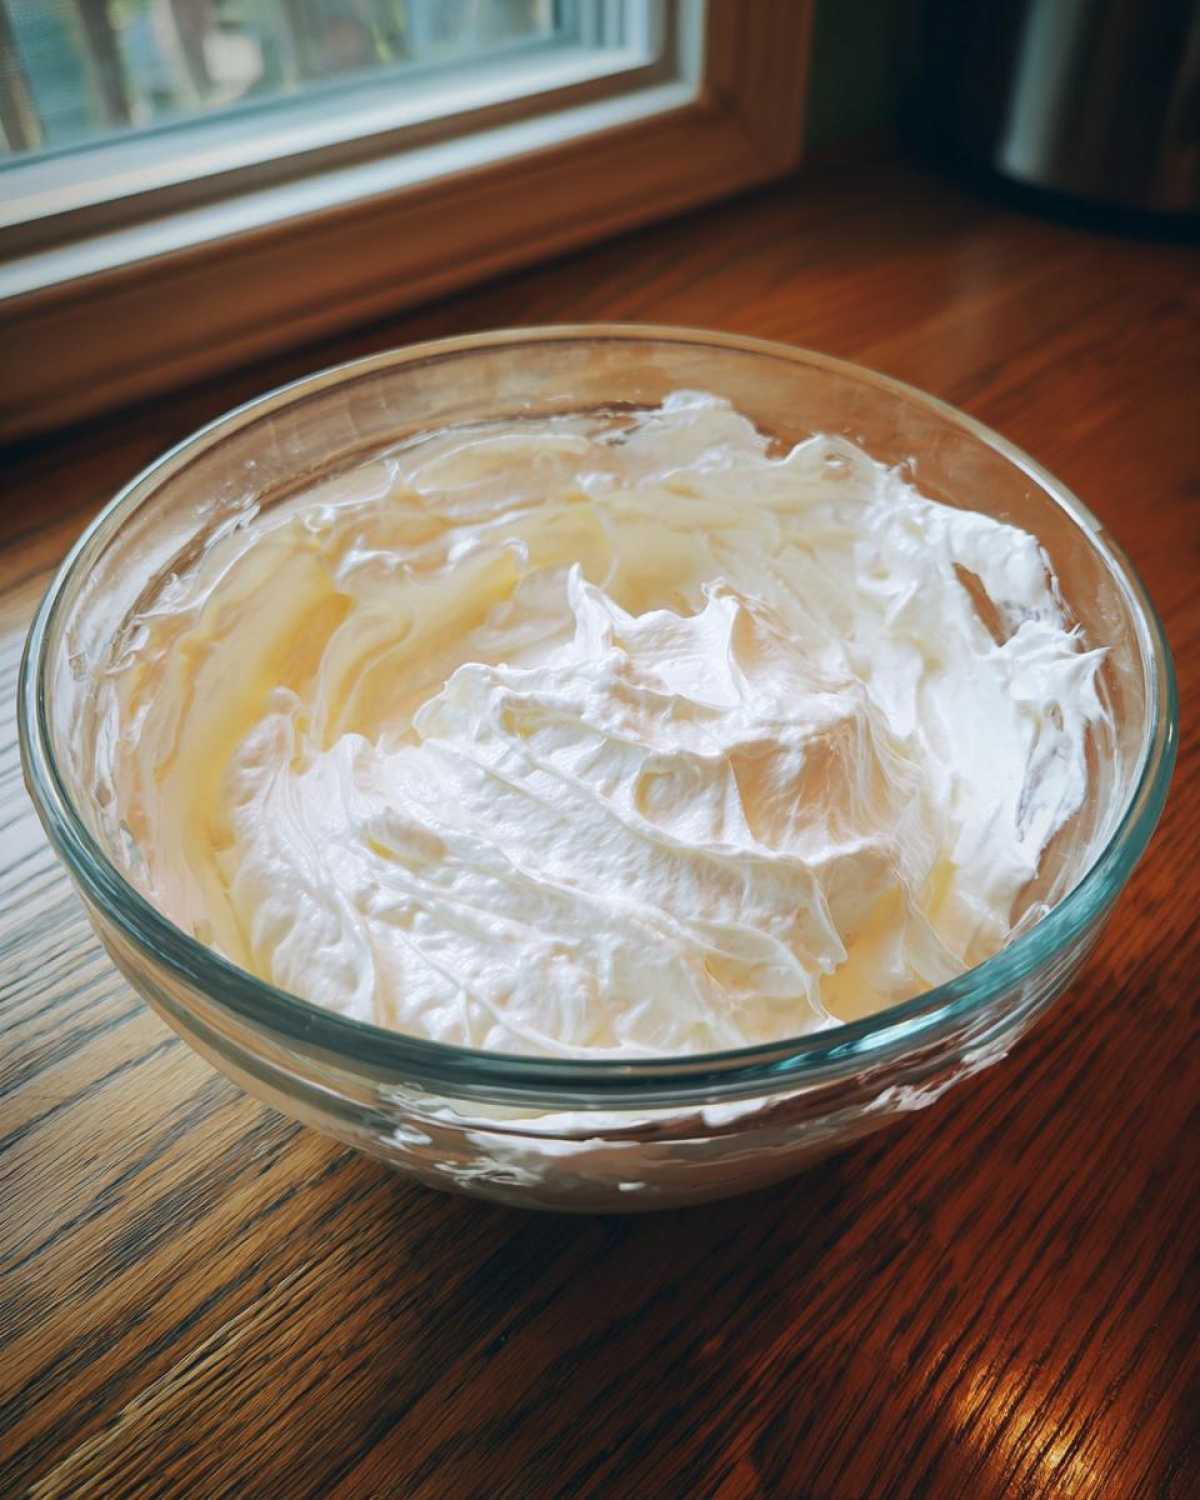
Once it looks stiff and shiny—like thick buttercream—you’re basically done for piping consistency. But I always follow Grandma’s rule here: cover your bowl with a damp paper towel or cloth immediately. This prevents that crusty top layer from forming while you’re working. It seems small, but waiting five minutes can be the difference between smooth and crumbly! If you get curious about other stiff frostings while waiting for this to set up, you can always check out my guide on making vanilla buttercream.

Achieving Perfect Flood Consistency in Your Royal Icing Recipe
Now, this next part is the make-or-break moment for decorating cookies. After you have that stiff piping consistency, you thin it down into flood consistency. You add water just a tiny bit at a time—a half teaspoon, maybe less!

To check if you hit perfection, try the 10-second rule. Lift your spatula or pour a bit of that thinned icing back into the main bowl. If the trail you made disappears back into the rest of the icing after you count to ten slowly, you’ve got the perfect flood icing consistency. If it disappears faster, add a touch more icing back in; if it doesn’t disappear yet, add a drop more water. See? Totally manageable!
Tips for Success with Your Easy Royal Icing Recipe
Even with the best royal icing recipe, sometimes the humidity in my kitchen has other ideas! Don’t let a small hiccup derail your cookie marathon. Let’s talk about those little fixes that make this an easy royal icing project.
First, that sifting tip I mentioned earlier? That’s crucial for getting a truly smooth icing recipe. If you skip it, you’ll notice the sugar creating little bumps when you flood. Also, remember that stiffness is better than runniness here; it’s so much easier to add a few drops of water later than it is to fix an icing that has completely turned to syrup!
If your icing is already dry and you notice it cracked a bit once it set, that means it was just a hair too thick when you applied it. Next time, thin it out just a drop or two more! Conversely, if your iced cookies are tacky or sticky 24 hours later, it usually means the humidity is high, or you might need a tiny bit more acid. I sometimes add a few drops of lemon juice or a tiny dab of corn syrup next time to help it set firm. These simple royal icing tips and tricks really save the day and keep you from wasting that precious cookie base!
For more troubleshooting advice on getting that perfect dry finish, I always refer back to my post on how to ensure your cookie icing dries firm.
Flavoring and Coloring Your Royal Icing Recipe
Since we stuck to clear vanilla extract in the main royal icing recipe to keep things pure and white, now’s the fun part—flavoring! If you want things like almond or maybe a nice bright lemon flavor, you can absolutely swap out that vanilla for a teaspoon of clear almond extract or even a few drops of lemon extract. The key is using extracts, not flavorings, especially if they are oil-based, as those can break down the icing structure.
When it comes to color, please, please—I beg you—use gel food coloring! Liquid coloring is basically water, and adding too much water is how you turn your perfect piping consistency into a sad puddle. A single toothpick dip into high-quality gel color will give you vibrant holiday hues without messing up the consistency of your cookie decorating icing. Trust me on that one; it’s a complete game-changer for keeping that white base stable!
Storage and Reheating Instructions for Leftover Royal Icing Recipe
We always make a huge batch because when you’re on a roll, you want to keep decorating! If you have any of this amazing royal icing recipe leftover, don’t just toss it! You can store any unused icing in an airtight container. Stick it right in the refrigerator, and it should be good for about a week. This is great news for any beginner royal icing decorator because you don’t have to worry about wasting product.
When you pull it out later, it’s going to look super stiff—maybe even a little dry on top, but that’s normal. Don’t panic! Just let it come up to room temperature, and then give it a quick whip with your mixer for about 30 seconds. That re-whip usually brings back that perfect, soft texture, ready for your next batch of cookies!
Frequently Asked Questions About Cookie Decorating Icing
I know when you’re trying out a new royal icing recipe, you have a million little questions buzzing in your head. That’s why I pulled together the most common things people ask me about getting this cookie decorating icing just right. If you’ve got your ingredients ready, these answers should give you total confidence!
How long does it take for this royal icing recipe to dry hard?
This is the million-dollar question, and honestly, it depends on the weather! In a perfectly dry, air-conditioned room, thin flood icing might be firm enough to stack in about 4 to 6 hours. But if you’re working in a humid kitchen—like I often am in the summer—it can take 8 to 12 hours for it to truly set hard everywhere. For super thick outlines, give them a full 12 hours before touching or packaging them. Remember, this icing is tough; it just needs a little time to cure!
Can I use this smooth icing recipe for detailed piping work?
Absolutely, yes! That’s what makes this recipe so versatile. Remember how I told you to beat it for 7 minutes until it holds stiff peaks? That initial stiff stage *is* your piping consistency. It’s thick enough that when you pipe a line, it holds its shape immediately and doesn’t sink—perfect for royal icing borders or writing names onto your cookies. Once you thin it down with water for the flood, it’s too runny for piping detail. So, just save a bowl of the stiff mixture before you add water, and you’ve got your piping icing recipe ready to go!
If you’re looking for even more deep dives on decorating techniques, especially when it comes to thinning glazes, I always recommend checking out my detailed guide on the science behind making royal icing.
What if my icing starts cracking while drying, even though I used meringue powder?
Cracking is usually a sign that the icing was just a tiny bit too thick for the cookie surface, or the layer was applied too heavily. It’s pulling itself apart as it dries because there isn’t enough moisture to relieve the surface tension. If you notice this happening with a batch, make a reserve batch later and thin it down just slightly more (add half a teaspoon of water to your next full batch). It’s a common hiccup in the world of hardening icing, but it’s easily fixed next time you mix up a batch of this glossy cookie icing!
Can I store this beginner royal icing recipe for longer than a week in the fridge?
While I told you it lasts about a week in the fridge, I really wouldn’t push it past 8 or 9 days. Royal icing is mostly sugar and air, but fresh ingredients (even the meringue powder) have a shelf life. Beyond a week, you start risking flavor changes or texture inconsistency when you try to re-whip it. If you need a larger supply, it’s much better to freeze it! You have to seal it super tightly—like vacuum sealed—and let it thaw slowly in the fridge overnight before re-whipping. For the best taste and crispest results, I always stick to making what I need within a week.
Estimated Nutritional Data for This Royal Icing Recipe
Just for transparency, here are the estimated nutritional details for this recipe. Keep in mind that this is based on a serving size of about 1/4 cup of the mixed icing, so the numbers can change based on how much you use to decorate your cookies!
- Calories: 450
- Sugar: 110g
- Protein: 1g
- Fat: 0g
Since this is pure sugar and meringue powder, the breakdown is pretty straightforward. For full details and important context on how we report this data, please check out our official nutritional disclaimer page. Happy baking!
Print
Foolproof Royal Icing Recipe: Easy Steps for Smooth, Hardening Cookie Designs
- Total Time: 10 min
- Yield: Enough to cover 3 dozen standard cookies
- Diet: Vegetarian
Description
Make perfect royal icing for decorating cookies using this simple recipe. This icing dries hard and smooth, ideal for outlining and flooding, and includes instructions for using meringue powder.
Ingredients
- 4 cups confectioners’ sugar, sifted
- 3 tablespoons meringue powder
- 6 tablespoons warm water
- 1 teaspoon clear vanilla extract
Instructions
- In a large bowl, whisk together the sifted confectioners’ sugar and meringue powder.
- Add the warm water and vanilla extract to the dry ingredients.
- Beat the mixture with an electric mixer on low speed until just combined. Scrape down the sides of the bowl.
- Increase the mixer speed to medium-high and beat for 5 to 7 minutes until the icing is very stiff, glossy, and holds stiff peaks.
- To achieve piping consistency, add water one teaspoon at a time until the icing flows slowly from the mixer paddle.
- To achieve flood consistency, thin the piping consistency icing further by adding water half a teaspoon at a time until it flows smoothly off a spoon and disappears back into the bowl after counting to 10.
- Cover the bowl with a damp cloth while working to prevent the icing from drying out.
- Use immediately for decorating cookies.
Notes
- If you do not have meringue powder, substitute with 2 large fresh egg whites, but beat them until slightly frothy before adding the sugar.
- If your icing cracks when dry, add a few drops more water next time.
- If your icing remains sticky after 24 hours, you may need to add a few more drops of lemon juice or a small amount of corn syrup next time you make it.
- Store unused icing in an airtight container in the refrigerator for up to one week; you may need to re-whip it before use.
- Prep Time: 10 min
- Cook Time: 0 min
- Category: Baking
- Method: Mixing
- Cuisine: American
Nutrition
- Serving Size: 1/4 cup
- Calories: 450
- Sugar: 110
- Sodium: 5
- Fat: 0
- Saturated Fat: 0
- Unsaturated Fat: 0
- Trans Fat: 0
- Carbohydrates: 112
- Fiber: 0
- Protein: 1
- Cholesterol: 0