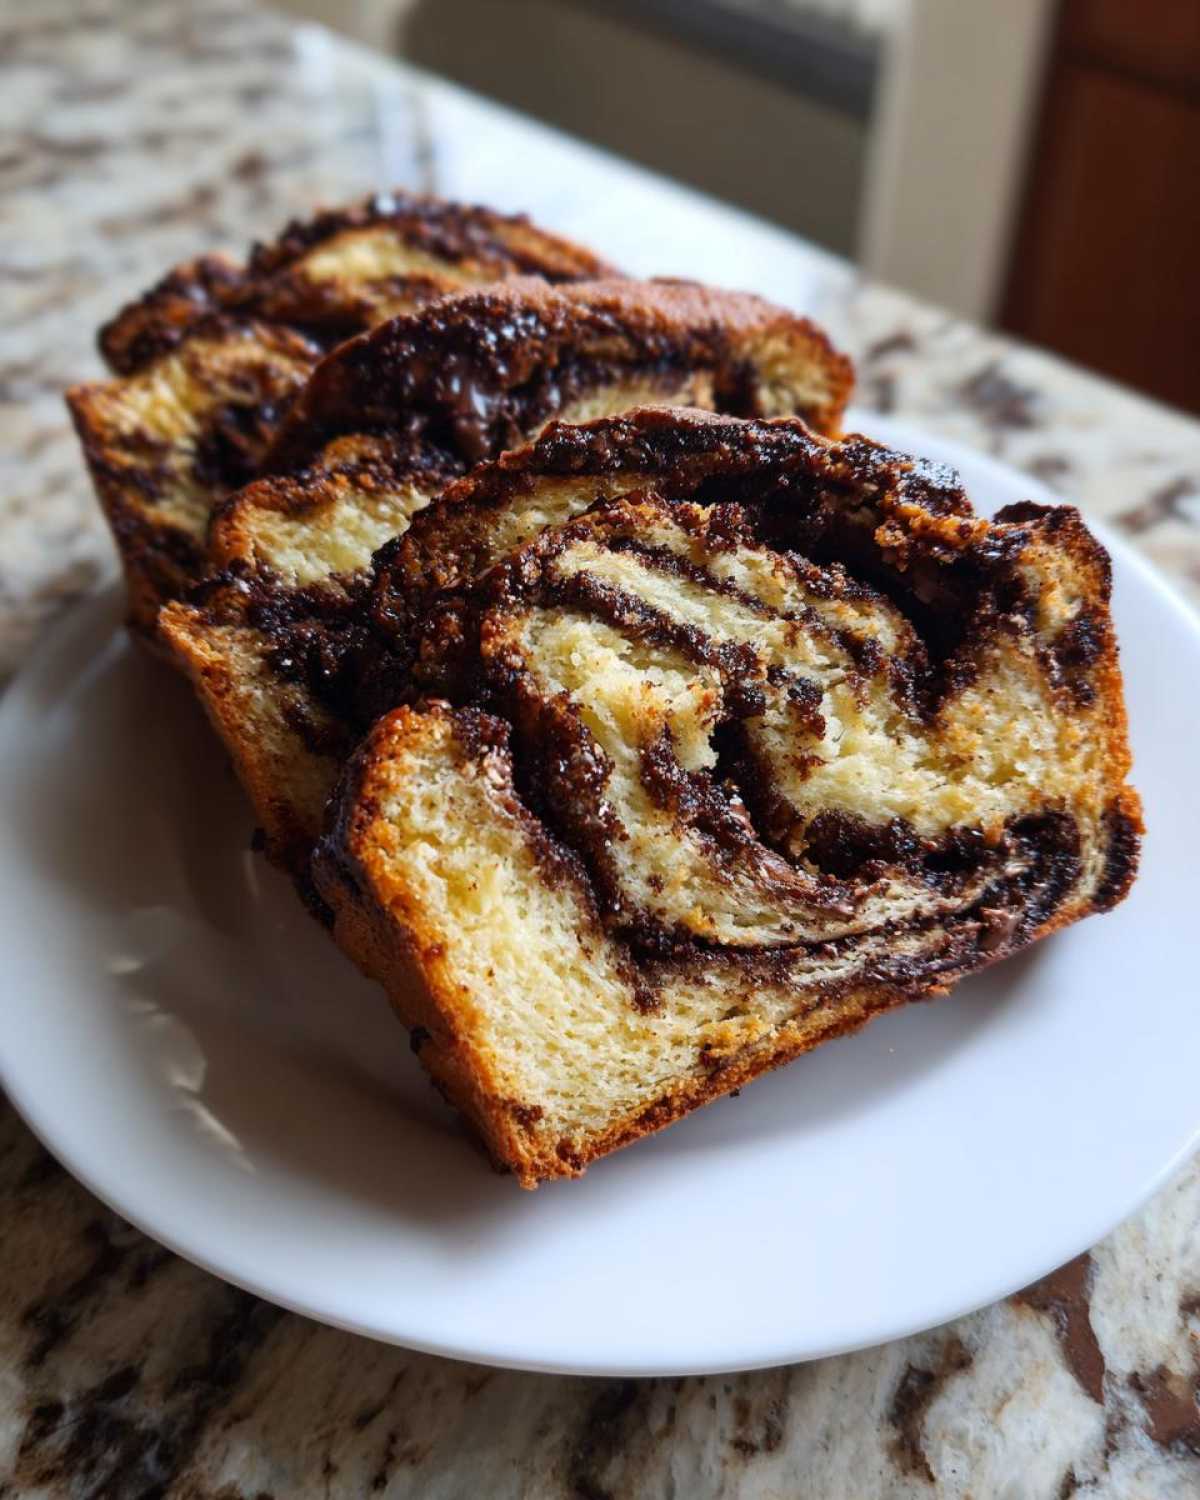
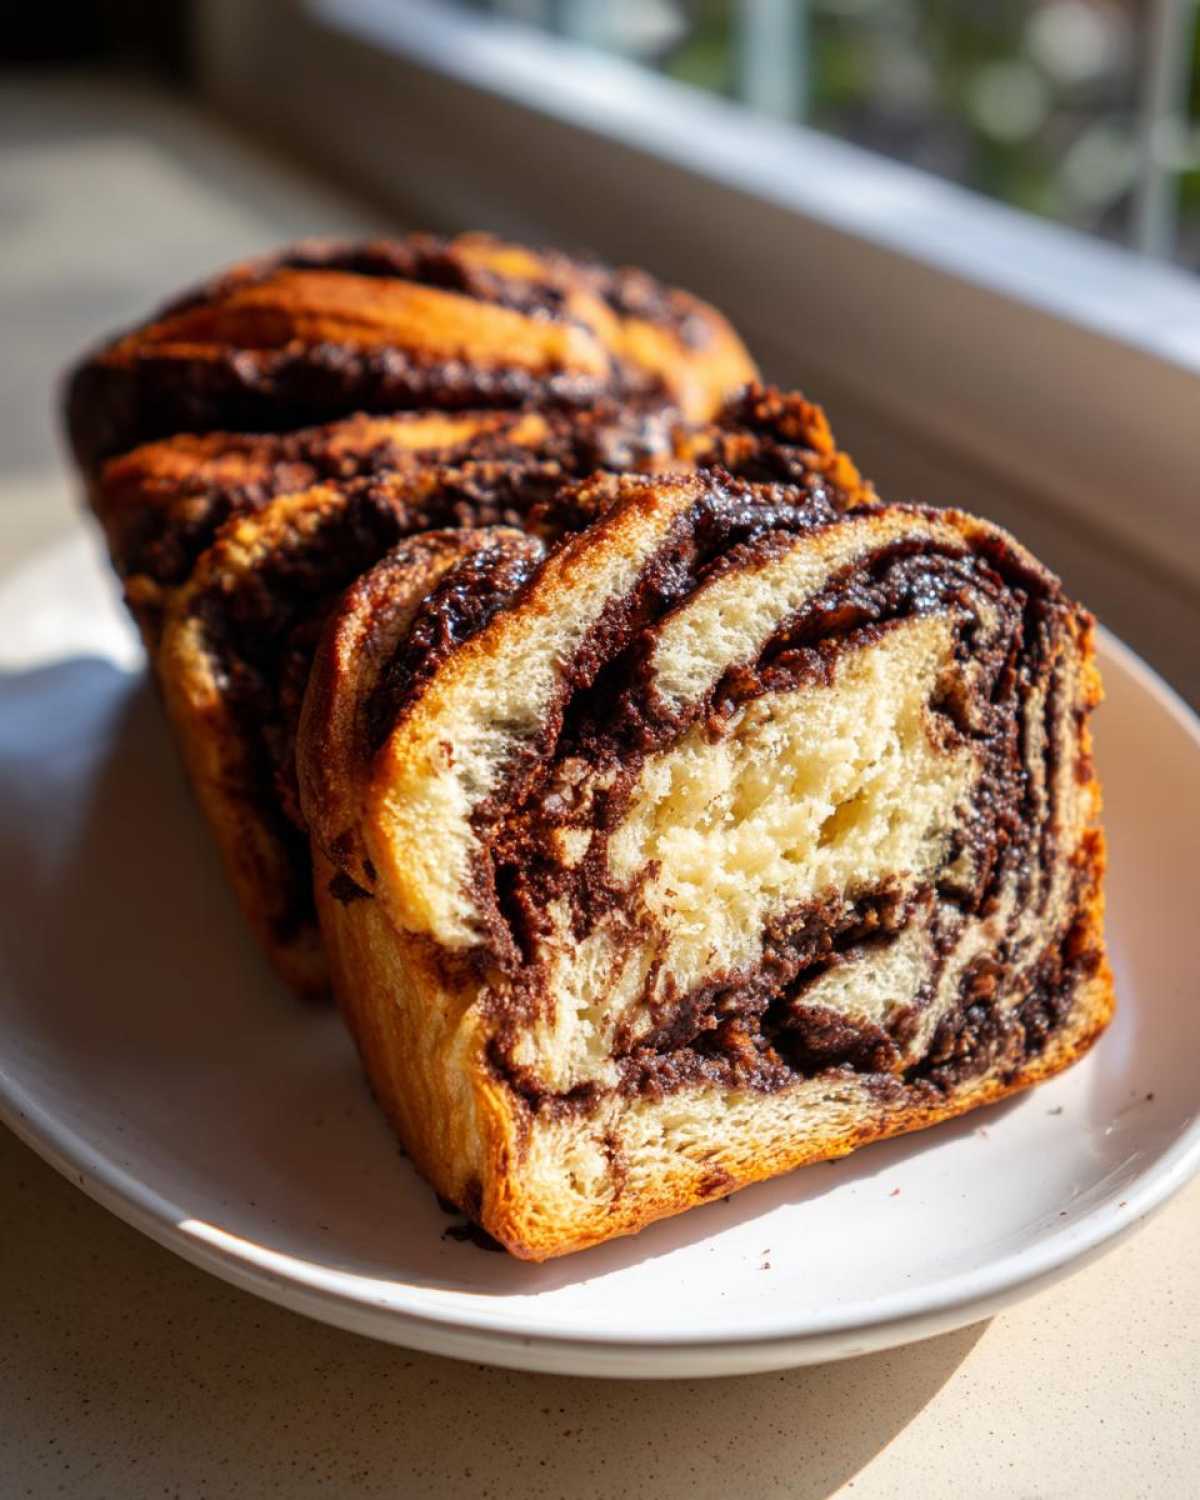
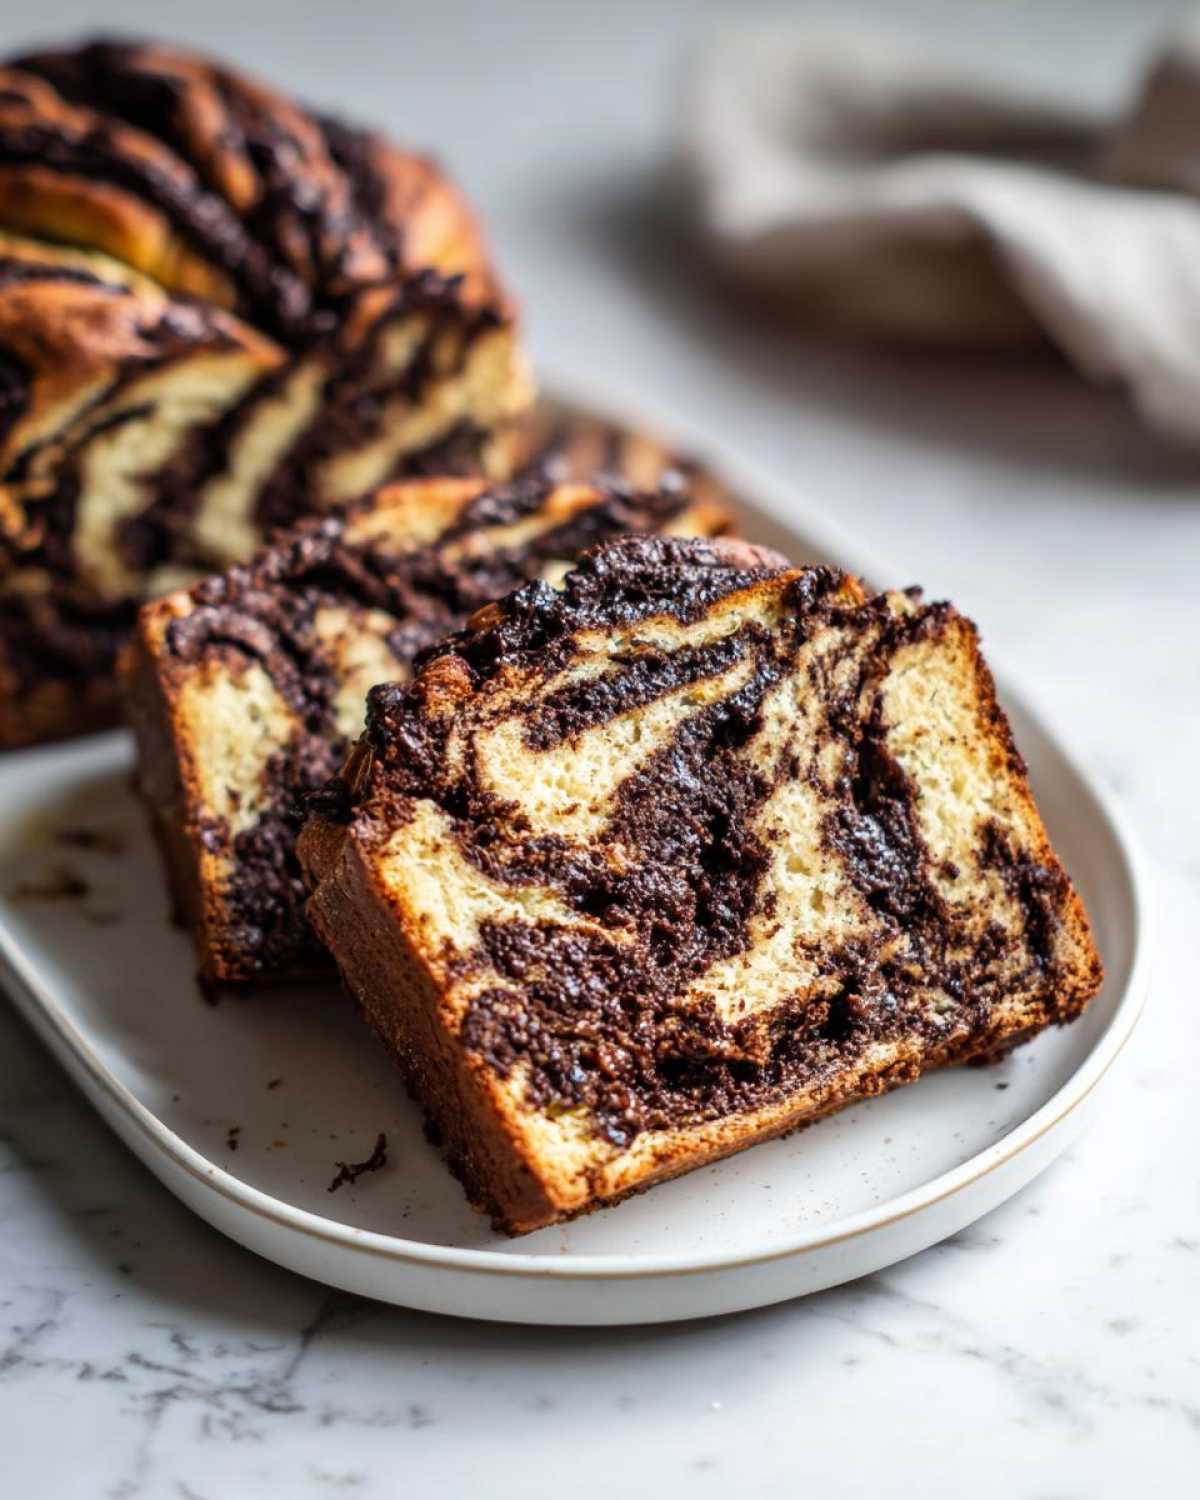
Oh my goodness, let me tell you, there is nothing, and I mean *nothing*, better than pulling a perfect chocolate babka out of the oven. That dramatic, glossy swirl—the way the chocolate oozes just slightly—it looks like it took a marathon of baking skill, right? Well, here’s the honest pitch: this is the Best Homemade Chocolate Babka Recipe you’ll ever try, and I promise you, it delivers that impossibly soft, tender crumb everyone dreams about without demanding you have ten sets of hands.
I absolutely struggled for years trying to get the brioche dough right. It’s all about getting enough richness in there without killing the yeast! I finally cracked the code on how to manage that buttery dough just perfectly, and now I can whip up this decadent pastry for brunch or holidays, and people always ask if I bought it. Trust me, making this chocolate babka from scratch is totally doable for anyone who wants a truly indulgent treat.
Why This Homemade Chocolate Babka Recipe Works (Tender Crumb & Rich Swirls)
So, what makes this version of chocolate babka rise above the rest? Honestly, it comes down to making sure we nail the dough and the filling separately. If you’ve ever tried a loaf that was dry or tasted too much like plain bread, I totally get it. This recipe defeats those bakery imposters every time. You’ll end up with something truly better than store bought babka, I guarantee it! We focus on giving you the softest dough, much like my recipe for classic chewy snickerdoodles, just much richer!
- We use a classic brioche base, which requires patience, but the result is unmatched flavor.
- The filling ratio is intentionally rich so every single slice has deep chocolate flavor.
- We handle the dough gently so we don’t deflate all the air we worked so hard to build in.
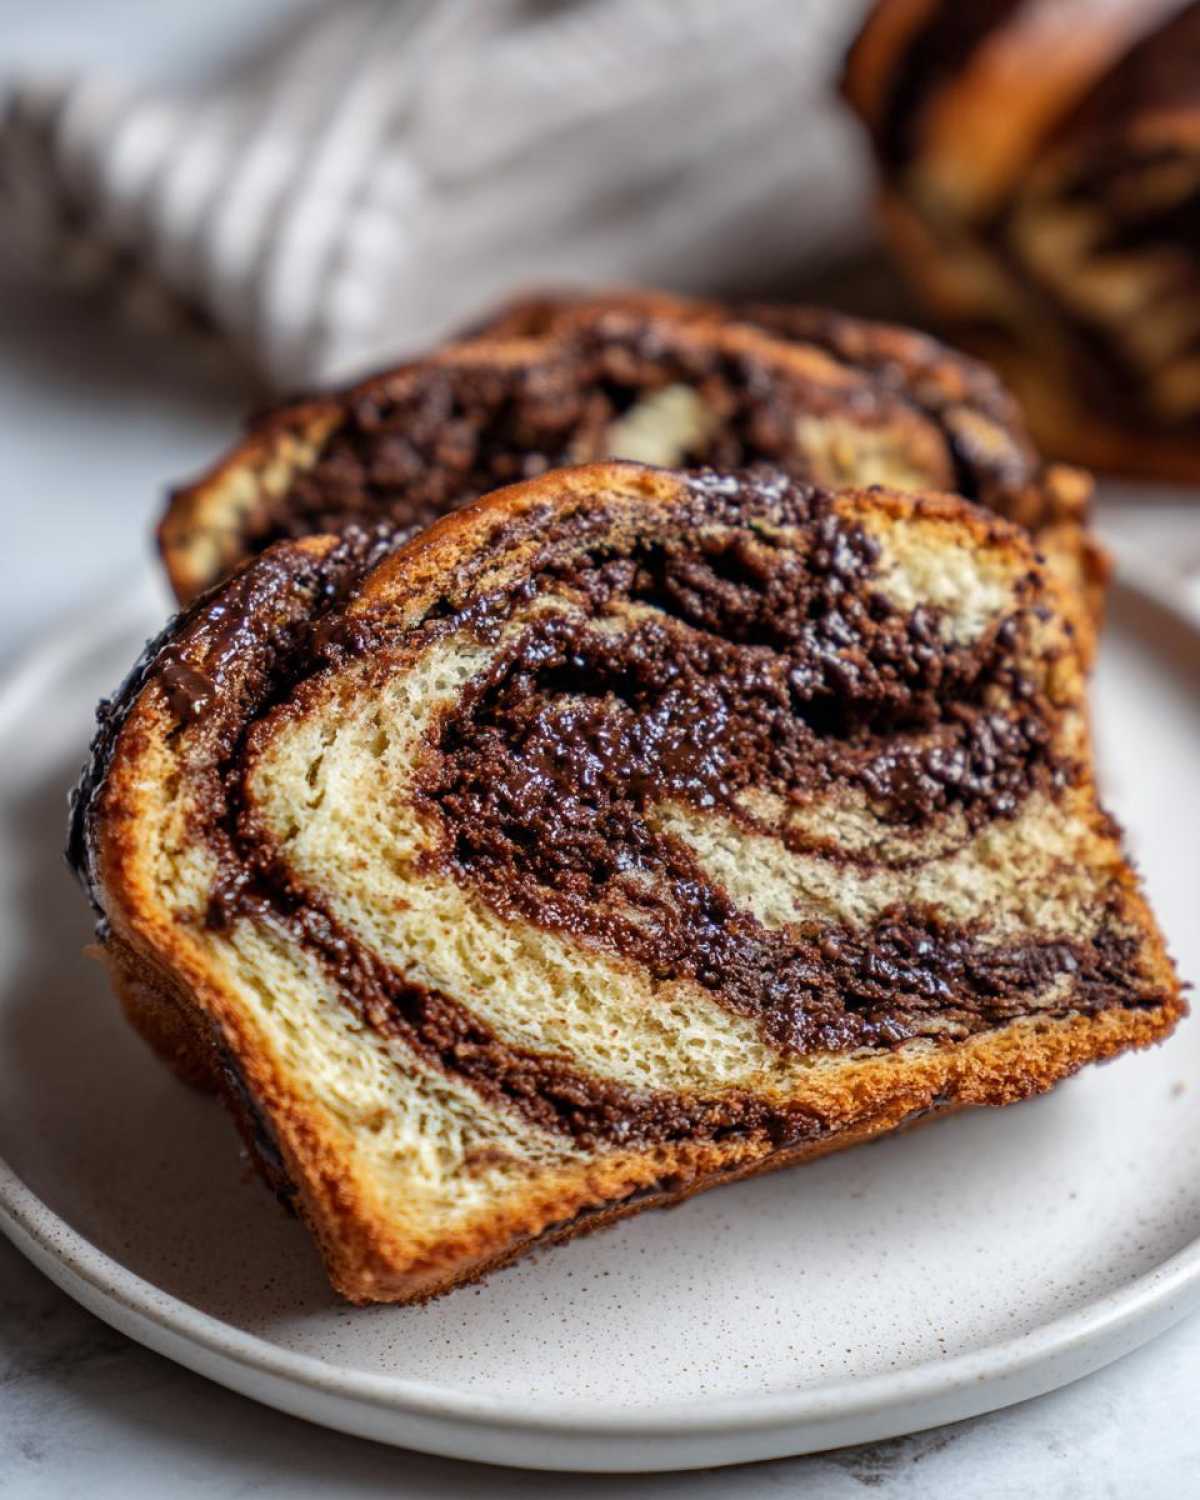
We are totally aiming for that unbelievably soft, tender crumb babka that melts in your mouth. It’s the perfect weekend baking project because the dough does most of the heavy lifting while it rests!
Achieving the Perfect Brioche Swirl Bread Texture
The secret to that light, airy structure that defines great brioche swirl bread is making sure those eggs are room temperature before they hit the yeast mixture. Cold eggs shock the yeast, and we can’t have that! Plus, when you add that softened butter during kneading—go slow! If you dump it all in at once, you wash out all the air bubbles you created by mixing the flour.
The slow incorporation of butter and the long first rise are non-negotiable for that signature soft texture. It gives the yeast time to fully develop and give us the structure needed to handle all that gorgeous chocolate filling. Don’t rush the rest; let the dough do its job!
Ingredients for the Best Homemade Chocolate Babka Recipe
Okay, let’s talk about what you need for this incredible chocolate babka. If you have everything measured out, the assembly goes so much smoother, which is key when dealing with this kind of rich, sweet bread. We break it down into three parts: the dough, the filling, and that shiny syrup finish you’ll want to soak every last drop of!
For the dough, make sure you get that whole milk lightly warmed—it needs to be between 105 and 115°F so you don’t kill your yeast. We also need 10 tablespoons of unsalted butter for the dough that’s nicely softened, not even slightly melted. For the intense filling, you’ll use melted butter alongside cocoa powder and powdered sugar. If you’re looking for a moist, rich experience similar to my sour cream coffee cake, ingredient quality here really matters!
Notes on Ingredients and Substitutions for Your Chocolate Babka
Please, please, *please* use good unsweetened cocoa powder here! You’re using a lot of it, so cheap stuff will taste dusty. You want that deep, intense chocolate color and flavor in your final loaf. Also, double-check that yeast because if it’s old, your beautiful brioche dough just won’t rise, and that’s a sad day.
If your standing mixer is on vacation, don’t sweat it! You absolutely can make this dough by hand, but you need to commit to that kneading time—it’s how we develop the gluten for the soft structure. Just know you’ll be working those arms for about 8 minutes instead of 6. And for the syrup? If you’re feeling fancy, I sometimes drop in a splash of rum right after I take the sugar water off the heat for an extra kick!
How to Make Babka Dough: The Foundation of Great Chocolate Babka
This is where we build the incredible structure for our chocolate babka! Getting this brioche dough sorted is the most important part of the whole project. We start simply by waking up the yeast; combine that warm milk with just a tiny bit of sugar and your yeast, then let it chill out for about ten minutes. If it gets foamy on top, yay, your yeast is happy and ready to work! If it doesn’t foam, well, grab new yeast because that batch is done for.
Next, we mix in the bulk of your sugar, the eggs, vanilla, flour, and salt. Mix until it looks shaggy! Now comes the crucial part of how to make babka dough: adding that softened butter, piece by piece. Don’t rush it here! You have to let the dough totally absorb each addition before plopping in the next stick. I swear, kneading this rich dough takes commitment. You’re looking for it to become smooth and elastic—I usually aim for a nice, thin windowpane when I pull a bit off; that means the gluten is developed enough to hold all that chocolate later on.
Once it passes the stretch test, pop it into an oiled bowl, cover it with plastic wrap, and find the warmest, quietest spot in your kitchen. This dough is basically hanging out, getting puffy and happy. It needs about two hours because it’s a rich dough, but that long rest helps develop the flavor profiles we love in a good sweet bread. If you struggle with letting dough rise, this recipe is similar to my reliable Irish Soda Bread in that warmth is key!
Tips for Baking with Yeast for Beginners
So many people get scared when they see the word “yeast,” but it’s really friendly if you treat it right. The absolute number one rule is milk temperature! If it’s scalding hot, you kill the yeast instantly. If it’s too cold, it just sleeps and never wakes up. Aim for that sweet spot around 110°F—it should feel just slightly warm, like a baby’s bath water.
Also, think about where you put the dough to rise. If your kitchen is chilly, turn your oven *off*, put the dough inside, and then just let it sit. The residual warmth is perfect. Don’t peek too much during the rise, though! Let it double in size undisturbed, and you’ll have a beautifully risen base for your chocolate babka.
Mastering the Chocolate Filling Technique for Maximum Swirl
Okay, the dough is relaxed and puffy, which means it’s time for the fun part: the chocolate layer! During the first rise, you whip up the filling. This is critical for that beautiful, defined ribbon effect. We’re mixing cocoa powder, powdered sugar, melted butter, and cream until we get a paste that is wonderfully rich, but not watery!
If your filling is too runny—and trust me, I’ve made that mistake—it just melts right into the brioche dough, and you end up with a chocolate loaf instead of a gorgeous swirl. We want a thick spreadable texture. When you roll out that dough into your big 12×18 inch rectangle, spread this mixture evenly, but leave that one-inch border bare on one of the long sides. That bare strip is what seals your chocolate babka log shut later on!
This meticulous spreading hits on the core of any great Chocolate Filling Technique. You need coverage without bulk! Once filled, roll it up TIGHTLY, sealing that edge with a little water if you need to. This tightness ensures you get those fine layers you want to display in the final twist. It’s all about setting up the structure perfectly here!
The Chocolate Swirl Bread Tutorial: Rolling and Twisting Your Chocolate Babka
Alright, this is the moment of truth, the part that separates just a nice sweet bread from an absolutely show-stopping chocolate babka! We’ve got our chocolate-slathered dough rectangle ready to go, and it’s time for the big roll. Starting from the long side opposite that clean border edge, you want to roll this up as *tightly* as you possibly can—get it nice and snug, like wrapping a present!
Once rolled, pinch that seam closed between your fingers. Don’t leave any gaps! Now, grab a sharp, preferably serrated knife, because we’re about to perform the magic trick required for this amazing chocolate swirl bread tutorial. Lay the log seam-side down, and then carefully slice it right down the middle lengthwise. I mean straight down the guts of the log, exposing all those lovely chocolate lines inside.
This next move defines the whole loaf. You need to gently turn those two cut halves so the chocolate layers face *up*. Then, you twist them around each other, almost like braiding, but keeping those cut, chocolaty sides facing the ceiling as much as possible. It’s messy, and you’ll feel like you’re messing up the symmetry, but trust me, even if it looks wonky in your hands, it bakes up stunningly—especially if you’ve already made my cinnamon swirl banana bread!
Carefully lift that whole twisted masterpiece and settle it into your greased loaf pan. Pinch the ends together underneath so you don’t have bits sticking out. Give it that final, gentle rest while the oven heats up. You’re about to create a masterpiece!
Baking the Chocolate Babka and Applying the Glazed Chocolate Babka Finish
That twisted log is officially nestled in its pan, looking gorgeous, but we’re not done yet! This dough needs a final little nap before the oven. Cover it loosely with plastic wrap—don’t let it dry out!—and let it rise again for about 30 to 45 minutes. You don’t want it to double this time; just look for it to puff up nicely and look relaxed in the pan. Make sure your oven is preheated to 350°F (175°C) before that second rise is done!
Bake it for about 35 to 45 minutes. Here’s a major tip for achieving that beautiful Glazed Chocolate Babka look: check the top around the 25-minute mark. Do you see it getting super dark on top while the middle looks pale? That means the crust is baking too fast! Grab a piece of aluminum foil and loosely tent the top. This protects the beautiful dark brown color while letting the center finish cooking through. If you’re ever unsure, remember the toothpick test, but for babka, you want moist crumbs clinging to it, not a bone-dry stick. We want tenderness!
The *instant* it comes out of the oven, grab that simple sugar syrup you made earlier. Brush it everywhere! Get every nook and cranny wet while the loaf is hot. This hot syrup soaks into the crust, giving it that amazing shine and locking in moisture. Let the chocolate babka cool in the pan for about 15 minutes before you wrestle it out onto a cooling rack. Trust me, waiting those 15 minutes prevents breakage, and then you just let it cool completely before slicing. It smells heavenly, doesn’t it?
Tips for Success with Your Chocolate Babka Baking Project
I know this chocolate babka makes a lot of steps, but don’t let it intimidate you! A little preparation goes a long way when working with rich doughs like this. If you have time and want an even silkier filling, try chilling the dough for 30 minutes after the first rise before you roll it out. Seriously, cold dough is way less sticky and easier to handle!
For pan preparation, the “cake goop” method I use for my rosemary focaccia works wonders here too. Just a thin swipe of oil, shortening, and flour mixed into a paste keeps even this sugary yeast bread from hugging the pan too tightly. It saves cleanup, which is always a win in my book!
Storage and Reheating Instructions for Chocolate Babka
You absolutely cannot let this beautiful chocolate babka go stale! If you have leftovers—and I mean *if*, because it usually disappears fast—store it tightly wrapped at room temperature for up to three days. Just make sure it’s sealed up well so the air doesn’t steal that moisture we worked so hard to get in there.
If you need it to last longer, freezing is totally fine! Wrap each slice tightly in plastic wrap, stick it in a freezer bag, and it’s good for about three months. When you want a treat, just microwave a slice for about 15 to 20 seconds. That little zap of heat brings back the tenderness and melts that syrup ever so slightly. It tastes just as divine as when it first came out of the oven!
Frequently Asked Questions About Making Chocolate Babka
I know baking can bring up a lot of questions, especially when you’re making something as impressive as a homemade chocolate babka! Here are a few things folks always ask me when they’re gearing up for this fun project.
Is this bread difficult for a beginner, or is it okay for a first-time yeast baker? Honestly, if you take your time with the dough rising—your main focus—it’s totally manageable! It’s more assembly than technical baking skill. If you can handle making my classic lasagna, you can tackle this sweet bread!
A common question is about substitutions: Can I use Nutella instead of the chocolate filling? Yes, you absolutely can! If you swap out the cocoa/butter/sugar mix for an equal amount of slightly warmed Nutella, you’ll get a fantastic, fudgy result. It’s a great shortcut for an indulgent chocolate treat!
When is the absolute best time to serve this chocolate babka? Anytime! But truly, it shines as a star at any Brunch Sweet Breads table, or it makes an incredible, rich ending to a dinner party. It’s just an all-around fantastic Holiday Dessert Bread.
Nutritional Information Disclaimer for This Chocolate Babka
Please remember that because this is a homemade recipe, the final nutrition facts will vary based on the exact ingredients, brands, and portion sizes you use. These numbers provided are just estimates for one slice.
Print
Best Homemade Chocolate Babka Recipe with Rich Swirls
- Total Time: 3 hours 30 min
- Yield: 1 loaf 1x
- Diet: Vegetarian
Description
Make a soft, tender brioche dough and fill it with rich chocolate for a beautiful, swirled homemade chocolate babka.
Ingredients
- 1 cup whole milk, warmed to 105-115°F
- 2 1/4 teaspoons active dry yeast
- 1/2 cup granulated sugar, divided
- 3 large eggs, room temperature
- 1 teaspoon vanilla extract
- 3 1/2 cups all-purpose flour, plus more for dusting
- 1 teaspoon salt
- 10 tablespoons unsalted butter, softened and cut into pieces
- 1 cup powdered sugar (for filling)
- 1/2 cup unsweetened cocoa powder (for filling)
- 1/2 cup unsalted butter, melted (for filling)
- 1/4 cup heavy cream (for filling)
- 1/2 cup granulated sugar (for syrup)
- 1/4 cup water (for syrup)
Instructions
- Activate the yeast: In a large bowl, combine the warm milk, yeast, and 1 tablespoon of the sugar. Let stand for 5-10 minutes until foamy.
- Make the dough: Add the remaining sugar, eggs, vanilla, flour, and salt to the yeast mixture. Mix until a shaggy dough forms.
- Knead in butter: Gradually add the softened butter, one piece at a time, kneading until the dough is smooth and elastic, about 8-10 minutes by hand or 6 minutes with a stand mixer.
- First rise: Place the dough in a lightly oiled bowl, cover, and let it rise in a warm place until doubled in size, about 1.5 to 2 hours.
- Prepare the filling: While the dough rises, whisk together the powdered sugar, cocoa powder, melted butter, and heavy cream until smooth.
- Shape the dough: Punch down the risen dough. Turn it out onto a lightly floured surface and roll it into a large rectangle, about 12×18 inches.
- Spread the filling: Spread the chocolate filling evenly over the dough, leaving a 1-inch border on one long edge.
- Roll and twist: Starting from the long edge opposite the border, tightly roll the dough into a log. Pinch the seam closed. Cut the log lengthwise down the center, exposing the layers.
- Create the swirl: Turn the two halves cut-side up. Twist the two halves around each other, keeping the cut sides facing up as much as possible. Pinch the ends together.
- Bake: Carefully transfer the twisted dough to a greased 9×5 inch loaf pan. Cover loosely and let it rise again for 30-45 minutes. Preheat your oven to 350°F (175°C). Bake for 35-45 minutes, or until golden brown. If the top browns too quickly, loosely tent with foil.
- Make the syrup: While the babka bakes, combine the 1/2 cup sugar and water in a small saucepan. Bring to a boil, stirring until the sugar dissolves. Remove from heat.
- Glaze: Immediately brush the hot syrup over the top of the hot babka as soon as it comes out of the oven. Let cool in the pan for 15 minutes before transferring to a wire rack to cool completely.
Notes
- For the best swirl, chill the dough for 30 minutes after the first rise before rolling it out.
- Use high-quality cocoa powder for a deeper chocolate flavor.
- If you do not have a loaf pan, you can bake the twisted dough on a parchment-lined baking sheet.
- Prep Time: 45 min
- Cook Time: 45 min
- Category: Dessert
- Method: Baking
- Cuisine: Eastern European
Nutrition
- Serving Size: 1 slice
- Calories: 450
- Sugar: 35g
- Sodium: 250mg
- Fat: 25g
- Saturated Fat: 15g
- Unsaturated Fat: 10g
- Trans Fat: 0g
- Carbohydrates: 50g
- Fiber: 3g
- Protein: 8g
- Cholesterol: 75mg