Oh, you know those nights? When the wind is howling outside, or maybe you just managed to survive a truly chaotic Tuesday, and all you need is something warm, sweet, and deeply comforting? That is when my trusty stovetop rice pudding comes out of hiding. Forget those runny, lukewarm versions you get sometimes; this is the real deal!
I’m talking about the creamy rice pudding recipe that tastes exactly like the best-loved old fashioned rice pudding your grandma—or maybe *my* grandma—used to make. This isn’t the baked kind that sometimes develops a skin you have to scrape off; nope, we’re sticking to the slow, gentle stovetop method. Trust me when I say this technique is superior because that slow simmering coaxes every bit of starch out of the short-grain rice, making the milk itself velvety without needing any crazy thickeners.
It’s the classic comfort dessert that requires maybe five minutes of actual work before you let the magic happen on the burner. Get yourself a good, heavy pot, settle in, and let’s make something wonderful.
Why This Old Fashioned Rice Pudding Recipe Works So Well
If you’re looking for that perfectly nostalgic dessert experience, this is where you land. The secret to making this old fashioned rice pudding truly shine isn’t in expensive specialty ingredients; it’s all about the method and the type of rice we use. We need that beautiful, comforting thickness that sticks right to your spoon, and that only comes from patience. For the very best results, you should check out my guide on creamy old-fashioned rice pudding recipe tips!
We absolutely must use short-grain rice here. Unlike that long, adventurous Basmati, the little short grains are stubby enough to break down slightly during the long, slow cook time. This breakdown is what releases the starch—the absolute foundation of our rich, luscious texture. When you stir constantly over low heat, you’re basically coaxing the starch out, essentially creating your own creamy sauce right in the pot. It’s almost magical how simple ingredients turn into such a cozy treat!
Achieving Peak Creaminess in Your Rice Pudding
When I say stir constantly, I mean it—at least for the first ten minutes! But even after it hits that gentle simmer, you need to check in often. Using whole milk is non-negotiable for the richest result. The fat in the milk carries flavor and helps prevent that starchy layer from forming on top. Constant, gentle agitation allows the starches to hydrate evenly throughout the liquid, yielding a pudding that feels both delicate and profoundly satisfying. Don’t rush this part; the slower the heat, the creamier your final product will be.
Ingredients for the Best Creamy Rice Pudding Recipe
I want to share the list for this vanilla rice pudding because it’s so simple—it’s almost startling how few things you need for such a rich homemade pudding dessert. We start with one cup of short-grain white rice, which you absolutely must rinse until the water runs totally clear; I always do this even if the package says I don’t have to.
Then we rely on four cups of whole milk. Don’t skimp here, friends! Sugar and salt come next, but the real flavor finishers are added at the very end: one teaspoon of pure vanilla extract and half a teaspoon of ground cinnamon, with extra cinnamon set aside just for that perfect dusting at the end.
Ingredient Notes and Substitutions for Rice Pudding
If you’re thinking of swapping out the whole milk for 2% or skim, stop right there for this specific creamy rice pudding recipe! The fat content is crucial for creating that desired velvety mouthfeel. If you’re out of sugar, you can use slightly less brown sugar, but the taste won’t have that classic deep molasses note. Honestly, though, the biggest tip I can give you is about that rice. If you use long-grain rice, you’ll end up with rice floating in milk, not a true pudding!
Short-grain rice has the starch structure we need to thicken everything beautifully. If you want to get fancy, adding a half-cup of heavy cream in place of some of the milk amps up the richness instantly for a truly decadent simple pudding recipe.
Step-by-Step Stovetop Rice Pudding Instructions
Okay, let’s get cooking! Making this classic comfort dessert on the stove is incredibly straightforward, but because we’re dealing with milk heating slowly, attention is key. If you want to see some other easy stovetop recipes, I love this guide on easy stovetop homemade applesauce recipe for inspiration!
I remember the first time I tried to make a truly creamy rice pudding recipe. I stepped away for maybe three glorious minutes to answer the phone, and when I came back, I saw smoke! That bottom layer was totally scorched onto my bottom-of-the-pot. What I learned is that you must fight the urge to walk away when the heat is on. I now use my heaviest-bottomed saucepan, which distributes that heat much more evenly and helps prevent disaster.
Preparing the Rice and Initial Cook for Classic Comfort Dessert
First things first, we prepare the rice. You need to rinse that cup of short-grain rice under cold running water. Keep rinsing and draining until the water runs basically clear—this washes away excess surface starch that often causes clumping or a gluey texture in the final product. Drain it really well after that step. Next, grab your heavy saucepan and get everything in there: the drained rice, your whole milk, the sugar, and that tiny pinch of salt. Give it one good stir to combine before turning on the heat.
Simmering and Thickening Your Rice Pudding
Now, set your burner to medium heat. You need to bring this mixture up to a gentle simmer, but you have to stir frequently while it’s heating up! We’re trying to coax the starch out, remember? Once it starts bubbling gently—that’s your cue to crank the heat *down*. Seriously, move it to low. We want a lazy, low bubble, not a frantic boil. From here, cook it uncovered for about 45 to 60 minutes. The rule is stirring every five to seven minutes. This constant stirring is essential to keep the rice from gluing itself to the bottom of the pot and helps create that luxurious thickness.
You’ll know it’s done when the rice is tender and the whole thing looks much thicker than you think it should—it should coat the back of your spoon nicely. Remember: this pudding always thickens up significantly more as it cools down! When you finally take it off the heat, that’s when you stir in your vanilla extract. Don’t add it too early, or that beautiful flavor cooks right out!
Tips for Perfect Old Fashioned Rice Pudding Every Time
You’ve spent an hour gently coaxing your pudding into thick, glorious submission, and now comes the most important part of texture management! I cannot stress this enough: your rice pudding will look looser when you take it off the heat than how you actually want to eat it. Seriously, don’t panic if it seems a bit soupy after 60 minutes on the stove, because it firms up substantially as it cools.
I always let it sit on the counter for about 20 minutes before portioning it out into bowls. This initial rest does most of the thickening work. If you still want to serve it warm but need it firmer, try stirring in half a cup of heavy cream right at the end, along with the vanilla. That richness stabilizes the texture beautifully! Also, make absolutely sure you add that vanilla extract *after* you remove the pot from the burner. If you add it while it’s simmering, you lose that lovely, fragrant warmth. If you’re looking for other great flavor infusions, check out some ideas on vanilla buttercream frosting recipe for inspiration on pure flavor boosting!
The ultimate goal is that spoonful that shouldn’t run off the back of your spoon, but rather coat it lazily. That’s the sign you nailed this easy rice pudding!
Serving Suggestions for Warm Sweet Treats Rice Pudding
Now for the best part—eating! You have the choice here, and honestly, there’s no wrong answer. Some days I crave this warm; it feels like a hug in a bowl, perfect for those moments when you just want a quick, warm sweet treat. If you serve it warm, I love grabbing a couple of toasted pecans or walnuts to sprinkle on top for crunch. That little bit of texture keeps things exciting!
But if you’re like my husband, you prefer it cold the next day. When it’s chilled, it sets up almost like a custard. Instead of cinnamon, try a light drizzle of pure maple syrup or even a tablespoon of fruit jam right on top. For something truly decadent, I sometimes make a small batch of a maple glaze—you can find my favorite simple glaze on my cinnamon roll cocktail recipe page, just skip the rum and use maple syrup instead!
Make Ahead Dessert Rice Storage and Reheating
You absolutely can make this ahead of time; this recipe is fantastic for meal prepping your cozy desserts! Once cooled slightly, transfer your rice pudding into an airtight container. I usually get about three days out of a batch stored correctly in the fridge. If you’ve got some great tips for storing leftovers, you should check out my post on make ahead dessert rice for more ideas!
The key thing to remember is that when you pull it out of the fridge, it will be quite stiff—that’s normal. It loses a lot of that creamy texture when cold. So, when you reheat your portion in the microwave or on the stovetop, you must add a splash of extra milk or even some heavy cream. Just stir it in slowly until you bring back that lovely, pourable consistency. Seriously, that little bit of liquid saves the day!
Rice Pudding Variations and Flavor Twists
While I stand by this old fashioned rice pudding being the perfect recipe on its own, I totally get the urge to switch things up now and then! It’s such a solid base for experimenting. If you want a richer, almost tropical vibe, try swapping out half the whole milk for canned full-fat coconut milk—it gives the whole dish a wonderful depth. My coconut version is linked in my coconut milk rice pudding with mango guide if you want to try it!
To enhance that vanilla rice pudding flavor, don’t just stop at extract. Right before serving, grate the zest of half an orange or a lemon directly into the warm pudding. The oils from the zest brighten up the whole flavor profile instantly! You could also stir in a few tablespoons of high-quality cardamom or even a pinch of black pepper if you’re feeling adventurous. It’s such a simple pudding recipe, but the flavor door swings wide open!
Frequently Asked Questions About Stovetop Rice Pudding
I feel like I get asked the same handful of questions every time someone tries this recipe for the first time. Which is great! It just means people are excited to try the best way to make creamy rice pudding recipe at home. Here are the top things people wonder about while making this simple stovetop wonder.
Can I use long-grain rice instead of short-grain for this rice pudding?
You certainly *can* try it, but please don’t if you’re chasing that deeply rich, classic texture! Long-grain varieties, like Jasmine or Basmati, are designed to stay separate and fluffy when cooked—that’s great for dinner, but terrible for pudding. We need the rice grain to shed its starch into the milk to create that thick, luscious sauce naturally. For this easy rice pudding, stick to short-grain rice, like Arborio (yes, the risotto rice!) or Calrose. They do the heavy lifting for us!
How do I make this rice pudding recipe dairy-free?
This recipe relies heavily on the fat from whole milk, so swapping it out requires a little more thought, but it is totally doable! For the creamiest, richest non-dairy version, I highly recommend using full-fat canned coconut milk for at least half of the required liquid. Oat milk also works surprisingly well because it tends to be a bit creamier than almond milk. Just be aware that cooking times might shift slightly when using non-dairy alternatives, so keep a closer eye on that simmer!
My rice pudding seems too thin after cooking. What should I do?
Don’t reach for the cornstarch just yet! This is the number one worry people have, and the answer is almost always: wait five minutes! This stovetop rice pudding thickens dramatically as it cools down from the simmer. Seriously, let it sit on the counter, unstirred, for about twenty minutes, and I promise you’ll see it firm right up. If, after that waiting period, it’s still too liquid for your taste, then you can put it back on very low heat and let it churn gently for another ten minutes. If it gets *too* thick overnight in the fridge? Just stir in a splash of regular milk or your preferred creamy substitute when reheating!
Share Your Homemade Pudding Dessert Experience
Alright, now that you have the roadmap to the best, most comforting rice pudding you’ve ever made, I truly want to hear how it went! Cooking is always a shared experience, and I love seeing what you all come up with in your own kitchens. Did you stick strictly to the cinnamon, or did you try some of those citrus zest ideas I mentioned?
If you whipped up a batch of this creamy rice pudding recipe and it brought back some wonderful memories, please do me a favor and leave a rating and a quick comment below. Knowing this classic comfort dessert is making the rounds and warming up your tables is what cooking for you all is all about!
For those of you who are new around here and want to learn more about my own kitchen adventures, feel free to check out my About Me page! I can’t wait to read your feedback!
Print
Creamy Old-Fashioned Stovetop Rice Pudding
- Total Time: 65 min
- Yield: 4 servings 1x
- Diet: Vegetarian
Description
Make a classic, creamy rice pudding on the stovetop using simple ingredients for a comforting dessert.
Ingredients
- 1 cup short-grain white rice
- 4 cups whole milk
- 1/2 cup granulated sugar
- 1/4 teaspoon salt
- 1 teaspoon vanilla extract
- 1/2 teaspoon ground cinnamon, plus extra for topping
Instructions
- Rinse the rice under cold water until the water runs clear. Drain well.
- Combine the rinsed rice, whole milk, sugar, and salt in a heavy-bottomed saucepan.
- Place the saucepan over medium heat. Bring the mixture to a gentle simmer, stirring frequently to prevent scorching on the bottom.
- Once simmering, reduce the heat to low. Cook uncovered for 45 to 60 minutes, stirring every 5 to 7 minutes. The pudding is done when the rice is tender and the mixture has thickened to your desired consistency. It will thicken more as it cools.
- Remove the saucepan from the heat. Stir in the vanilla extract.
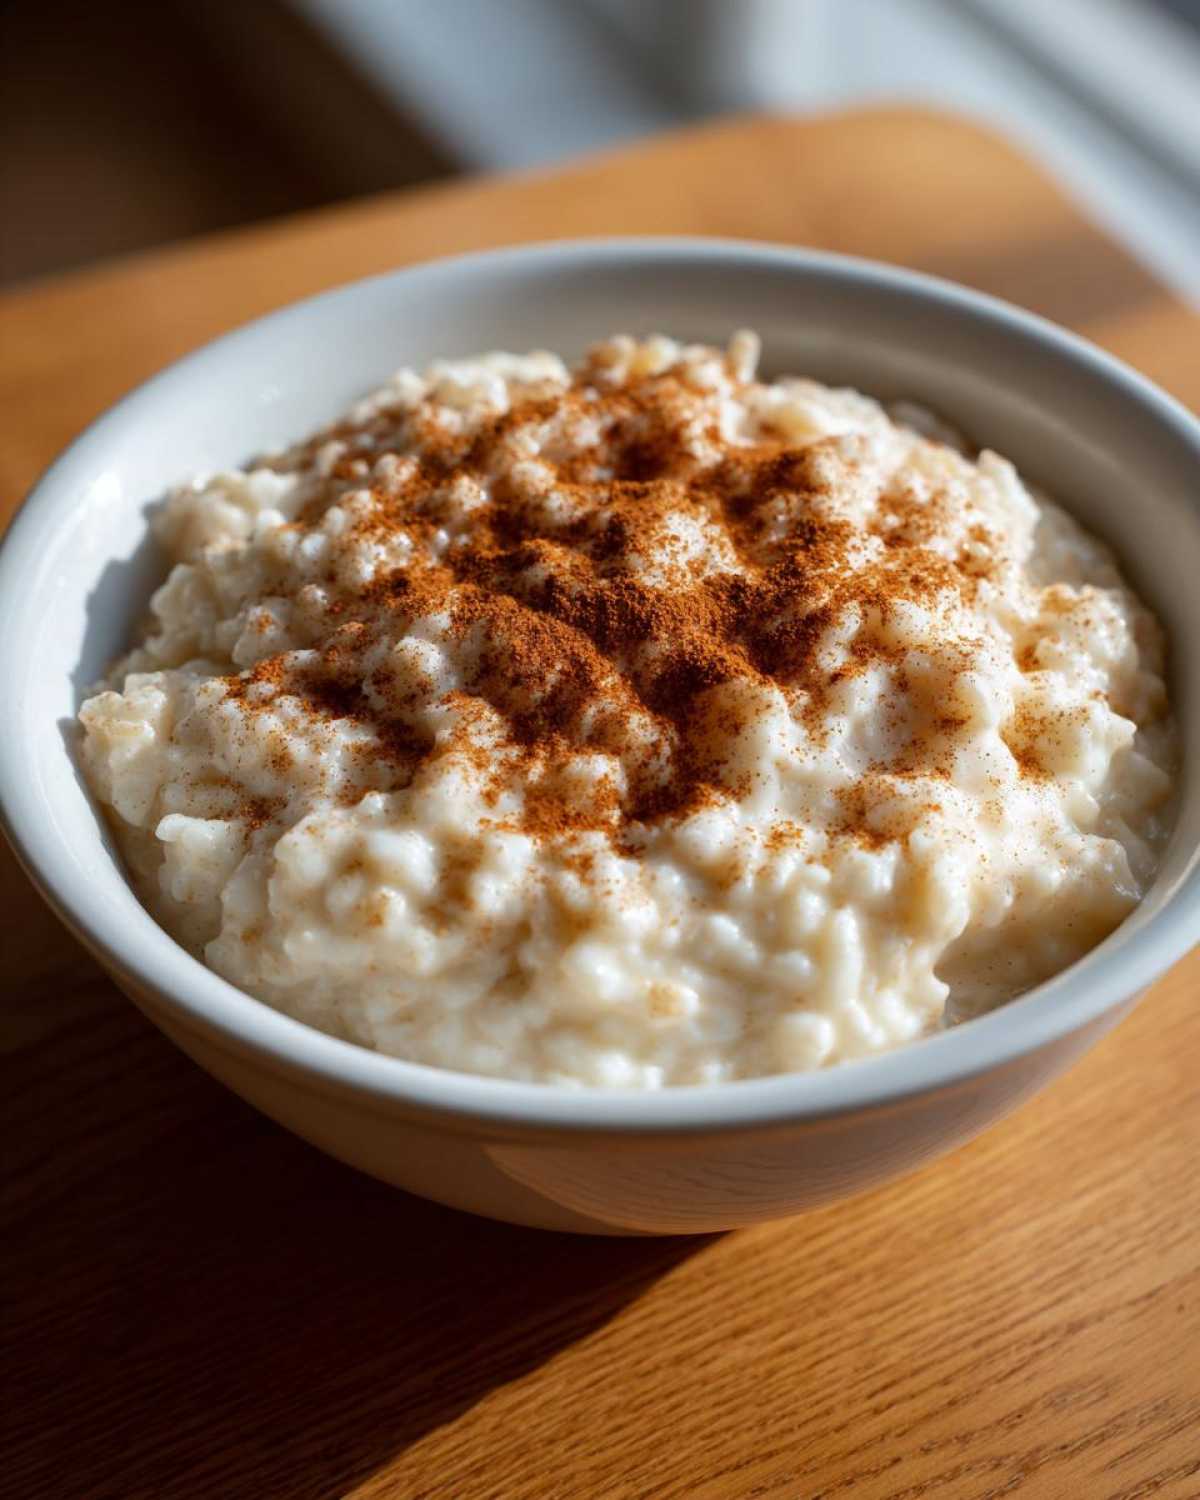
- Serve warm, sprinkled with extra ground cinnamon, or chill completely before serving.
Notes
- For a richer flavor, substitute 1/2 cup of the whole milk with heavy cream.
- If the pudding becomes too thick while cooling, stir in a splash of milk to reach your preferred texture.
- You can make this dessert ahead of time; store it covered in the refrigerator for up to 3 days.
- Prep Time: 5 min
- Cook Time: 60 min
- Category: Dessert
- Method: Stovetop
- Cuisine: American
Nutrition
- Serving Size: 1 cup
- Calories: 320
- Sugar: 25
- Sodium: 180
- Fat: 7
- Saturated Fat: 4
- Unsaturated Fat: 3
- Trans Fat: 0
- Carbohydrates: 58
- Fiber: 1
- Protein: 9
- Cholesterol: 25