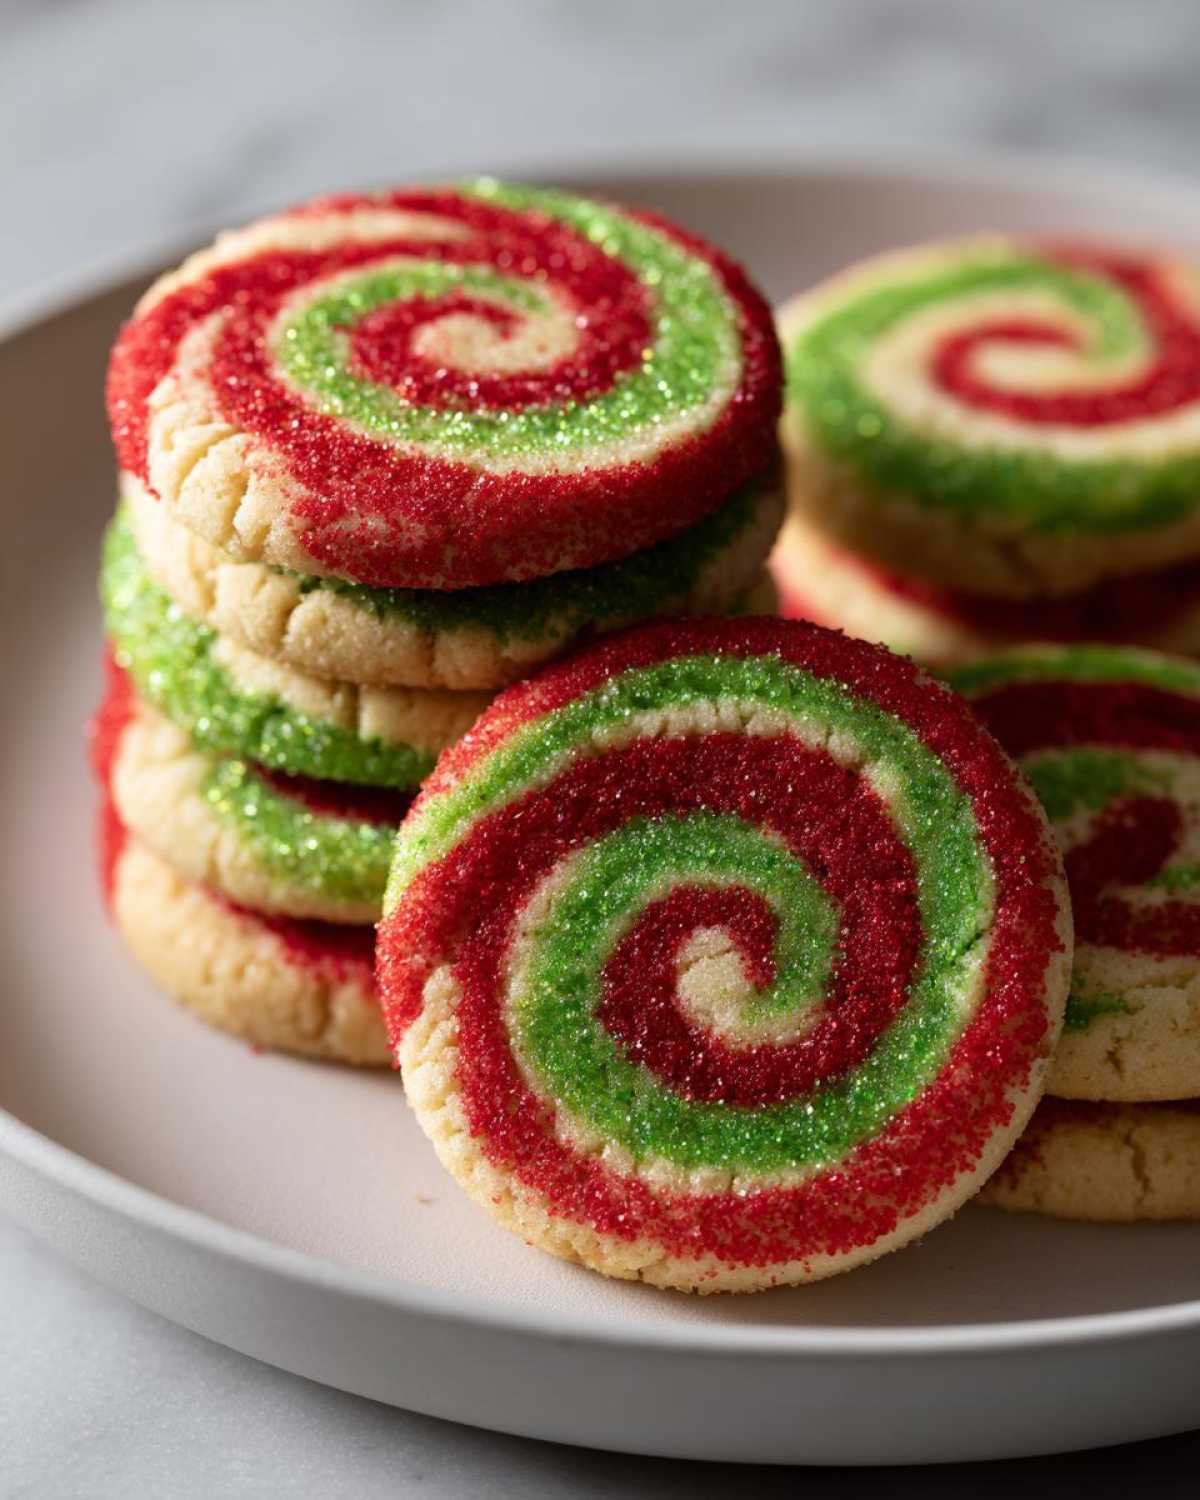
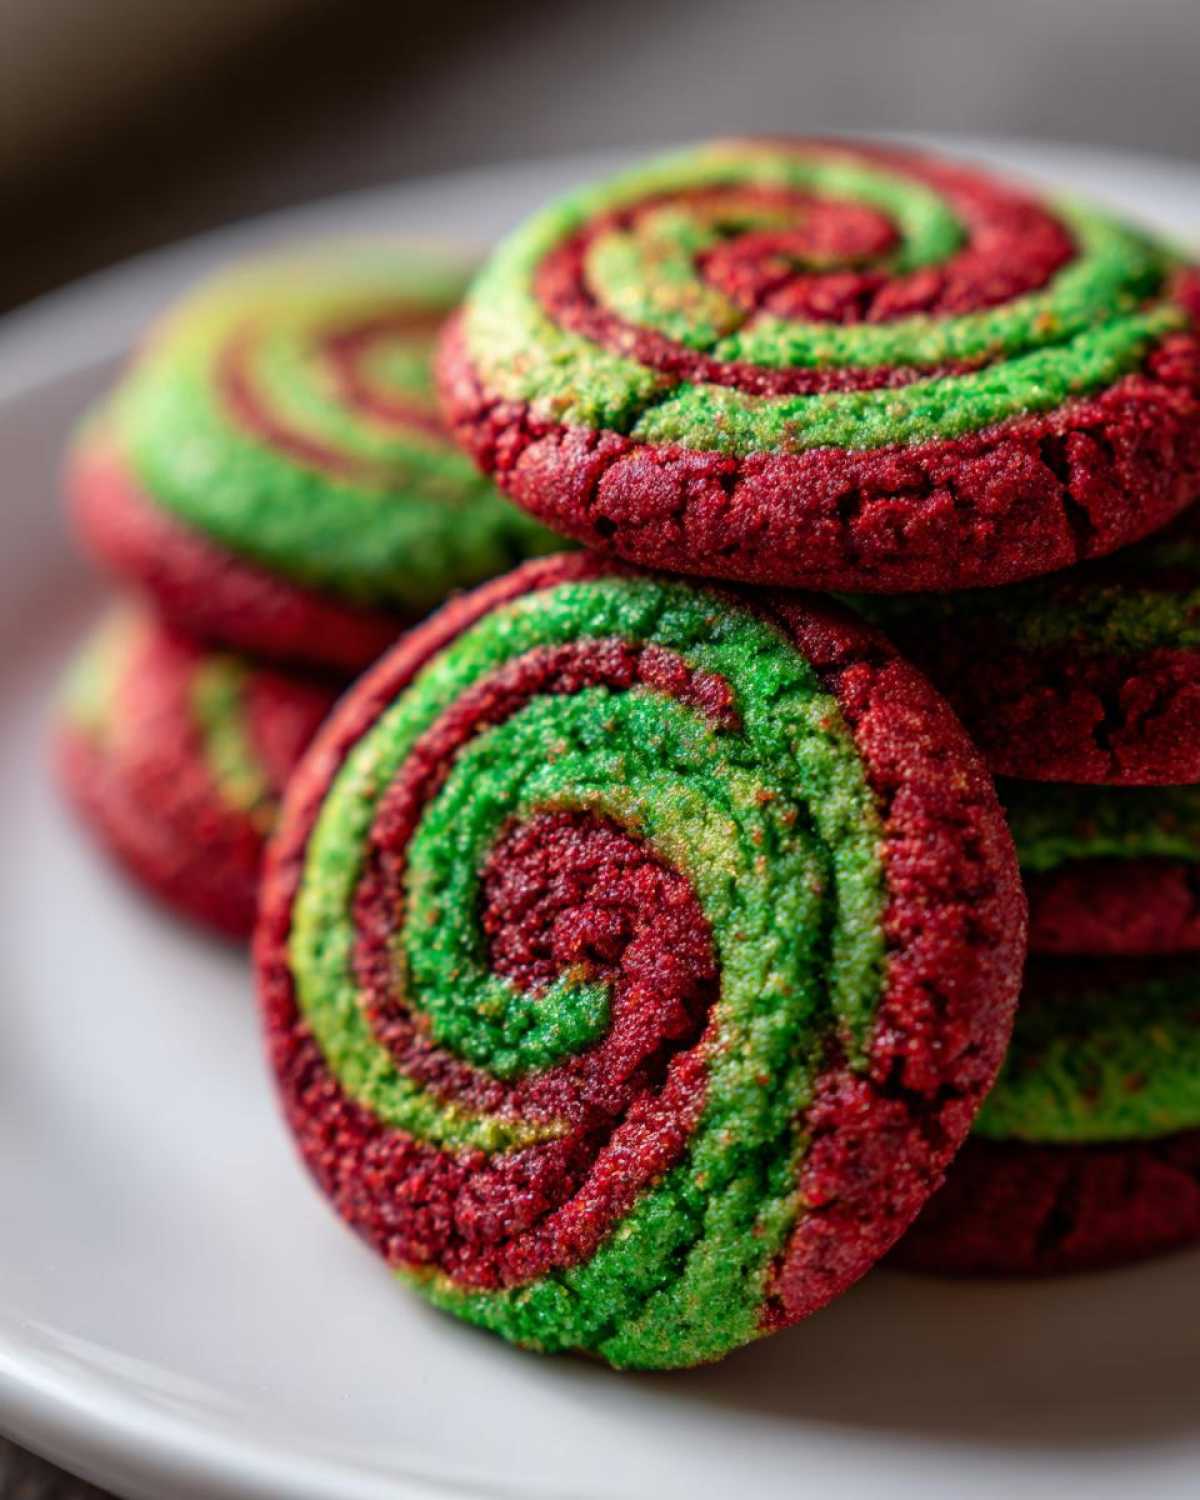
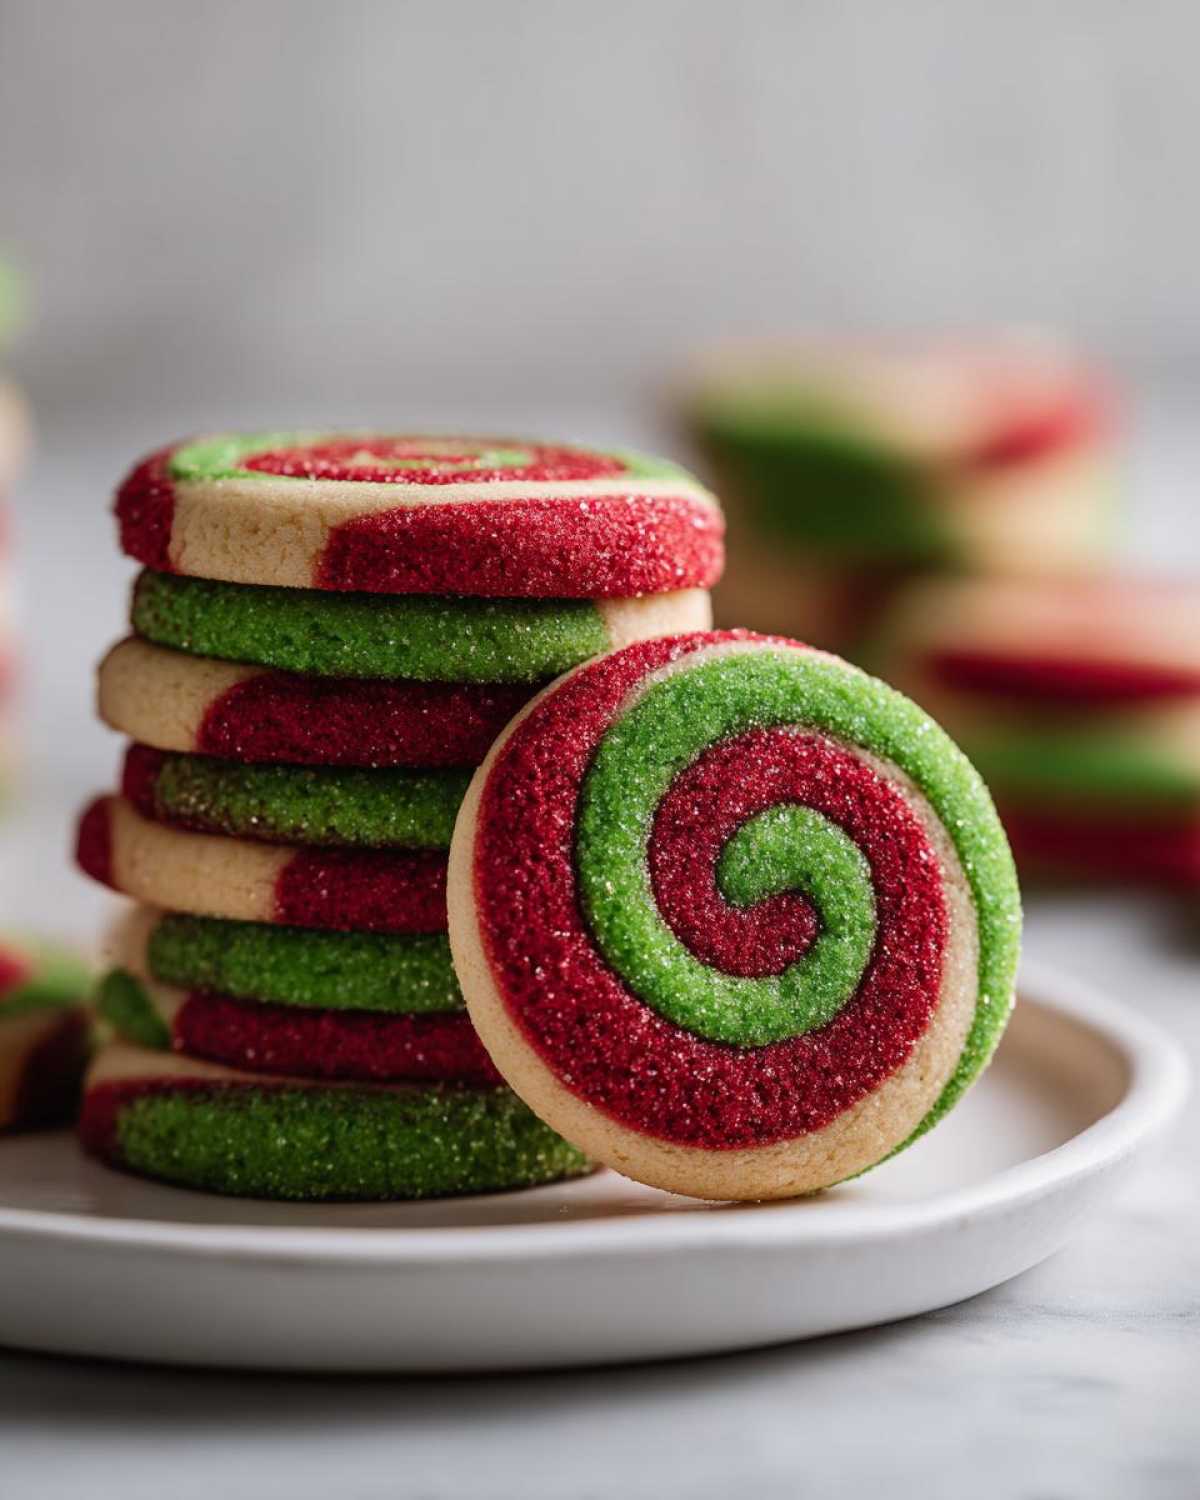
Oh, the holidays just aren’t complete without cookies everywhere, right? Seriously, the smell of butter and vanilla baking always means Christmas is right around the corner for me! If you’re looking for that show-stopping cookie that looks way harder than it actually is, you absolutely need these classic red and green pinwheel cookies in your life. I’ve been making this exact recipe—the simple slice-and-bake sugar cookie version—for almost fifteen years now. It’s foolproof! They become the star of any cookie exchange because who doesn’t love perfectly patterned, buttery swirled sugar cookies? Trust me, once you see how these colorful spirals come together, they will become your go-to festive bake.
Why You Will Love This Classic pinwheel cookies recipe
Honestly, why wouldn’t you love them? These aren’t fussy drop cookies; they are pure, structured fun! Here’s why this pinwheel cookies recipe is my absolute favorite for everything from class parties to big family gifts. Plus, since they are slice and bake, they are fantastic make ahead Christmas baking prep!
- Stunning Visuals: The bright red and green swirls look so festive! They instantly elevate any platter featuring your festive swirled desserts.
- Simple Slice and Bake: You do all the hard work once when rolling the log; then it’s just quick slicing and baking. No flattening, no fuss!
- Incredible Texture: They are beautifully buttery and soft on the inside, just like the best sugar cookies should be. If you need ideas for decoration later, I have a great post on icing that dries firm!
- Perfect for Sharing: They bake up durable, meaning they travel well for any big Christmas cookie exchange ideas you might have planned.
Ingredients Needed for the Best pinwheel cookies recipe
Okay, the ingredient list is super basic, which I love! It’s really just standard for high-quality buttery pinwheel cookies. You want to make sure your butter is truly softened—not melted sludge, just soft enough to press a finger into. My biggest expert tip here, and please listen: use gel food coloring, not the watery liquid stuff. Gel gives you that intense, gorgeous color without messing up the dough consistency. If you decide to whip up some fluffy icing later, I always use my favorite vanilla buttercream frosting recipe!
- 2 1/4 cups all-purpose flour (This is the backbone!)
- 1 teaspoon baking soda (Just enough lift.)
- 1/2 teaspoon salt (To balance everything out.)
- 1 cup unsalted butter, softened (Crucial for creaming!)
- 1 1/2 cups granulated sugar (Yes, we need this sugar!)
- 1 large egg (Your binder, don’t skimp.)
- 1 teaspoon vanilla extract (For warmth.)
- 1/2 teaspoon almond extract (This is my secret flavor boost!)
- Red food coloring (Gel, gel, gel!)
- Green food coloring (Gel for maximum holiday hue!)
How to Prepare Your Festive pinwheel cookies
Okay, this is where the magic happens, but you have to respect the chill time! Seriously, if you rush the chilling, you’ll end up with colorful puddles instead of beautiful swirl sugar cookies. This is a process, but every step makes your final slice so clean it looks like it came from a bakery. If you’re thinking of decorating these beauties later with icing, I recommend checking out my post on sugar cookie icing that hardens for the perfect finish!
Mixing the Buttery pinwheel cookies Dough Base
First up, get that classic sugar cookie base going! Cream your softened butter and sugar together until it’s fluffy and light—you want air in there! Then beat in the egg and those flavor extracts. Once that’s blended, slowly add your dry stuff just until it comes together. Don’t overmix! Overmixing makes tough cookies, and we want these melt-in-your-mouth delicious! If you prefer a snickerdoodle texture sometimes, you can see how I handle the mixing there, but for these, gentleness is key, unlike my best soft chewy classic snickerdoodles recipe!
Coloring and Chilling the Dough Layers
Now, divide that perfectly mixed dough into three equal balls. One stays plain white, the other two get your gel colors—red and green. Mix each until the color is totally uniform. Wrap these three separate balls up nice and tight in plastic wrap. Pop them into the fridge for at least one hour. They have to be firm enough to roll without sticking everywhere!
Assembling and Rolling the Colorful spiral cookies Log
This takes a little patience, but it’s so fun to watch the colors line up! Take one dough color—say, the white—and roll it out between two sheets of plastic wrap into a thin rectangle, about a quarter-inch thick. Do the exact same thing for the red and the green. Then, peel the top plastic off the white, lay the red right on top, then peel that top layer and put the green layer on. Gently press them together. Starting from one long side, wrap that entire color stack up into a really tight log. I mean tight! That tightness is what keeps your colorful spiral cookies looking sharp later. You’re basically building a candy cane!
Slicing and Baking the pinwheel cookies
Back to the fridge the finished log goes for at least two hours—honestly, overnight if you can manage it, because a super solid log slices beautifully. Preheat your oven to 375°F. Slice the chilled log into neat 1/4-inch rounds. Lay them on parchment-lined sheets, giving them room because they spread just a little bit. Bake for about 8 to 10 minutes. You are looking for just slightly set edges, not brown edges. If you rush it, they might fall apart when you move them, so give them that 5 minutes to cool on the sheet before you touch them!
Tips for Perfect pinwheel cookies Every Time
Listen, I’ve made these enough times (and made enough mistakes!) to know a few things that just guarantee success when making these pinwheel cookies. The first time I tried using liquid coloring, my dough got sticky way too fast, and the swirls looked blurry. Stick to the gel colors; they give you vibrant color without adding unwanted moisture to your dough mix.
Temperature control is everything for those clean cuts. If your dough is too soft when you go to slice it, the colors run into each other, and poof, no more perfect swirls! Make sure that log is rock solid before you even think about grabbing your knife. You want that firm chill for those 1/4-inch rounds to hold their shape perfectly on the hot baking sheet.
For getting those perfectly even layers? Roll each colored piece to the same 1/4-inch thickness. I usually use my hands to gently flatten the layers together after peeling off the plastic wrap—don’t roll the colors *after* they are stacked, or you’ll lose definition! If you’re planning on decorating these beautiful cookies later, remember that any thick icing should be applied after they are completely cool. For reference, I always check my notes on sugar cookie icing that dries firm to make sure I don’t ruin the look!
Make Ahead & Freezer Tips for pinwheel cookies
This is probably my favorite part about these pinwheel cookies! They are the ultimate stress reliever during the holidays because they fall squarely into the fantastic world of make ahead Christmas baking. When things get hectic in December, you’ll be so thankful you prepped ahead.
You have two great options here. First, once you’ve got that gorgeous, tightly wrapped log of multicolored dough, just pop the whole thing straight into the freezer. Make sure it’s wrapped super securely—I usually double-wrap mine in plastic and then put it into a freezer bag. It will keep perfectly for up to two months!
If you need cookies faster, you can slice the hardened log into rounds right away, place the slices separated on a cookie sheet, and then freeze those individual rounds. Once they are solid little coins, toss them into a Ziploc bag. When you’re ready to bake, just pull out what you need. You can bake them straight from frozen; just add an extra minute or two to the baking time. That’s a lifesaver! If you’re looking for other easy make-ahead ideas, check out my tips for make ahead cheesy egg cups!
Variations on the Classic pinwheel cookies Recipe
While the red and green swirls are classic for Christmas, these slice-and-bake cookies are so versatile depending on what extracts and ingredients you have hanging around. You definitely don’t need to wait for the holidays to make amazing pinwheel cookies!
If you want to try out those vanilla chocolate pinwheels, it’s incredibly easy. Just take one of your three dough balls—maybe the one you were going to dye green—and mix in about two tablespoons of unsweetened cocoa powder until it’s rich brown. Now you have white, red, and chocolate dough! Or, switch up your essence entirely, like I do sometimes for birthdays. Skip the food coloring and swap out the almond extract for a stronger splash of lemon or orange extract in the white dough layer. It makes these buttery pinwheel cookies taste completely different but still addictive!
For a fun twist that leans a bit red velvet, sometimes I just add a tiny bit of pure raspberry extract to the red portion instead of coloring, giving it flavor and color all at once. If you are planning a big holiday spread and are already baking rolls, check out my fantastic red velvet cinnamon rolls recipe—they use similar coloring principles!
Serving Suggestions for Your Festive swirled desserts
These pinwheel cookies are absolutely built for sharing! When you are putting together your big holiday dessert platter, these colorful guys should always be front and center, standing right next to those glossy, chocolatey things. I think they look the prettiest next to simpler white cookies, just so the red and green really pop!
If you’re heading out to a big Christmas cookie exchange, these make a wonderful centerpiece because they require zero extra decorating once they come out of the oven. They look finished all on their own! I always pack mine in simple tins with parchment paper dividers.
Taste-wise, they are perfect alongside a warm beverage—think cozy coffee or, even better, a rich mug of hot chocolate. If you’re making hot chocolate from scratch, you have to try my recipe for peppermint hot chocolate bombs; they make the whole room smell like Christmas! Or, if you need quantities for a party, use a slow cooker version like my slow cooker peppermint hot chocolate so everyone can stay warm while admiring your beautiful festive swirled desserts.
Storage & Reheating Instructions for pinwheel cookies
The best part about these amazing pinwheel cookies is how long they stay perfect, even without fancy sealing! Once they are completely cool—and I mean stone cold—pop them right into an airtight container. Keep them at room temperature, away from weird heat sources or direct sun. Since they are robust slice and bake cookies, they actually keep their buttery texture really well for a solid week. Seriously, they taste just as good on day seven!

Now, do you need to reheat them? Nope, not at all! They are totally delicious at room temperature. If you have leftovers way past a week, you can freeze the baked cookies, too. Just make sure they are totally cooled, stack them with parchment paper layers between them in a sturdy freezer bag, and they should be good for a month or so. When you want one, just let it thaw on the counter for about 15 minutes!
Frequently Asked Questions About pinwheel cookies
I get so many questions about these cookies, especially around the holidays! It makes sense; you want your cookie box ideas to look absolutely perfect. Troubleshooting the dough stage is key to success here, so let’s clear up the most common concerns about these amazing pinwheel cookies.
Can I make these pinwheel cookies without chilling the dough?
Oh, please don’t try it! Chilling isn’t just a suggestion; it’s the law for these cookies, honestly. If you skip the chilling—especially that final chill after you roll the log—the dough will be too soft when you slice it. The colors will squish together right away, and you’ll end up with messy, thick blobs instead of those lovely, clean swirl sugar cookies. We lose all the visual payoff if we skip that two-hour nap in the fridge!
What is the best way to get sharp swirls in my swirl sugar cookies?
Sharp swirls come from two things: color intensity and rolling technique. Like I stressed before, use the gel colors so the dough doesn’t get wet. But the real skill is rolling each colored piece to the same 1/4-inch thickness before layering them up. When you start rolling the final log, pull it tight—tighter than you think you need to! A tight roll ensures there are no air gaps where colors blend awkwardly. If you follow that method, you get those beautiful, crisp edges, which makes them look like perfect colorful spiral cookies.
Are these considered kid friendly holiday baking treats?
Absolutely! These are some of the best kid friendly holiday baking projects because you can break the steps up. The younger kids can help cream the fats and sugar (with supervision, of course!). Older kids are usually really good at helping you roll out the colored layers to the same size. My niece loves being in charge of slicing the main log, as long as we’ve chilled it until it’s rock hard. They are so much fun for family baking days!
If you want more ideas for easy baking projects you can do with the little ones, you should definitely check out the tips in my guide to easy slice-and-bake cookies!
Nutritional Estimate for These Buttery pinwheel cookies
Now, listen up, because I’m not a registered dietitian, just a mom who loves butter and sugar! These estimates are just a ballpark for one of these gorgeous, buttery pinwheel cookies. They are made with real sugar, so, you know, enjoy them in moderation! For the official breakdown, take a look here: Calories land around 130, with about 7 grams of fat. They are definitely a treat, not a health food, but worth every bite! For a note on ingredient sourcing and estimates, you can always read my full disclaimer here: I check my disclaimer before posting anything like this!
Print
Classic Red and Green Christmas Pinwheel Cookies
- Total Time: 155 min
- Yield: 3 dozen cookies 1x
- Diet: Vegetarian
Description
Make slice-and-bake sugar cookies with red and green swirls for a festive holiday treat.
Ingredients
- 2 1/4 cups all-purpose flour
- 1 teaspoon baking soda
- 1/2 teaspoon salt
- 1 cup unsalted butter, softened
- 1 1/2 cups granulated sugar
- 1 large egg
- 1 teaspoon vanilla extract
- 1/2 teaspoon almond extract
- Red food coloring (gel preferred)
- Green food coloring (gel preferred)
Instructions
- Whisk together the flour, baking soda, and salt in a medium bowl. Set aside.
- In a large bowl, cream the softened butter and sugar until light and fluffy. Beat in the egg, vanilla extract, and almond extract.
- Gradually add the dry ingredients to the wet ingredients, mixing until just combined.
- Divide the dough evenly into three separate bowls. Leave one bowl plain (this will be the white layer).
- Add red food coloring to the second bowl and mix until the color is uniform.
- Add green food coloring to the third bowl and mix until the color is uniform.
- Wrap each color of dough separately in plastic wrap and chill in the refrigerator for at least 1 hour, or until firm enough to handle.
- On a piece of plastic wrap or parchment paper, place the white dough. Cover with another sheet of plastic wrap and roll it into a rectangle approximately 1/4 inch thick.
- Repeat the rolling process for the red dough and the green dough, making them the same size as the white rectangle.
- Remove the top layer of plastic wrap from the white dough. Carefully place the red dough directly on top of the white dough, pressing gently to adhere.
- Remove the top layer of plastic wrap from the red dough. Carefully place the green dough on top of the red dough, pressing gently.
- Starting from one long edge, tightly roll the layered dough into a log. Wrap the log tightly in plastic wrap.
- Chill the dough log for at least 2 hours, or until very firm.
- Preheat your oven to 375 degrees F (190 degrees C). Line baking sheets with parchment paper.
- Remove the log from the refrigerator and slice it into 1/4-inch thick rounds.
- Place the cookie slices about 2 inches apart on the prepared baking sheets.
- Bake for 8 to 10 minutes, or until the edges are lightly set. Do not overbake.
- Let the cookies cool on the baking sheet for 5 minutes before transferring them to a wire rack to cool completely.
Notes
- Use gel food coloring for the most intense, non-streaky colors in the dough.
- For easier slicing, let the dough log sit at room temperature for 5 to 10 minutes before cutting.
- You can freeze the sliced cookies on a baking sheet before baking; transfer them to a freezer bag and bake directly from frozen, adding 1 to 2 minutes to the baking time.
- Prep Time: 45 min
- Cook Time: 10 min
- Category: Dessert
- Method: Baking
- Cuisine: American
Nutrition
- Serving Size: 1 cookie
- Calories: 130
- Sugar: 11
- Sodium: 65
- Fat: 7
- Saturated Fat: 4
- Unsaturated Fat: 3
- Trans Fat: 0
- Carbohydrates: 16
- Fiber: 0
- Protein: 2
- Cholesterol: 25