Oh my gosh, if you need a showstopper dessert that requires zero actual *baking*, you have clicked on the absolute right button today! Seriously, those scorching summer afternoons or those nights when you realize you forgot to plan dessert for tomorrow? This is your answer, your hero, your chocolatey savior. I’ve made about a million versions of chocolate cream pies over the years, but trust me when I say this No-Bake Creamy Oreo Cheesecake Pie reigns supreme. It’s richer than a simple pudding pie, easier than a true cheesecake, and gives you that satisfying, crumbly, pure chocolate hit you crave in an authentic oreo pie. This recipe nails the texture combination—a sturdy, buttery crust holding up this impossibly velvety filling. It never fails!
Why This No-Bake Oreo Pie Recipe is a Must-Try (Easy Oreo Dessert)
What’s not to love about a dessert that tastes like it took all day but only took about 20 minutes to assemble? This is my absolute go-to when friends drop by unexpectedly or when the weather outside is just too hot to even look at the stove. I’ve made about a million versions of chocolate cream pies over the years, but trust me when I say this No Bake Oreo Pie reigns supreme. It’s richer than a simple pudding pie, easier than a true cheesecake, and gives you that satisfying, crumbly, pure chocolate hit you crave in an authentic oreo pie. This recipe nails the texture combination—a sturdy, buttery crust holding up this impossibly velvety filling. It never fails! You can find some similar quick recipes for the kids, like no-bake peanut butter oat bars, but nothing beats this decadent pie!
- If you need a fast, impressive dessert, this No Bake Oreo Pie is your best friend. It’s practically foolproof!
- It travels like a dream, which makes it marvelous for any Party Oreo Dessert situation. Keep it chilled, and it’s perfect.
Zero Oven Time: The Ultimate No Oven Dessert
Let me tell you, when it’s 90 degrees outside, the oven stays shut. That’s rule number one in my kitchen during the summer! This recipe delivers all the rich chocolate flavor without taking up any precious oven space. It’s pure, chilled magic for any Quick Oreo Dessert.
Velvety Oreo Filling Texture
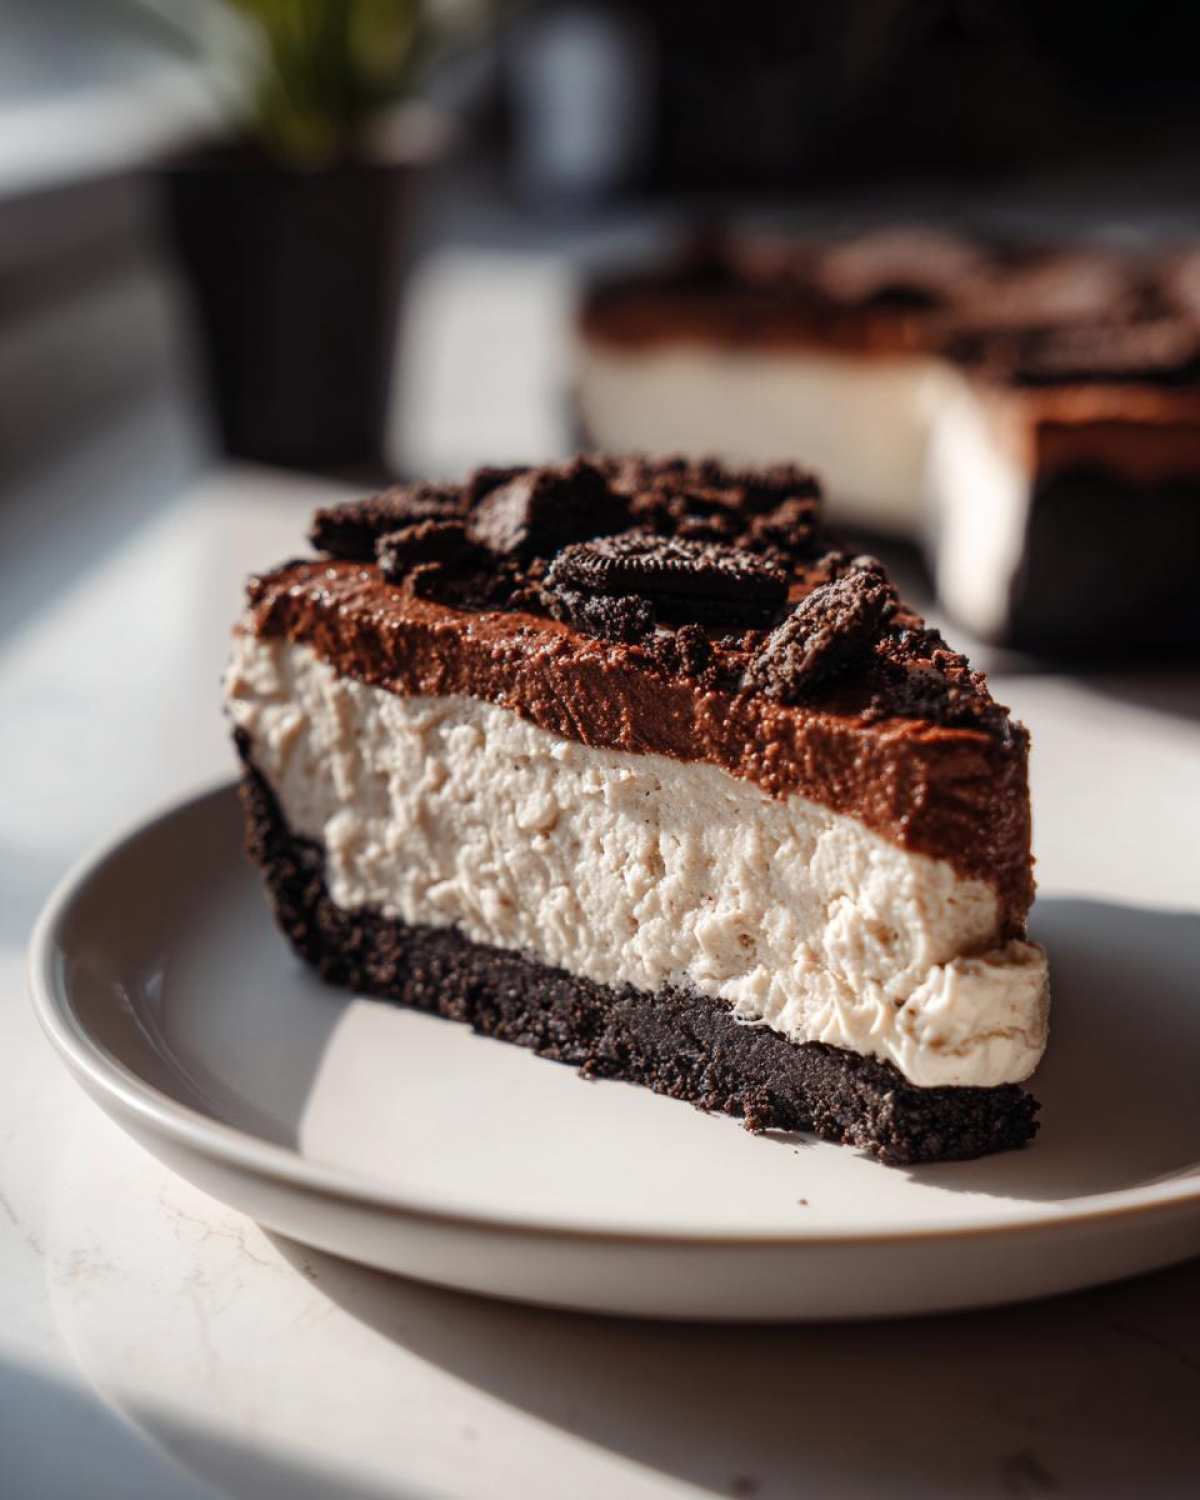
The combination of softened cream cheese and that instant pudding mix creates a signature texture that is just divine. It’s denser than mousse but softer than a firm cheesecake—that’s where the ‘creamy’ comes in! This Velvety Oreo Filling is why people always ask me for the recipe when I bring this Chocolate Oreo Dessert to gatherings.
Gathering Ingredients for Your Creamy Oreo Pie Recipe
Okay, the best part about this wonderfully easy dessert is how few things you actually need! You won’t be making a tricky custard or whipping up egg whites until your arm hurts. Nope! We are sticking to the essentials to create the most luxurious Creamy Oreo Pie Recipe possible. If you’ve got a package of Oreos and a block of cream cheese, you’re already halfway there. I always keep a few backup boxes of Oreos in the pantry specifically for emergency Oreo Pie making. You might want to bookmark my recipe for no-bake peppermint bark cheesecake for later, but right now, let’s focus on chocolate!
For the Homemade Oreo Crust
This crust sets up beautifully in minutes in the freezer, which is a huge time saver. For the ultimate Homemade Oreo Crust, you need about 25 whole cookies—the whole sandwich! Don’t scrape out the filling; we want the sugar and fat from the cream center to help bind everything together. You’ll process those whole cookies until they are fine crumbs, almost like sand. Then you mix them with six tablespoons of good quality, fully melted unsalted butter. Don’t use too much butter, or it gets oily; too little, and it crumbles apart!
For the Velvety Oreo Filling
The filling is what we call a ‘two-step powerhouse.’ First, we build the cheesecake base. You must have your 8 ounces of cream cheese softened to room temperature—if it’s cold, it will never mix smoothly, and you’ll end up with lumps, which ruins the Velvety Oreo Filling effect! Beat that until it’s dreamy, then fold in your vanilla and powdered sugar. Next, you create the chocolate layer. This requires one package of that wonderful little instant chocolate pudding mix! You’ll whisk that with cold milk and, this is important, cold heavy cream. Whisking those three together until they get nice and thick is key before layering everything onto that frozen crust.
Step-by-Step Instructions to Make the Perfect Oreo Pie
Now that we have all our beautiful ingredients lined up, it’s time to get serious! This process really flies once you get going, but we need to pay attention to the timing, especially when it comes to chilling. You can’t rush perfection when making this ultimate Oreo Pie, even though it’s no-bake! If you’re short on time, you can check out my recipe for dirt cake for another quick chocolate fix, but for the full cheesecake texture, follow these steps closely.
Preparing the Oreo Cookie Pie Crust
First thing’s first: the base! Take those fine Oreo crumbs and pour them into a bowl with the six tablespoons of melted butter. Now, this is the part where you need some muscle. You need to press this mixture firmly into the bottom of your 9-inch pie dish—and don’t forget the sides! Use the flat bottom of a measuring cup or just your clean fingers to pack it down like you’re building a tiny, chocolatey retaining wall. Once it’s packed tight and smooth, slide that whole thing into the freezer. It needs to chill hard while we make the filling, so aim for at least 15 minutes in the freezer to set up nicely!
Creating the Cream Cheese Layer
While the crust is hardening up, we’ll whip up the luxurious bottom layer. Grab your big mixing bowl and your electric mixer—or just a strong arm! Beat that room-temperature cream cheese until it’s completely smooth; I mean silky, no lumps allowed. Then, slowly beat in that powdered sugar and the vanilla until it’s all incorporated. Next step is folding in the thawed whipped topping. Just gently fold it—we don’t want to deflate all those lovely air bubbles! Once it’s evenly mixed, take that frozen crust out of the freezer and spread this creamy goodness evenly over the crumbs. Try not to crush the crust while you spread!
Mixing the Thickened Oreo Pudding Pie Filling
Time for the chocolate magic! In a separate bowl, you’re going to whisk together your instant chocolate pudding mix, the cold milk, and that cold heavy cream. The whisking is important here! You need to beat that mixture fairly vigorously for about two full minutes. Trust me, if you stop too soon, it will be runny. Keep going until you see it really thickening up and holding soft peaks—that’s what creates that dense, incredible texture for the top layer of your Oreo Pudding Pie.
Assembling and Chilling Your Oreo Pie
Now we layer! Gently spoon that thick chocolate pudding mixture right on top of your cream cheese base. You can use an offset spatula to get a nice, flat top, or just leave it rustic—whatever you prefer for your beautiful Oreo Pie. Once assembled, cover the pie loosely with plastic wrap. Please, do not skip this chilling time! It needs a minimum of four hours in the refrigerator for the layers to truly bond and set firm. But here’s my secret: if you can wait until the next day, it becomes the best Chilled Oreo Dessert you’ve ever had. Overnight is always the winner!
Tips for Success When Making an Oreo Pie
I know I harp on temperature a lot, but honestly, that’s 90% of the battle with any oreo pie that relies on no-bake chemistry! If you want that smooth, luxurious filling that just melts in your mouth, you have to respect the cheese temperature. You really do! I’ve learned a few tricks over the years to make sure my pie sets perfectly every single time, which is especially important when you are bringing it to a potluck and hoping it holds its shape.
- Make absolutely sure your cream cheese is completely soft. If you forget to let it sit out, you can microwave it for about 10 seconds, but watch it closely—you want soft spots, not melted soup!
- Don’t over-whip the whipped topping when folding it in. Once it’s incorporated into the cream cheese, stop mixing. Over-mixing starts to deflate it, and that leads to a runny bottom layer later on.
- Be patient with the chilling! I know you want to dig in, but that minimum four-hour chill time is non-negotiable. The pudding layer needs time to grab onto the cream cheese layer. If you want the best results, like when I make my amazing candy cane chocolate pie, I always wait until the next day.
- Use a fork or a mini-whisk to incorporate air when mixing the pudding and cream. This helps it thicken up faster and achieve that perfect, thick consistency fast.
Ingredient Notes and Simple Oreo Treats Substitutions
Listen, I know sometimes you look in the fridge and realize you’re missing one obscure ingredient. Don’t panic! While I swear by this exact setup for the ultimate oreo pie, I’ve learned a few tricks over the years for substitutions. This recipe is a favorite because it’s so flexible, but a few things just make it perfect. If you need a backbone for your dessert that’s just as good as the famous red velvet cheesecake, you need to respect the ratios here.
We need to talk specifically about how many Oreos you need and what to do if you run out of heavy cream for that thick pudding layer. Don’t let a missing item stop you from making these Simple Oreo Treats!
The Exact Cookie Count for the Crust
The recipe calls for one full package (14.3 ounces) of Oreos crushed. Most folks ask me, “Are we counting the cream filling?” The answer is a hearty, enthusiastic yes! You toss the whole cookie right in the food processor. If you crush them by hand, you’re going to be crushing for a long time, maybe start an hour before you think you want to eat the dessert! I estimate that a standard package usually gives us about 25 whole cookies. Use exactly that many if you can count them, or weigh them out if you’re feeling precise—it ensures that crucial buttery binder ratio holds up when you freeze that Homemade Oreo Crust.
What if I don’t have Heavy Cream?
This is my most common question! That heavy cream is what gives us that thick, slightly luxurious texture in the pudding layer—it whips up better than regular milk. However, if you’re fresh out, you definitely don’t have to run to the store! You can substitute it, but you have to compensate for the lower fat content. The note says you can swap it out for an extra cup of cold milk. But here’s the trick: if you use only milk, you need to use one and a half packages of that instant chocolate pudding mix instead of just one. That extra dry mix gives the filling the structure it needs to set up properly without the heavy cream fat helping things along. You’ll still get a wonderful Oreo Pudding Pie!
Can I make this Fudgy Oreo Pie instead?
If you want something a little less creamy cheesecake and more dense and fudgy, you can tweak the cream cheese layer. For a truly Fudgy Oreo Pie variation, you can skip the instant pudding mix entirely in the top layer! After you beat your cream cheese layer smooth, you can fold in a cup of softly melted chocolate chips or even some softened fudge sauce right into that first layer. Then, for the topping, just use softened Cool Whip mixed with a little vanilla. It won’t have that classic pudding structure, but boy, is it rich!
Serving Suggestions for Your Indulgent Oreo Dessert
Once your amazing oreo pie has chilled overnight—seriously, you need that time, trust me!—it’s time to make it look pretty for your guests. That little bit of crunch on top really makes all the difference, setting this apart from your average Quick Oreo Dessert. We already discussed those optional mini chocolate chips, but I have a couple of other ideas that really elevate this dish for company or just when you want to treat yourself!
If you’re feeling extra fancy, grab a can of whipped cream and pipe little rosettes all over the top edge before drizzling on some melted white chocolate. That creates a gorgeous contrast against the dark chocolate filling. It looks like you slaved away for hours! For serving, this pie pairs perfectly with a warm, strong cup of coffee or maybe even a little glass of milk, naturally. If you feel like sneaking in another dessert that’s slightly healthier, you could always try my chocolate chip zucchini bread later in the week!
Storing Your Leftover No Bake Oreo Pie
So, you miraculously have leftovers of this perfect No Bake Oreo Pie? Good job, you have excellent self-control! Since this is a chilled dessert that relies heavily on dairy and pudding to set, refrigeration is absolutely mandatory here. You cannot leave this pie sitting out on the counter for more than two hours, or you risk everything getting soupy. Keep it tightly covered in the fridge, and it stays wonderfully fresh for about three to four days. That’s a lot of delicious chances to have another slice!
Now, can you freeze it? Yes, you certainly can! Freezing is actually a great way to prep this ahead of time for a big holiday party—just make sure you wrap that whole oreo pie really well in plastic wrap and then foil so it doesn’t pick up any freezer smells. When you’re ready to eat it, pull it out of the freezer and let it thaw in the refrigerator for a full day. Thawing slowly keeps that smooth texture intact. If you’re looking for another great make-ahead chocolate treat, my fudgy Oreo brownies freeze even better, but this pie is worth the extra thaw time!
Frequently Asked Questions About This Oreo Pie
It’s so common for people to have little questions pop up once they start gathering ingredients, especially with a filling that has a few different parts like this oreo pie! I’ve collected the most common things folks ask me when they are aiming for that perfect, no-bake set. Don’t sweat it if you have to make a small swap; we can usually work around it, but some things really help secure that creamy texture that everyone loves!
Can I use a baked crust instead for my Oreo Pie?
That’s a great question, especially if you’re used to pies that need heat! While a baked crust *technically* works, you really don’t need it for this one. Since our entire filling relies on chilling firmly in the fridge—the cream cheese setting up and the pudding thickening—a baked crust doesn’t offer much structural advantage here. Plus, using the crust straight from the freezer is the fastest way to get this No Bake Oreo Pie assembled! The melted butter hardens up beautifully when frozen, making it incredibly sturdy to hold all that creamy goodness.
How do I make this a 3 Ingredient Oreo Pie?
Oh, I totally see why people look for 3 Ingredient Oreo Pie recipes! They sound amazing, right? Usually, those recipes are made by just mixing Oreos, butter, and maybe Cool Whip or canned condensed milk for the filling. They are definitely quick, but they aren’t quite the same as this decadent dessert. To get that amazing, dual-layered texture—the fluffy cheesecake layer under the thick chocolate layer—we really need the cream cheese stabilizing the first layer and the combination of milk and cream to set the pudding layer. Think of this as the upgraded, luxury version of those Simple Oreo Treats!
What is the best way to slice this Creamy Oreo Pie Recipe neatly?
This is the make-or-break moment between an Instagram-ready slice and a messy blob on the plate! Because the filling is so rich and chilled, a cold knife just wants to drag the filling around. The trick I use for every cheesecake or creamy pie—even when cutting into my s’mores cheesecake dip—is hot water. Get a sharp, thin knife and dip the blade completely into a glass of very hot or boiling water. Wipe the blade dry quickly with a paper towel, and then make your cut. Dip, wipe, cut! You might need to repeat that for every slice, but the clean slices are stunning!
Sharing Your Homemade Oreo Pie Experience
Honestly, the best part of developing these recipes is hearing from you all! Now that you’ve made your own stunning, decadent oreo pie, I really want to know what you thought. Did it disappear in five minutes flat at your house? Did you manage to save a slice for leftovers (I usually don’t)?
Please, please, please come back here and leave a rating! Just click those little stars at the top of the recipe card. Your feedback helps future bakers decide if they should try this awesome Chocolate Oreo Dessert, too. And if you tried a fun customization—maybe you used peanut butter cups instead of chips on top, or you needed to make that heavy cream substitution—please share the details in the comments below. Sharing tips is how we all get better at this! If you’re still craving a chocolate fix after this pie, you absolutely have to check out my recipe for three-ingredient fudge!
Happy chilling, and I can’t wait to read what you thought of your new favorite No Bake Cookies and Cream Pie!
Print
No-Bake Creamy Oreo Cheesecake Pie
- Total Time: 4 hr 20 min
- Yield: 8 servings 1x
- Diet: Vegetarian
Description
Make this easy, no-bake Oreo pie using a simple cookie crust and a rich, creamy filling made with cream cheese and instant pudding.
Ingredients
- 1 package (14.3 ounces) Oreo cookies, crushed
- 6 tablespoons unsalted butter, melted
- 1 package (8 ounces) cream cheese, softened
- 1 cup powdered sugar
- 1 teaspoon vanilla extract
- 1 container (8 ounces) frozen whipped topping, thawed
- 1 package (3.4 ounces) instant chocolate pudding mix
- 1/2 cup cold milk
- 1 cup cold heavy cream
- 1/2 cup mini chocolate chips (optional, for topping)
Instructions
- Prepare the crust: Combine the crushed Oreo cookies and melted butter in a bowl. Press the mixture firmly into the bottom and up the sides of a 9-inch pie dish. Place the crust in the freezer while you prepare the filling.
- Make the cream cheese layer: In a large bowl, beat the softened cream cheese, powdered sugar, and vanilla extract until smooth. Fold in the thawed whipped topping until just combined. Spread this mixture evenly over the chilled Oreo crust.
- Prepare the pudding layer: In a separate bowl, whisk together the instant chocolate pudding mix, cold milk, and cold heavy cream for about two minutes until the mixture thickens.
- Assemble the pie: Pour the thickened pudding mixture over the cream cheese layer. Gently spread it to cover the entire surface.
- Chill the pie: Cover the pie loosely with plastic wrap and refrigerate for at least 4 hours, or preferably overnight, until the filling is firm.
- Serve: Before serving, top the pie with extra crushed Oreos or mini chocolate chips, if desired. Slice and serve cold.
Notes
- For the crust, you can use about 25 whole Oreo cookies to get the required amount of crumbs.
- If you do not have heavy cream, you can substitute it with an additional 1 cup of cold milk and increase the instant pudding mix to 1.5 packages.
- This pie sets best when chilled for a full 8 hours.
- Prep Time: 20 min
- Cook Time: 0 min
- Category: Dessert
- Method: No Bake
- Cuisine: American
Nutrition
- Serving Size: 1 slice
- Calories: 450
- Sugar: 35g
- Sodium: 310mg
- Fat: 28g
- Saturated Fat: 15g
- Unsaturated Fat: 13g
- Trans Fat: 0.5g
- Carbohydrates: 48g
- Fiber: 2g
- Protein: 5g
- Cholesterol: 55mg