Ugh, have you ever stood in the grocery aisle staring at those tall bottles of chocolate syrup, knowing exactly how thin and suspiciously bright red the ingredients list is? Trust me, I’ve been there. I always felt like what I was pouring over my ice cream was more coloring and corn syrup than actual rich chocolate goodness. That’s why I finally locked myself in the kitchen and perfected this Ultra-Rich and Silky Homemade Chocolate Syrup recipe. It’s shockingly superior to anything store-bought, and here’s the best part: it’s ready in about 10 minutes flat!
I developed this because my kids kept asking for chocolate milk, and I refused to put that stuff in their growing bodies. This recipe uses only basic pantry staples—mostly cocoa powder and sugar—to create this incredible texture. It’s so versatile, too! We use it for the absolute best chocolate milk (it dissolves instantly!), we drizzle it thick over vanilla bean ice cream, and honestly, a spoonful mixed into my morning coffee makes the best homemade mocha you can imagine. You absolutely have to try this simple chocolate syrup.
Why This Homemade Chocolate Syrup Recipe Beats Store-Bought
Look, I don’t usually make grand statements about recipes, but when it comes to this chocolate syrup, I have to be honest. Once you make this version, you’ll never reach for that big plastic bottle again. Seriously, you just watch the difference happen right there on the stove. It’s a confidence boost in a saucepan!
When you look at the ingredients list for most commercial syrups, it’s kind of scary, right? High-fructose corn syrup is usually number one. Yuck! My recipe keeps things simple and real, which is why it qualifies as the Better Than Store Bought Chocolate Topping in my book.
Here’s why I insist you whip up this small batch:
- It uses just sugar and *real* cocoa powder, giving you that genuine, dark chocolate flavor, not that weak stuff.
- There is absolutely no sticky corn syrup in here; we rely on the sugar dissolving perfectly in water to make the magic happen.
- The texture is what really sets it apart. It starts thin, but when it cools, it turns into this gorgeously rich and silky chocolate drizzle. You just can’t replicate that smoothness from a bottle.
- You control the flavor! If you want it sweeter, you add a tiny bit more sugar. Want it richer? I’ll show you later how to sneak in some heavy cream.
If you’re looking for other great pantry staples you can make quickly, you should check out my recipe for easy 3-ingredient chocolate fudge—it uses similar core ingredients!
Ingredients for Your Ultra-Rich Chocolate Syrup
Okay, let’s talk about what you need for this amazing chocolate syrup. The beauty of this DIY Chocolate Syrup from Cocoa Powder is that you probably have almost everything sitting in your pantry right now. It’s the ultimate pantry staple recipe! We need just five things, and they come together so fast on the stovetop.
For the best flavor, and I really stress this for the best chocolate syrup experience, please grab the highest quality unsweetened cocoa powder you can find. It makes a huge difference in how dark and decadent this turns out. This recipe naturally makes it Vegetarian, by the way!
Here’s what you’ll gather:
- One cup of plain old granulated sugar.
- One cup of water—tap water is totally fine here!
- Half a cup of unsweetened cocoa powder (the good stuff!).
- A tiny pinch of salt—don’t skip this; it wakes up the chocolate flavor!
- One teaspoon of vanilla extract, added right at the end.
Ingredient Notes and Substitutions for Chocolate Syrup
The main thing to remember here is that this recipe is naturally free of those nasty corn syrup fillers. We are making a true, simple sugar-and-cocoa version. If you are totally vegan, this recipe works beautifully as is since we start using just water!
Now, for a richness level that borders on sinful, you can replace a quarter cup of that water with heavy cream. Just stir it in when you add the vanilla. It won’t affect the basic structure of this no corn syrup chocolate recipe, but wow, does it make it luxurious! If you need to make it vegan, just stick to the water—it’s still fantastic.
How to Make Chocolate Syrup at Home: Quick & Easy Instructions
Okay, this is the fun part! Learning how to make chocolate syrup at home is honestly faster than driving to the store, buying a bottle, and coming back. We are talking about 10 minutes total, which is why I love calling this my 5 minute chocolate sauce secret weapon. Grab a small saucepan—don’t use anything too big, or the chocolate will scorch easily around the sides!
First things first: get all your dry ingredients into the pan—the sugar, the cocoa powder, and that little bit of salt. Then, add your cup of water. I like to give it a quick stir right there in the cold pan, just to get everything introduced before the heat comes on. This keeps the cocoa from puffing up into a cloud when you turn on the burner.
Next, put the pan over medium heat. This is crucial: you need to whisk constantly at this stage. You’ll notice the mixture starts looking dull and grainy at first, but keep whisking! You have to keep stirring until you visibly see all the sugar dissolve and the mixture starts to barely steam. Once it looks smooth, let it come up to a gentle simmer. It only needs to cook for one minute—no longer! Letting it boil rapidly actually ruins the texture, so keep that heat controlled.
Take that pan right off the heat the instant that minute is up. Now stir in your vanilla extract. That’s it for the cooking process! If you want to see another simple stovetop sauce recipe, I have a great one for homemade applesauce that follows a similar, easy heating method.
Now comes the hardest part: waiting! You need to let this chocolate syrup cool completely on the counter before you even think about putting it in the fridge. It will look thin when it’s hot, almost watery, but trust the process. Pour it into your storage jar and let patience work its magic.
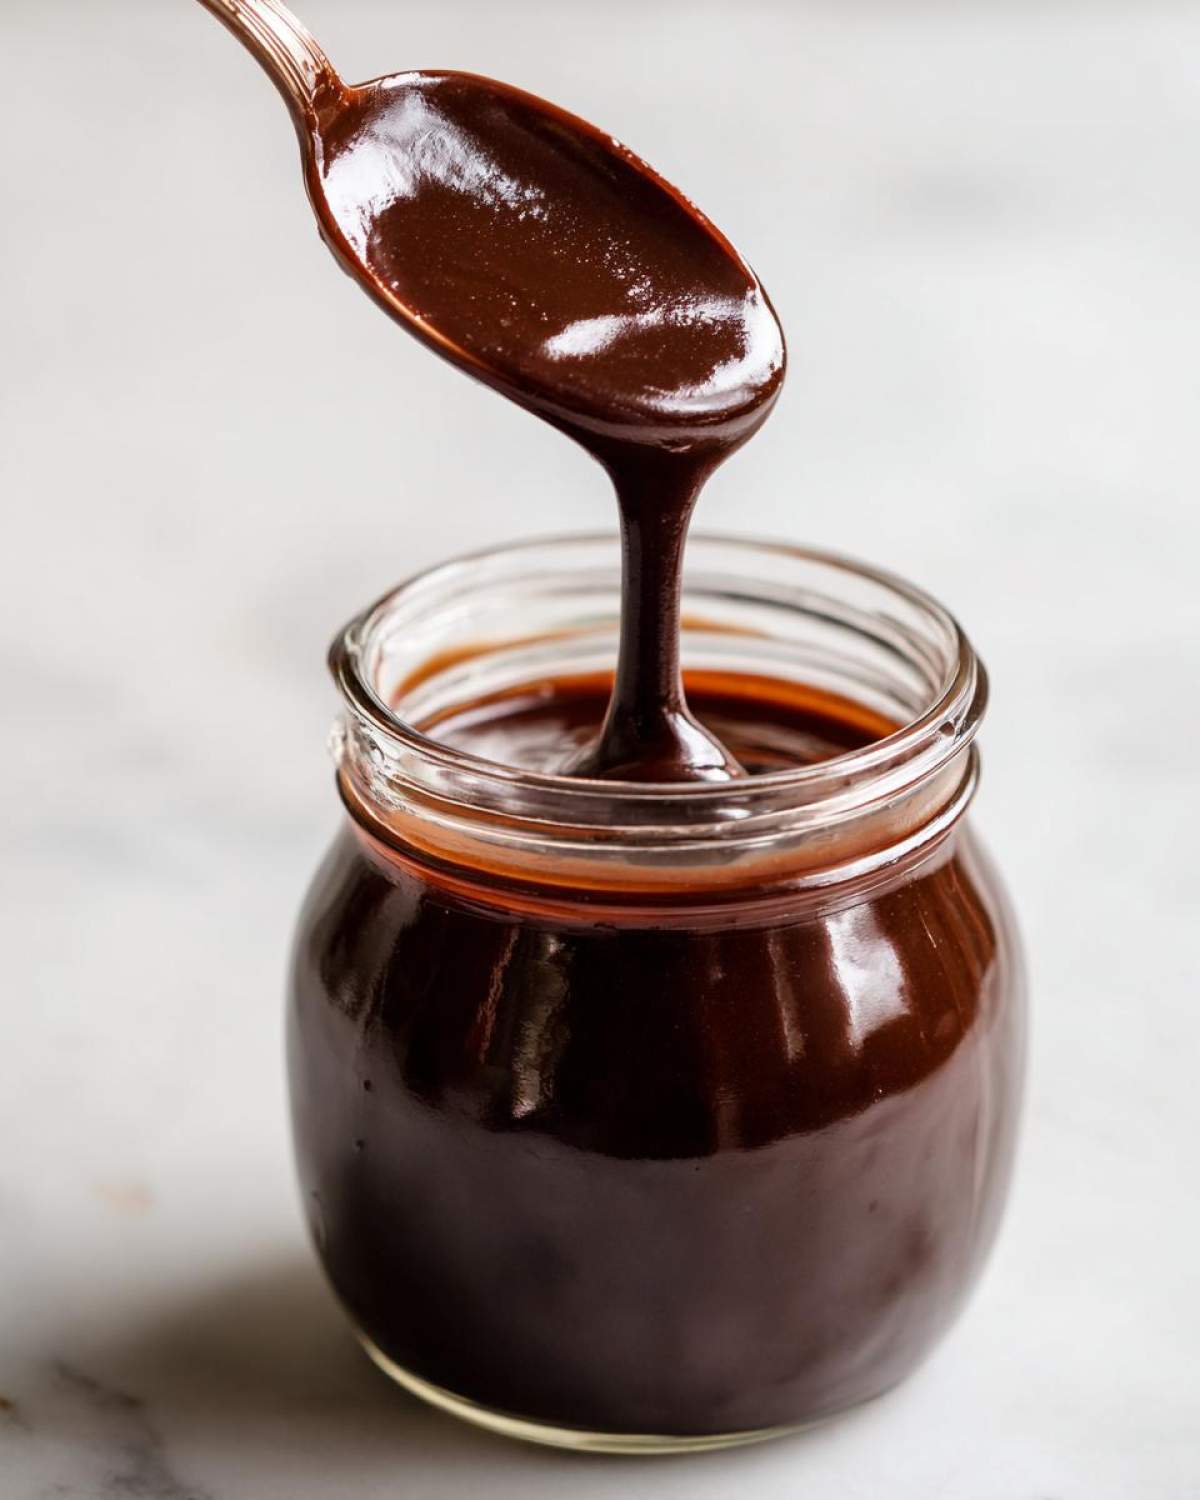
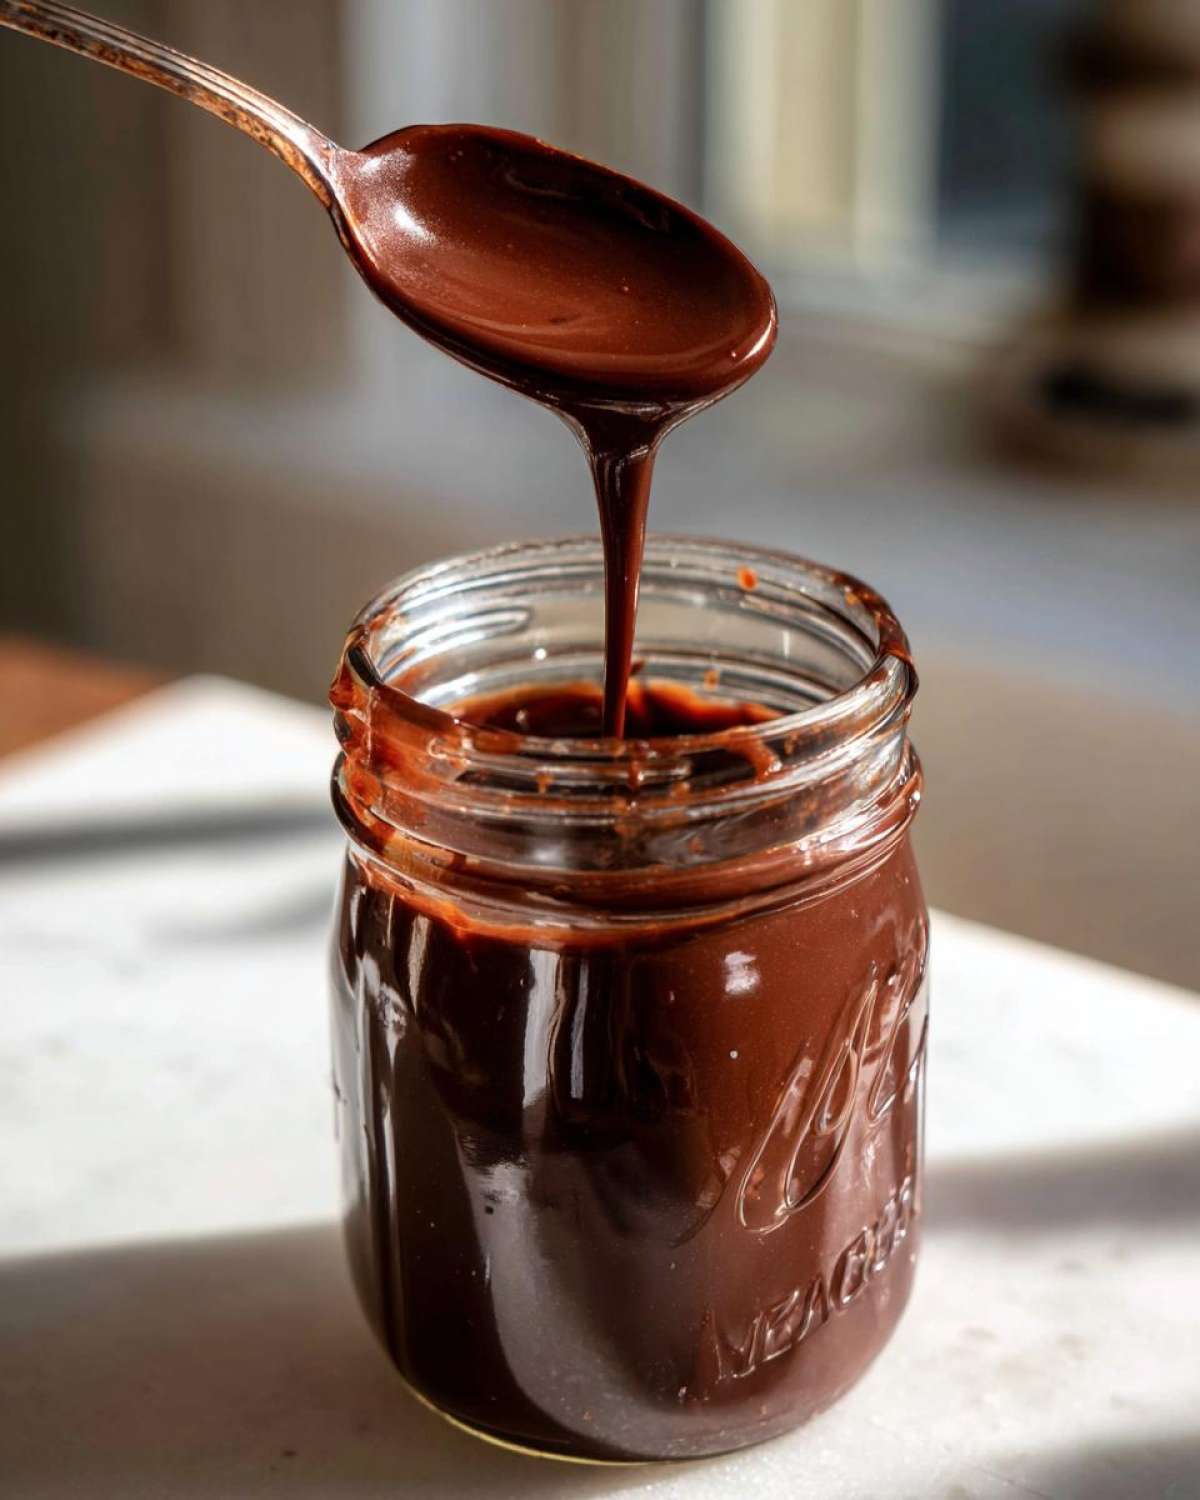
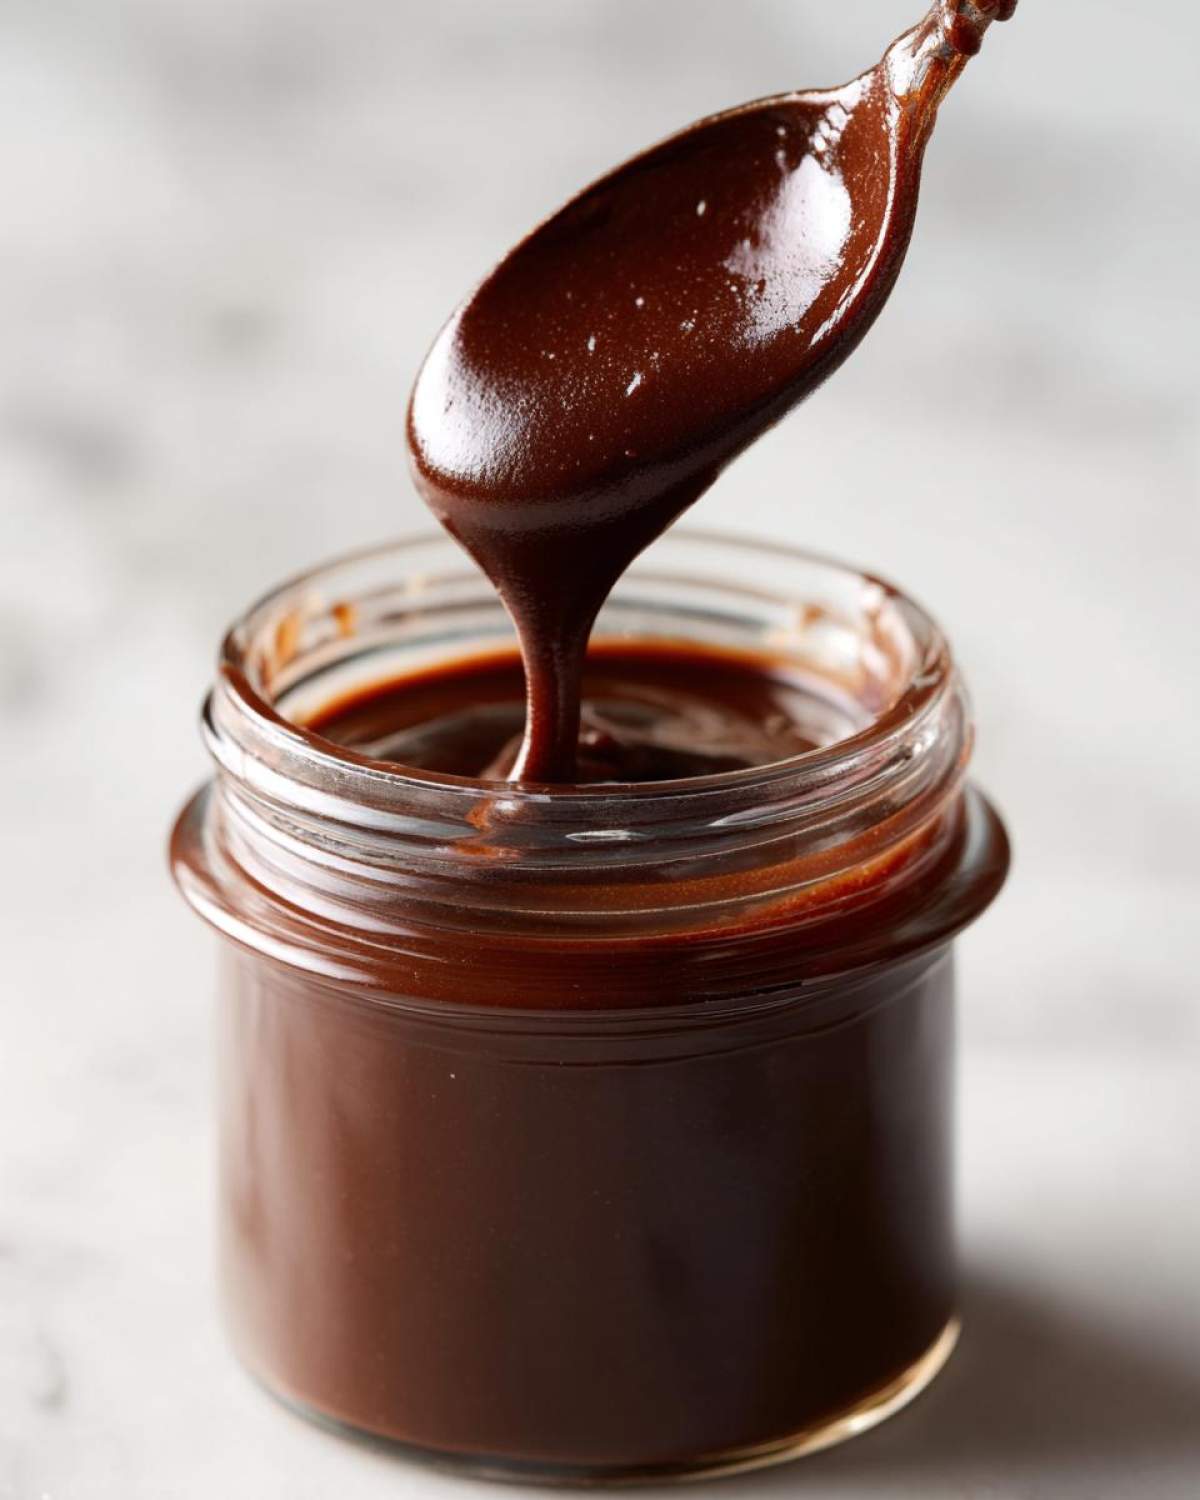
Achieving That Rich and Silky Chocolate Drizzle Texture
The cooling is where we transform this liquid into the perfect Rich and Silky Chocolate Drizzle. As the syrup cools down—especially once it hits the fridge—the sugar concentration firms up. Think about how fudge sets; it’s the same principle, just less intense! This is why my syrup clings perfectly to a scoop of ice cream instead of just running right off like the store-bought kind.
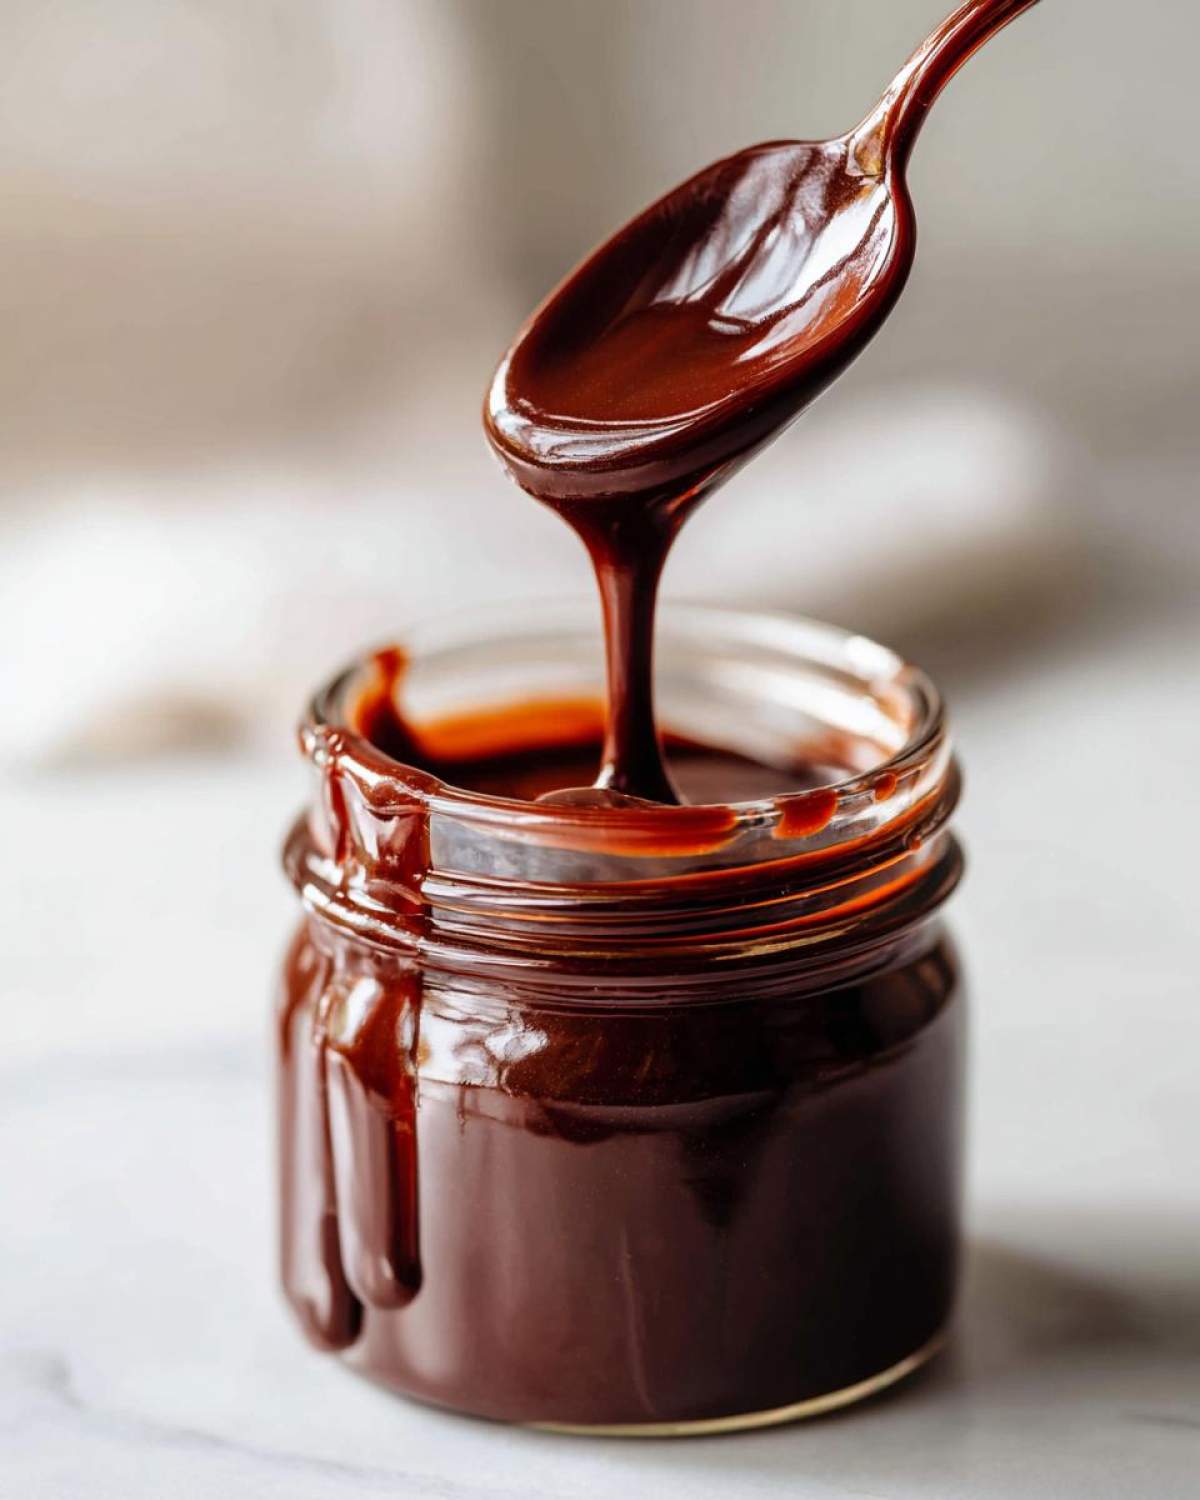
My expert tip for testing consistency is this: once it’s chilled for an hour or two, pull out a spoonful. If it’s too thick to drizzle easily—and sometimes it gets quite firm, especially in the winter—don’t panic! Just scoop out the amount you need for your dessert into a little bowl and warm it up gently in the microwave for 10 seconds. It immediately loosens up into that perfect, pourable silkiness again. That’s the beauty of making it fresh!
Versatile Uses for Your Homemade Chocolate Syrup
Now that you have this amazing, rich chocolate syrup sitting on your counter, the real fun begins! Honestly, I keep a jar in the fridge at all times because it gets used up so fast in our house. It performs beautifully across cold, hot, and baked applications. It’s truly one of the best dessert sauces you can make from scratch!
I love how versatile it is. Whether you’re looking for a classic topping or trying to jazz up your morning routine, this syrup handles it all. You’ll want to use it immediately, I promise!
The Perfect Chocolate Milk Syrup Recipe
If you have kids, this is your ticket to an instant win—and you can feel good about what you’re putting in their glass! For a perfect single serving of chocolate milk syrup, start with about one cup of cold milk. Then, whisk in two tablespoons of my homemade syrup. Taste it before you add more!
What I love is that because this syrup is so concentrated and rich, it actually blends into the cold milk better than the watery store-bought kind. You don’t get that annoying sludge at the bottom of the glass. If you’re making a big pitcher, start with a 1:16 ratio—one part syrup to sixteen parts milk—and adjust from there until it tastes exactly how you like it.
Best Chocolate Topping for Ice Cream and Coffee
This is where the “silky” part of the description really shines through. For cold things, like Sunday night ice cream sundaes, the chilled syrup pours beautifully over the top, setting up just a tiny bit as it hits the cold surface. It’s the best chocolate topping for ice cream because it’s pure flavor, no waxy texture at all.
But don’t forget the hot drinks! This is fantastic for making a homemade mocha syrup. When you’re making your coffee, mix a tablespoon or two of the syrup directly into your espresso shot *before* you add the steamed milk. The heat instantly thins the chocolate syrup out, mixing it perfectly so you get that deep, delightful flavor throughout your whole drink. It works just as well mixed right into hot cocoa, especially if you check out my recipe for peppermint hot chocolate bombs if you are in the winter baking mood! If you’re feeling fancy, you can even add a little cinnamon for a southwestern kick, just like in my pumpkin spice latte recipe seasoning!
Tips for Success with DIY Chocolate Syrup from Cocoa Powder
Even though this recipe is super straightforward, I always want to give you a couple of insider secrets for handling your DIY Chocolate Syrup from Cocoa Powder once it’s made. A little knowledge goes a long way in keeping your syrup perfect for weeks!
First thing: Storage is key. Always keep it tightly sealed in an airtight jar in the refrigerator. It keeps beautifully, but remember, it’s going to firm up dramatically in the cold. If you pull it out to drizzle over ice cream and it’s basically a solid slab of chocolate, don’t panic! That just means you did a great job making it thick.
Here’s my most important tip: If your refrigerated syrup seems too thick or tough to pour, just scoop out what you need into a tiny microwave-safe bowl and warm it for about 10 seconds. It brings it right back to that perfect silky consistency instantly. Also, for a bonus flavor burst, consider adding that little bit of heavy cream—it adds so much richness!
Storage and Making Chocolate Gift Ideas Homemade
This chocolate syrup is fantastic because once you make it, it lasts! Store it tightly covered in the fridge. I prefer using a small mason jar because they seal up so well, which is important for keeping that gorgeous texture when it gets cold. This batch should easily last you two to three weeks, sometimes even longer if you’re good about not double-dipping spoons into the jar (which I definitely am not!).
Because it tastes so incredibly good and simple, it makes for the loveliest Chocolate Gift Ideas Homemade. Seriously, who wouldn’t want a jar of this ultra-rich topping? You can dress up the jar with some nice twine or maybe tie a little handwritten tag onto it. It’s a thoughtful gift that shows you actually put some love into it.
If you’re making these up for holiday gifting, you might want to check out how I make my retro Holiday Jello Poke Cake—it’s another great make-ahead dessert that people always rave about!
Frequently Asked Questions About This Chocolate Syrup
I know when you’re trying something new, whether it’s a quick sauce or a complex bake, you always have a few questions buzzing around. I’ve gathered the most common ones I get about this wonderful chocolate syrup so you can get pouring with total confidence!
Can I make a Vegan Chocolate Syrup Homemade version?
Yes, you absolutely can! And the best news is that the base recipe I gave you—the one using sugar, cocoa, salt, water, and vanilla—is completely Vegan Chocolate Syrup Homemade friendly! No tricks needed. If you were thinking about adding that optional heavy cream for richness, just skip it and stick to the water, or for a super creamy vegan version, use a good quality oat milk instead of the water in the initial cooking phase. Either way, it works perfectly.
How long does homemade chocolate syrup last in the refrigerator?
Because we are relying mostly on sugar and a quick cook time, this syrup lasts quite well! When stored tightly sealed in a clean jar in the fridge, you should get a good two to three weeks out of it. That’s plenty of time to make chocolate milk every morning! If you notice any fuzziness or off odors, toss it, but honestly, the high sugar content acts as a decent preservative keeping things safe for a few weeks.
What is the difference between chocolate syrup and chocolate sauce?
That’s a great question that always confuses people! Generally, when cooks talk about chocolate syrup, they mean something that flows very easily, even when cold, often used primarily for mixing into cold drinks like milk. Chocolate sauce, on the other hand, implies something thicker. My recipe actually walks that line perfectly!
When it’s warm, it acts like a thin syrup perfect for mixing. But as it cools, the sugar concentration makes it set up beautifully, giving you that decadent, thick, silky chocolate drizzle consistency that you’d usually look for in a high-end chocolate sauce. It’s really the best of both worlds, cooked up right in your own kitchen!
Estimated Nutritional Data for Chocolate Syrup
I always feel a little nerdy putting in the nutritional side of things, but hey, if you’re watching what you eat—or what your kids eat—it helps to know what’s what! This is all based on my standard recipe, using water and sticking exactly to the measurements I listed. Remember, this is just an estimate based on standard ingredient averages when you divide the whole batch into servings of two tablespoons.
If you’re adding cream or a different kind of sugar, these numbers will definitely shift, so treat this as a helpful guide rather than gospel!
For a standard 2-tablespoon serving of this chocolate syrup, here’s what we’re looking at:
- Calories: About 105
- Sugar: 25 grams (Yep, it’s sweet, that’s what makes it yummy sauce!)
- Fat: Just over half a gram, which is ridiculously low since we aren’t using heavy cream in this base version.
- Sodium: Around 15 milligrams.
- Protein and Fiber: Both are pretty low, usually less than a gram each.
The main takeaway is that this is essentially a sugar and cocoa treat, but because it’s homemade, you know exactly where it came from! It’s definitely a topping, not a health food, but it’s worth every bit of that sweetness for how good it tastes drizzled over everything.
Share Your Silky Chocolate Syrup Creations
I truly hope this recipe has become a staple in your kitchen just like it is in mine! Honestly, having this chocolate syrup ready to go makes life so much easier—and definitely tastes better!
When you give this homemade chocolate syrup a try, please come back here and let me know what you thought! Did you use it to make the ultimate chocolate milk? Did you pour it thick over homemade ice cream? Or perhaps you turned it into a fantastic homemade mocha syrup for your morning pick-me-up?
I absolutely adore hearing how you customized it or which application you loved the most. Don’t be shy; pop down into the comments section below and give the recipe a star rating—a full 5 stars if it deserves it! Your feedback helps other people trust this recipe, and it keeps me inspired to develop more ridiculously easy, pantry-staple recipes like this one.
If you have any questions while you’re whipping up a batch, or if you just want to send a virtual high-five, you can always reach out through my contact page. Happy drizzling, everyone!
Print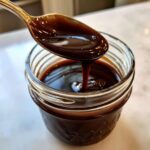
Ultra-Rich and Silky Homemade Chocolate Syrup
- Total Time: 10 min
- Yield: About 1.5 cups 1x
- Diet: Vegetarian
Description
Make a superior chocolate syrup at home using simple pantry ingredients. This recipe is quick and yields a smooth topping perfect for milk, ice cream, or coffee.
Ingredients
- 1 cup granulated sugar
- 1 cup water
- 1/2 cup unsweetened cocoa powder
- 1/4 teaspoon salt
- 1 teaspoon vanilla extract
Instructions
- Combine the sugar, water, cocoa powder, and salt in a small saucepan.
- Place the saucepan over medium heat. Whisk the mixture constantly until the sugar dissolves and the mixture begins to simmer.
- Reduce the heat to low and cook for 1 minute, stirring occasionally. Do not let it boil rapidly.
- Remove the saucepan from the heat. Stir in the vanilla extract.
- Let the syrup cool completely before using. It will thicken as it cools.
- Pour the cooled syrup into an airtight container for storage.
Notes
- This syrup thickens significantly after refrigeration. If it becomes too thick for drizzling, warm a small amount gently before serving.
- For a richer flavor, substitute 1/4 cup of the water with heavy cream.
- This syrup works well as a homemade gift when bottled attractively.
- Prep Time: 5 min
- Cook Time: 5 min
- Category: Dessert Topping
- Method: Stovetop Cooking
- Cuisine: American
Nutrition
- Serving Size: 2 tablespoons
- Calories: 105
- Sugar: 25
- Sodium: 15
- Fat: 0.5
- Saturated Fat: 0.3
- Unsaturated Fat: 0.2
- Trans Fat: 0
- Carbohydrates: 27
- Fiber: 1
- Protein: 0.5
- Cholesterol: 0