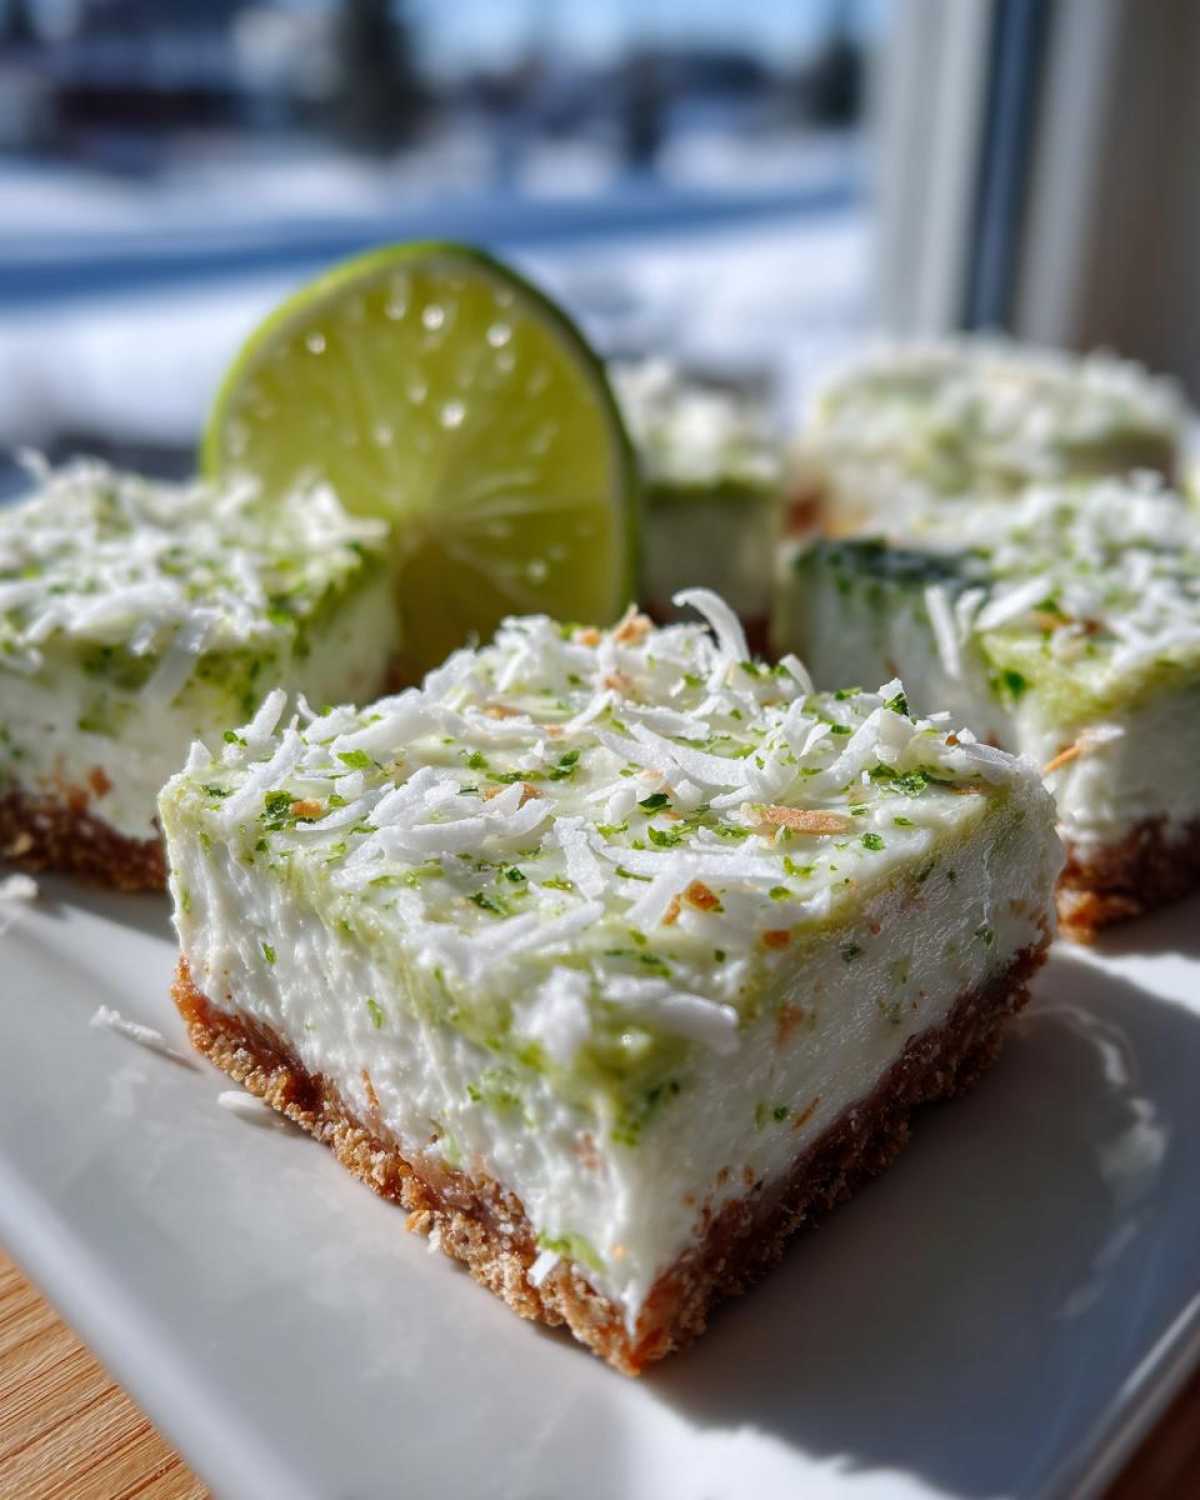
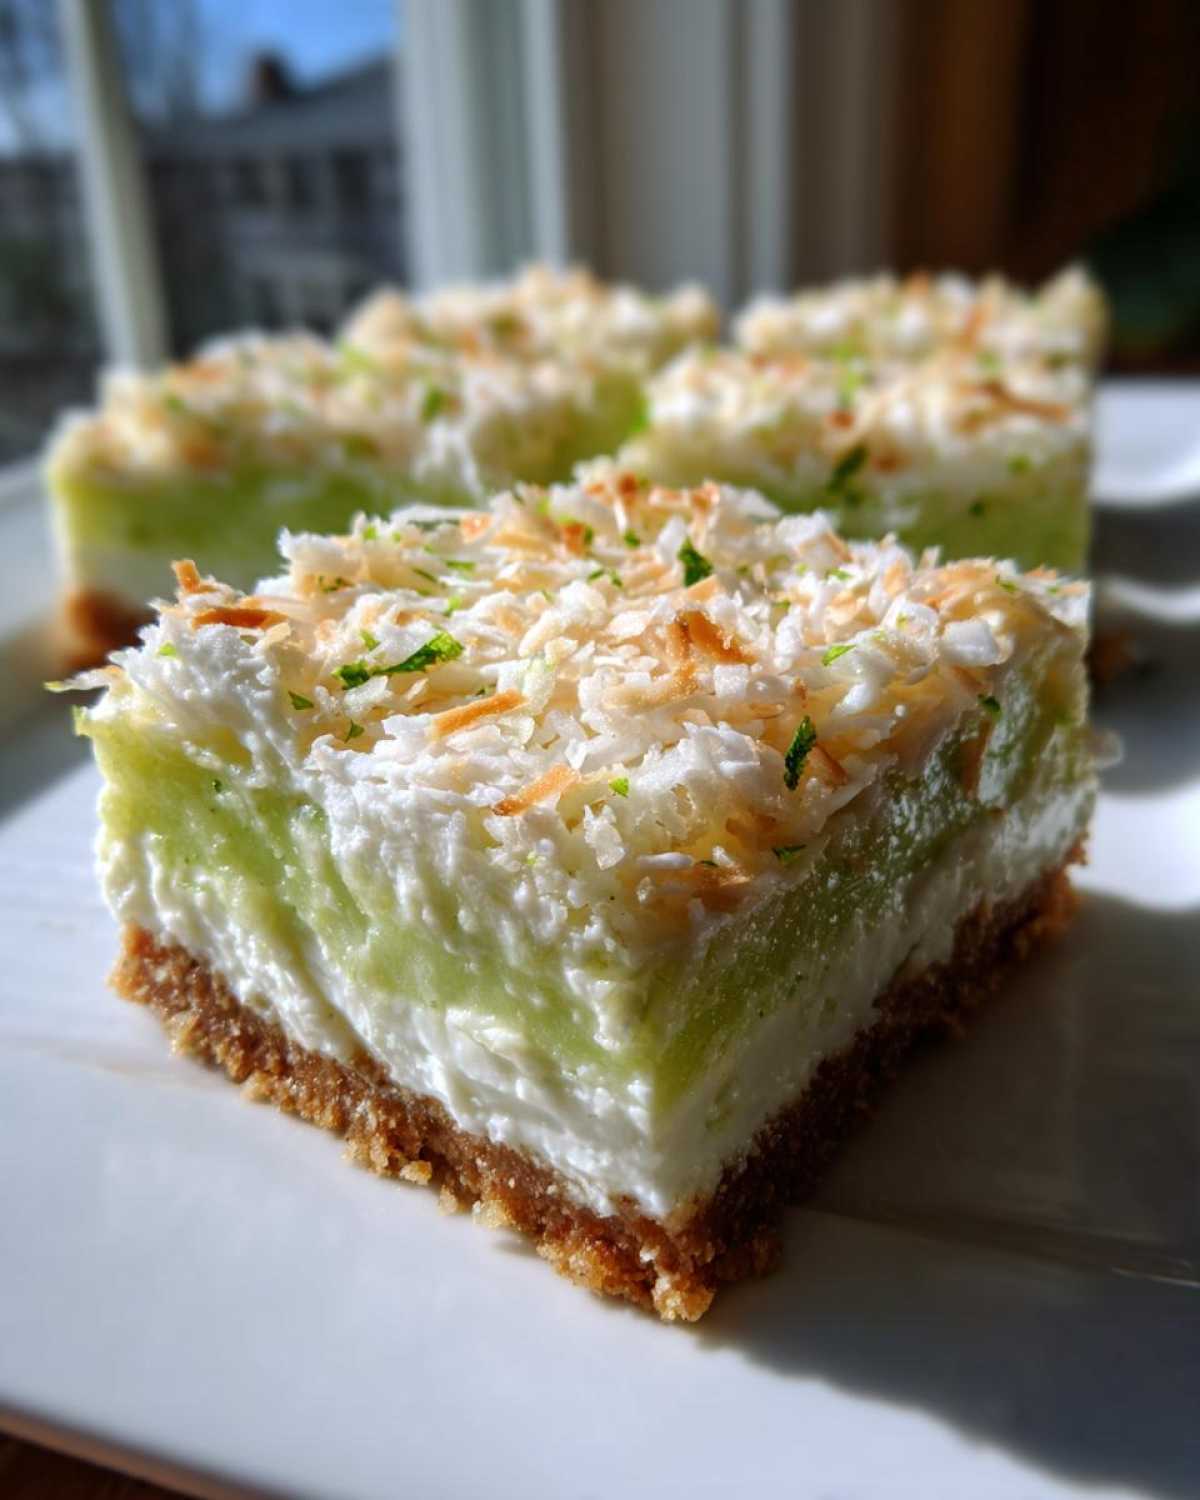
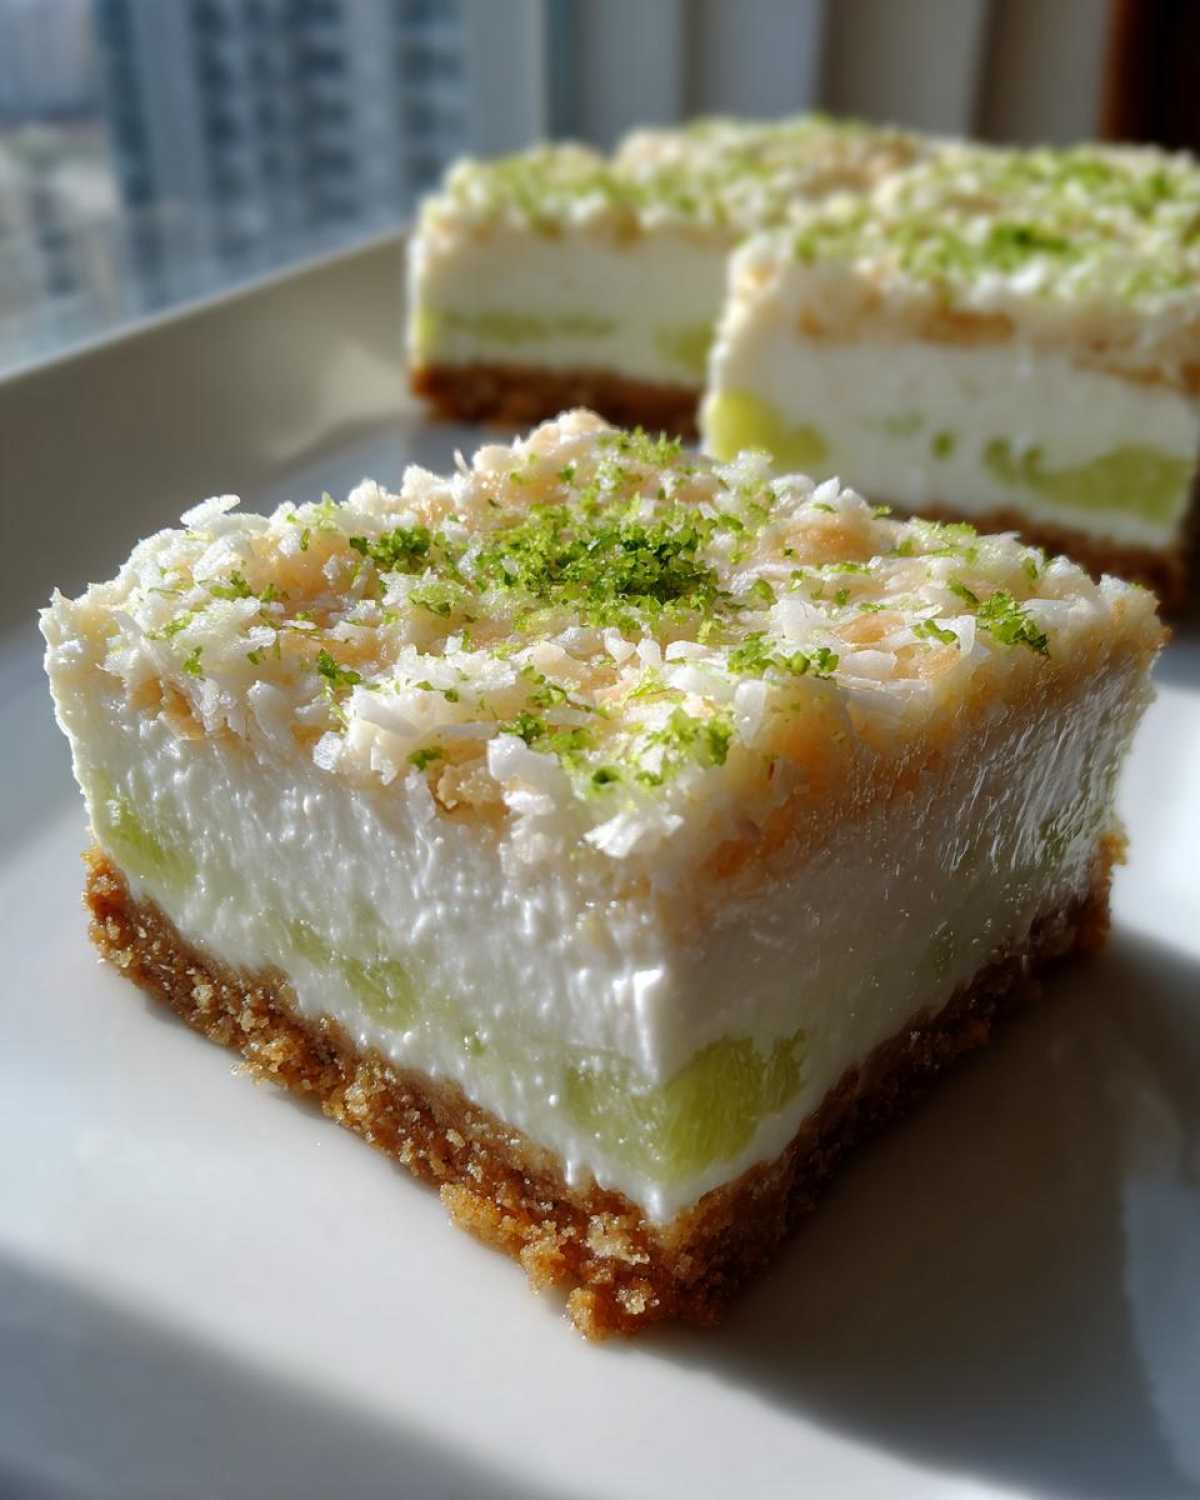
Oh, you know those days when the heat is just *trying* to ruin your life, and the last thing you want is an oven running hot? I live for those moments because that’s when I turn to my secret weapon: these unbelievably refreshing No-Bake Coconut Lime Bars. Seriously, they hit that perfect tropical sweet spot!
I first whipped these up for a neighborhood block party last summer when my A/C decided to take a vacation. Everyone was melting, but these bars were cool, zesty, and disappeared faster than ice cream on a sidewalk. The combination of sweet coconut and super bright lime is just magic. Best part? You don’t even need to preheat anything. That’s what I call a summer win!
Why You Need These No-Bake Coconut Lime Bars Today
Look, if you’re looking for something that screams “vacation” but only takes about fifteen minutes of actual work, these bars are IT. They are genuinely top-tier Refreshing No Bake Desserts.
- They come together so fast, making them the ultimate Quick Lime Dessert for when company shows up unexpectedly.
- The flavor is intensely bright. That fresh lime cuts right through the richness of the condensed milk and coconut!
Perfect for Summer Dessert Ideas
Seriously, ditch the oven until September! Since these No Bake Dessert Bars are completely chilled, they keep your kitchen cool. They are the perfect treat to bring to any cookout because they travel well and stay refreshing right out of the cooler.
Simple Lime Bars Preparation
You’re just mixing, pressing, and chilling. That’s it. Cleanup is a breeze too, which is a huge bonus when you’re trying to enjoy the sunshine. You can even make a batch while you wait for your other summer recipes to cool down!
Ingredients for Perfect No-Bake Coconut Lime Bars
Okay, let’s talk about what makes these bars sing. Since this is a no-bake treat, the quality of what you *do* use really shines through. You only need a handful of things, but I insist you pay attention to the citrus! When I bring these to a potluck, people always ask what my secret is, and usually, the secret is just using high-quality, fresh stuff. If you’re looking for more easy, creamy snacks for a party, you should check out my easy creamy beer cheese dip recipe—it’s a totally different vibe, but equally popular!
- Crust Time: 1 1/2 cups graham cracker crumbs and 1/2 cup unsalted butter that needs to be melted.
- The Filling Magic: We use a whole 14-ounce can of sweetened condensed milk—it’s the binder!
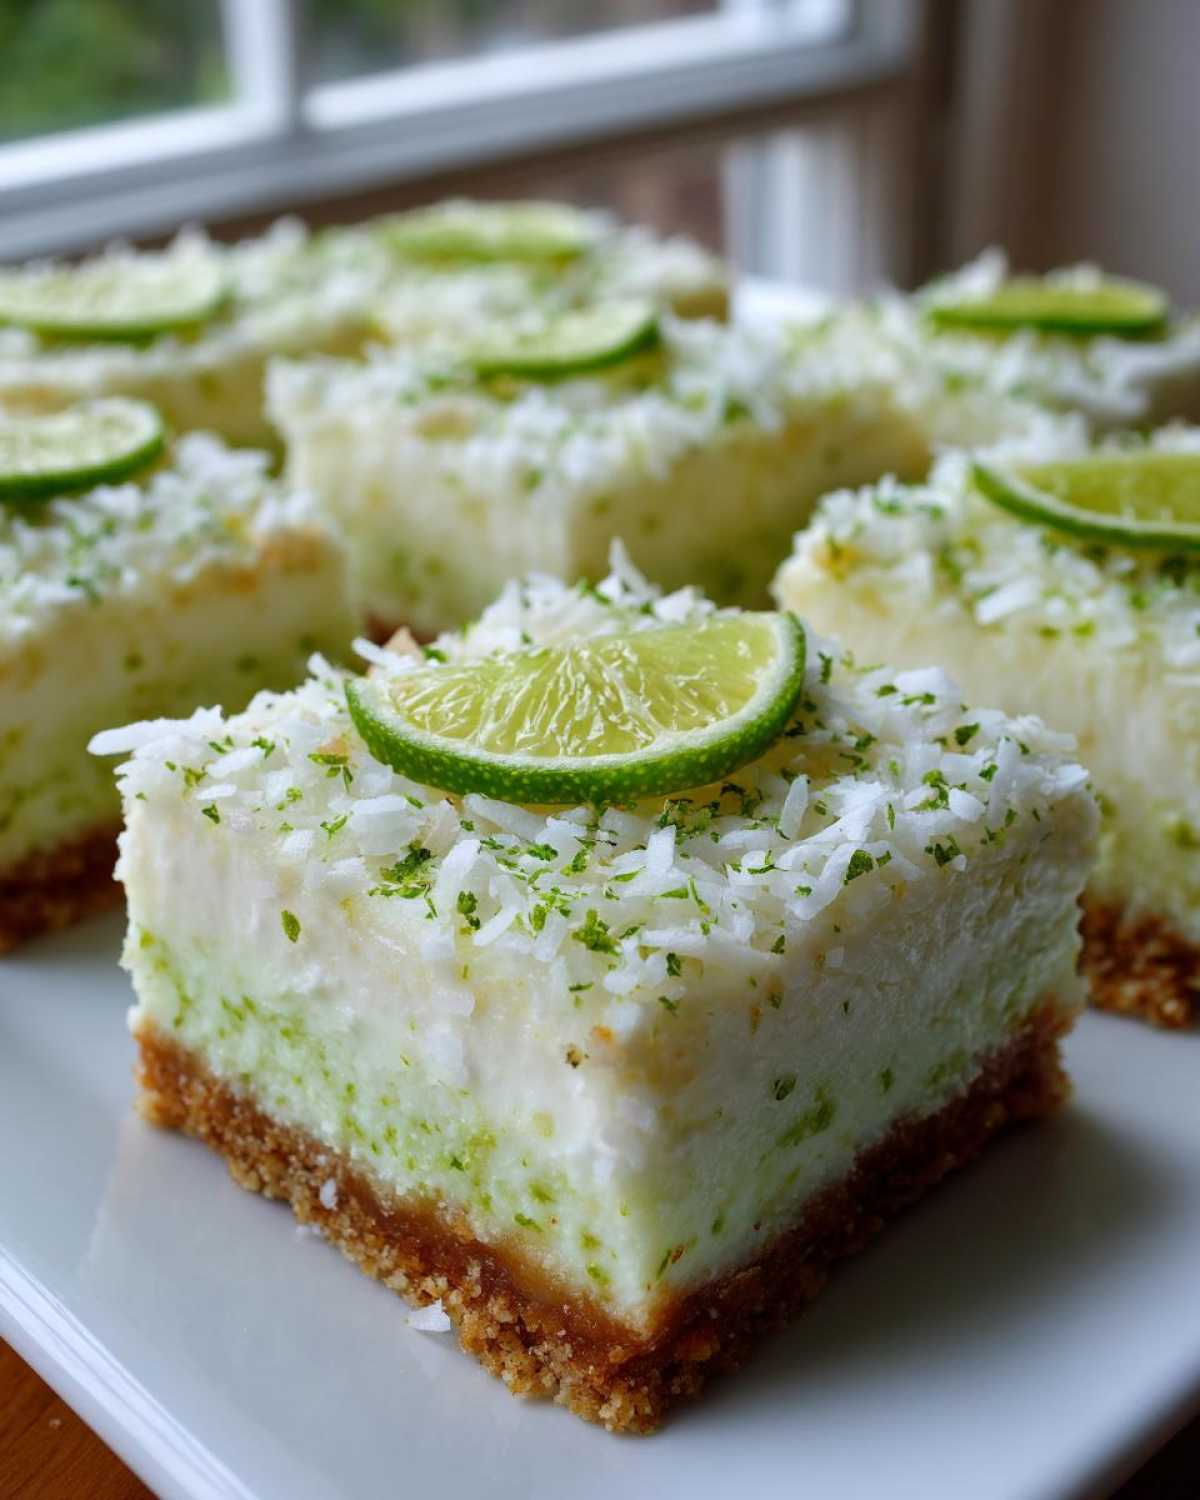
- Coconut Goodness: You need 1 cup of shredded sweetened coconut for the main filling, plus an extra 1/2 cup for sprinkling right on top.
- Flavor Bomb: This is non-negotiable: 1/2 cup of *fresh* lime juice and 2 tablespoons of lime zest. Trust me, bottled juice just flattens that beautiful tropical punch we’re going for.
- Just a pinch of salt to balance out all that sweet goodness.
If you’ve got a sharp microplane, get ready to make some amazing zest!
Ingredient Notes and Substitutions for No-Bake Coconut Lime Bars
Because I am all about making sure everyone can try these, let’s quickly chat about swaps. If someone has an issue with gluten, you can easily swap those graham crackers for certified gluten-free crumbs; they work just as well for the crust base. Or, you could crush up some plain shortbread cookies if you have those lying around!
Also, if you like things extra tart—and I sometimes do when the limes are mild—just add an extra tablespoon of lime juice to the filling mixture. If you’re worried about dairy, I hear good things about using Dairy Free Coconut Lime condensed milk alternatives. Always happy to share tips for my favorite Easy Coconut Treats!
Step-by-Step Instructions for No-Bake Coconut Lime Bars
This is where these No Bake Dessert Bars really shine because there’s no complicated baking happening! We’re moving straight from mixing bowls to the fridge. I like to line my 8×8 pan with parchment paper first, leaving that little bit hanging over the sides—that’s your perfect little handle for lifting everything out later. Don’t skip that step; it makes life so much easier!
If you want to see my trick for another set of no-bake favorites, you have to check out my post on no-bake peanut butter oat bars. The process is similar, but these lime ones are much zesty!
Preparing the Crust for Your No-Bake Coconut Lime Bars
First up is that crust. Grab your melted butter and mix it really well with the graham cracker crumbs. You want it evenly combined—no dry pockets allowed! Then, press it down into your parchment-lined pan. I use the bottom of a flat measuring cup to really mash it down tight. A firm foundation is everything here so your bars don’t crumble apart when you try to slice them later!
Mixing and Setting the Zesty Coconut Squares Filling
Next, grab a separate bowl for the filling. Whisk your condensed milk, that glorious fresh lime juice, the zest, and the salt until it’s all smooth and dreamy. Then, gently fold in one full cup of your shredded coconut. Pour this creamy, gorgeous mixture right over your packed crust. Top it all off by sprinkling that last half-cup of coconut evenly over the top. Now, the hardest part of the whole recipe: cover it loosely and shove it into the fridge for at least four hours. These No Oven Desserts need that time to firm up properly so you can enjoy clean slices of these Zesty Coconut Squares!
Tips for Success Making Your No-Bake Coconut Lime Bars
Even though these are super simple, there’s always a little extra wisdom that takes them from good to absolutely legendary. Think of this as insider information to ensure you have the Best No Bake Coconut Recipe on the block. My biggest pet peeve is when a no-bake bar seems soft or gummy; we’re aiming for firm!
First, remember that crust setting? Make sure that butter is fully mixed in. If you see any dry crumbs clinging to the bottom corner of the bowl after mixing, that crust won’t hold together. You want that buttery, even compaction. For a quick visual check of another quick treat, sometimes I refer back to the steps for my easy 3-ingredient chocolate fudge—patting is key!
Now, for the chilling time, that minimum of four hours is really the minimum. If your kitchen is really hot, or if you need to transport them somewhere, aim for five or six hours, or even overnight. The longer they chill, the cleaner your slices will be. When it comes time to cut, don’t use a regular knife first!
Here’s the trick for perfect squares: Use a long, thin, sharp knife that’s been dipped in hot water and wiped dry between every single cut. That hot blade glides right through the chilled condensed milk filling without dragging or smearing the beautiful coconut topping. It takes an extra second, but wow, does it make a difference in presentation!
Storage and Make Ahead Desserts: Keeping No-Bake Coconut Lime Bars Fresh
The absolute best thing about these bars, besides tasting like sunshine, is that they are fantastic Make Ahead Desserts. Honestly, they taste even better the next day once all those bright lime and coconut flavors have had time to really marry together in the fridge. I usually plan to make them the day before any party!
Keep them covered tightly in the pan or in an airtight container in the refrigerator. They hold up really beautifully, usually for about three or four days, sometimes longer because the condensed milk acts like a natural preservative. Don’t leave them out on the counter for too long; we want them chilled!
If you need to make them even further in advance, you can absolutely freeze these beauties! Wrap the entire chilled (and preferably sliced) pan tightly in plastic wrap, then foil. They freeze wonderfully for up to two months, which is perfect for planning ahead for big holiday baking if you need some quick, light options. When you’re ready, just thaw them overnight in the fridge. You can find more great ideas for quick recipes you can prep early, like my make-ahead cheesy egg cups, if you need similar grab-and-go options!
Variations on These Tropical Dessert Bars
Once you nail the basic structure of these No-Bake Coconut Lime Bars, you suddenly see endless possibilities! Since the base is so reliable—that graham cracker crust and the thick, sweet, firm filling—you can really play around with the citrus and flavor extracts. These are definitely going to be your new go-to for Easy Coconut Treats because you can change them up every time you make them!
My first suggestion is to mix up the citrus. If you have fresh lemons sitting on the counter, swap out half of the lime juice and zest for lemon! The combination of lemon and lime is just dazzling—super bright, super zesty, and still tastes just as tropical. If you try that, let me know what you think!
For something smoother and perhaps a little richer, try adding some vanilla extract or even a tiny splash of coconut extract right into the milk mixture before you fold in the coconut. Vanilla always rounds out flavors nicely, but coconut extract just doubles down on that wonderful aroma. I followed a similar principle when adapting my easy cranberry chicken recipe to use orange instead of cranberry for a winter variation—sometimes a simple swap makes a huge difference!
Another fun idea is to change up the texture of the crust. While graham crackers are classic, you could try using vanilla wafers if you have those! Or, if you really want to lean into the coconut, skip the graham crackers entirely and use about 2 cups of finely processed toasted coconut mixed with the melted butter instead. Just press that in really firmly, and you have an ultra-coconutty base for those zesty lime squares!
Serving Suggestions for Simple Lime Bars
Now that you’ve successfully chilled your magnificent Simple Lime Bars, the last step is deciding how to serve them! Since they are already so bright and delicious on their own, they don’t need much adorning. A simple dusting of powdered sugar right before I slice them is my go-to presentation—it just looks so pretty against the white coconut top.
But if you’re feeling a little fancy, a dollop of freshly whipped cream is heavenly next to that zingy lime. Honestly, these bars are the perfect size to have alongside a tall glass of something cool. I love pairing them with a homemade iced vanilla chai tea latte in the afternoon. It cuts the sweetness perfectly!
Frequently Asked Questions About No-Bake Coconut Lime Bars
I get tons of questions about these bars every time the weather warms up! Because they are so quick and depend entirely on chilling, people always want to make sure they’ve got the technique down. Don’t worry if you’re new to No Bake Dessert Bars; I’ve got the answers right here to make sure your results are perfect every time!
Can I use bottled lime juice instead of fresh lime juice for these No Bake Dessert Bars?
Oh, I really, really advise against this! Remember how I emphasized using fresh juice? The flavor is miles apart. Bottled juice just doesn’t have that bright, zesty punch we need to balance the sweetness of the condensed milk and coconut. More importantly, the chemical composition of fresh juice helps the filling set up correctly when combined with the milk. Using bottled juice might result in a filling that stays too soft. Stick to fresh for the best results in these Lime Squares Recipe!
How long do the No-Bake Coconut Lime Bars need to chill?
The absolute minimum time you should give these bars is four hours of chilling in the refrigerator. Why? Because the filling relies on cold temperatures to firm up enough to slice cleanly. If you try to cut them at three hours, you’re going to end up with a sloppy, gooey mess—even though it will taste amazing, it won’t look good! If you need perfect presentation, I always recommend pushing it to five or six hours. That extra time guarantees those neat little squares!
Are these Lime Squares Recipe naturally Gluten Free Coconut Bars?
No, not straight out of the recipe! Because the crust calls for graham crackers, the standard version includes gluten. However, these are incredibly close to being Gluten Free Coconut Bars! As I mentioned earlier in the tips, you can easily swap the traditional graham crackers for certified gluten-free ones, or even use crushed gluten-free shortbread cookies. As long as the base is compliant, the filling itself is naturally gluten-free. You can find more tips on adapting favorite recipes over on our privacy policy page as well, just joking—but seriously, substituting the crumbs is easy!
Estimated Nutritional Data for One Serving
Just so you know what you’re diving into when you grab one of these delicious squares, here’s a quick rundown of the nutrition info. Since we’re dealing with condensed milk and graham crackers, these are definitely a treat, not an everyday snack! These numbers are estimates based on standard supermarket ingredients for one square of the 16 we cut. For the most detailed breakdown, you can always check out the recipe disclaimer.
- Serving Size: 1 square
- Calories: 205
- Fat: 11g (7g saturated)
- Carbohydrates: 25g
- Sugar: 22g
- Protein: 3g
See? Totally worth it for that blast of sunshine flavor. Enjoy every bit of these No-Bake Coconut Lime Bars!
Print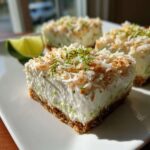
No-Bake Coconut Lime Bars
- Total Time: 4 hours 15 min
- Yield: 16 servings 1x
- Diet: Vegetarian
Description
Make these simple, refreshing no-bake bars featuring a bright lime flavor and sweet coconut. They set quickly and require no oven time.
Ingredients
- 1 1/2 cups graham cracker crumbs
- 1/2 cup unsalted butter, melted
- 1 (14 ounce) can sweetened condensed milk
- 1 cup shredded sweetened coconut, plus 1/2 cup for topping
- 1/2 cup fresh lime juice
- 2 tablespoons lime zest
- 1/4 teaspoon salt
Instructions
- Line an 8×8 inch baking pan with parchment paper, leaving an overhang on two sides for easy removal.
- In a medium bowl, combine the graham cracker crumbs and melted butter. Press this mixture firmly and evenly into the bottom of the prepared pan.
- In a separate bowl, whisk together the sweetened condensed milk, lime juice, lime zest, and salt until fully combined.
- Fold in 1 cup of the shredded coconut into the lime mixture.
- Pour the coconut-lime mixture evenly over the crust in the pan.
- Sprinkle the remaining 1/2 cup of shredded coconut over the top layer.
- Cover the pan loosely with plastic wrap and refrigerate for at least 4 hours, or until the bars are firm enough to slice.
- Use the parchment overhang to lift the bars from the pan. Cut into 16 squares before serving.
Notes
- For a gluten-free option, substitute the graham crackers with gluten-free graham cracker crumbs or use crushed shortbread cookies made with gluten-free flour.
- If you prefer a tangier flavor, increase the lime juice by one tablespoon.
- You can substitute regular sweetened condensed milk with a dairy-free condensed milk alternative if needed.
- Prep Time: 15 min
- Cook Time: 0 min
- Category: Dessert
- Method: Chilling
- Cuisine: American
Nutrition
- Serving Size: 1 square
- Calories: 205
- Sugar: 22
- Sodium: 75
- Fat: 11
- Saturated Fat: 7
- Unsaturated Fat: 4
- Trans Fat: 0
- Carbohydrates: 25
- Fiber: 1
- Protein: 3
- Cholesterol: 15