You know those desserts that just disappear the second you put them out? That’s exactly what happens with these cloud-like sweets! I’m talking about meringue cookies. They look fancy, but honestly, they are among the easiest things you can make, and everyone assumes you spent hours fussing over them. I once brought a huge platter of these vanilla kisses to a neighborhood potluck, and by the time I got back from getting a cup of coffee, they were completely gone! I promise you, this is the ultimate recipe for getting them perfectly light, crisp on the outside, and totally melt-in-your-mouth soft inside. Forget cracked, weeping messes—we are making perfect meringue cookies today!
Why This Easy Meringue Cookies Recipe Works Every Time
So many people tell me their meringues weep, crack, or refuse to get that gorgeous perfect meringue texture, but that usually comes down to two things: impatience or grease. This recipe focuses on the French meringue base, which is incredibly reliable for beginners. When you follow these steps closely, you’ll get those signature light and airy cookies that just dissolve on your tongue.
Here’s the simple magic behind the success:
- We use cream of tartar to stabilize the egg whites, which prevents them from deflating too fast.
- We bake them at a ridiculously low temperature, which actually dries them out instead of cooking them fast.
- We always, always let them cool completely inside the turned-off oven.
Mastering the French Meringue Cookies Technique
We chose the French method here because it’s the most straightforward for simple recipes. It involves whipping raw egg whites first while slowly adding the sugar. The absolute number one thing you must do? Make sure your egg whites are at room temperature! Cold whites just won’t whip up to the big, fluffy volume we need for these delicate treats. They give you that essential aeration right from the start.
Essential Ingredients for Perfect Meringue Cookies
Let’s gather the simple lineup for these gorgeous meringue cookies. You don’t need much, which is part of why this is such a fantastic, minimal-waste dessert (hello, baking with egg whites!). The ingredients list is short, but every item plays a huge role in making sure they become those crispy meringue treats.
Here is what you need:
- Four large egg whites, warmed up to room temperature.
- One cup of superfine granulated sugar—and I mean superfine!
- One teaspoon of pure vanilla extract—don’t skimp here; it’s one of the main flavors.
- One-quarter teaspoon of cream of tartar. This is your secret stabilizer!
- Just a tiny pinch of salt to make the sweetness pop.
Now, about that sugar. Granulated sugar takes forever to dissolve into the egg whites, which can lead to a gritty, weeping mess later. That’s why we use superfine sugar (or caster sugar). If your pantry is out, don’t panic! You can make your own right now. Just take regular granulated sugar and pulse it in your food processor or spice grinder for about 30 seconds until it looks finer. Trust me, this small step guarantees that smooth, melt in your mouth cookie texture we are aiming for.
Step-by-Step Instructions for Light and Airy Meringue Cookies
Okay, time to get messy—but delicately messy! First, get the oven set to its absolute lowest temperature, usually just 200°F or 225°F. We aren’t baking these like cookies; we are drying them! Line up two baking sheets with parchment paper. Now, listen up, this is serious:
Before you touch your mixer, scrub your stand mixer bowl and whisk attachment with a little bit of vinegar or lemon juice, then dry them thoroughly. I mean bone dry! Even a microscopic drop of oil or water will sabotage your beautiful egg whites and stop them from whipping up right. This is the best insurance you can buy when making any recipe relying on baking with egg whites.
- Put your room-temperature egg whites and the cream of tartar into that sparkling clean bowl.
- Start mixing on medium speed until they look foamy, like pale soap bubbles.
- Now, the secret: add that superfine sugar one tablespoon at a time. Don’t dump it! Wait about 30 seconds between each addition. This slow incorporation is key to stability.
- Once all the sugar is in, crank that mixer up to high speed! Keep going for about 8 to 10 minutes total.
The whole time, I monitor it. Once you think you are done, stop the machine, scoop a little bit between two fingers, and rub them together. If you feel any grittiness, it’s sugar, and you need to whip it more! Keep going until it feels perfectly smooth. Then, quickly beat in that vanilla extract for just about 30 seconds.
For more fun ideas on using these sweet bases, check out my guide on making simple meringue cookies!
Whipping the Meringue to Stiff Peaks
When it’s ready, the meringue should look like smooth, bright white shaving cream—so glossy! When you pull the whisk attachment out, the tip should stick straight up without folding over, those are stiff peaks. If you tilt the bowl, the entire mass should stay firmly glued in place. This structure is what guarantees those beautiful light and airy cookies instead of flat puddles.
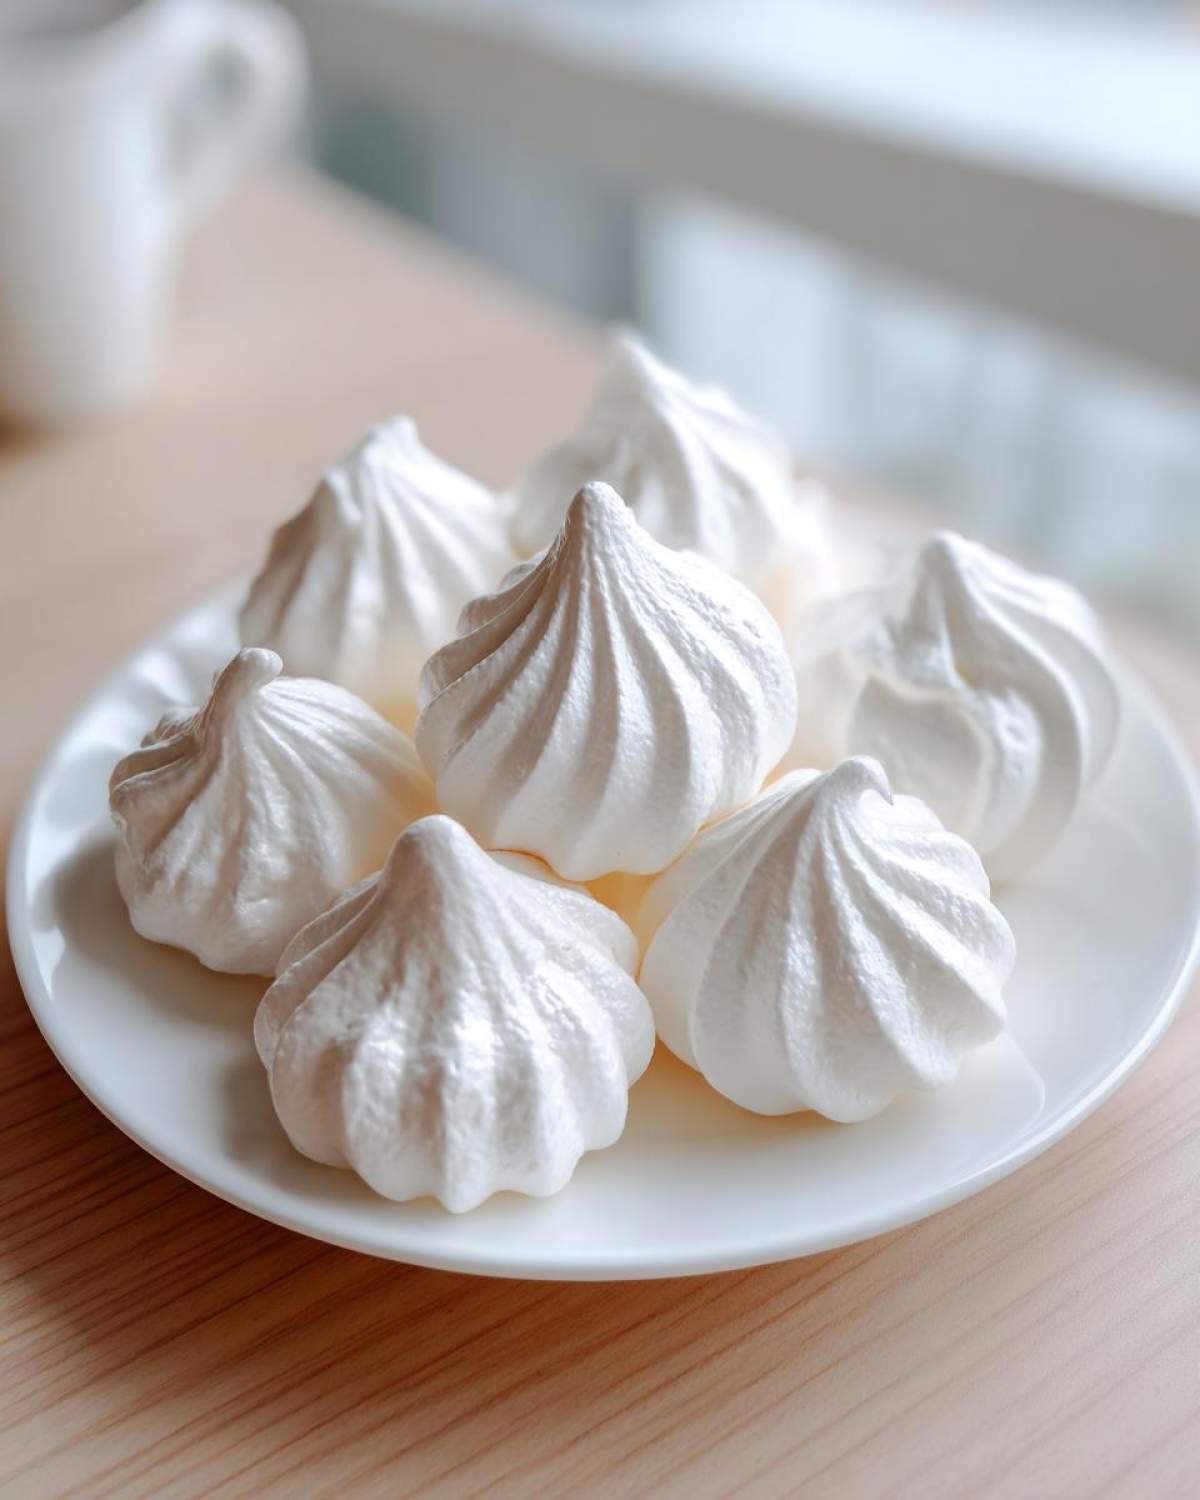
Piping and Preparing Your Meringue Kisses Recipe
Spoon your perfect meringue into a piping bag fitted with a star or round tip. I really love using a star tip because it makes them look exactly like those classic Meringue Kisses Recipe delights. Pipe small drops, maybe the size of a quarter, onto the parchment, making sure to leave an inch of space between each one. They spread just a tiny bit as they bake, so give them room to breathe!
Baking and Drying: The Secret to Crispy Meringue Treats
This part is where most people mess up, but honestly, it’s the easiest phase if you just trust the process of drying! We are aiming for crispy meringue treats that are completely dry, not browned candies. Get your oven dialed into its lowest setting—usually between 200°F and 225°F. Pop those piped kisses onto the middle rack and let them bake, maybe for 1 to 1.5 hours. You’re looking for them to look dry and peel easily off the parchment paper. If they start getting ivory or tan, your oven is too hot!
But here is the non-negotiable magic step! Once that baking time is up, turn the oven OFF. Do not open the door yet! Prop it open just a crack—I use a wooden spoon handle jammed into the door—and just leave them in there. Seriously, forget about them overnight if you can. This very slow cooling process is 100% what prevents weeping and guarantees their signature melt in your mouth cookie texture. It slowly acclimates them to the room temperature, locking in that glorious, delicate crispiness.
Flavor Variations for Your Meringue Cookies
Once you nail the base vanilla meringue, you realize these little things are just blank canvases waiting for fun! It’s so easy to create festive batches for holidays or surprise flavor combinations. I keep the egg white ratio the same, but we swap out that lovely vanilla extract for something else.
If you want beautiful color and light flavor, try the Jello Meringue Cookie Recipe. Just gently fold in about one tablespoon of your favorite Jello powder right after you add the vanilla. It colors the meringue wonderfully and adds a subtle fruity or tart note. Be careful not to overmix once the Jello is in!
For wintertime treats, I absolutely love making Peppermint Meringue Cookies. You substitute the vanilla with about half a teaspoon of peppermint extract. If you want that pretty red swirl, spoon the white meringue into your piping bag first, then gently drizzle a few lines of gel red food coloring down the inside wall of the bag. When you pipe, the colors swirl together magically for a great effect!
If you’re looking for ideas on pairing these flavors with warmer drinks, you absolutely have to check out my recipe for Peppermint Hot Chocolate Bombs—they are incredible together!
Tips for Success When Baking Meringue for Beginners
Look, nobody makes perfect meringue cookies on the first try, and that’s okay! The biggest enemy of these delicate treats isn’t the recipe; it’s humidity. If it’s drizzling outside or super muggy, put off making these until a drier day. Meringue loves sucking up moisture from the air, which leads straight to that weeping mess we want to avoid.
Remember I said egg whites need to be room temp? That’s crucial for the volume, but if they start looking slightly soft or deflated after you’ve added the sugar (oops!), just add that cream of tartar if you haven’t already, and give it another two minutes on high speed. A little burst of stabilization can often save a slightly tired batch.
For more detailed expertise on handling egg whites, I broke down everything in my guide on properly baking with egg whites. It’s the foundation for so many fantastic simple egg white desserts!
Storage and Keeping Your Meringue Cookies Fresh
Once you’ve gone through all that careful drying time, the storage phase is just as important! These meringue cookies absolutely must be kept in an airtight container. I mean tightly sealed. Do not store them in the fridge, no matter what you do! That lovely cool air is full of hidden moisture that the crispy shell will suck right up like a sponge. If they go into the fridge, you’ll wake up to sticky, soft meringue treats instead of light kisses.
Keep the container on your counter at room temperature, and they will stay perfectly crisp for at least a week. If you want to be extra cautious on a super humid day, you can toss a small food-safe silica packet in there with them, but usually, a good seal is all you need for these amazing, delicate sweet treats!
Frequently Asked Questions About Meringue Cookies
I get so many messages whenever I post these sweet little clouds online! You all have the best questions about making sure these meringue cookies turn out absolutely perfect. Here are a few things I hear all the time while folks are learning how to make meringue.
Can I use regular granulated sugar instead of superfine sugar?
You absolutely *can*, but I really, really advise against it if you can manage to make your own superfine sugar first! Remember how I talked about pulsing it in the food processor? Regular sugar crystals are too large, and if you don’t whip them long enough, those sharp edges don’t dissolve into the egg whites. This leaves you with a mix that might look stiff but will start to break down and weep later in the oven. For the best Meringue Cookie Recipe, treat your sugar gently first!
What causes my meringue to weep or sweat after baking?
Weeping is the arch-nemesis of everyone trying to make crispy meringue treats! In almost every single case, weeping means the sugar didn’t fully dissolve before you started baking, or you cooled them too fast. If the sugar isn’t completely incorporated, it separates during the low-heat drying process and weeps out as sugary syrup. The second common cause is temperature shock: taking those hot, delicate cookies directly from the oven into the cool kitchen air makes them contract too fast and pull moisture to the surface. That’s why we turn the oven off and leave them inside!
Can I make these ahead of time for Holiday Meringue Cookie Ideas?
Yes, you definitely can make these well in advance! Since they are basically dehydrated sugar and egg white, they store like a dream if you follow the rule about keeping them airtight, away from humidity. I often make my batch for Christmas in early December and store them in tins. They are fantastic for Festive Meringue Kisses because they don’t need any refrigeration and they don’t go stale the way a cake or a chewy cookie does. You can even find some neat tips on advanced techniques over at my guide on how to make meringue from start to finish!
Are Meringue Cookies Naturally Gluten Free Meringues?
Yes, they certainly are! This is one of the best parts about these wonderful simple egg white desserts. Since the base recipe calls for only egg whites, sugar, and flavoring, there is absolutely no wheat or gluten involved in the traditional French meringue preparation. If you are making these for someone with dietary restrictions, you don’t need to substitute anything, which makes them a fantastic, stress-free addition to any holiday tray!
Share Your Delicate Sweet Treats
Now that you have all the secrets to making these incredibly light, melt-in-your-mouth meringue cookies, I really hope you give them a try! They are such a fantastic, simple addition to any dessert spread. Once you’ve managed to perfectly crisp yours up, please come back and leave me a rating below. I just love seeing your creations, so don’t forget to snap a picture and share your best batch of festive meringue kisses on social media!
Print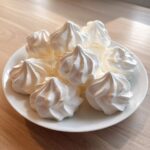
The Ultimate Easy Meringue Cookies Recipe: Light, Crisp, and Perfect Every Time
- Total Time: 110 min
- Yield: About 3 dozen 1x
- Diet: Gluten Free
Description
Make light, airy meringue cookies that are crisp on the outside and melt in your mouth. This simple recipe uses the French meringue method, perfect for beginners.
Ingredients
- 4 large egg whites, room temperature
- 1 cup superfine granulated sugar (caster sugar)
- 1 teaspoon pure vanilla extract
- 1/4 teaspoon cream of tartar
- Pinch of salt
Instructions
- Preheat your oven to the lowest setting, typically between 200°F and 225°F (95°C to 105°C). Line two large baking sheets with parchment paper.
- Ensure your mixing bowl and whisk attachment are completely clean and free of any grease or water.
- Place the egg whites and cream of tartar in the bowl of a stand mixer fitted with the whisk attachment. Beat on medium speed until soft peaks form.
- Slowly add the superfine sugar, one tablespoon at a time, while the mixer runs on medium-high speed. Wait about 30 seconds between each addition.
- Once all the sugar is added, increase the speed to high and beat until the meringue is stiff, glossy, and holds firm peaks. When you rub a small amount between your fingers, you should not feel any sugar granules. This takes about 8 to 10 minutes total.
- Beat in the vanilla extract during the last minute of mixing.
- Transfer the meringue to a piping bag fitted with your desired tip (a star tip works well for kisses).
- Pipe small mounds or kisses onto the prepared baking sheets, leaving about 1 inch between each cookie.
- Place the sheets in the preheated oven. Bake for 1 to 1.5 hours, depending on the size of your cookies and your oven temperature. The goal is to dry them out, not brown them.
- Turn off the oven, but leave the meringue cookies inside with the door slightly ajar (prop it open with a wooden spoon) for at least 1 hour, or preferably overnight, until completely cool and dry.
- Store the finished cookies in an airtight container at room temperature.
Notes
- For best results, use room temperature egg whites; they whip up to a greater volume.
- If you do not have superfine sugar, pulse regular granulated sugar in a food processor for 30 seconds.
- To make Jello Meringue Cookies, gently fold in 1 tablespoon of flavored Jello powder after the vanilla extract.
- For Peppermint Meringue Cookies, substitute the vanilla extract with 1/2 teaspoon peppermint extract and gently swirl in a few drops of red food coloring before piping.
- Prep Time: 20 min
- Cook Time: 90 min
- Category: Dessert
- Method: Baking
- Cuisine: American
Nutrition
- Serving Size: 1 cookie
- Calories: 45
- Sugar: 11
- Sodium: 5
- Fat: 0
- Saturated Fat: 0
- Unsaturated Fat: 0
- Trans Fat: 0
- Carbohydrates: 11
- Fiber: 0
- Protein: 0.5
- Cholesterol: 0