Welcome to Our Kitchen: Making Perfect Meringue Cookies
I’m Sara, and I’m so happy you’re here!
We’re diving into something truly special today. We’re making light, crisp meringue cookies. These airy sweets are pure edible art.
My husband Liam usually handles the precision. I bring the playful spirit.
This recipe is a perfect example of our Child Recipe way of cooking.
It’s about joy, not just following rules. Get ready for stunning results.
Why This Classic Meringue Cookies Recipe Works
You might think these delicate treats are too tricky. I used to think that too!
Liam, my technically brilliant husband, struggled at first.
He needed that perfect, stable structure. Our method borrows from the classic French technique.
It builds strength slowly with sugar.
That slow sugar addition creates the magic. It gives you that signature light, crisp texture.
We want airy sweets that never weep or collapse. This process guarantees that beautiful, stable base.
It’s where Liam’s precision really shines through.
He taught me the secret to truly crisp meringue cookies.
It’s about patience during the sugar incorporation step.
When done right, these are naturally gluten free and stunning.
Essential Equipment for Your Meringue Cookies
Making beautiful meringue requires the right gear. Don’t worry; you don’t need a professional pastry kitchen.
A few key items make all the difference here.
Trust me, having these ready helps everything go smoothly.
I always keep these tools handy for our airy sweets.
- A stand mixer or a very powerful hand mixer.
- Large, very clean mixing bowl. Glass or stainless steel works best.
- Piping bags and your favorite decorative tips.
- Parchment paper for lining your baking sheets.
Preparing Your Baking Setup for Meringue Cookies
The oven setup is the most important step.
We need a gentle, slow environment to dry these out.
Preheat your oven to a very low 200\u00b0F (95\u00b0C).
Never rush the heat with these delicate treats.
Line your baking sheets with parchment paper first.
This paper prevents sticking beautifully.
We are aiming for a low and slow bake.
This drying time is what creates that perfect crispness.
Ingredients for Light and Crisp Meringue Cookies
Gathering your supplies is simple for these airy sweets.
This recipe uses just a few basic pantry items.
The result is a naturally gluten free dessert.
It’s amazing what these simple things can become.
- Four large egg whites, room temperature is key.
- One full cup of granulated sugar.
- Half a teaspoon of cream of tartar.
- One teaspoon of pure vanilla extract.
- Just a small pinch of salt.
Ingredient Clarity and Preparation Notes
Let’s talk about those egg whites first.
They absolutely must be at room temperature.
Cold whites just won’t whip up properly for us.
Also, this is non-negotiable for success.
Your mixing bowl and whisk must be spotless.
Any trace of grease stops the peaks from forming.
Salt helps stabilize the foam early on.
Cream of tartar acts like a safety net for the structure.
It keeps your meringue stable while we add the sugar.
Step-by-Step Instructions for Perfect Meringue Cookies
Now for the fun part: making the magic happen!
Follow these steps closely for the best results.
We move from foamy whites to stiff, glossy clouds.
This process takes a little time, so put on some music.
Remember, patience yields those light, crisp meringue cookies.
We are building structure layer by layer here.
Whipping Technique: Achieving Stiff, Glossy Meringue Cookies
Start by beating your room-temperature egg whites and salt.
Beat them on medium speed until they look foamy.
Add the cream of tartar right about then.
Keep beating until you see soft peaks forming.
This is where you must slow down your pace.
Add the granulated sugar very slowly, one tablespoon at a time.
Wait about thirty seconds between each sugar addition.
If you dump it in, the meringue will deflate fast.
Once all the sugar is in, crank the speed up high.
Beat until the mixture is stiff and very glossy.
Test it by rubbing a little between your fingers.
It should feel totally smooth, not gritty at all.
If you feel sugar granules, keep whipping longer.
Finally, mix in your vanilla extract quickly.

Piping and Baking Your Meringue Cookies
Get your piping bag ready with a star tip.
Fill the bag with your beautiful, stiff meringue.
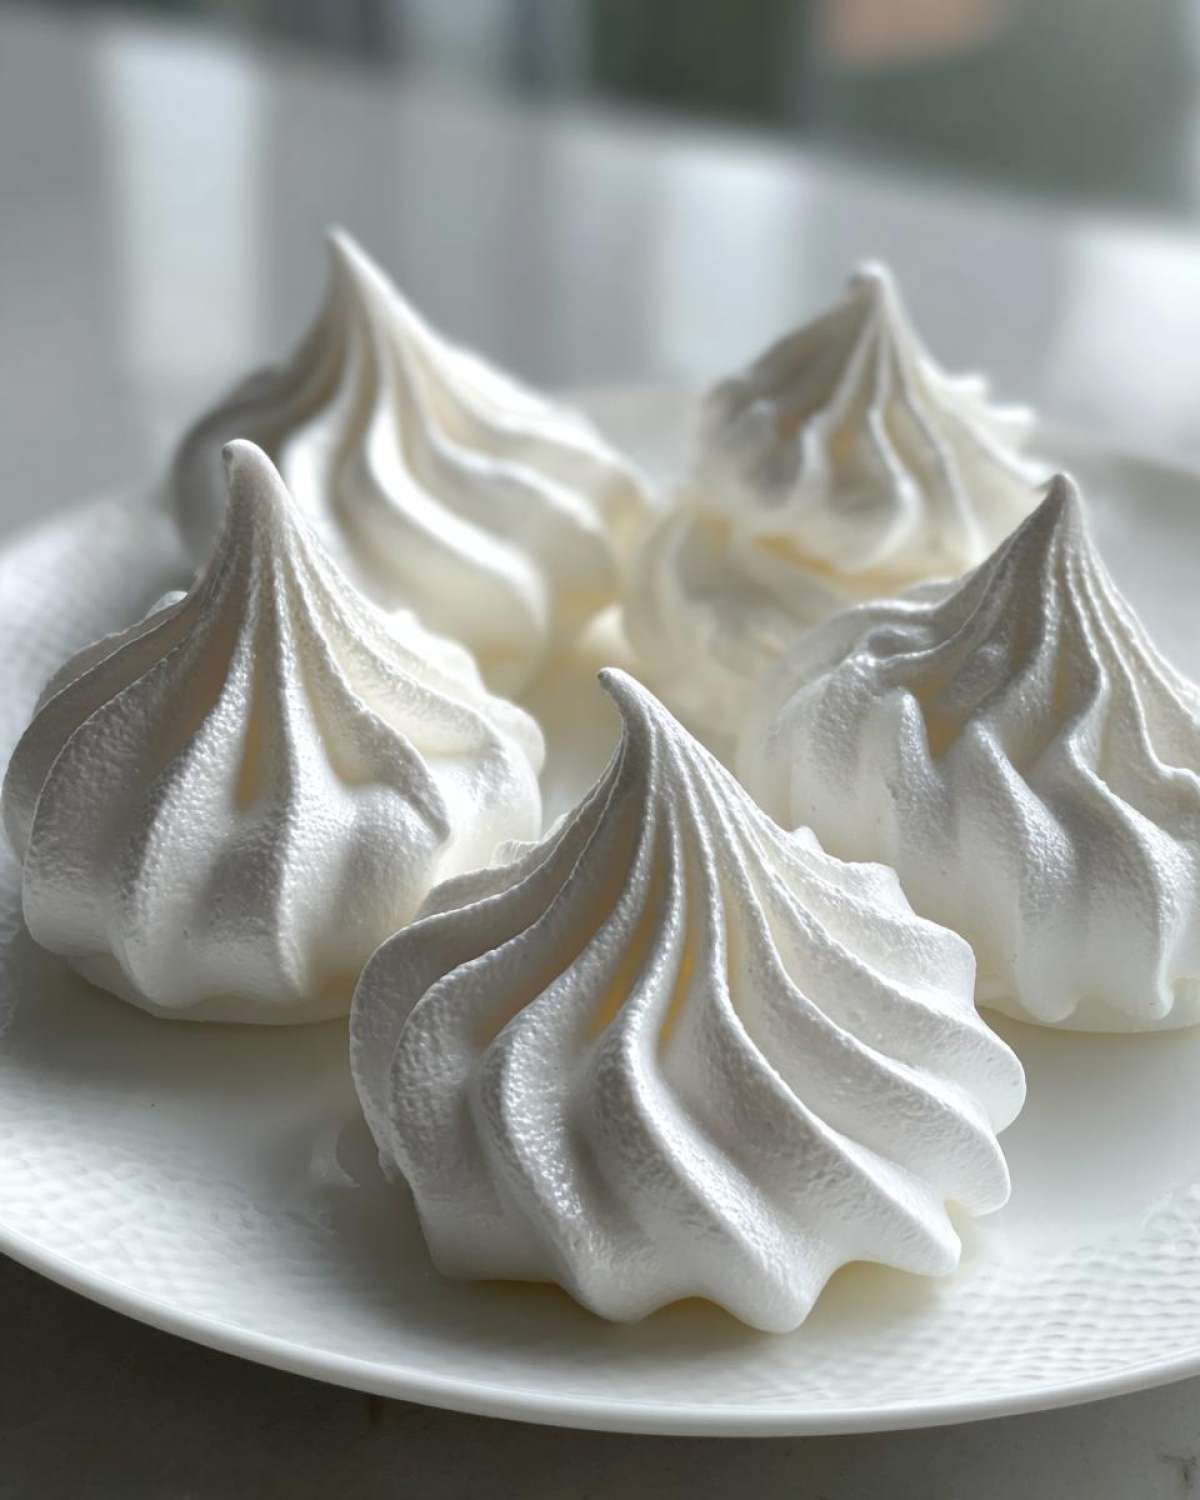
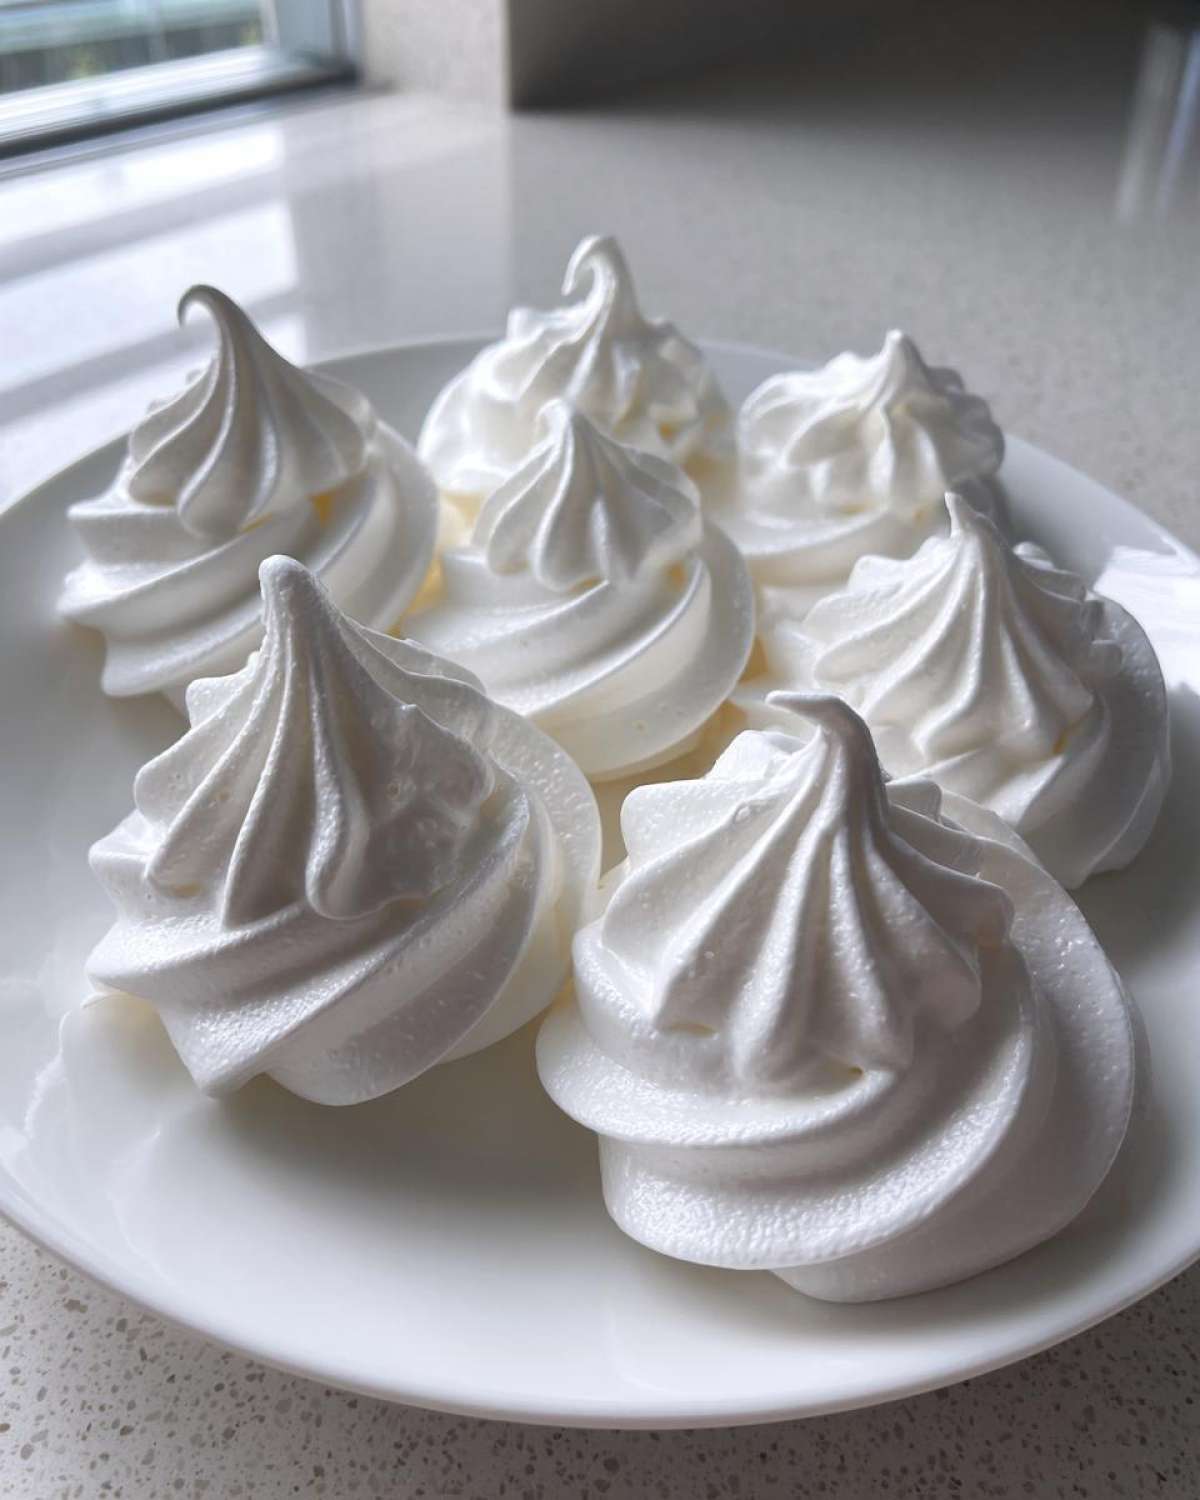
Pipe small, uniform shapes onto the parchment paper.
Uniform size means they bake evenly, which is important.
Place your sheets into that waiting 200\u00b0F oven.
We bake these for about 1.5 to 2 hours.
The goal is drying them out completely, not browning them.
They are done when they lift easily off the paper.
The Crucial Cooling Phase for Flawless Meringue Cookies
This last step stops most common meringue failures.
When the baking time is up, turn the oven off.
Prop the oven door open slightly with a wooden spoon.
Let the cookies cool inside the oven completely.
This slow temperature drop is essential.
It prevents shocking the delicate structure.
Cooling inside takes at least one full hour.
This prevents cracking and annoying weeping liquids.
Resist the urge to peek or pull them out early!
Troubleshooting Common Meringue Cookies Issues
Even with care, sometimes meringue misbehaves.
Don’t panic if your beautiful cookie shows a flaw.
If your meringue feels gritty after beating, keep going.
It means the sugar hasn’t fully dissolved yet.
Weeping liquid usually means underbaking or fast cooling.
If you see liquid, put them back in the warm oven longer.
Collapsing often happens when the structure weakens.
This is usually due to fat contamination earlier on.
Always check that bowl and whisk before starting.
A slow, gentle bake solves most textural problems.
Creative Variations for Your Meringue Cookies
Once you master the classic base, the fun begins!
These light, crisp cookies are perfect canvases.
Think about turning them into edible art for holidays.
For Christmas, divide the batch before piping.
Add a drop of red or green food coloring gently.
You can fold in mini chocolate chips too.
Make sure they are very small chips first.
These additions make whimsical snowman shapes easy.
They look especially elegant dusted with powdered sugar.
This is where your inner child gets to play!
Serving Suggestions and Storing Your Meringue Cookies
These are truly beautiful when finished.
Treat your meringue cookies like little jewels.
They shine best on simple white platters.
Display them high on a tiered serving tray.
They make wonderful, elegant edible gifts too.
Tie a pretty ribbon around a small cellophane bag.
For storage, air is the enemy of crispness.
Humidity will make them soft fast.
Keep them in a completely airtight container.
Do not refrigerate them ever.
The fridge has too much moisture inside.
Store them at cool room temperature instead.
They keep their perfect texture for a week.
If they soften slightly, just dry them out again.
Pop them back in a very low oven for thirty minutes.
Estimated Nutritional Data for Meringue Cookies
Liam and I always keep nutrition in mind.
These airy sweets are surprisingly light on fat.
Since they are mostly sugar and egg white, fat is zero.
Remember these numbers are just estimates for you.
They help guide your planning for dessert tables.
Here is a quick look at what two cookies contain:
- Serving Size: 2 cookies exactly.
- Calories: Approximately 60 per serving.
- Total Fat: Zero grams, which is great!
- Protein: About 1 gram.
- Total Carbohydrates: Roughly 15 grams.
- Sugar Content: Around 15 grams of sugar.
Because we skip heavy butter, these are naturally low in fat.
They are a wonderfully light option for your celebrations.
Enjoying a few of these crisp meringue cookies feels guilt-free.
It’s all about balance in the kitchen, right?
Share Your Culinary Creations
We poured our hearts into this recipe for you.
Now, I want to see what you made!
Did your meringue cookies turn out light and crisp?
Did you try any fun colors or shapes?
Tell us about your kitchen adventure below.
Leave a rating for our recipe if you loved it.
Your feedback helps other cooks feel inspired.
Ask Liam and me any lingering questions you have.
We read every single comment here.
Let’s keep this theater of food open for everyone.

Happy baking, my friends!
Print
Master 4 Easy Meringue Cookies Secrets
- Total Time: 2 hours 20 minutes
- Yield: About 3 dozen cookies
- Diet: Gluten Free
Description
Create stunning, light, and crisp meringue cookies that are perfectly sweet. This classic recipe, inspired by the joy of playful cooking, yields delicate, airy treats ideal for any celebration or as an elegant edible gift. You will achieve the perfect texture with simple steps.
Ingredients
- Egg whites: 4 large (room temperature)
- Granulated sugar: 1 cup
- Cream of tartar: 1/2 teaspoon
- Vanilla extract: 1 teaspoon
- Pinch of salt
Instructions
- Preheat your oven to 200°F (95°C). Line two baking sheets with parchment paper.
- Ensure your mixing bowl and whisk attachment are completely clean and dry. Add the room-temperature egg whites and salt to the bowl.
- Beat the egg whites on medium speed until foamy. Add the cream of tartar and continue beating until soft peaks form.
- Gradually add the granulated sugar, one tablespoon at a time, beating well after each addition. This step takes patience.
- Once all the sugar is incorporated, increase the speed to high. Beat until the meringue is stiff, glossy, and holds very firm peaks. When you rub a bit between your fingers, it should feel smooth, not gritty.
- Beat in the vanilla extract briefly.
- Transfer the meringue to a large piping bag fitted with your preferred tip (a star tip works well for classic shapes).
- Pipe small mounds or desired shapes onto the prepared baking sheets. Keep them uniform in size for even baking.
- Bake for 1.5 to 2 hours, depending on the size of your cookies. The goal is to dry them out, not brown them. They should lift easily from the parchment paper when done.
- Turn off the oven, prop the door open slightly, and let the cookies cool completely inside the oven for at least 1 hour, or until the oven is cool. This prevents cracking and weeping.
Notes
- Room temperature egg whites whip higher and create more stable meringue.
- Ensure absolutely no trace of fat (yolk or grease) gets into the whites, or they will not whip properly.
- For holiday variations, divide the finished meringue and add food coloring or mix in chocolate chips gently before piping.
- If your cookies weep (liquids form), they likely needed more time baking or cooling inside the turned-off oven.
- Prep Time: 20 minutes
- Cook Time: 2 hours
- Category: Dessert
- Method: Baking
- Cuisine: American
Nutrition
- Serving Size: 2 cookies
- Calories: 60
- Sugar: 15g
- Sodium: 10mg
- Fat: 0g
- Saturated Fat: 0g
- Unsaturated Fat: 0g
- Trans Fat: 0g
- Carbohydrates: 15g
- Fiber: 0g
- Protein: 1g
- Cholesterol: 0mg