If you’re like me, you love chicken wings, but you absolutely *hate* that sad, floppy texture you get from a mediocre attempt. I swear, I have thrown out entire batches because they came out soggy—it’s just heartbreaking! Well, stop torturing yourself with the deep fryer! I finally figured out the secret to getting those incredibly crispy baked chicken wings that rival any sports bar, all while keeping things way cleaner in my kitchen. Trust me, this technique is a game-changer. We are focusing on the no-fry method, using just a tiny bit of baking powder to transform mundane oven wings into something spectacularly crackly. You’re going to want this recipe for every single game day!
Why These Are the Best Crispy Baked Chicken Wings (No Fry Needed)
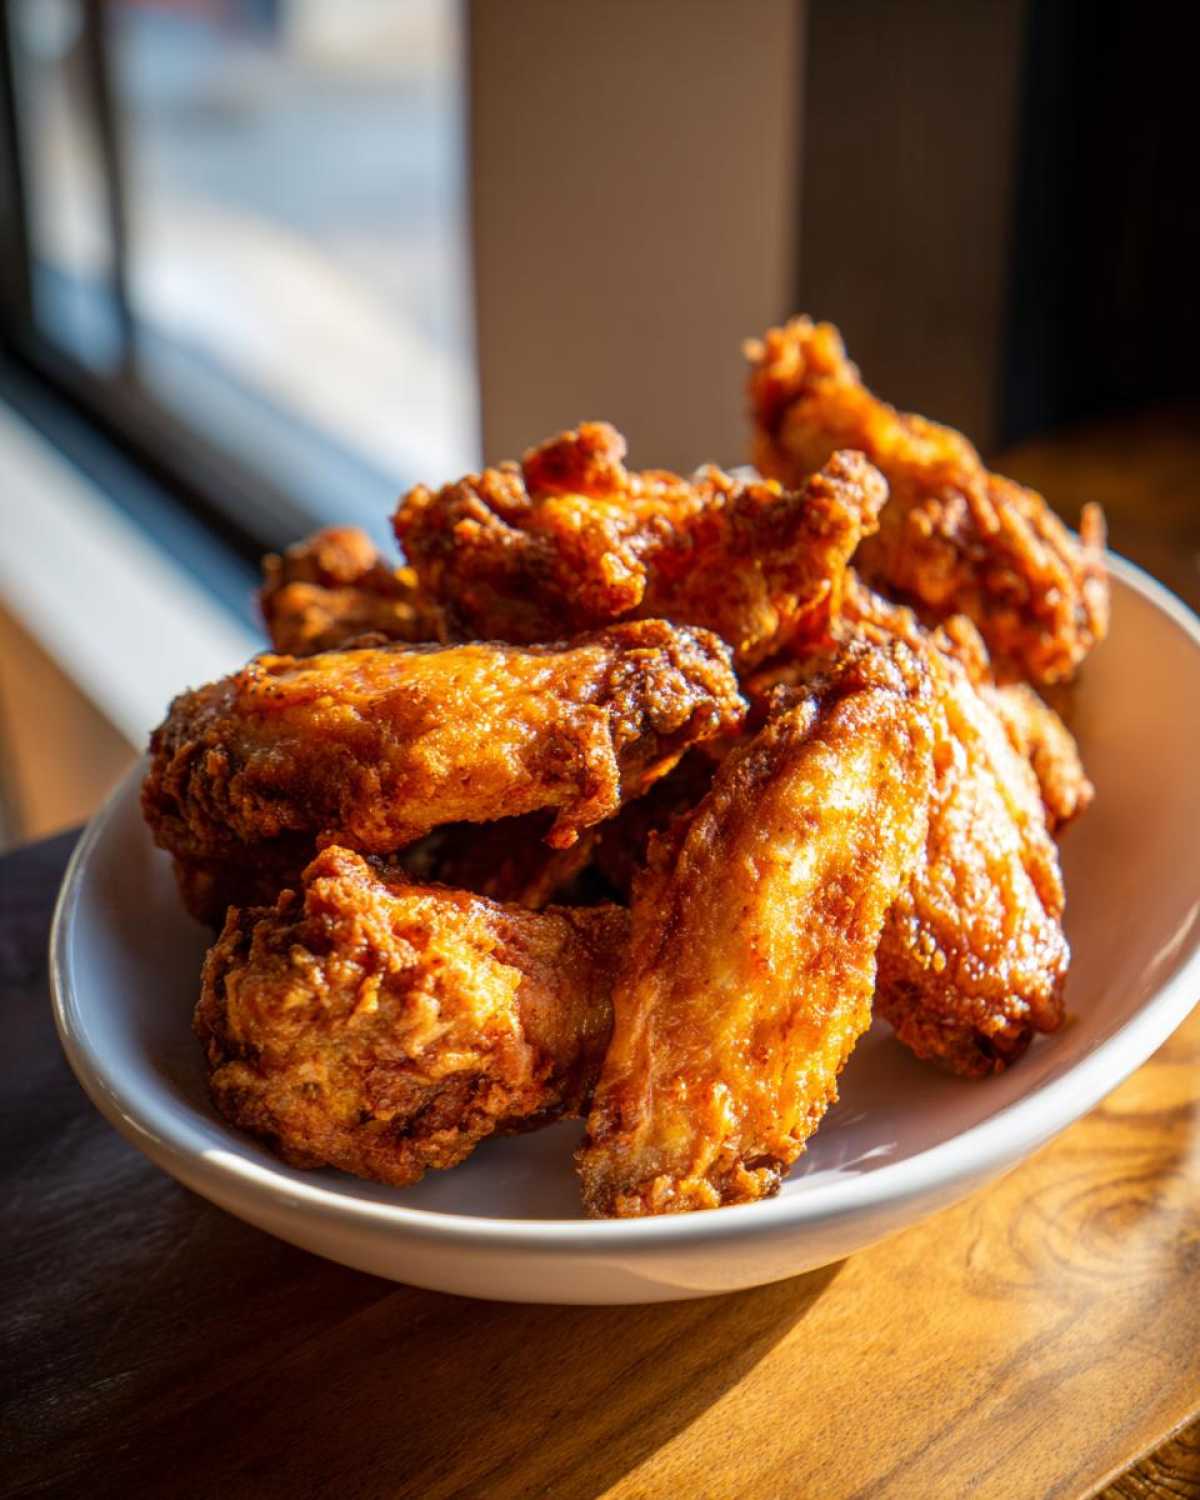
Seriously, forget everything you thought you knew about making crispy chicken wings at home. Deep frying is messy, it smells up the house, and honestly, who wants all that extra oil? These baked wings deliver that amazing Juicy Inside Crispy Outside texture without any of the fuss. They are my absolute go-to for every Super Bowl party we host, and people are always shocked when I tell them no deep fryer was involved. When you need reliable No Fry Chicken Wings that come out crunchy every single time, this is your answer.
Plus, cleanup is a breeze! We just line the tray with foil, and we are set. These wings aren’t just good for parties, either; they make for a fantastic, high-protein weeknight dinner when you don’t want to spend an hour dealing with oil splattering everywhere. I even made a batch last week just for a quick snack while running errands—it’s amazing how well these crisp up! If you’ve ever had trouble getting a good crunch, you might want to check out my recipe for oven-fried chicken fingers, as the technique is super similar.
The Science Behind Crispy Chicken Wings Using Baking Powder
It seems like magic, but the baking powder is doing heavy lifting chemically. It raises the pH level of the chicken skin slightly. This alkalinity helps break down proteins faster on the surface, letting the skin dry out rapidly in the oven. That rapid drying is what turns soft skin into that wonderfully brittle, crunchy crust you crave!
Gathering Ingredients for Your Extra Crispy Baked Chicken Wings
Okay, let’s talk about what you actually need. This list is short, which is fantastic for a quick recipe! I always keep these pantry staples on hand for wing nights, which happens way more often than I like to admit. The most important thing I need you to see right away is the difference between baking powder and baking soda. They are NOT interchangeable here! Baking powder is essential if you want crunchy wings. Baking soda can leave a slightly metallic, bitter taste, and we definitely don’t want that on our perfect flavor bombs. Gather these bits, and we’ll move on to the real magic!
- 2 lbs chicken wings, separated into flats and drumettes
- 1 tablespoon baking powder (and please, make sure it’s powder, not soda!)
- 1 teaspoon salt
- 1/2 teaspoon black pepper
- 1/2 teaspoon garlic powder
- 1/4 teaspoon cayenne pepper (only if you like a tiny little kick!)
Ingredient Notes and Substitutions for Perfect Chicken Wings
First thing: break those wings down! It’s much easier to evenly coat and cook the separate flats and drumettes. I know some folks just toss them in whole, but trust me, you want them separated for maximum crispiness coverage. Also, when you buy the baking powder, look for the aluminum-free kind if you can find it. Grandma always insisted on that because she said it just had a cleaner lift. Honestly, the spices we use here are just the simple base layer—they build flavor, but your real flavor payoff comes after they bake when you smother them in your favorite Buffalo Wing Sauce or maybe some tangy Lemon Pepper seasoning!
The Ultimate Technique for Oven Baked Wings
Now we get to the good part—the actual method. Listen closely because these couple of prep steps are what separate the soggy wing disasters from the glorious, crackling Oven Baked Wings. If you skip the drying step, you’re going to end up steaming your poor little wings, and we absolutely cannot have that! They need to be bone dry before anything else touches them. I use about three paper towels per pound of wings, just blotting and patting until I think they can’t possibly get any drier. Once they feel slightly tacky, that’s when we move to the coating.
For the best results, we are coating them thoroughly in that baking powder mix we made earlier. Think of it like giving each wing a super-thin, dusty blanket. Make sure you toss them really well in a big bowl so every nook and cranny is covered. This is the Best Chicken Wing Technique if you’re avoiding the deep fryer! If you want to check out how this method compares to my classic Air Fryer Chicken Wings recipe, you can look there next!
Preparing the Baking Setup for Crispy Chicken Wings
You absolutely need air circulation for that perfect all-around crunch. That means we are lining a baking sheet with foil (for easy cleanup, naturally!) and then immediately placing a sturdy wire rack on top of that foil. The rack elevates the wings so hot air can circulate 360 degrees around them. Don’t overcrowd them either! Give them space to breathe. Crank that oven up to 425 degrees Fahrenheit (that’s 220 Celsius) and let it get properly hot before those coated beauties go in. That initial blast of high heat is key to setting that crunchy exterior instantly.
Step-by-Step Instructions for Making Juicy Inside Crispy Outside Chicken Wings
Okay, buckle up, buttercup, because this is where we bake magic into your appetizer! Since we dried them and coated them perfectly in that baking powder mixture, this part is surprisingly hands-off, though you do need to pay attention to the timing. The goal here is to cook them all the way through until they are wonderfully tender inside, but that skin has to get deep golden brown and shattering crispy outside. The high heat ensures we maximize the effect of the baking powder we added earlier. I usually set a timer on my phone because running to check on things too early can sometimes ruin the rhythm!
Grab your prepared baking sheet with the rack—make sure those wings aren’t touching! Place them in that screaming hot 425-degree oven. Forty-five minutes total is what we are aiming for, but we break that up smartly to ensure even cooking. This simple process turns humble wings into the best savory chicken bites you’ve ever had.
Baking Times and Flipping for Optimal Chicken Wings
You’ll want to let those wings bake, undisturbed, for the first 20 minutes. Resist the urge to peek, okay? Let science do its work! After 20 minutes are up, gently pull the pan out, and using tongs, flip every single wing over. This ensures both sides get equal exposure to the dry, high heat. Pop them right back in for another 20 to 25 minutes. You’re looking for a deep, rich, golden-brown color on the outside—it should look hard and crackly, not soft or pale. If they aren’t deep brown, give them another five minutes! That color means crunch, folks!
Flavoring Your Baked Chicken Wings: Sauce Ideas for Game Day Chicken Wings
They are out of the oven, they are crispy, and they are perfect! Now, the best part: saucing them up! You absolutely have to toss these wings immediately when they come off that wire rack. The residual heat will help the sauce adhere beautifully without making them instantly soggy, which is how we maximize the crunch we worked so hard for. If you’re prepping for the big game, these Game Day Chicken Wings are already a guaranteed winner, but the sauce drives the flavor home!
I love having options for huge crowds. You can easily divide your pile of crispy wings into two bowls. One batch gets tossed in a tangy Lemon Pepper mixture, maybe another gets slathered in a classic sweet and salty BBQ sauce. But my personal favorite recently is that spicy-sweet approach. If you haven’t tried Hot Honey Chicken Wings yet, you are missing out! If you’re looking for some other spicy appetizer ideas, check out my recipe for Honey Sriracha Lil Smokies—super easy!
Quick Buffalo Wing Sauce Recipe Addition
If Buffalo Wing Sauce is your jam, you don’t even need a specialized recipe. Take about half a cup of your favorite Frank’s RedHot or Crystal brand hot sauce, melt about four tablespoons of *real* butter—no substitutes here!—and whisk them together until they are beautifully emulsified. Toss those hot wings vigorously in that mixture right away. That’s it! Two ingredients, pure, classic heat that clings perfectly to our crispy surface!
Making Air Fryer Chicken Wings Using This Same Technique
I know what you’re thinking: “This sounds amazing, but I really want to toss them in the air fryer!” Don’t worry! The best news is you can absolutely use this same amazing baking powder coating on your Air Fryer Chicken Wings. The method is almost identical because we’ve already done the crucial prep work by drying the wings and applying that dry coating. The main difference is the cooking environment—air fryers work much faster and more intensely!
Once you have your wings coated, instead of putting them in the 425°F oven, you’re going to set that air fryer to about 380°F. You might need to work in two batches depending on how big your basket is; remember, we don’t want them touching! Cook them for about 18 minutes total, flipping halfway through. They cook super quick this way! If you’re looking for another great basket recipe, you might want to peek at my Air Fryer BBQ Chicken Drumsticks for more basket wisdom.
Tips for Success with Easy Wing Recipes
We’ve covered the baking powder trick, which is the real secret to these Easy Wing Recipes, but I have one more ace up my sleeve for truly next-level crunch. If you have the time—and I mean, if you’re planning ahead for a big party—try this: coat the wings, place them on the rack, and then stick the whole setup in the fridge uncovered overnight. Seriously! Letting them chill uncovered for several hours actually dries the skin out even more. It’s amazing!
When you pull them out the next day, go straight into the 425°F oven—no need to let them come to temp or anything. They cook the same amount of time, and the result is simply unbeatable. Remember, prepping the chicken properly is 90% of the battle for perfect homemade chicken wings!
Storage and Reheating Instructions for Leftover Chicken Wings
Ah, the inevitable question: what do we do when we actually have leftover wings? This is where most people go wrong, so pay attention! If you’ve got any Savory Chicken Bites left over from your Wing Night Ideas spread, you want to treat them right so they don’t turn into sad, rubbery messes later. The moment they cool down after saucing, get them into an airtight container. I try not to stack them too tightly, but honestly, just get them sealed up and into the fridge as fast as you can.
Now, for reheating—this is the most crucial part if you value crispiness. You absolutely, positively *cannot* use the microwave. I know it’s tempting because it’s fast, but the steam trapped inside will turn that hard-earned crunchy skin back into soggy wallpaper. It’s tragic! If you want to bring them back to life, you need dry heat again.
Your best bet is pulling out the oven or the air fryer again. If you have a few wings, the air fryer works miracles. Set it to about 375°F and let them cook for about 5 to 7 minutes. They crisp right back up! If you have a big batch that you want to make warm for later, spread them out on that same wire rack over foil and bake them at 350°F for about 10 minutes. They steam out the moisture and get that beautiful crackle back. Keep that in mind for your next Party Appetizer Wings assembly!
Frequently Asked Questions About Crispy Chicken Wings
Can I use this baking powder method for frozen chicken wings?
Oh, absolutely not! Believe me, I’ve thought about trying it when I’m in a total rush, but you have to resist that urge. The baking powder coating needs a totally dry surface to stick to and activate properly. If you try this on frozen wings, they’ll just thaw into a soggy mess inside the coating, and you’ll end up with steamed wings instead of crispy chicken wings. You need to thaw them completely first, and then you have to dedicate those five minutes needed to pat them until they are shockingly dry!
What is the best way to serve these Party Appetizer Wings?
These are meant to be the star of the table, right? For the ultimate presentation and flavor combo, I always arrange these Party Appetizer Wings on a big platter surrounded by crunchy, cool accompaniments. You have to have celery and maybe some carrot sticks—it helps cut through the richness. And crucially, you need dipping sauces! A good, cooling homemade Ranch or a sharp Blue Cheese dressing is non-negotiable for me. Trust me, folks clean these off the platter first; they really are the best Crowd Pleaser Appetizers around! If you’re looking for other easy appetizers, check out my recipe for homemade chicken katsu curry!
Can I skip the wire rack when making these baked chicken wings?
If you want maximum crispiness, please don’t skip that wire rack! I know you want to save on dishes, but the rack is fundamental to this whole technique. The rack allows the heat to circulate completely underneath the wings, drying out the underside and developing that crackly skin all the way around. If you just bake them directly on the foil-lined pan, the bottom half sits in its own rendered fat and steam. You’ll end up with a delicious top half and a deeply disappointing, soggy bottom half, and we just can’t live with that imbalance!
Print
Extra Crispy Baked Chicken Wings Using Baking Powder
- Total Time: 60 min
- Yield: 4 servings 1x
- Diet: Low Fat
Description
Make incredibly crispy chicken wings in the oven without deep frying. This recipe uses baking powder to achieve a crackly skin perfect for game day or appetizers.
Ingredients
- 2 lbs chicken wings, separated into flats and drumettes
- 1 tablespoon baking powder (not baking soda)
- 1 teaspoon salt
- 1/2 teaspoon black pepper
- 1/2 teaspoon garlic powder
- 1/4 teaspoon cayenne pepper (optional)
Instructions
- Preheat your oven to 425 degrees Fahrenheit (220 degrees Celsius). Line a baking sheet with foil and place a wire rack on top of the foil.
- Pat the chicken wings completely dry using paper towels. This step is crucial for crispiness.
- In a large bowl, combine the baking powder, salt, pepper, garlic powder, and cayenne pepper.
- Add the dried chicken wings to the bowl. Toss thoroughly until every piece is evenly coated with the baking powder mixture.
- Arrange the coated wings in a single layer on the wire rack. Do not let the wings touch each other.
- Bake for 20 minutes.
- Flip the wings over. Return them to the oven and bake for another 20 to 25 minutes, or until the skin is deeply golden brown and very crisp.
- Remove from the oven. Toss immediately with your favorite sauce, such as Buffalo, Honey Garlic, or Lemon Pepper, or serve plain.
Notes
- For the crispiest results, ensure the baking powder is aluminum-free.
- If you prefer a saucier wing, toss them in sauce immediately after they come out of the oven while they are hot.
- For an extra crisp, you can place the wings in the refrigerator uncovered for 1 to 4 hours before baking to dry the skin further.
- Prep Time: 15 min
- Cook Time: 45 min
- Category: Appetizer
- Method: Baking
- Cuisine: American
Nutrition
- Serving Size: 4 wings
- Calories: 280
- Sugar: 0
- Sodium: 350
- Fat: 18
- Saturated Fat: 5
- Unsaturated Fat: 13
- Trans Fat: 0
- Carbohydrates: 1
- Fiber: 0
- Protein: 27
- Cholesterol: 95