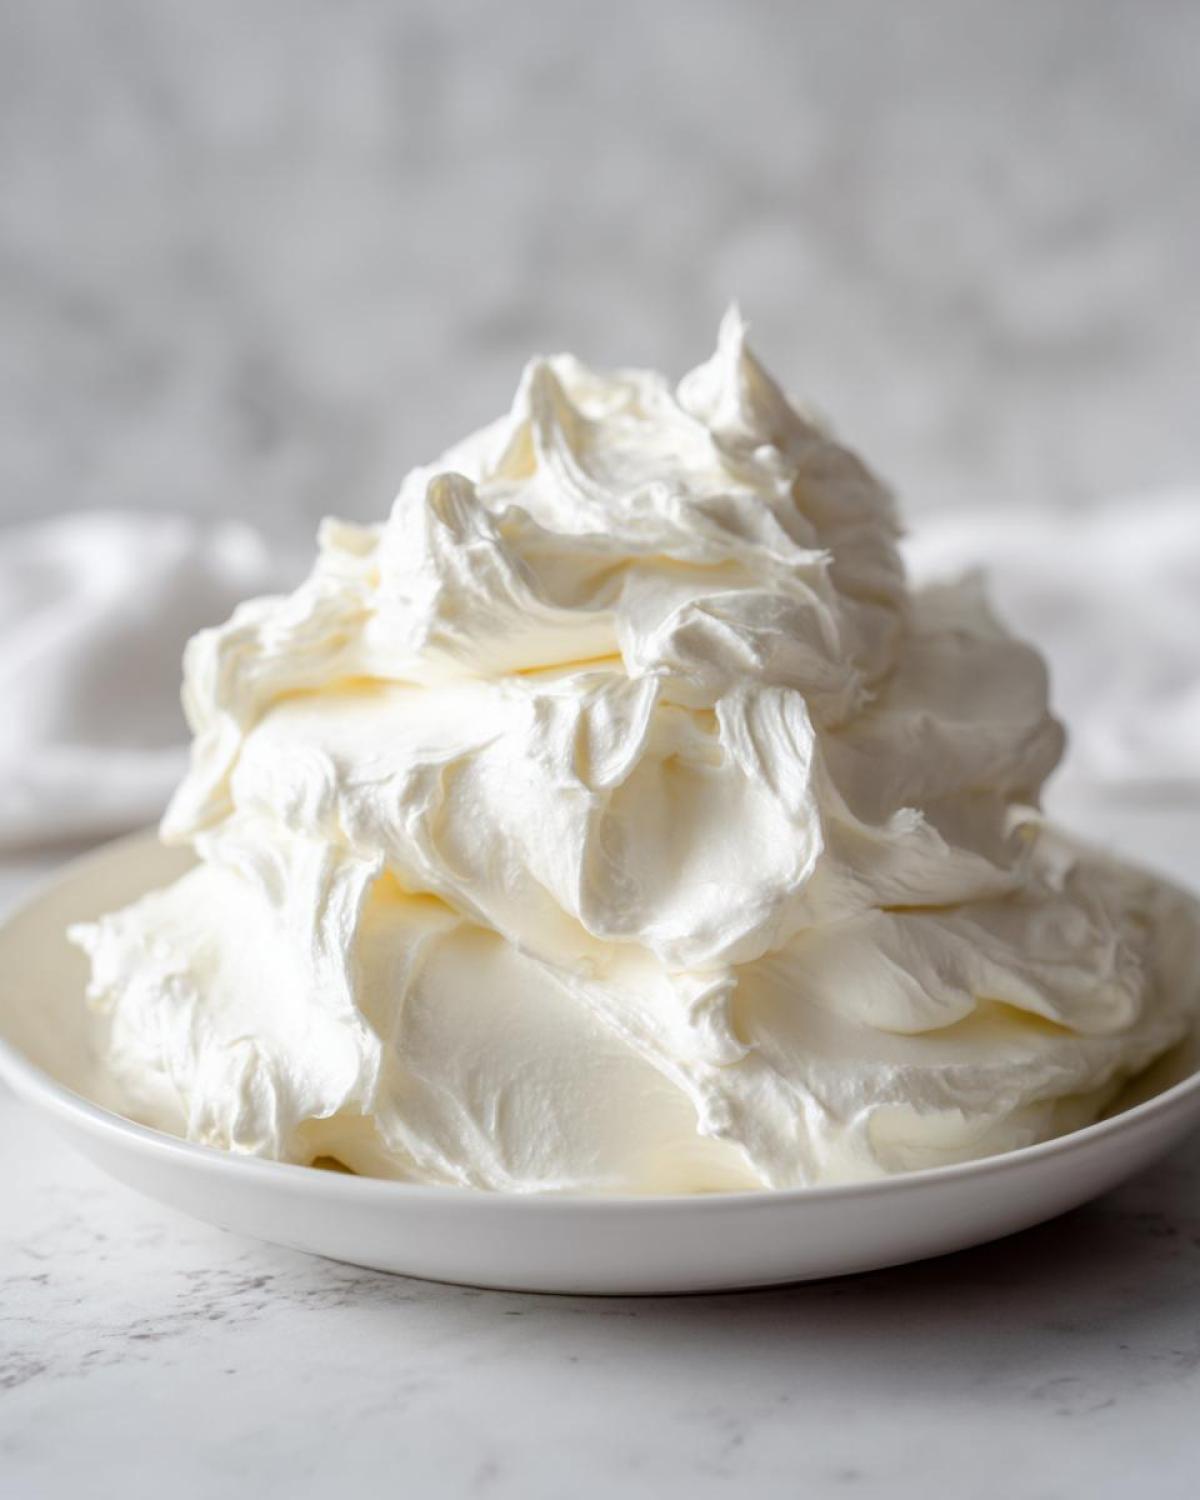
I swear, there is nothing sadder than sinking your fork into a beautiful cake only to find the frosting is gritty, runny, or tastes overwhelmingly like powdered sugar. Ugh! After years of kitchen mishaps (we’ve all been there!), I finally nailed down what I consider to be the absolute best cream cheese frosting recipe out there. It’s so easy, I make it after a busy weeknight when I need a sweet fix, and it always comes out perfectly fluffy and consistently smooth. Forget the lumpy stuff; this is the reliable, no-fail method you need to keep in your back pocket.
Seriously, if you’ve struggled with getting that perfect balance of tang and sweetness, or ending up with a soft mess when you wanted stiff peaks, stick with me. This recipe guarantees a creamy, stable, and delightfully tangy topping every single time. It’s my secret weapon for the best cinnamon rolls, the moistest carrot cake daydreams, and honestly, sometimes I just eat it with a spoon straight from the mixer. Don’t judge!
Why This is the Best Cream Cheese Frosting Recipe
I know, everyone says their frosting is the best, but I’m telling you, I perfected this one through pure trial and error until it hit every single requirement I ever had. This recipe takes less than ten minutes if you have your ingredients ready to go! It’s the classic flavor you crave—rich, sweet, but cut perfectly with that essential tang.
- It comes out unbelievably smooth; we’re talking zero grittiness here.
- The flavor is perfectly balanced for a beautiful tangy cream cheese icing without being overwhelmingly sweet.
- It comes together incredibly fast—you can stop whipping in under 10 minutes total!
- It’s stable enough to hold its shape beautifully for piping without slumping all over your creation.
Achieving Fluffy Cream Cheese Frosting Texture
The fluffiness doesn’t just happen by magic, folks. You need to really let the mixer work its magic in the final step. After you introduce the sugar, you crank that speed up, and you let it beat for a solid couple of minutes until it visibly lightens in color. That air incorporation is what turns a simple spread into a truly whipped cream cheese topping.
The Secret to a Smooth Cream Cheese Frosting (No Lump Frosting)
If you have ever ended up with tiny, annoying white bits in your frosting, I sympathize! That is the number one sign that your butter or your cream cheese was too cold straight from the fridge. You absolutely must let both dairy components sit out until they are soft—like totally ready to mix. Cold dairy hitting temp sugar? Instant lumps. Trust me on this one; room temperature ingredients are the difference between a beautiful final product and wanting to throw your bowl across the kitchen.
Ingredients for Perfect Cream Cheese Frosting
Okay, the beauty of this basic cream cheese icing is that it uses just five core ingredients. That’s it! But the quality and the preparation of those five things are non-negotiable if you want that top-tier, smooth result. If you try to skimp on letting things soften, you’re back to the lumpy mess territory we are desperately trying to avoid!
Here’s exactly what you need for about three cups of glorious, pipeable topping:
- 1 cup (which is 2 sticks) unsalted butter, softened completely to room temperature. This is crucial!
- 8 ounces full-fat cream cheese, also softened completely to room temperature. No light cream cheese here, please! Full fat gives you the body we need.
- 4 cups powdered sugar, and yes, you need to sift it first. I know, nobody likes extra steps, but this prevents those dry clumps from ruining your buttercream alternative.
- 1 teaspoon vanilla extract—use the good stuff if you have it!
- 1/4 teaspoon salt. This small addition cuts through the richness and stops the final product from tasting too sweet.
How to Make Quick Homemade Cream Cheese Frosting
If you thought making this amazing frosting took hours, think again! You can have this luscious, tangy topping ready to spread in about ten minutes flat. That’s why this is my go-to easy cream cheese frosting recipe when I’m short on time but still want something spectacular. The key here is managing your mixer speeds and making sure you scrape down the bowl, or you miss out on capturing all that creamy goodness.
Step 1: Creaming Butter and Cream Cheese for Smooth Cream Cheese Frosting
Grab your electric mixer—handheld or stand mixer, doesn’t matter—and put that perfectly softened butter and cream cheese right in the bowl. You need to start these two together so they become one happy, cohesive unit. Beat them on a medium speed for about two full minutes. Don’t rush this part! You’re looking for a color change; it should go from yellowish to pale, fluffy, and really smooth. Once it looks like pale, fluffy whipped clouds, scrape down the sides of the bowl really well before moving on. If you have any unincorporated chunks hiding at the bottom, your final frosting won’t be smooth!
Step 2: Incorporating Powdered Sugar into Your Cream Cheese Frosting
Now we add the sugar, but we do it gently! Dramatically dropping all four cups in at once is how you end up with a sugar cloud filling your entire kitchen. Turn the mixer speed down to low—we want slow and steady here. Add the sifted powdered sugar one cup at a time, letting it incorporate fully into the butter-cream cheese base before adding the next scoop. Keep the speed low throughout this addition. This slow introduction is how we guarantee that no lump frosting result we are aiming for. It’s similar to making a great smooth buttercream alternative; patience pays off!
Step 3: Whipping for Fluffy Cream Cheese Frosting
Once all the sugar is in and mixed just until combined, it’s time to transform it into that light, decadent topping! Add your vanilla and salt. Then, crank that mixer up to medium-high speed. Let it run like that for a good two to three minutes. You’ll see it physically change—it gets lighter, incorporates air, and looks beautiful and high. This final blast of air turns it into the whipped cream cheese topping that’s ready sometimes even faster than making something from a can! If you stop too soon, it’s delicious but dense; this final whip gives you the lift you want.
Tips for Pipeable Cream Cheese Frosting Stability
We’ve made this gorgeous, fluffy cream cheese frosting, but what if you need it to sit securely on top of a birthday cake or hold those intricate edges if you’re piping designs? Dealing with frosting that melts or slumps is the worst, especially when you worked so hard to get that perfect tang and texture!
Luckily, because we used full-fat ingredients and didn’t overload it with liquid, this recipe already sets up nicely. However, if the room is warm or you’re using it for serious decorating work, you might need a quick chill. If your frosting feels a little too soft after you finish whipping it, just cover the bowl and pop it into the refrigerator for about 10 to 15 minutes. Don’t forget it in there, though! You just need it slightly firmed up.
When you pull it out, give it a quick whisk by hand or on low speed for just 10 seconds—usually long enough to redistribute the cold spots and get it back to that ideal spreading or pipeable cream cheese frosting consistency. Now, if you accidentally leave it in too long and it gets rock hard (oops!), don’t panic and don’t add more sugar! Just add one tiny teaspoon of milk or heavy cream and beat it on medium speed until it smooths out again. A tiny splash of liquid will bring it right back to life!
Versatile Uses for Your Tangy Cream Cheese Icing
The best recipes are the ones you can use over and over, right? That’s what makes this tangy cream cheese icing such a workhorse in my kitchen. Sure, it’s the perfect, classic topping for a slice of red velvet cake—it simply has to be, it’s tradition!—but it shines in so many other places too. It’s miles better than any standard canned stuff, and it works beautifully just slathered onto warm brownies as a quick basic cream cheese icing.
I actually made a batch last week just to frost my coffee cake instead of the usual streusel topping. Wow! The slight tang elevated the whole brunch experience. People always ask me if this recipe works as well as the ones I use for my holiday baking spreads, like when I make those gorgeous red velvet snowball cookies. And yes, it does! It’s that reliably good.
Cream Cheese Frosting for Cinnamon Rolls
If you need one definitive reason to master this recipe, let it be for your homemade cinnamon rolls. Seriously, forget the thin, runny drizzle you sometimes get pre-packaged. This dense, sweet-yet-tangy frosting absolutely melts perfectly into those warm, gooey centers. Here’s my non-negotiable tip for cinnamon roll application: Wait until your rolls are out of the oven, but still piping hot—I mean, *just* out of the pan—and immediately slather this frosting generously over the top. The heat of the rolls slightly softens the frosting, making it glide into every crevice without making the entire thing look soupy.
It tastes incredible alongside a festive drink, maybe even something inspired by a cinnamon roll cocktail if you’re feeling adventurous!
Ingredient Notes and Substitutions for Cream Cheese Frosting
I always get asked about ingredient swaps, and honestly, for this cream cheese frosting, I stick pretty close to the script because those five elements create that signature flavor and body. But I know sometimes you’re scrambling, or maybe you’re trying to cater to a preference, so let’s talk about what you can change and what you absolutely shouldn’t mess with.
First thing first: the cream cheese itself. Please, please, please use full-fat cream cheese. I know low-fat or Neufchâtel sounds tempting from a health perspective, but it has more water content. That extra water is your enemy when you’re trying to achieve a stable, pipeable cream cheese frosting. It lowers the fat ratio, and you end up with a thinner, almost greasy topping that just won’t hold its shape. Stick to the bricks, not the tubs!
If you’re wondering about the butter, unsalted is key because it lets us control the saltiness ourselves, but if you only have salted on hand, you can totally use it! Just skip adding that 1/4 teaspoon of salt to the recipe. You might need a tiny taste test before you add it, though.
Boosting the Tang Factor
My favorite little trick for making this frosting taste extra bright, especially if I’m putting it on something sweet like a really rich chocolate cake, is messing with the vanilla. I mentioned in the notes that you can swap some of the vanilla out for fresh lemon juice. I usually swap about half a teaspoon of the vanilla for a full teaspoon of fresh lemon juice.
This swap is perfection if you want a distinctly tangy cream cheese icing that still tastes classic. It adds a lovely little zing on the finish. Be careful if you add too much acid, though, because it can thin out the frosting slightly. Start small, taste, and beat it in well!
Vanilla Alternatives and Flavor Ideas
Vanilla extract is standard, but what if you’re out? You can absolutely use vanilla bean paste if you have it—it adds those beautiful little black specks that make it look so homemade and fancy. If you are in a real pinch, clear vanilla extract works fine, though I find the flavor isn’t quite as deep. Whatever you do, avoid artificial vanilla flavoring if you can, because it sometimes introduces a chemical aftertaste that ruins the beautiful richness of the cream cheese.
For next-level flavor—though this moves it out of the “basic” category—try adding a tiny pinch of ground cinnamon or even a little bit of high-quality almond extract. Just a drop or two goes a long way when you’re aiming for that perfect easy dessert topping profile!
Storage & Reheating Instructions for Cream Cheese Frosting
Don’t let any of this gorgeous, fluffy cream cheese frosting go to waste! Because it contains real cream cheese and butter—actual dairy, not just sugar and fat—it needs to be stored properly in the fridge. We don’t want any worries about food safety, and we definitely don’t want it sweating all over the counter.
To store it, scrape your leftover frosting into an airtight container. I prefer a glass container so I can see how much is left! It will keep beautifully in the refrigerator for about a week. If you frosted a cake or cupcakes, just cover the whole dessert loosely with plastic wrap, making sure the wrap doesn’t touch the frosting surface if you can help it, and pop the whole thing in the fridge.
Bringing Chilled Frosting Back to Life
Okay, this is the most important part about reheating—technically, you’re not reheating it, you’re bringing it back to temperature so it’s spreadable again. If you take your container straight from the fridge and try to beat it right away, it will seize up and look crumbly or grainy. That’s not good for your basic cream cheese icing!
Take the container out of the fridge about 1 to 2 hours before you plan to use it, depending on how warm your kitchen is. Let it sit on the counter covered. When it looks soft enough to easily press a finger into—similar to how the butter and cream cheese felt when you started this recipe—it’s ready.
Once it’s softened, use your mixer on low speed for just 30 seconds to bring everything back together into that smooth, beautiful consistency. You’ll be shocked how perfect it becomes! If you skip this resting step, you’ll end up having to add liquid to soften it, and that can sometimes throw off the stability needed for piping.
Can I Freeze This Cream Cheese Topping?
Yes, you absolutely can freeze extra frosting! This is a great tip if you make a double batch for a big event. Wrap the frosting tightly in a layer of plastic wrap, pressing the wrap directly onto the surface to minimize air exposure, and then place it inside a freezer-safe container. It handles freezing surprisingly well because of the high fat content.
When you want to use it, let it thaw completely overnight in the refrigerator. Then, just like the refrigerated batch, let it sit on the counter for an hour or so until softened, finish it with a quick 30-second whip on low speed, and it’s ready to use on those cinnamon rolls or your next batch of cupcakes!
Frequently Asked Questions About Cream Cheese Frosting
Can I make this a 5 Ingredient Frosting?
You betcha! This recipe is beautifully simple. If you look at the core components, once you’ve got your butter, your cream cheese, your powdered sugar, your vanilla, and your salt—that’s only five main items! It’s fantastic because you don’t need any weird stabilizers or meringue powders to get that gorgeous texture we talked about. It’s just high-quality basics handled correctly that result in that fluffy cream cheese frosting.
What is the best way to get a tangy cream cheese icing?
If you want that extra zip that cuts through a rich cake—that perfect tangy cream cheese icing finish—you have a couple of easy levers to pull. First, use great quality, full-fat cream cheese; sometimes the cheaper brands are milder. Second, and this is my favorite move, add a tiny bit of fresh acid! I use about a teaspoon of fresh lemon juice when I add the vanilla. It brightens up the entire flavor profile without making it taste like, well, lemon frosting. It just enhances that natural cheese tang beautifully.
How long does homemade cake icing last?
Since this is a dairy-based topping—gotta have that cream cheese!—it doesn’t sit on the counter forever like a pure sugar glaze would. If you have leftovers, put that homemade cake icing in an airtight container in the fridge. It usually stays perfect for about a week. Sometimes even 10 days if your fridge is crisp! Just remember what I said earlier: always let it warm up on the counter and give it a quick 30-second refresher whip before you try spreading it again.
If you’ve got questions about using this on a specific treat, like our carrot cake, or if you need troubleshooting help, send us a message over on the contact page! I love hearing how my recipes turn out for you all.
Share Your Cream Cheese Frosting Creations
Alright, now that you have the secret to the most reliably smooth and tangy cream cheese frosting, I really, truly want to see what you made! Seriously, nothing makes me happier than knowing I helped someone conquer a recipe that used to give them trouble. Did you stack it high on a chocolate cake? Did you dollop it thick on your fresh-baked cinnamon rolls? Tell me everything!
When you try this recipe, please head down below and leave a star rating. Five stars means I nailed the fluff factor, and I use those ratings to keep improving things for everyone else reading along. Even if you just want to say, “Wow, this was so easy!” that feedback makes my day.
And if you’re sharing pictures online—Instagram, Facebook, anywhere fun—tag me! I love seeing your results. If you want to know more about my own baking journey and why I stick to these classic comfort recipes, you can pop over to my About Me page anytime! Happy whipping, everyone. I can’t wait to see your beautiful, lump-free creations!
Print
Best Classic Cream Cheese Frosting
- Total Time: 10 min
- Yield: About 3 cups 1x
- Diet: Vegetarian
Description
Make a smooth, fluffy, and tangy cream cheese frosting quickly. This recipe yields a stable icing perfect for cakes, cupcakes, and cinnamon rolls.
Ingredients
- 1 cup (2 sticks) unsalted butter, softened to room temperature
- 8 ounces full-fat cream cheese, softened to room temperature
- 4 cups powdered sugar, sifted
- 1 teaspoon vanilla extract
- 1/4 teaspoon salt
Instructions
- Place the softened butter and softened cream cheese in a large mixing bowl. Beat them together with an electric mixer on medium speed until the mixture is completely smooth and creamy, about 2 minutes. Scrape down the sides of the bowl.
- Reduce the mixer speed to low. Gradually add the sifted powdered sugar, one cup at a time, mixing until just combined after each addition.
- Add the vanilla extract and salt. Increase the mixer speed to medium-high and beat for 2 to 3 minutes until the frosting is light, fluffy, and smooth. Do not overmix once fluffy.
- If the frosting is too soft for piping, chill it for 10 to 15 minutes before using. If it is too stiff, add 1 teaspoon of milk or cream and beat briefly.
Notes
- For the smoothest texture, ensure both the butter and cream cheese are truly at room temperature. Cold ingredients cause lumps.
- Sifting the powdered sugar removes any dry clumps before mixing.
- If you need a slightly tangier flavor, substitute 1 tablespoon of the vanilla extract with fresh lemon juice.
- This frosting holds its shape well for piping if kept cool.
- Prep Time: 10 min
- Cook Time: 0 min
- Category: Dessert Topping
- Method: Mixing
- Cuisine: American
Nutrition
- Serving Size: 1/4 cup
- Calories: 380
- Sugar: 45
- Sodium: 110
- Fat: 23
- Saturated Fat: 14
- Unsaturated Fat: 9
- Trans Fat: 0
- Carbohydrates: 46
- Fiber: 0
- Protein: 2
- Cholesterol: 65