
Welcome to Our Kitchen: Making Festive Red Velvet Snowball Cookies
Hello there! I’m Sara, and I’m thrilled you’ve stopped by our little corner of the internet.
Liam and I are so excited to share these amazing Red Velvet Snowball Cookies.

Festive baking is truly our favorite kind of culinary show.
We used to take things too seriously in the kitchen, you know?
Now, we cook with joy and connection, just like we show you here.
These rich, snowy treats capture that feeling perfectly for any holiday event.
Why You Will Love These Red Velvet Snowball Cookies
These little beauties are pure holiday magic.
They taste just like classic red velvet cake.
The texture is wonderfully soft inside.
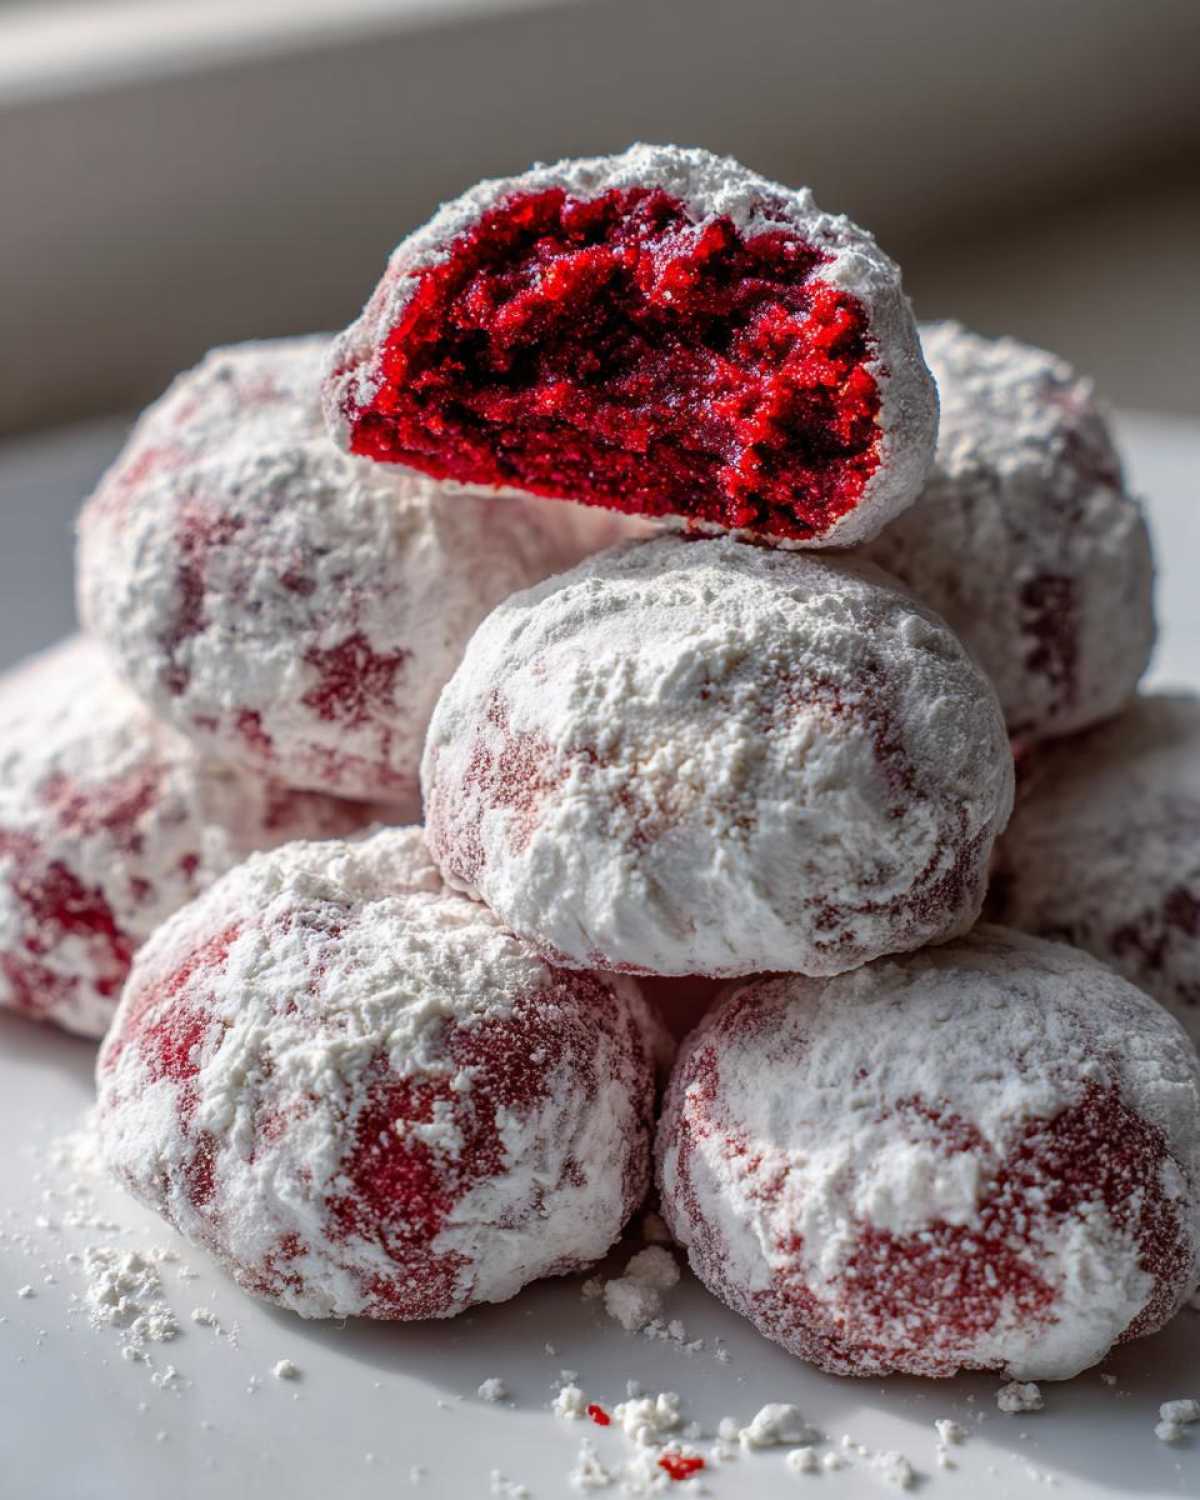
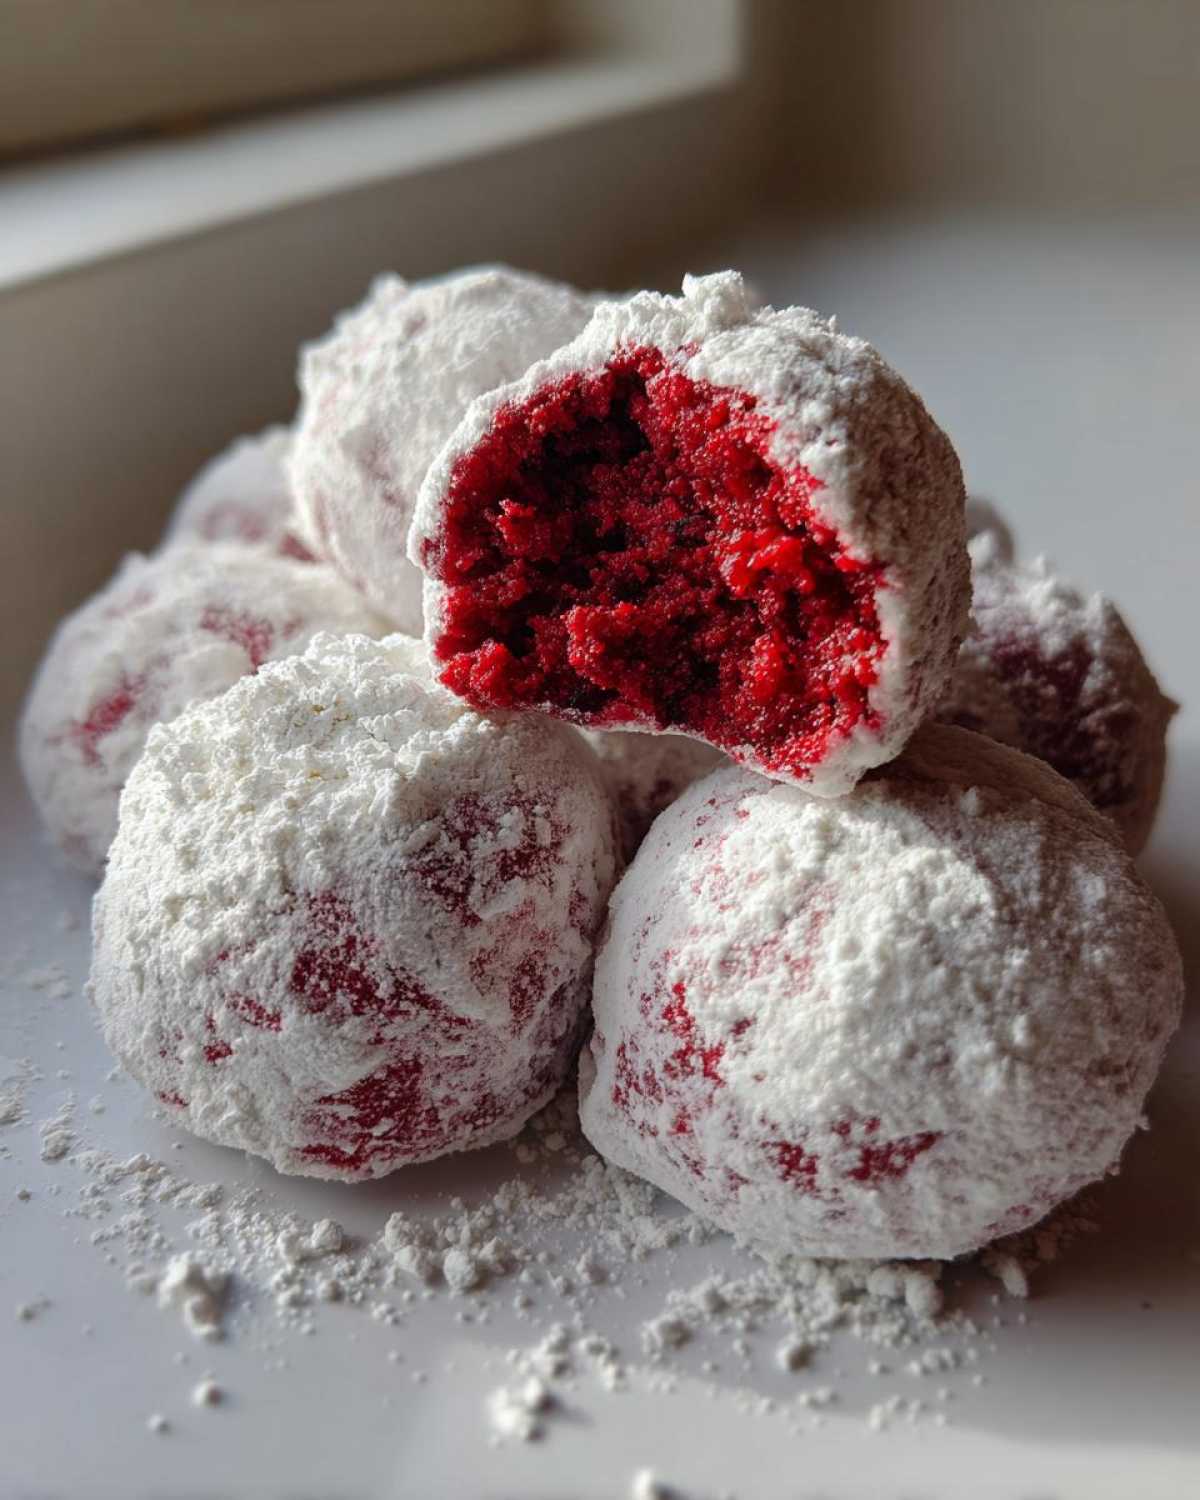
That thick, snowy coating is just divine.
They look stunning on any holiday platter.
They are the ultimate Cookie Exchange Recipe winner.
Key Features of Our Red Velvet Snowball Cookies
- Incredibly tender, melt-in-your-mouth texture.
- Deep, satisfying red velvet flavor profile.
- Visually striking, perfect for festive tables.
- They bake up surprisingly fast for busy cooks.
Gathering Your Ingredients for Red Velvet Snowball Cookies
Alright, let’s talk supplies!
Great baking starts with great ingredients.
For these stunning Red Velvet Snowball Cookies, quality really matters.
Using good stuff makes a huge difference here.
Grab your apron; we are ready to assemble our components.
Essential Dry and Wet Ingredients for Red Velvet Snowball Cookies
- 1 cup unsalted butter, softened
- 1 cup powdered sugar, plus more for coating
- 1 large egg
- 1 teaspoon vanilla extract
- 1 teaspoon white vinegar
- 1/2 teaspoon red food coloring (gel preferred)
- 1 3/4 cups all-purpose flour
- 1/2 cup unsweetened cocoa powder
- 1/2 teaspoon baking soda
- 1/4 teaspoon salt
Equipment Needed for Your Red Velvet Snowball Cookies
Before we start mixing, let’s check our tools.
Having everything ready makes baking fun.
You don’t need fancy gear for this recipe.
Here are the basics for success.
- Large mixing bowl and separate dry bowl.
- Electric mixer or strong arm for creaming.
- Baking sheets lined with parchment paper.
- Wire cooling racks.
- Shallow dish for the snowy coating.
Step-by-Step Instructions for Perfect Red Velvet Snowball Cookies
Now for the fun part, making the dough!
Follow these steps closely for the best result.
We want soft cookies, not crunchy ones.
Let’s turn these simple ingredients into magic.
Preparing the Dough Base for Red Velvet Snowball Cookies
First, get that oven hot.
Preheat your oven to 350°F (175°C).
Line your baking sheets with parchment paper now.
Cream your softened butter and one cup of sugar well.
Mix until the texture is light and airy.
Beat in the egg, vanilla, vinegar, and that bright red coloring.
Mixing and Forming the Red Velvet Snowball Cookies
In a separate bowl, whisk your dry items together.
This includes the flour, cocoa, baking soda, and salt.
Slowly add the dry mix to the wet ingredients.
Mix only until the dough just comes together.
Scoop tablespoonfuls of the soft dough.
Roll these quickly into smooth little balls, spacing them apart.
Baking and Cooling Your Red Velvet Snowball Cookies
Bake these beauties for just 10 to 12 minutes.
Watch them closely; they should look set but stay soft.
Do not let them bake too long, please!
Let them rest five minutes on the hot baking sheet.
Then, move them carefully to wire racks.
They must cool completely before the next step.
Achieving the Perfect Snowy Finish on Red Velvet Snowball Cookies
This step makes them true snowballs.
Put plenty of powdered sugar in a shallow dish.
Roll each cooled cookie until fully coated.
I like to give them a second dusting sometimes.
Wait for the first coat to slightly melt in.
This double coat gives you that beautiful, thick snow look.

Tips for Success When Making Red Velvet Snowball Cookies
Baking is all about learning little secrets.
These tips help your cookies shine.
We want your batch to be the best at the exchange.
Don’t stress if things look a little messy.
A little kitchen chaos is part of the fun.
Follow these pointers for guaranteed happy baking.
Ingredient Notes and Substitutions for Red Velvet Snowball Cookies
For that deep, signature red color, listen up.
Use a high-quality gel food coloring, seriously.
Liquid colors just won’t give you the depth we need.
If your dough feels too soft before rolling, chill it.
Fifteen minutes in the fridge fixes sticky dough fast.
Want a tiny flavor twist? Add almond extract with the vanilla.
Serving and Storing Your Red Velvet Snowball Cookies
These cookies look amazing on a platter.
They are perfect for your next holiday party.
Presentation makes them feel extra special.
Store leftovers carefully in an airtight container.
They keep well at room temperature for one week.
Enjoy your delicious Holiday Baking creations all week long!
Frequently Asked Questions About Red Velvet Snowball Cookies
I know you might have a few last questions.
That’s normal when trying a new recipe.
Liam and I have gathered common concerns here.
Let’s make sure your batch is perfect for sharing.
These are essential for great Holiday Baking.
Can I make Red Velvet Snowball Cookies ahead of time for my Cookie Exchange?
Absolutely, yes, you can make them early.
Bake them fully, let them cool completely.
Then, roll them in the powdered sugar coating.
Store your finished Christmas Cookies airtight.
They stay fresh for about a week this way.
Why are my Red Velvet Snowball Cookies not red enough?
That deep red color needs good dye.
Use a high-quality gel food coloring, please.
Liquid drops often just water down the batter.
Gels give you that rich, stunning red hue.
How do I prevent the powdered sugar coating from melting off the Red Velvet Snowball Cookies?
This is a crucial step for the snowball look.
You must wait until the cookies are totally cool.
Warm cookies melt the sugar right off them.
They turn into a sticky, thin glaze instead.
Wait until they reach room temperature first.
Share Your Culinary Performance
Did you have a showstopper moment in your kitchen?
I hope making these cookies brought you joy.
Rate this recipe below if you loved it.
Tell us how your Red Velvet Snowball Cookies turned out!
Estimated Nutritional Information for Red Velvet Snowball Cookies
Liam always reminds me that baking is an act of love.
But knowing what’s in our treats is helpful too.
Here is an estimate for these festive cookies.
Keep in mind these are approximations, not exact science.
Every kitchen adds its own little difference.
This data is per serving size, which is one cookie.
- Serving Size: 1 cookie
- Calories: Approx. 150
- Sugar: Approx. 12g
- Fat: Approx. 8g
- Carbohydrates: Approx. 18g
- Protein: Approx. 2g
We focus on flavor over strict counting here.
Enjoying a few of these Christmas Cookies is part of the fun.
Print
Amazing Red Velvet Snowball Cookies 1 Winner
- Total Time: 32 minutes
- Yield: About 2 dozen cookies 1x
- Diet: Vegetarian
Description
These Red Velvet Snowball Cookies bring festive cheer to any gathering. They are soft, rich, and coated in a sweet snowy layer, perfect for your cookie exchange.
Ingredients
- 1 cup unsalted butter, softened
- 1 cup powdered sugar, plus more for coating
- 1 large egg
- 1 teaspoon vanilla extract
- 1 teaspoon white vinegar
- 1/2 teaspoon red food coloring (gel preferred)
- 1 3/4 cups all-purpose flour
- 1/2 cup unsweetened cocoa powder
- 1/2 teaspoon baking soda
- 1/4 teaspoon salt
Instructions
- Preheat your oven to 350°F (175°C). Line baking sheets with parchment paper.
- In a large bowl, cream together the softened butter and 1 cup of powdered sugar until light and fluffy.
- Beat in the egg, vanilla extract, white vinegar, and red food coloring until well combined.
- In a separate bowl, whisk together the flour, cocoa powder, baking soda, and salt.
- Gradually add the dry ingredients to the wet ingredients, mixing on low speed until just combined into a soft dough.
- Scoop rounded tablespoons of dough and roll into smooth balls. Place them 2 inches apart on the prepared baking sheets.
- Bake for 10 to 12 minutes. The cookies should look set but remain soft; do not overbake.
- Let the cookies cool on the baking sheets for 5 minutes before carefully transferring them to wire racks to cool completely.
- Once completely cool, place a generous amount of powdered sugar in a shallow dish. Roll each cookie thoroughly in the powdered sugar until completely coated, creating the snowball effect.
- For an extra snowy look, you can roll them a second time after the first coating has slightly melted in.
Notes
- For the deepest red color, use a high-quality gel food coloring.
- If your dough feels too sticky, chill it for 15 minutes before rolling.
- These cookies store well in an airtight container at room temperature for up to one week.
- Feel free to add a drop of almond extract with the vanilla for a different flavor note.
- Prep Time: 20 minutes
- Cook Time: 12 minutes
- Category: Dessert
- Method: Baking
- Cuisine: American
Nutrition
- Serving Size: 1 cookie
- Calories: Approx. 150
- Sugar: Approx. 12g
- Sodium: Approx. 50mg
- Fat: Approx. 8g
- Saturated Fat: Approx. 5g
- Unsaturated Fat: Approx. 3g
- Trans Fat: Trace
- Carbohydrates: Approx. 18g
- Fiber: Approx. 0.5g
- Protein: Approx. 2g
- Cholesterol: Approx. 25mg