If you’re anything like me, weeknight dinners need speed, but I absolutely refuse to sacrifice flavor just because I’m short on time. For years, I struggled to get broccoli-like vegetables right—either they came out steamed and sad, or they turned into bitter mush. Then I discovered the magic of broccolini, that amazing little sibling to regular broccoli, and I swear I finally nailed the perfect simple side dish recipe. This, my friends, is the ultimate way to get roasted broccolini that’s tender-crisp with those little charred, happy tips, all done in under 20 minutes. Trust me, once you try this garlic lemon combo, it’s the only way you’ll want to cook it!
Why This Garlic Lemon Roasted Broccolini is Your New Favorite Quick Vegetable Side Dish
It took me entirely too long to realize that broccolini isn’t just a fancy version of broccoli; it cooks completely differently! That’s why this specific broccolini recipe has become my go-to when I need something vibrant on the table fast. I’m talking about a dish that doesn’t require babysitting, yet somehow tastes like it took hours of effort. Honestly, it just ticks every single box for a genuinely good, satisfying side dish.
Here’s exactly why this one beats every other quick vegetable side dish I’ve ever tried:
- Speed is King: Honestly, the active prep takes about five minutes flat. With a 15-minute cook time, you can easily get this done while your main protein is resting or finishing up. We’re talking under 20 minutes total, which is music to my ears on a Tuesday.
- Flavor Bomb: I’m a huge sucker for the classics, and you simply can’t beat olive oil, fresh garlic, and bright lemon. It wakes up the slightly earthy flavor of the baby broccoli perfectly.
- That Holy Grail Texture: Forget soggy green things! The goal here is tender crisp broccolini. The roasting method ensures the stalks are tender but the florets get just slightly caramelized and crispy on the edges, which is just divine.
- Clean Eating Approved: If you’re watching macros or cutting out grains, this is perfect. It fits right into routines like keto or paleo, so I often make a huge batch because everyone cleans their plate. If you want another easy healthy recipe, check out my chocolate avocado smoothie for dessert!
Essential Ingredients for Perfect Broccolini Recipe
You only need a handful of very basic things for this, which is another reason I love it so much! There’s no need to run out for weird specialty items. When I’m prepping, I make sure everything is ready to go the second the oven dings. This minimizes dishes later, which is always a win in my book.
For this broccolini recipe, you’ll need about one pound of the green stalks, making sure you trim off any really tough, woody ends right at the bottom. Garlic is non-negotiable; I use three cloves, and I insist on finely minced garlic because those tiny pieces get beautifully fragrant when roasting. We use two tablespoons of good quality olive oil—don’t skimp here, as it helps everything crisp up, or you can swap half of it for melted butter, which makes phenomenal garlic butter broccolini.
Finally, just salt, pepper, and the indispensable fresh lemon juice added right at the end. That bright pop cuts through the richness of the oil and garlic. If you want to see how I use simple ingredients to make something huge, check out my classic lasagna sometime!
How to Prepare Broccolini Using the Sheet Pan Roasting Method
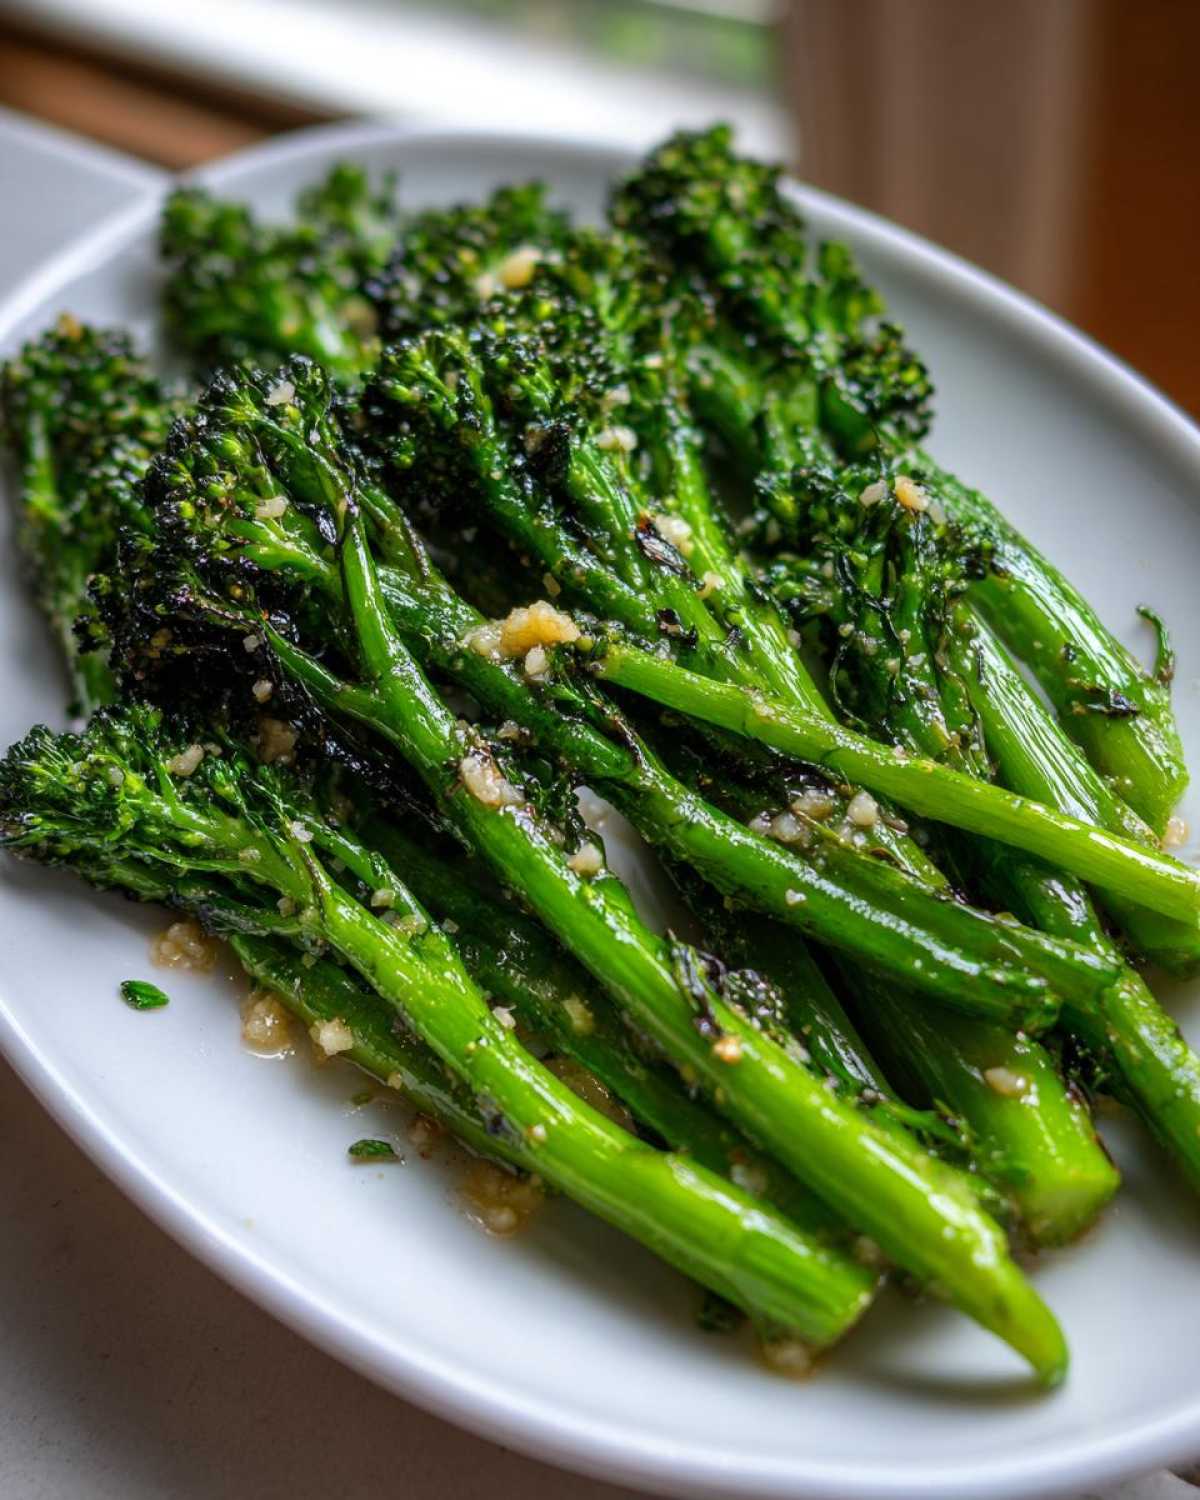
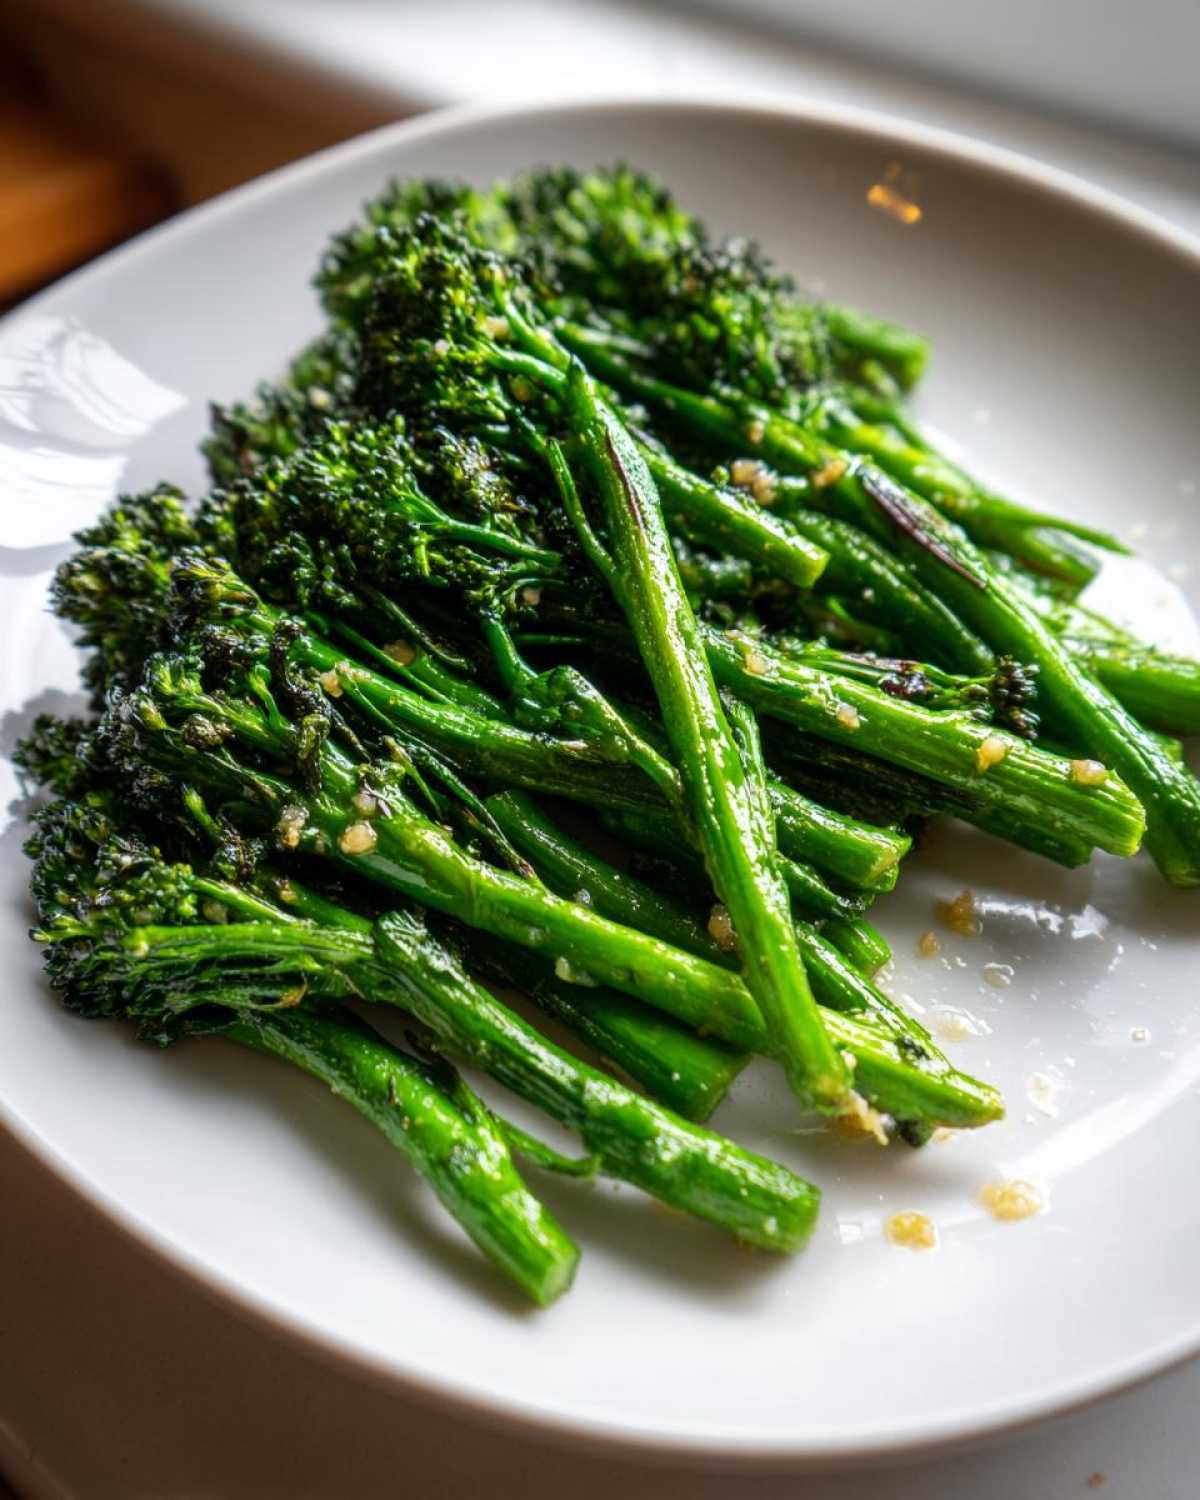
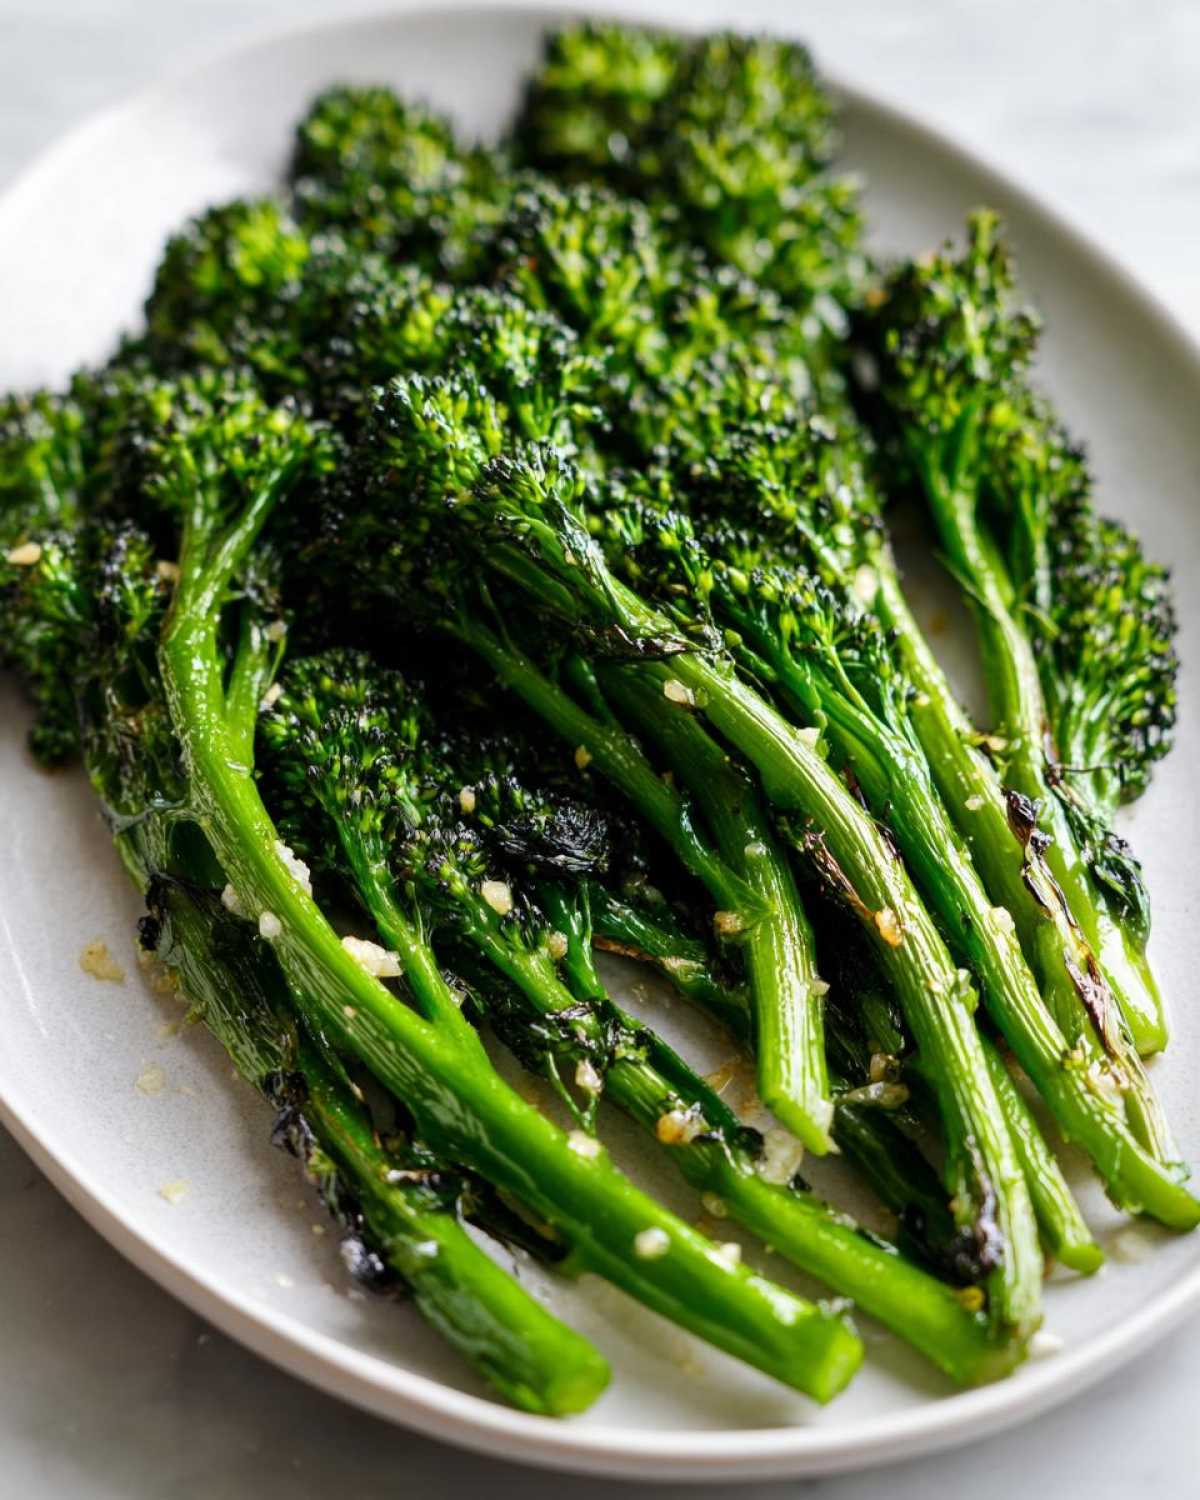
This is where the magic happens, and I promise you, the sheet pan method is the best way to cook broccolini if you want those restaurant-quality crispy bits. Getting tender-crisp texture without turning the vegetables mushy is all about applying high, dry heat quickly. So, the very first thing you must do—don’t skip this—is crank that oven up to 400°F (200°C). While it’s heating, line a sturdy baking sheet with parchment paper. This is key for easy cleanup later, which we always appreciate!
Next, toss your trimmed broccolini right onto that sheet pan. Drizzle on your two tablespoons of olive oil, scatter over the minced garlic, salt, and pepper. Now, use your hands if you want—it gets you more involved!—but make sure every single stalk is nicely coated. This even coating of oil is what guarantees that gorgeous browning we are after. The most critical part of this whole roasted broccolini process is Step 5: spread the vegetable pieces out so they are in a single layer. Seriously, don’t overcrowd the pan! If the stalks are piled up, they steam instead of roast, and you just ruined the effort to get that perfect texture.
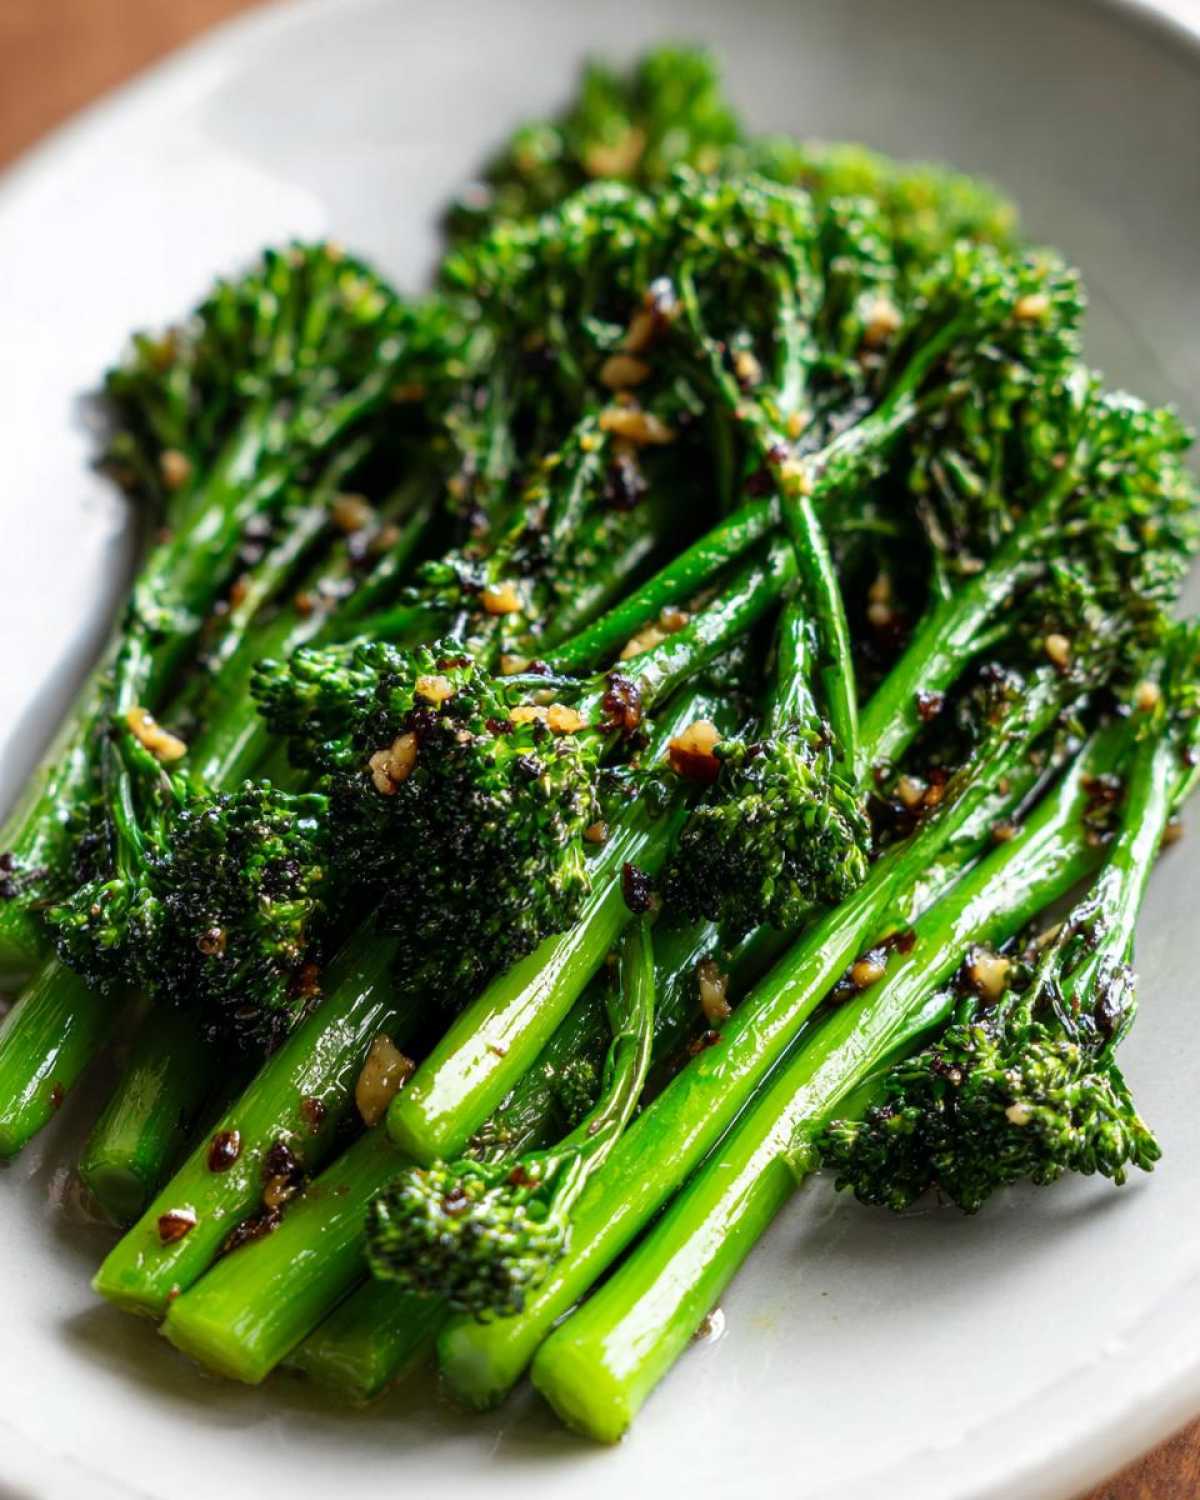
Slide that sheet pan broccolini into the hot oven and let it do its job for about 12 to 15 minutes. You’re looking for the stalks to be fork-tender but not floppy. When they look slightly browned at the tips, pull them out immediately. The final step for flavor is adding that fresh squeeze of lemon juice right before serving. It brightens up the whole dish. If you love crispy roasted vegetables, you absolutely have to check out my recipe for garlic parmesan crispy roasted broccoli—it uses a similar high-heat philosophy!
Tips for Achieving Tender Crisp Broccolini
If your oven runs a little cool, or if you like your edges extra dark and crunchy—and who doesn’t?—I have a little secret that takes this from great to unbelievable. Once the 12 to 15 minutes are up, if the stalks seem tender but the tips aren’t quite browned enough, switch your oven setting to broil. Watch it like a hawk! I mean it—it goes from perfect to charcoal in about 60 seconds flat. Setting the pan about six inches from the heat source works best. This blast of direct heat right at the end is what caramelizes those delicate florets without overcooking the stalks. That’s your shortcut to perfect, deeply flavorful baby broccoli recipes every single time!
Alternative Cooking Methods: Sautéed Broccolini and Air Fryer Options
I preach the sheet pan method tirelessly because it’s hands-off, but hey, sometimes you need dinner faster than you can preheat an oven, or maybe you just don’t want to pull out that big baking tray. That’s when we turn to the stovetop or my beloved air fryer for another fantastic broccolini recipe.
If you’re leaning toward the stovetop, let’s talk sauteed broccolini. This method is unbelievably fast, usually taking only about 6 to 8 minutes. You want a large skillet—cast iron is the best if you have one—hot over medium-high heat with a generous drizzle of olive oil. Toss in your garlic first for about 30 seconds until it smells amazing, then throw in the broccolini. You have to stir constantly here; it’s a quick toss, not a long simmer! This way, you get those gorgeous, slightly blistered spots, and it’s ready before you can even get your silverware out. This is a fantastic answer for everyone looking for easy broccolini sides that don’t involve turning on the big oven.
Now, for my favorite gadget when I’m cooking for just two: the air fryer. If you want those amazing crispy bits we chased with the broiler earlier, the air fryer broccolini will deliver them with zero effort! Just toss your seasoned stalks as usual, shake them into the basket (don’t overlap too much!), and set the temperature to 375°F. They usually take about 8 to 10 minutes. I posted my air fryer roasted chickpeas recipe if you need another quick idea for the basket! The air fryer blasts heat from all sides, giving you that fantastic, uniform browning that makes this truly one of the best ways to cook broccolini when you’re in a hurry.
Ingredient Notes and Substitutions for Your Broccolini Side Dish
Okay, now that you know the roasting technique, let’s talk quality control on the ingredients. While this recipe is simple, the quality of what you put in really impacts the final result, especially since the cooking time is so short. First and foremost: that lemon juice. Please, please, please use fresh lemon juice! Don’t grab that little plastic lemon bottle from the fridge; it has a sharp, canned flavor that just doesn’t complement the mild sweetness of the broccolini. If you squeeze it fresh right over the hot vegetables as they come out, it steams slightly and releases all this incredible fragrance.
Next, the garlic. I specify minced in the instructions, and I stand by that choice for roasting because when it’s fine, it coats everything evenly and toasts without burning too quickly. If you slice it thicker, you run the risk of having crunchy, raw-tasting garlic pieces next to perfectly roasted stalks. If you *have* to use slices, toss them in the oil about two minutes before you add the stalks to the pan so they get a head start softening up.
Also, remember that butter swap I mentioned? If you use melted butter instead of olive oil—even just a tablespoon—you get this beautiful, rich flavor usually reserved for restaurant sides. This is great for maximizing flavor without adding any complicated steps. Because we are relying on natural fats and fresh vegetables here, this simple recipe slides right into whatever dietary framework you’re using. This exact seasoning blend makes this a fantastic option if you’re looking for great keto friendly vegetable sides or reliable paleo side dishes. It’s so versatile!
If you’re feeling inspired to make another side dish while you’re at it, don’t forget to check out my recipe for easy homemade classic lasagna—it’s a bit more involved, but totally worth the effort on a weekend!
Serving Suggestions for Broccolini for Dinner
Getting this incredibly easy roasted broccolini right means you need a main course to go with it, right? That’s the best part! Because this side dish is packed with bright lemon and savory garlic, it basically kisses whatever you pair it with. I find it’s often the star side dish, especially on busy nights when I need a fast, healthy vegetable component for broccolini for dinner.
For proteins, I always default to something that cooks quickly too. Grilled chicken breast chopped up and tossed with a little bit of that leftover lemon juice is phenomenal. But honestly, where this shines is with seafood. If you have about 20 minutes, you have time to make my favorite sheet pan salmon and asparagus recipe! The salmon flavor blends so perfectly with the garlic notes in the broccolini because they cook on the same timing.
If you’re looking for something heartier, this bright green side cuts through the richness of red meat beautifully. A simple medium-rare steak is fantastic when paired with this crispy green veggie. On the starch front, keep it simple so the broccolini can still shine. Fluffy white rice is perfect for soaking up any of the lemon-garlic residue left on the plate, or if I’m keeping things low-carb, I’ll just serve it straight up with my protein!
Storage and Reheating Instructions for Leftover Garlic Broccolini
I always hope for leftovers because, honestly, this garlic broccolini tastes almost as good the next day, provided you handle the reheating right. When I have any bits left over, I generally keep them in an airtight container right in the fridge. If you store it properly away from things that smell strongly, it lasts great for about three to four days. Any longer than that, and the texture starts getting a bit sad, which we definitely want to avoid!
Now, the reheating stage is where people usually mess up easy broccolini sides. Putting these lovely charred stalks in the microwave is basically a death sentence; they’ll turn completely soggy and limp in about 45 seconds. Don’t do it unless you’re in a complete emergency!
If you want to bring back some of that glorious crispness, you have to use dry heat again. My favorite method is taking a skillet—the same one you used for sautéing works perfectly—and heating it over medium-high heat with just a tiny splash of fresh olive oil. Toss the cold broccolini in quickly. Seriously, just 60 to 90 seconds of tossing is all it takes. You’re not really cooking it again; you’re just warming it through and evaporating any condensed moisture that built up in the fridge. It warms up fast and you get back that nice toothsome bite.
If you happen to have leftovers from making my minestrone soup, you know that reheating vegetables properly is half the battle! We want to respect the vegetable even when it’s day-old. If you absolutely must use the oven, spread the leftovers onto that lined baking sheet again, pop it in a 350°F oven for maybe five minutes, but stay close! Honestly, it’s not as good as the skillet trick, but it’s better than the microwave mess. Giving your leftovers a second chance with dry heat keeps this side dish tasting fresh!
Frequently Asked Questions About How to Cook Broccolini
I get so many questions about baby broccoli recipes—it’s understandable, because people are always trying to figure out if it’s worth buying over regular broccoli! I’ve pulled out some of the burning questions I hear all the time about how to cook broccolini and how to get this vegetable just right.
What is the difference between broccoli and broccolini?
This is the big one! They look similar, but they are distinctly different plants. Regular broccoli has a big, thick stalk and a dense head of florets. Broccolini, on the other hand, is actually a hybrid cross between broccoli and Chinese kale, which is why it has those long, thin, tender stems and much smaller florets. The stems cook way faster than regular broccoli, and they have a slightly sweeter, milder flavor. That’s why you don’t need to steam it for forever like you might with traditional broccoli!
Can I use frozen broccolini for this recipe?
Oh, I wouldn’t recommend it for this specific recipe, and I’m going to tell you why. When we are trying to achieve that fantastic tender crisp broccolini with charred edges, we need a dry surface. Frozen vegetables, even after you thaw and drain them, hold onto too much water. If you throw frozen broccolini onto the sheet pan here, it will steam itself into soggy submission before it has a chance to brown. Stick to fresh for this garlic lemon preparation!
How do you tell when broccolini is perfectly cooked?
It’s all about the fork test, but with a gentle squeeze for confirmation! A perfectly cooked stalk should yield when you press it gently with a fork, meaning it’s tender all the way through. However, you don’t want it flopping over. The tips should look visibly slightly darkened—that’s your cue that the caramelization happened. If you’re aiming for the *best* roast, it should take about 15 minutes at 400°F. If you want to know more about my general philosophy on vegetable roasting, you can read all about me over on my About Me page!
Is broccolini naturally Keto or Paleo friendly?
Absolutely, yes! That’s one of the huge selling points for this vegetable. Since our recipe relies just on olive oil, garlic, lemon, and the vegetable itself, it’s incredibly clean. Broccolini is low in carbs and high in fiber, making it an amazing staple for anyone following those dietary styles. It’s a fantastic way to bulk up a meal without adding a lot of starch, which is why you see it pop up so often in keto friendly vegetable sides.
Nutritional Overview of This Healthy Side Recipe
I know a lot of you are tracking macros or just trying to keep things light and clean, especially when you’re looking for healthy side recipes. While the main goal of this recipe is flavor and speed—it’s our go-to 15 minute vegetable side, after all—it’s fantastic that it’s also really good for you! Since we’re using simple, whole ingredients, this broccolini recipe is easy to fit into almost any healthy eating plan.
Based on the ingredients listed in the full recipe (assuming 4 servings), here’s a quick snapshot of what you’re looking at per serving. Keep in mind these are estimates, because if you use a heavier hand with the olive oil or add a squeeze of extra lemon, things will shift a touch!
- Calories: About 75 per serving. That’s wonderful for a side dish!
- Fat: Roughly 5 grams. Most of this good fat comes directly from the olive oil we use for roasting.
- Carbohydrates: About 6 grams total.
- Protein: A solid 3 grams to round things out.
- Fiber: You get about 3 grams of fiber in that small plate, which is excellent for digestion.
Because we rely purely on olive oil and fresh vegetables and avoid processed sweeteners or starches (unless you count the natural sugars in the vegetable itself!), this remains a fantastic choice for anyone trying to keep their sugar counts low or stick to principles for Keto friendly vegetable sides. It proves that healthy eating doesn’t ever have to mean boring eating. Enjoy that crispy green goodness!
Print
15-Minute Garlic Lemon Roasted Broccolini
- Total Time: 20 min
- Yield: 4 servings 1x
- Diet: Low Fat
Description
A fast and simple recipe for roasting broccolini until tender-crisp with slightly charred edges, seasoned with garlic and fresh lemon.
Ingredients
- 1 lb broccolini, trimmed
- 2 tablespoons olive oil
- 3 cloves garlic, minced
- 1/4 teaspoon salt
- 1/8 teaspoon black pepper
- 1 tablespoon fresh lemon juice
Instructions
- Preheat your oven to 400°F (200°C). Line a baking sheet with parchment paper.
- Place the trimmed broccolini on the prepared baking sheet.
- Drizzle the olive oil over the broccolini.
- Add the minced garlic, salt, and pepper. Toss everything together until the broccolini is evenly coated.
- Spread the broccolini in a single layer on the sheet.
- Roast for 12 to 15 minutes, or until the stalks are tender and the tips are slightly browned and crisp.
- Remove from the oven and immediately drizzle with fresh lemon juice before serving.
Notes
- For extra crisp edges, you can briefly place the baking sheet under the broiler for the last 1-2 minutes, watching closely to prevent burning.
- If you prefer a richer flavor, substitute 1 tablespoon of the olive oil with 1 tablespoon of melted butter.
- This recipe works well for Keto, Paleo, and Gluten-Free diets.
- Prep Time: 5 min
- Cook Time: 15 min
- Category: Side Dish
- Method: Roasting
- Cuisine: American
Nutrition
- Serving Size: 1/4 of recipe
- Calories: 75
- Sugar: 1
- Sodium: 150
- Fat: 5
- Saturated Fat: 0.7
- Unsaturated Fat: 4.3
- Trans Fat: 0
- Carbohydrates: 6
- Fiber: 3
- Protein: 3
- Cholesterol: 0