Listen, if you think you know chocolate cake, well, you might want to sit down for this one. I adore a simple, rich chocolate dessert, but when you mix in the salty, sweet perfection of a Reese Peanut Butter Cup with that signature sunken, gooey interior of an Earthquake Cake? That’s not dessert anymore—that’s a culinary event. Trust me, after trying maybe a dozen versions, I finally nailed it.
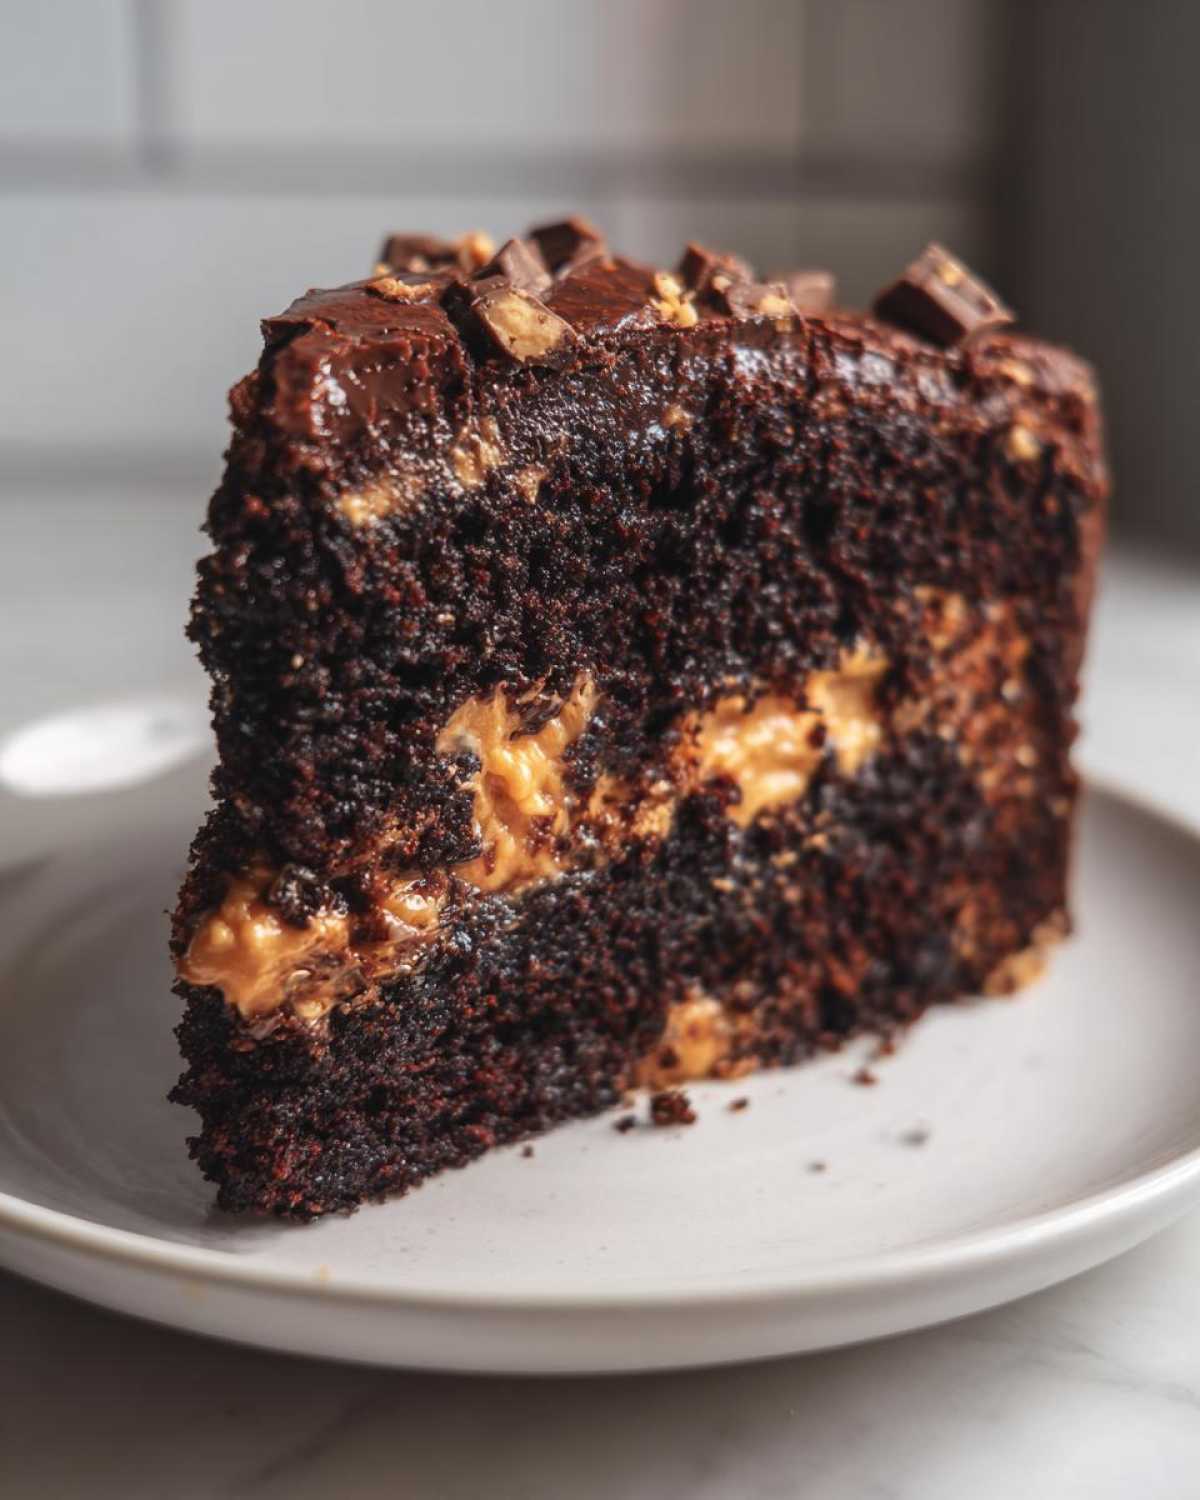
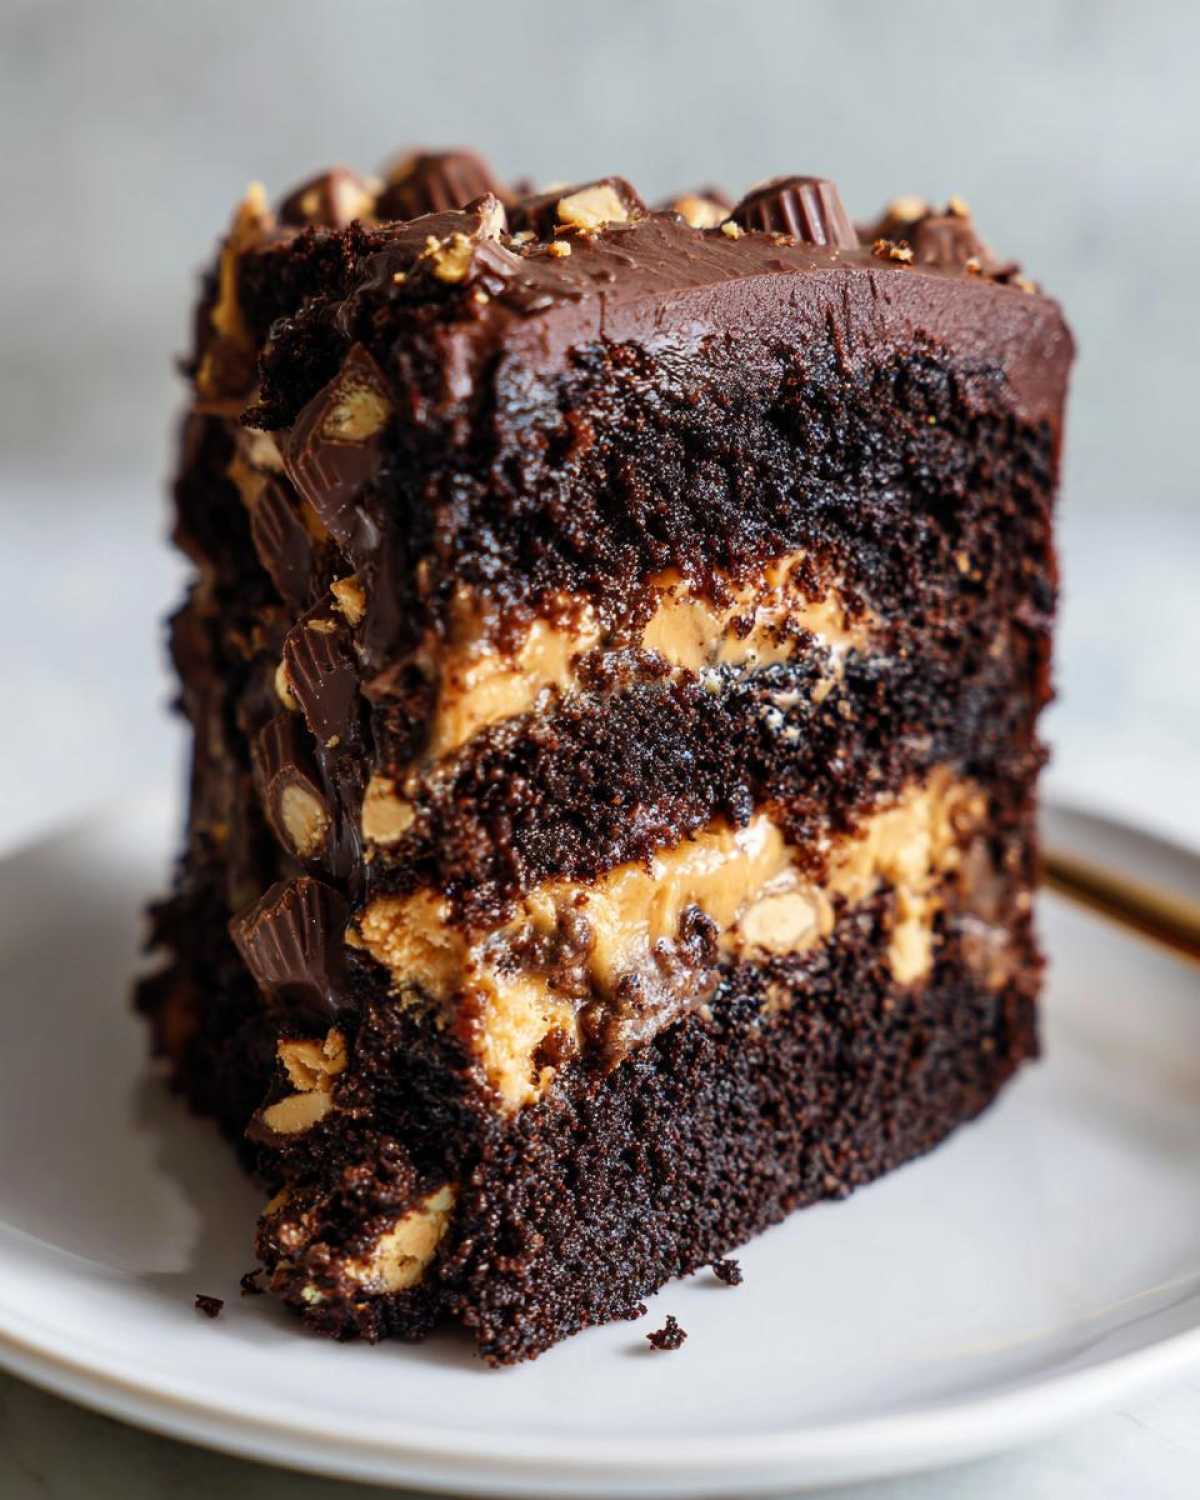
This isn’t like those dry layered cakes; this is deep down, fudgy, needs-a-fork, scoop-it-out deliciousness. My version of the Reese Peanut Butter Cup Earthquake Cake Chocolate recipe ensures you get that intensely rich chocolate base laced with pockets of melted peanut butter filling. It’s the ultimate combination of textures and flavors, and honestly, it’s my go-to when I need to really spoil someone.
Why This Reese Peanut Butter Cup Earthquake Cake Chocolate Recipe Works (E-E-A-T)
What makes this cake so special? It beats a regular boxed cake mix, hands down, because we are hacking the system to get that gourmet texture without spending hours fussing. It’s incredibly easy—almost a dump cake style—but the result looks and tastes like you worked all day on it. This recipe is all about texture payoff, which is why I spent so much time testing the ratios.
We get that incredible result because the ingredients interact perfectly. I’ve even linked over to my flourless decadent chocolate lava cake post where I talk about how much I love rich textures, and this falls right in line!
Achieving the Gooey Earthquake Cake Texture
This is the secret sauce for any good earthquake cake! You put those dollops of cream cheese filling right on top of the chocolate batter, and as it bakes, gravity does the work. The filling sinks down, creating those delicious, moist, cavernous pockets. Trust me, if you try to stir it in, you ruin the whole effect. That sinking action is what sets this apart from any basic chocolate peanut butter cup cake recipe.
The Ultimate Chocolate Peanut Butter Cake Recipe Flavor Profile
We nail the flavor by balancing the really dark, rich chocolate base with the salty tang of the peanut butter filling. Then, you throw in the chunks of Reese candy and chocolate chips! Every bite is a perfect combination of salty and sweet. It’s decadent, yes, but it’s that salty counterpoint that makes you reach for a second piece of this ultimate chocolate peanut butter bake.
Gathering Ingredients for Your Reese Peanut Butter Cup Earthquake Cake Chocolate
Okay, before we even think about turning on the oven, we need to get our supplies lined up. This cake is so easy because we start with a mix, but those extra additions are what turn it into the ultimate chocolate peanut butter bake. You want everything ready ahead of time so you can move fast once the mixing begins. If you’re looking for tips on making a truly rich chocolate base from scratch, I have a great moist fudgy chocolate cake recipe, but for this earthquake style, this combination is gold.
Cake Batter Components
For the main chocolate layer, you’re going to need the basics: one full box of chocolate cake mix—don’t stress about the brand, just grab your favorite! To boost it up, grab one cup of all-purpose flour, one cup of plain granulated sugar, one teaspoon of baking soda, and half a teaspoon of salt. For wet ingredients, keep one cup of water cold, half a cup of regular vegetable oil, two large eggs, and just one teaspoon of vanilla extract. That’s it for the base!
Peanut Butter Filling and Toppings for Reese Cake
Now for the fun part! You must have one 8-ounce package of cream cheese that is completely softened—this is important for a smooth filling. Pair that with one cup of powdered sugar, half a cup of creamy peanut butter (the smooth stuff works best here!), and then the stars of the show: about one cup of chopped Reese Peanut Butter Cups and one full cup of semi-sweet chocolate chips. Don’t skimp on the chips; they melt beautifully into the crevices!
Easy Earthquake Cake Instructions for Perfect Reese Peanut Butter Cup Earthquake Cake Chocolate
Listen, this recipe is designed so you can have a complex-tasting dessert on the table without all the fuss. We’re moving fast, so make sure your cream cheese is good and soft before you start, or your filling is going to be lumpy! If you need a refresher on prepping pans, I detailed my favorite foolproof method over here at my easy earthquake cake instructions guide.
Preparing the Base Batter
First things first: set your oven to 350 degrees Fahrenheit, and make sure you grease and flour that 9×13 inch pan really well. In a big bowl, gently whisk together your chocolate cake mix, flour, sugar, and baking soda. Then, add the cold water, oil, eggs, and vanilla. This is important: beat that mixture on medium speed for a full two minutes. Don’t stop early! That two minutes is what gets the air in there. Pour that chocolate batter evenly into your prepared pan.
Creating and Layering the Peanut Butter Filling
Now for that luxurious filling. In a separate bowl, beat your softened cream cheese until it’s silky smooth. Gradually mix in the powdered sugar, then beat in the peanut butter until everything is perfectly uniform. Grab a spoon, and randomly drop dollops of this mixture all over the chocolate batter. Do not try to spread it! Seriously, let it sit in random globs—that’s how the pockets form. Then, scatter your chopped Reese Peanut Butter Cups and the chocolate chips right on top!
Baking and Cooling the Decadent Chocolate Dessert
Pop that pan into the preheated oven and let it bake for 40 to 45 minutes. You want a toothpick inserted near the edge to come out clean, but don’t panic if the very center looks too moist or gooey—that’s the whole point of this decadent chocolate dessert! Once it’s out, you have to let it cool completely in that pan. It needs time to settle down, even though the temptation to dive in right away will be strong!
Tips for Success with Your Moist Chocolate Cake with Peanut Butter Filling
Even though this is ridiculously easy, a couple of little tricks make this moist chocolate cake with peanut butter filling absolutely flawless every time. My first pro tip comes straight from the recipe card: if you want an extra layer of deep chocolate flavor that really complements the peanut butter, swap that cold water out for strong, cold brewed coffee. Wow, what a difference that makes!
Also, when you’re making that peanut butter filling, make sure your cream cheese is truly room temperature, not just slightly soft. If it’s too cold, you’ll get little annoying lumps in your filling, and we want smooth pockets of heaven! If you’re short on time, I’ve shared how I keep ingredients perfectly tempered over on my guide to moist sour cream coffee cake. If you chill the filling for about 15 minutes before dropping it on the batter, it holds its shape a little better during the initial bake, too!
Storage and Reheating Instructions for This Rich Chocolate Dump Cake Style
You definitely won’t finish this rich chocolate dump cake style treat in one sitting, so you need to know how to keep it perfect! Store any leftovers tightly covered right there on the counter at room temperature for up to two days. Since this cake is so moist, the fridge can sometimes dry it out slightly. If you need it to last longer, pop it into the refrigerator for four days maximum. If you want to see how I manage super rich chocolate items like this, check out my guide on easy 3-ingredient chocolate fudge!
When you are ready for a piece later, skip the microwave if you can! Just let a slice sit on the counter for 30 minutes to come back to room temperature—that lets the peanut butter gooey pockets soften up again. If you’re impatient like me, you can zap it for just 10 seconds, but room temp is truly the winner here for texture.
Serving Suggestions for the Ultimate Chocolate Peanut Butter Bake
You’ve made this incredible, over-the-top chocolate peanut butter bake, and now you need to present it, right? Because this cake is so intensely rich and fudgy, I like to keep the toppings simple—we don’t want to compete with the Reese candy!
A light dusting of powdered sugar goes a long way to make it look finished. If you want something colder, a scoop of good quality vanilla ice cream is non-negotiable because the cold creaminess is amazing against the warm, gooey peanut butter pockets. For a little brightness, serve it alongside some fresh raspberries—the tartness cuts through the richness perfectly. If you’re feeling ambitious, you could whip up a quick batch of my vanilla buttercream frosting, but honestly, it usually doesn’t even make it out of the kitchen!
Frequently Asked Questions About the Reese Peanut Butter Cup Earthquake Cake Chocolate
I get so many questions about this bake, and honestly, I love hearing how everyone is modifying it! It shows you’re excited to try this unique chocolate cake texture. Before you panic if something looks different than expected, check these common concerns first!
Can I substitute the cake mix for a homemade chocolate cake base?
You absolutely could try it, but honestly, you’d lose the magic of the whole ‘dump cake’ style which makes this recipe so quick! If you choose to go homemade, you have to be super careful with your wet-to-dry ratios. We need that specific balance to support the peanut butter filling as it sinks. If your batter is too thin, it’ll just mix right in, and we want those distinct layers!
Why is my Gooey Earthquake Cake center still liquid after baking?
Oh, this is the best part! If the center looks a little wet when you pull it out, don’t panic—that’s exactly what we’re aiming for to get that amazing gooey earthquake cake texture. The recipe relies on that center staying incredibly moist. If it looks truly liquid-y and raw, just pop it back in the oven for another five minutes and check again. Moist crumbs are the goal, not fully set cake!
What is the best way to store leftovers of this Best Reese Cake Recipe?
Because this bake has so much moisture from the filling, I find it’s actually best kept on the counter, covered tightly, for the first two days. If you put it right into the fridge, the texture can firm up too much. If you need it to last longer than that, go ahead and refrigerate it for a total of four days. The main thing is to let any slice sit out for about 20 minutes before you eat it so that peanut butter filling gets soft again.
For more tips on handling super rich desserts, you might want to check out my guide on chocolate chip zucchini bread—it has great info on keeping high-moisture baked goods fresh!
Estimated Nutritional Data for This Decadent Chocolate Dessert
Now, I’m keeping it real: this decadent chocolate dessert is not exactly health food, is it? It’s pure indulgence! But since I know some of you are curious, here are the averages based on my ingredients list. Keep in mind these are just estimates, because the brand of chocolate chips or the exact size of your Reese Cups can change things!
For one slice, you are looking at roughly 450 calories, 45 grams of sugar, and 25 grams of fat. If you want to see how I handle lower-carb treats sometimes, take a peek at my post on keto fudgy brownies. But for this rich bake, just embrace the gooey-ness!
Share Your Ultimate Chocolate Peanut Butter Bake Experience
Listen, I put my heart and soul into getting this Reese Peanut Butter Cup Earthquake Cake Chocolate just right, and I absolutely live to see your results! If you made this ultimate chocolate peanut butter bake, I want to hear every single detail.
Did you use coffee instead of water? Did the peanut butter filling sink perfectly? Did your family hover waiting for that gooey center to cool? Don’t just leave me hanging!
Please take a picture and share it below, or rate the recipe so other bakers know what to expect. It helps me keep making sure these recipes are the best they can be. If you’ve got other favorite ways to eat this magnificent chocolate creation—maybe with a side of my peanut butter cup cookies—leave the suggestion in the comments!
Print
Reese Peanut Butter Cup Earthquake Chocolate Cake
- Total Time: 60 min
- Yield: 12 servings 1x
- Diet: Vegetarian
Description
A rich, fudgy chocolate cake featuring pockets of peanut butter filling and chopped Reese Peanut Butter Cups, creating the signature moist, gooey texture of an earthquake cake.
Ingredients
- 1 box (15.25 oz) chocolate cake mix
- 1 cup all-purpose flour
- 1 cup granulated sugar
- 1 teaspoon baking soda
- 1/2 teaspoon salt
- 1 cup cold water
- 1/2 cup vegetable oil
- 2 large eggs
- 1 teaspoon vanilla extract
- 1 package (8 oz) cream cheese, softened
- 1 cup powdered sugar
- 1/2 cup creamy peanut butter
- 1 cup chopped Reese Peanut Butter Cups
- 1 cup semi-sweet chocolate chips
Instructions
- Preheat your oven to 350 degrees Fahrenheit. Grease and flour a 9×13 inch baking pan.
- In a large bowl, whisk together the cake mix, flour, granulated sugar, and baking soda.
- Add the cold water, vegetable oil, eggs, and vanilla extract to the dry ingredients. Beat with an electric mixer on medium speed for two minutes until well combined. Pour the batter into the prepared pan.
- In a separate medium bowl, beat the softened cream cheese until smooth. Gradually beat in the powdered sugar until fully incorporated. Add the peanut butter and mix until the filling is uniform.
- Drop spoonfuls of the peanut butter mixture randomly over the cake batter in the pan. Do not spread.
- Sprinkle the chopped Reese Peanut Butter Cups and the chocolate chips evenly over the top of the batter and filling.
- Bake for 40 to 45 minutes, or until a toothpick inserted near the edge comes out clean. The center will remain very moist and gooey.
- Let the cake cool completely in the pan before slicing and serving.
Notes
- For an even richer texture, you can substitute the water in the cake batter with an equal amount of strong brewed coffee.
- If you prefer a slightly firmer peanut butter layer, chill the cream cheese mixture for 15 minutes before dropping it onto the batter.
- This cake is best served at room temperature or slightly warm.
- Prep Time: 15 min
- Cook Time: 45 min
- Category: Dessert
- Method: Baking
- Cuisine: American
Nutrition
- Serving Size: 1 slice
- Calories: 450
- Sugar: 45
- Sodium: 350
- Fat: 25
- Saturated Fat: 8
- Unsaturated Fat: 17
- Trans Fat: 0
- Carbohydrates: 55
- Fiber: 2
- Protein: 6
- Cholesterol: 30