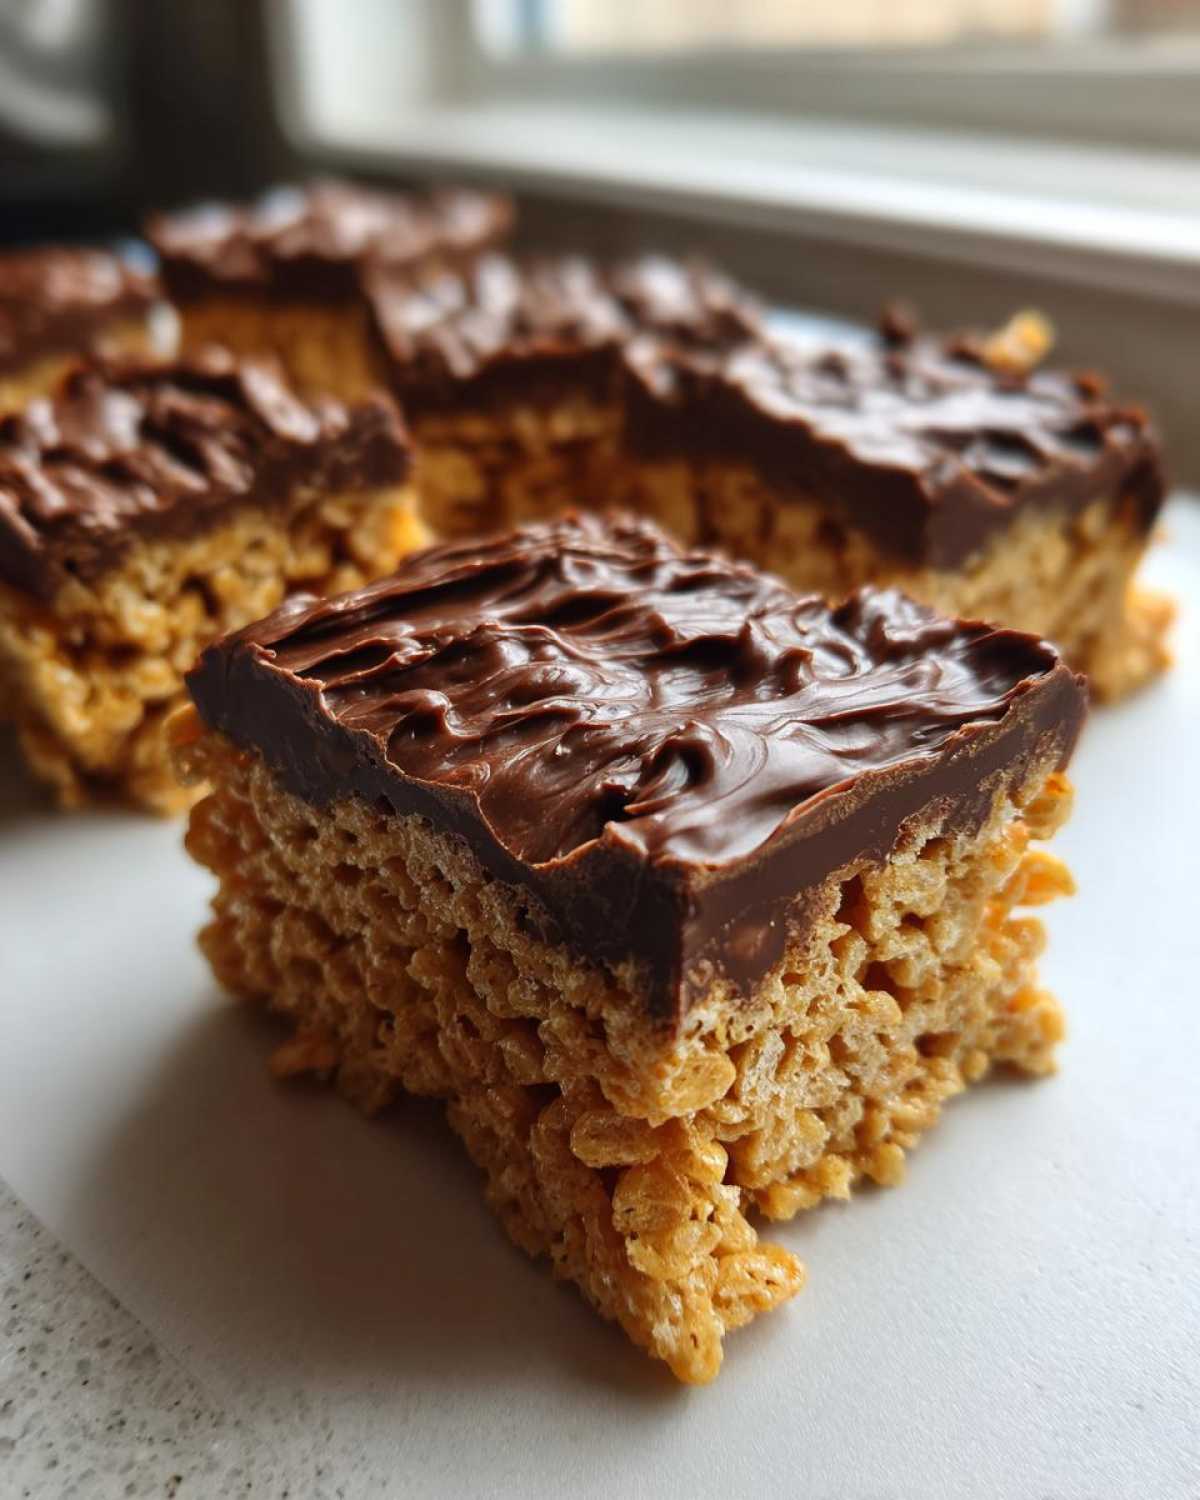
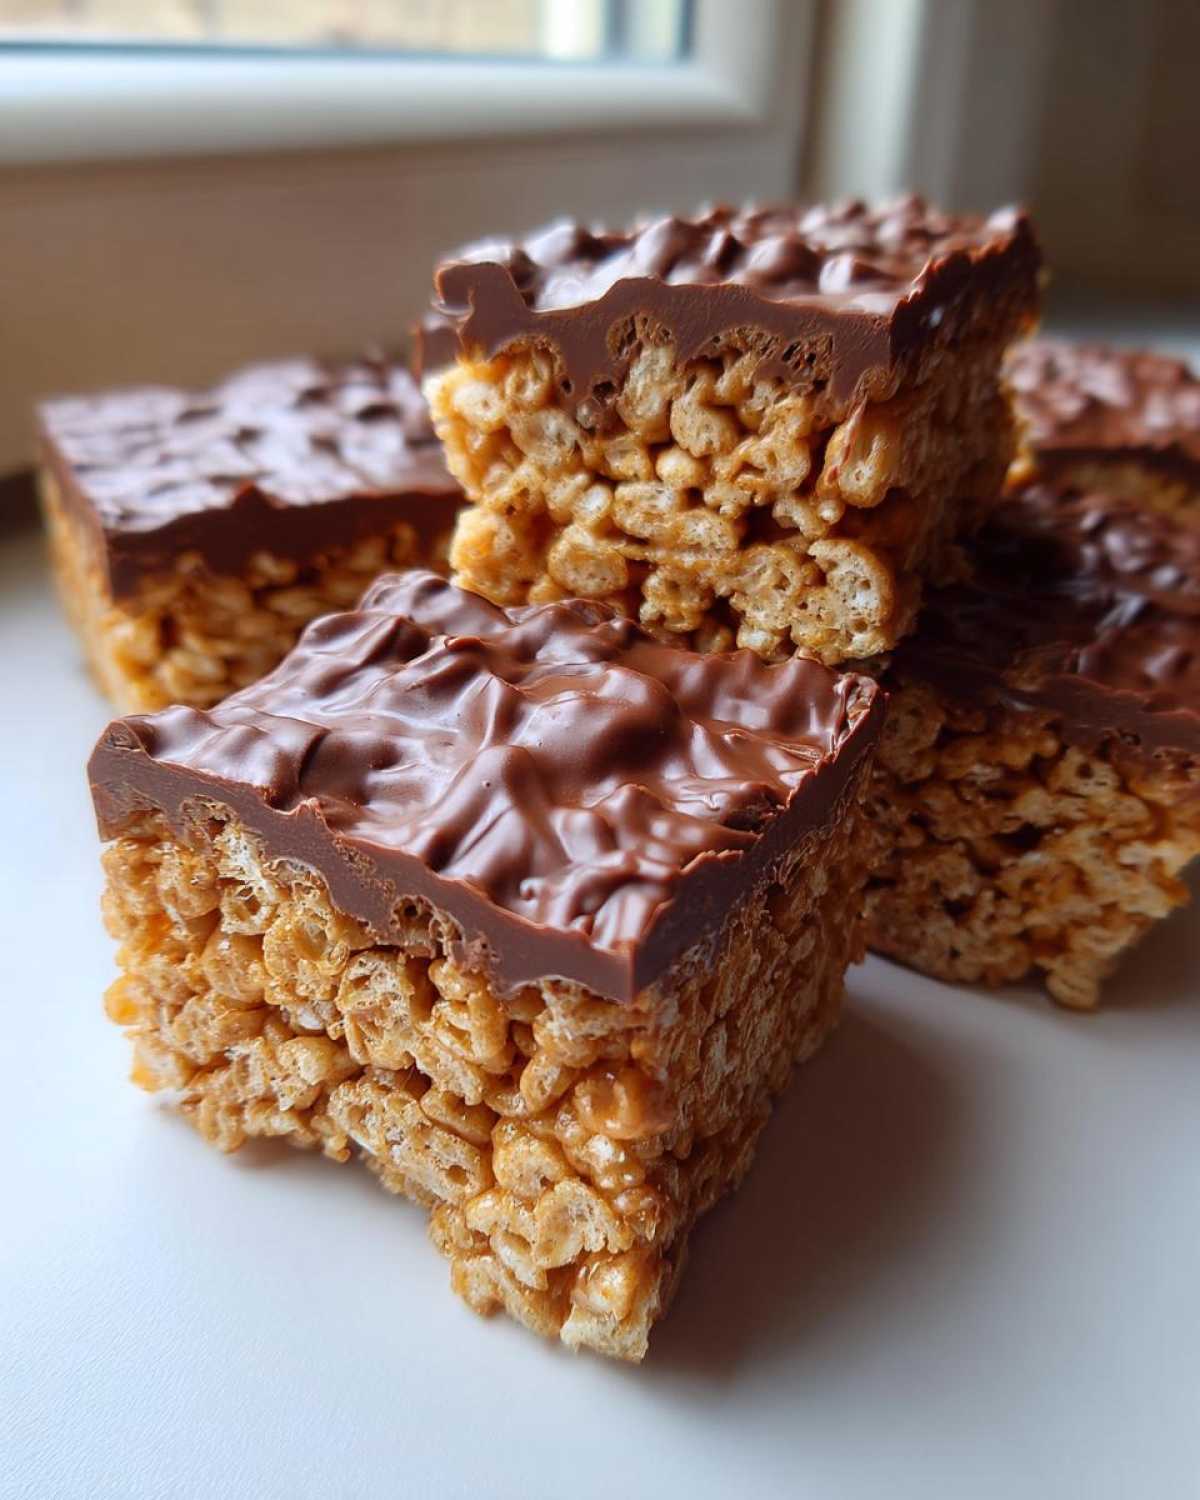
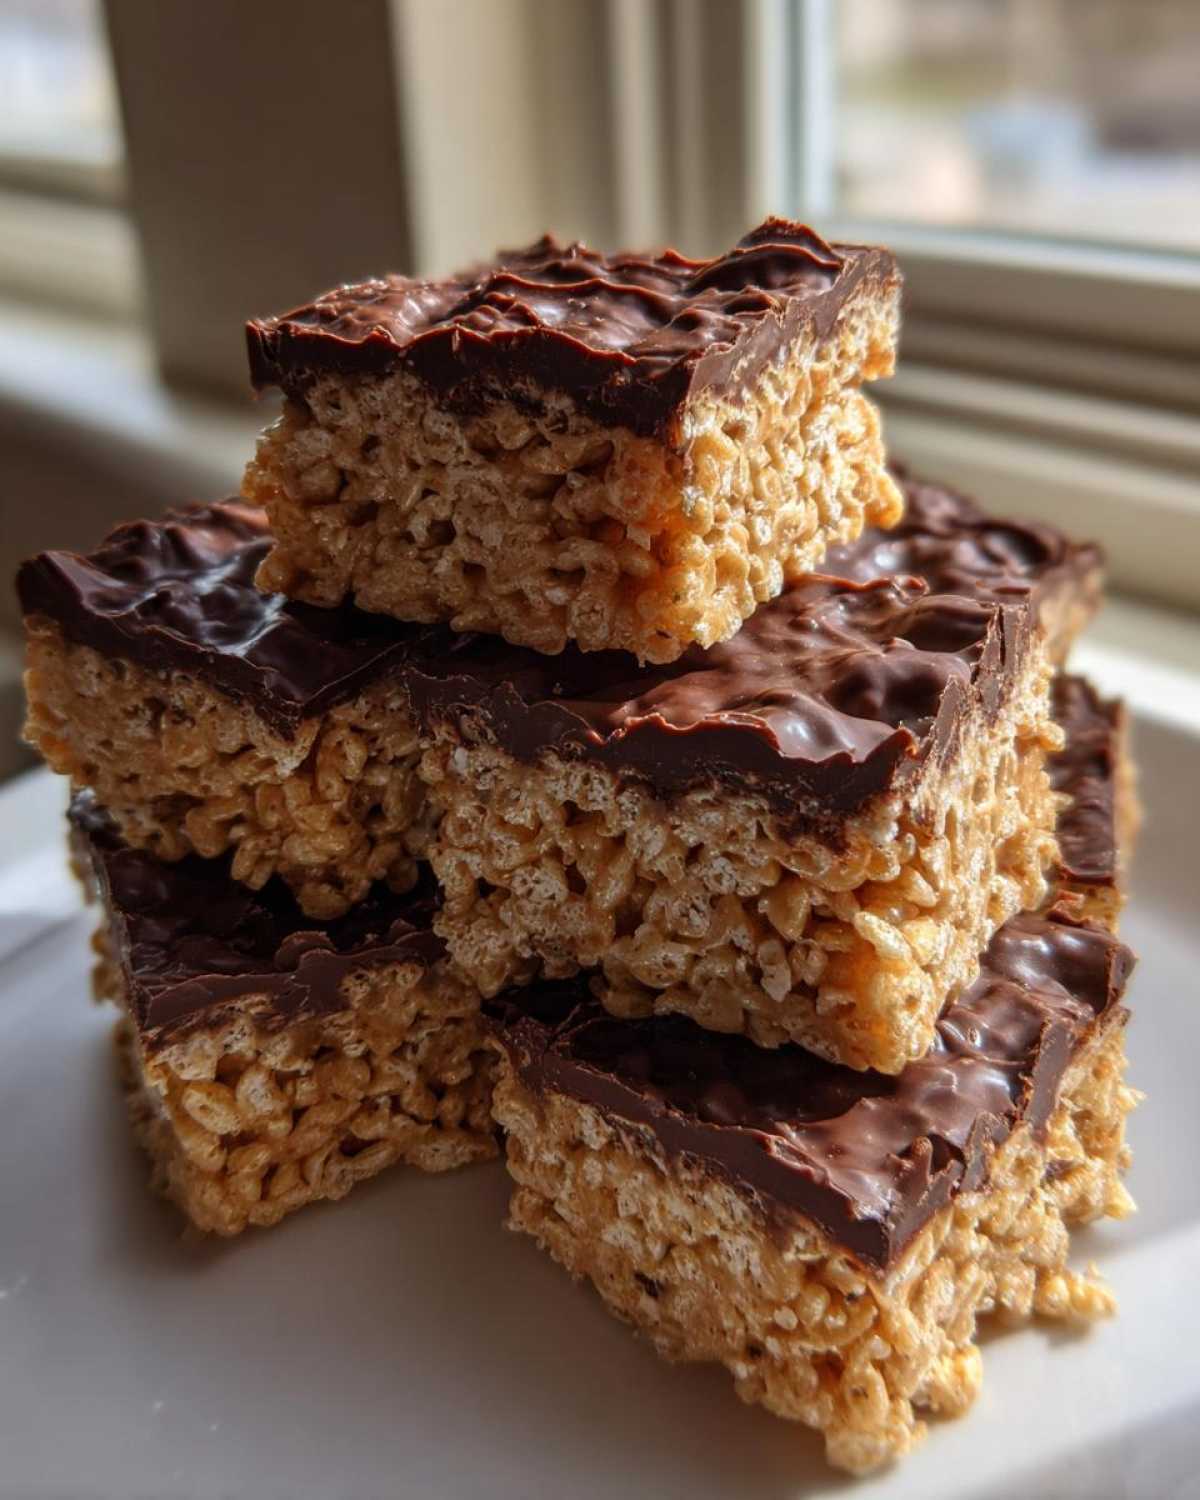
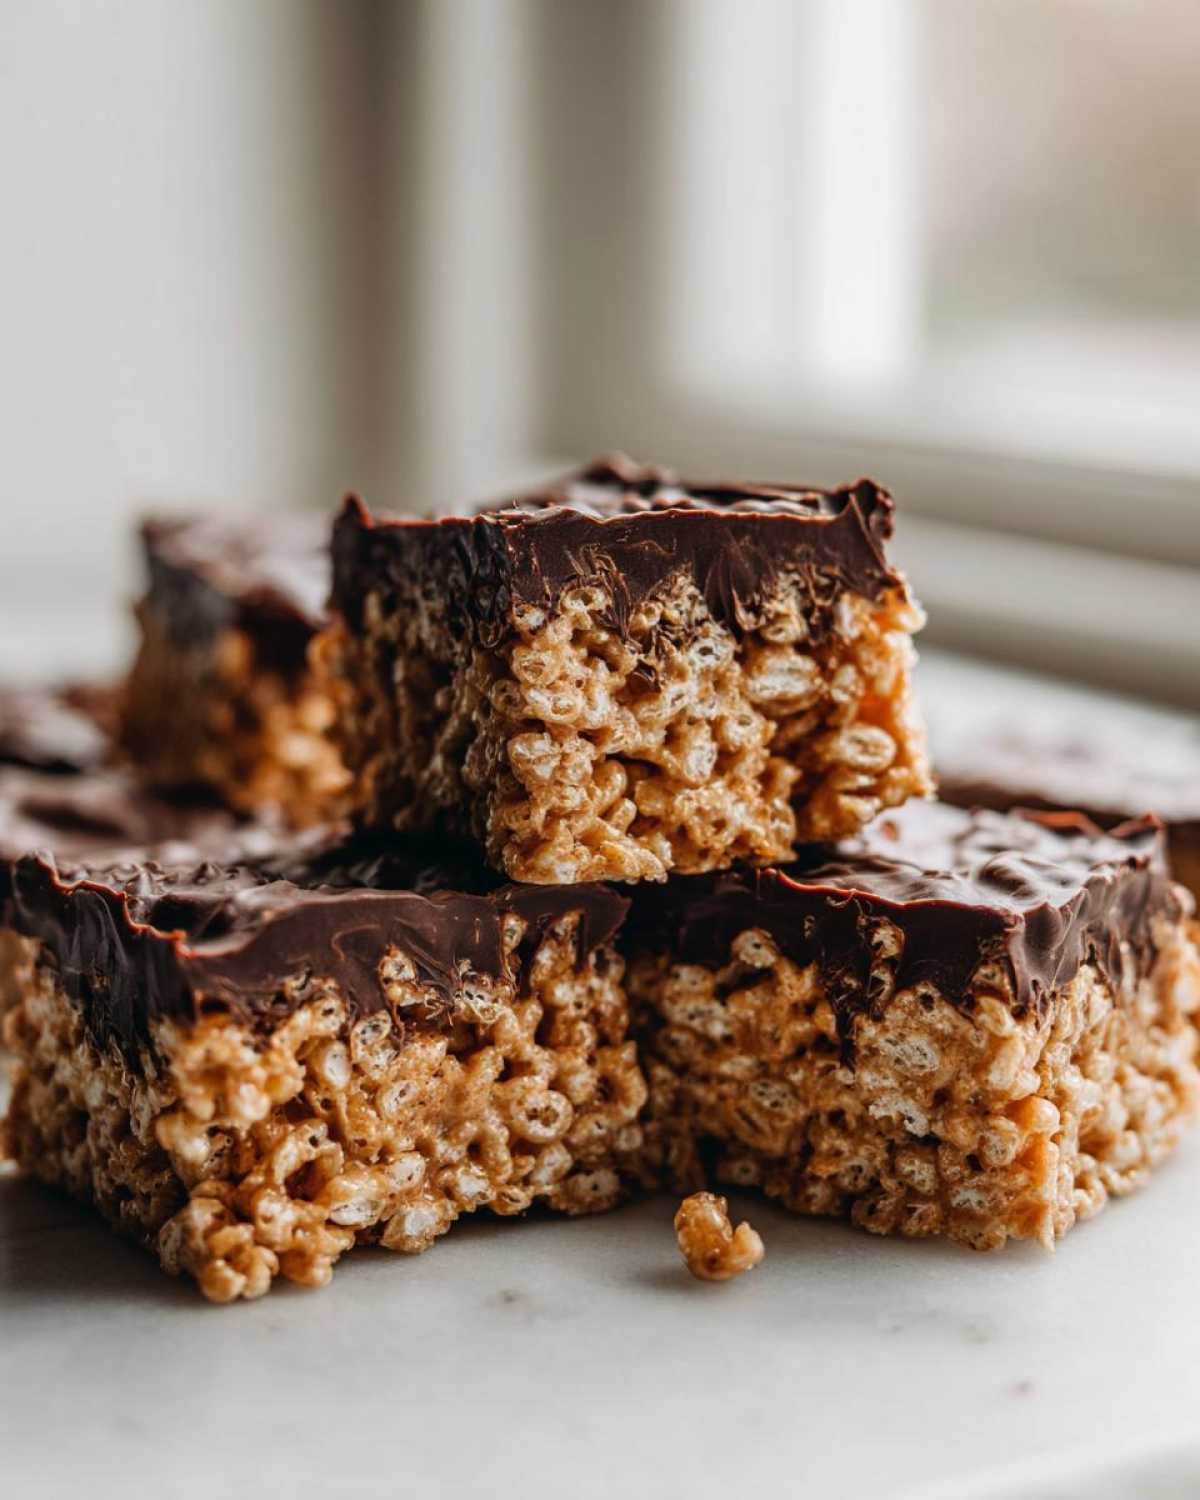
Raise your hand if you instantly smell your elementary school cafeteria just reading the words “Rice Krispie Treats”! Oh, those were the days, right? Liam, my husband, makes food that sings opera, but sometimes, you just need that pure, simple, chewy joy of childhood. Well, today, I, Sara, your resident Flavorful Muse—you can read a little more about my chaotic ways on the About Me page—am bringing you the grown-up, perfected version: the Ultimate Chewy peanut butter rice krispie treats with Chocolate Topping. Forget the hard, stale squares you sometimes get! We nail the soft, gooey texture AND make sure these peanut butter Rice Krispie treats are perfectly sturdy so they don’t crumble everywhere on you. It’s all about slow melting and gentle jazz hands in the mixing stage!
Why You Will Love These Chewy peanut butter rice krispie treats
I promise you, these aren’t your grandma’s rock-hard squares (though bless her heart for trying!). When you follow Liam’s gentle melding process, you get melt-in-your-mouth goodness every single time. We’re upgrading the classic snack into something truly special. If you’re looking for the ultimate comfort food experience that satisfies that sweet + salty craving, look no further.
- They are unbelievably soft and that gooey marshmallow pull is non-negotiable!
- You get that rich peanut butter flavor throughout the entire bar, not just a hint.
- The chocolate topping makes them feel fancy without adding any real work.
Soft, Gooey Texture Guaranteed
The secret to truly gooey marshmallow treats is patience—and low heat! If you rush the marshmallows, they seize up and everything gets stiff fast. We keep the stovetop heat low and slow when we melt the butter and peanut butter first. This ensures the marshmallows incorporate beautifully, giving you that perfect stretchiness when you bite in.
Quick Peanut Butter Snack Ready Fast
Seriously, this is magic for busy weeknights! These peanut butter rice krispie treats come together faster than ordering takeout—we’re talking about 15 minutes total time before they head off to cool. This checks every box when you need an Easy 15 Minute Dessert that still feels indulgent. No oven required, which is always a win in my book!
Nostalgic Childhood Desserts Reimagined
Who doesn’t love a good dose of nostalgia? These Peanut Butter Rice Krispie Bars bring me right back to school lunch boxes, but we gave them a serious glow-up with the chocolate layer. The combination of creamy peanut butter and sweet, melted chocolate is just divine. It turns a simple cereal bar into a beautiful moment!
Essential Ingredients for Perfect peanut butter rice krispie treats
Okay, since this is a no-bake wonder—which means the ingredients *are* the performance—we have to be a little bossy about quality here at Child Recipe. Liam usually laughs at me, but for these peanut butter rice krispie treats, skipping on the good stuff means a less gooey result, and we just can’t have that drama! We need to use two different kinds of peanut butter action, for instance. The ingredient list gives you the exact plan, but before you rush to the pantry, let me give you my personal notes, because that’s where the magic hides.
For this recipe, you’ll grab six tablespoons of butter, a full cup of that lovely creamy peanut butter, a 10-ounce bag of miniature marshmallows (trust me, minis melt faster and smoother!), six cups of that crispy rice cereal, and then, for the topping upgrade, some semi-sweet chocolate chips and just one more tablespoon of butter for gloss.
Ingredient Notes and Substitutions
Now, let’s talk peanut butter. To get that perfect, luscious base, I insist on using creamy peanut butter—the kind that you stir a little before using. If you use the natural, oily stuff, you might need an extra marshmallow or two to help it set right, so stick to creamy for guaranteed success! Also, make sure your marshmallows are fresh. If they’ve been sitting open since last Halloween, they are going to leave you with hard little lumps in your otherwise soft, chewy Rice Krispie Treats.
The chocolate on top? That’s completely up to you! If you want to take a total trip down memory lane and make something like a classic Scotcharoos Recipe, swap out half those chocolate chips for butterscotch chips. I only use semi-sweet because it cuts through the richness of the peanut butter, but milk chocolate fans are obviously welcome at my party, too! If you’re after that traditional Peanut Butter Krispie Squares experience without the chocolate, just skip the topping entirely—the base is still incredible on its own!
Once you’ve gathered your players, head over to my post about No Bake Peanut Butter Oat Bars; sometimes I swap out cereal for oats in other recipes, so you can see how I play with pantry staples!
Step-by-Step Guide to Making peanut butter rice krispie treats
Alright, time for the main act! This is where the real fun happens. Since we just want fantastic, gooey peanut butter rice krispie treats, we need to move with purpose but without rushing the heat. Remember, we are making a performance, not an emergency! First thing’s first: get your 9×13 pan ready. I always recommend lining it completely with parchment paper first, letting those edges hang over the side like little handles. This is my number one trick for lifting the whole block out later so you can cut perfect squares—no struggling required!
Next, grab your biggest saucepan. We start slow! Over medium-low heat, melt your six tablespoons of butter until it’s just liquid. Don’t let it brown, we aren’t looking for nuttiness here, just smooth sailing for the peanut butter. Once melted, stir in the full cup of creamy peanut butter. Keep stirring until those two gorgeous, creamy components look like one unified, smooth sauce. This step is crucial for everything that follows!
Melting the Base for Sturdy Rice Krispie Bars
This is the critical phase where we decide if we end up with soft squares or little brick-like Peanut Butter Krispie Squares. When the butter and peanut butter are perfectly blended, toss in the entire contents of your miniature marshmallows. Keep that heat low! You need to stir constantly and gently until *everything* is melted down into a smooth, pale, sticky blanket. The moment it’s homogenous, pull the pot *off* the heat immediately. If you let it sit boiling even for a moment too long, you’ll cook out the moisture, and those delicious Sturdy Rice Krispie Bars will turn into chewing gum!
Folding in Cereal Without Compressing
Now it’s time for the cereal! Dump those six cups of crispy goodness into the sticky mixture. Here’s where I channel my inner kindergarten teacher: use a rubber spatula and fold, fold, fold. Think of it like gently tucking the cereal into bed. You want to coat every piece evenly, but you absolutely must resist the urge to press it down into the pan before it’s in its final resting place. Pressing too hard compresses the cereal, takes out the air pockets, and that’s how you lose the wonderful, airy lift. Once it’s coated, transfer it to your parchment-lined pan and use a piece of wax paper or a lightly buttered spatula to *gently* ease it into an even layer across the bottom.
Applying the Chocolate Peanut Butter Rice Krispie Treats Topping
For the grand finale! While those bars cool slightly, let’s whip up the topping. I just combine the chocolate chips and the extra tablespoon of butter in a microwave-safe bowl. Heat it in short bursts—30 seconds, stir, 30 seconds, stir—until it’s all liquid silk. If you are making the classic Scotcharoos Recipe variation, this is where you’d melt the chocolate and butterscotch chips together, maybe even 50/50! Pour that beautiful melted chocolate right over your peanut butter base and smooth it out gently. Let the whole thing chill out on the counter for about an hour until it’s totally set before slicing into perfect squares for your next great party snack!
If you want to see how Liam makes his extravagant desserts, you can check out his wild concoctions over at No Bake Peppermint Bark Cheesecake Magic—it’s totally different but equally inspiring!
Tips for the Best peanut butter krispie squares
Even with the best intentions, sometimes the audience gets a little restless, right? That’s what happens when you slice them too soon! If you want clean cuts for those beautiful, sturdy peanut butter krispie squares, you must let them cool completely. I mean rock solid, about an hour on the counter. If they are even slightly warm, they will pull apart oddly and that lovely chocolate top might stick to your knife. Don’t let last-minute enthusiasm ruin the grand finale!
If you find your treats turned out a little firmer than you hoped—maybe your marshmallows were old classics—I have a little trick! These don’t need fudgy texture like a brownie, but if they are too hard, next time melt the peanut butter slightly longer with the butter before adding the marshmallows. Also, when you clean up, check out my recipe for Easy 3-Ingredient Chocolate Fudge; that same low-and-slow melting technique is what keeps everything pliable!
How to Prevent Your Treats from Crumbling
I mentioned this before, but this is so important for those perfect takeaway boxes or party platters. Crumbling happens when you press too hard while setting them into the pan, or when you cut them too soon. When pressing, remember to use wax paper, not your fingers—fingers inject warmth which makes the marshmallow glue soften right where you’re pressing! Warmth equals stickiness, and stickiness equals crumbling later.
Also, don’t cheat the cooling time! If you want that crisp edge but a soft, gooey center, they absolutely need to set at room temperature. If I’m in a huge rush, I’ll pop them in the fridge for just 30 minutes, but no longer than that, because cold marshmallows get rubbery, and we are aiming for soft, not resistant!
Storage and Serving Suggestions for No Bake Peanut Butter Cereal Bars
Now that you’ve created these magnificent No Bake Peanut Butter Cereal Bars, we need to keep them perfect until showtime! The great news is that these are excellent for making ahead. You can store them airtight at room temperature for about three days. If you stack them, put a little piece of wax paper between the layers so that lovely chocolate topping doesn’t try to fuse with the layer beneath it. Trust me, nobody wants to accidentally eat parchment paper!
These are huge hits as Kid Friendly Snacks, but they are also my go-to for last-minute requests. If you are prepping for a gathering, you can totally cut them into smaller, poppable Peanut Butter Cereal Balls sized chunks, which makes them look fancy on a platter too. For the best experience, serve them at room temperature. Seriously, leave them on the counter for 20 minutes before serving if they’ve been chilling in the fridge.
For more fun ideas on things you can make ahead for school lunches or parties, you should totally check out my recipe for Kid Friendly No-Bake Granola Oat Bars!
Frequently Asked Questions About peanut butter rice krispie treats
If you still have questions swirling around your head about how to get the best flavor and texture out of these amazing bars, don’t worry! That’s why we have this little Q&A corner. Liam always says if you have to ask, it means you care about the performance, and I love that supportive vibe!
Can I use crunchy peanut butter instead of creamy?
You absolutely *can*, but just know you are changing the texture a little bit! When you use crunchy peanut butter, you lose some of that lovely smooth, fudgy texture that makes the base so darn easy to press into the pan. You’ll still get fantastic flavor in your peanut butter krispie squares, but it won’t be quite as uniform. If you use crunchy, I promise it’s still delicious—just be extra gentle when pressing everything down so you don’t end up with crumbs!
What is the secret to making Chewy Rice Krispie Treats?
This is my favorite secret to share because it’s all about temperature control! The true secret to achieving those perfect Chewy Rice Krispie Treats is twofold. First, buy fresh marshmallows—old ones dry out and make everything hard, period. Second, you must keep the heat low when melting the marshmallows into the peanut butter mixture. As soon as it’s smooth and off the burner, you fold in the cereal quickly. That tiny bit of residual heat is all you need; boiling the marshmallows will suck all the stretch right out of them!
Are these a good option for Lunchbox Treats?
Yes! They are totally a winner for Lunchbox Treats, honestly. Because we use peanut butter and we take care not to over-press the cereal, these are some of the sturdiest bars we make. They hold their shape beautifully when cut into squares, and as long as they are stored properly in an airtight container, they’ll stay soft for days. I think they are a much better option than a fussy, crumbly cookie when you’re packing up snacks!
If you have any other burning questions about substitutions or need anything else, feel free to send us a note through the contact page!
Nutritional Estimates for This Dessert
Okay, now that we’ve celebrated all the joy and fun of making these peanut butter rice krispie treats, I know some of you amazing grown-ups might be wondering about the numbers game. Liam always insists on keeping track, even with our most spontaneous snacks! Remember, these figures are just estimates based on the standard ingredients used in our recipe (Yield: 18 servings). Life is too short to stress over every microgram, but it’s helpful to have a general idea of what you’re diving into!
Since these are decadent and delicious, they certainly hit that sweet spot for a satisfying treat. For a single square, here’s the breakdown. You can always find more context on how we calculate these things over on our Disclaimer page if you want to dive deep!
- Serving Size: 1 square
- Calories: 210
- Fat: 11g (including about 4g Saturated Fat)
- Carbohydrates: 27g
- Sugar: 18g (That’s the yummy part!)
- Protein: 4g
- Sodium: 110mg
See? Not bad for such a big burst of flavor! It’s a perfect little boost when you need something satisfying without reaching for a whole slab of cake. Enjoy every piece of these No Bake Peanut Butter Cereal Bars!
Share Your Culinary Performance
Whew! Now that you have the blueprint for these incredible peanut butter rice krispie treats, it’s time for you to step onto the stage! Remember, cooking here isn’t about being perfect—it’s about creating a joyful experience. Did you try the chocolate layer? Did you swap in butterscotch for a true Scotcharoos moment? I want to hear all about your take on this classic recipe!
Liam and I genuinely love seeing how you translate our scripts into your own culinary performances. Please, if you loved how soft and gooey these turned out, come back and leave a 5-star rating right below! Your feedback helps other folks find that perfect, nostalgic, quick peanut butter snack. It feels like the whole family is gathering in the kitchen when I see your lovely comments roll in.
If you snapped a picture of your perfectly cut peanut butter krispie squares (especially if they have that gorgeous chocolate topping!), tag us on social media. I’m working hard to keep our recipes fun and soulful. Head over to our Privacy Policy page if you ever have questions about how we connect here, but seriously, just leave a comment first! We can’t wait to celebrate bringing this delicious energy into your home!
Print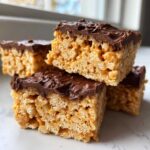
Ultimate Chewy Peanut Butter Rice Krispie Treats with Chocolate Topping
- Total Time: 15 min
- Yield: 18 servings 1x
- Diet: Vegetarian
Description
Make the best no bake peanut butter Rice Krispie treats that are soft, gooey, and hold together perfectly. This easy recipe adds creamy peanut butter for extra flavor and includes an optional chocolate topping for a nostalgic, delicious snack.
Ingredients
- 6 tablespoons unsalted butter
- 1 cup creamy peanut butter
- 1 (10 ounce) package miniature marshmallows
- 6 cups crispy rice cereal
- 1 cup semi-sweet chocolate chips (for topping)
- 1 tablespoon butter (for topping)
Instructions
- Lightly grease a 9×13 inch baking pan or line it with parchment paper, leaving an overhang for easy removal.
- In a large saucepan over medium-low heat, melt the 6 tablespoons of butter.
- Once the butter melts, stir in the creamy peanut butter until it is completely smooth and combined with the butter.
- Add the entire package of miniature marshmallows to the saucepan. Stir constantly until the marshmallows are fully melted and the mixture is smooth. Keep the heat low to prevent scorching.
- Remove the saucepan from the heat immediately.
- Pour the crispy rice cereal into the marshmallow-peanut butter mixture. Fold everything together gently until the cereal is evenly coated. Do not press down too hard, as this can make the treats dense.
- Transfer the mixture into your prepared pan. Lightly press the mixture evenly into the pan using a piece of wax paper or lightly buttered spatula. This step helps create sturdy Rice Krispie bars.
- Prepare the topping: In a small, microwave-safe bowl, combine the chocolate chips and 1 tablespoon of butter. Microwave in 30-second intervals, stirring between each, until smooth.
- Spread the melted chocolate mixture evenly over the top of the peanut butter cereal bars.
- Let the treats cool completely at room temperature, about 1 hour, before cutting into squares.
- Use the parchment overhang to lift the entire block out of the pan before slicing into your desired peanut butter Rice Krispie squares.
Notes
- For extra gooey marshmallow treats, use fresh marshmallows; older marshmallows result in a firmer bar.
- If you want a classic Scotcharoos look, substitute half of the chocolate chips with butterscotch chips in the topping mixture.
- To prevent sticking while pressing the mixture into the pan, lightly coat your hands or the spatula with cooking spray or butter.
- This recipe makes a great quick peanut butter snack that holds together well for lunchboxes.
- Prep Time: 10 min
- Cook Time: 5 min
- Category: Dessert
- Method: No Bake
- Cuisine: American
Nutrition
- Serving Size: 1 square
- Calories: 210
- Sugar: 18
- Sodium: 110
- Fat: 11
- Saturated Fat: 4
- Unsaturated Fat: 7
- Trans Fat: 0
- Carbohydrates: 27
- Fiber: 1
- Protein: 4
- Cholesterol: 10