Oh, the endless mealtime scramble! Does that sound familiar? I know the feeling. As a parent, I am always looking for easy, delicious meals. We need something that makes everyone happy. That’s where these amazing Kid-Friendly Ham & Cheese Roll-Ups come in! They are a true lifesaver in my kitchen. I remember one crazy afternoon, Leo was having a meltdown. Mia was asking for a snack. I needed something fast. These roll-ups saved the day!
They are so simple to make. You probably have all the ingredients already. These roll-ups are perfect for busy mornings. They also work great for quick lunches. And they are fantastic as an after-school snack. My kids just adore them. They ask for them all the time!
This recipe is a go-to for me. It takes away mealtime stress. It brings smiles to my kids’ faces. You will love how easy they are. Your kids will love eating them. Let’s make mealtime fun again!

Why You’ll Love These Kid-Friendly Ham & Cheese Roll-Ups
- They are super quick to make.
- You only need a few simple things.
- Picky eaters often love them.
- You can change them up easily.
- They pack perfectly for lunchboxes.
These roll-ups make mealtime simple. They are a win-win for everyone.
The Magic Behind Kid-Friendly Ham & Cheese Roll-Ups
Kids love these because they taste great. Ham and cheese are classic flavors. They also love the fun, rolled shape. It’s like a little present! For parents, they are easy. No complicated steps. It’s a truly kid-friendly meal solution.

Essential Ingredients for Kid-Friendly Ham & Cheese Roll-Ups
Gathering your ingredients is super easy. You won’t need anything fancy for these delicious Kid-Friendly Ham & Cheese Roll-Ups. Here is what you will need:
- 8 slices of sandwich bread. I like a soft white or whole wheat.
- 8 slices of deli ham. Thinly sliced is best.
- 8 slices of cheese. Cheddar or mozzarella work great.
- 2 tablespoons of butter. Melted, of course!
That’s it! Simple, right?
Choosing the Best Components for Your Kid-Friendly Ham & Cheese Roll-Ups
For the bread, a standard sandwich loaf is perfect. Soft bread rolls up easily. When it comes to ham, I always pick a low-sodium deli ham. It’s better for little ones. For cheese, mild cheddar is a family favorite. Leo loves it! You can also use mozzarella. If you have dietary needs, gluten-free bread works. Dairy-free cheese is also an option. Just make sure they melt well.

How to Prepare Your Kid-Friendly Ham & Cheese Roll-Ups
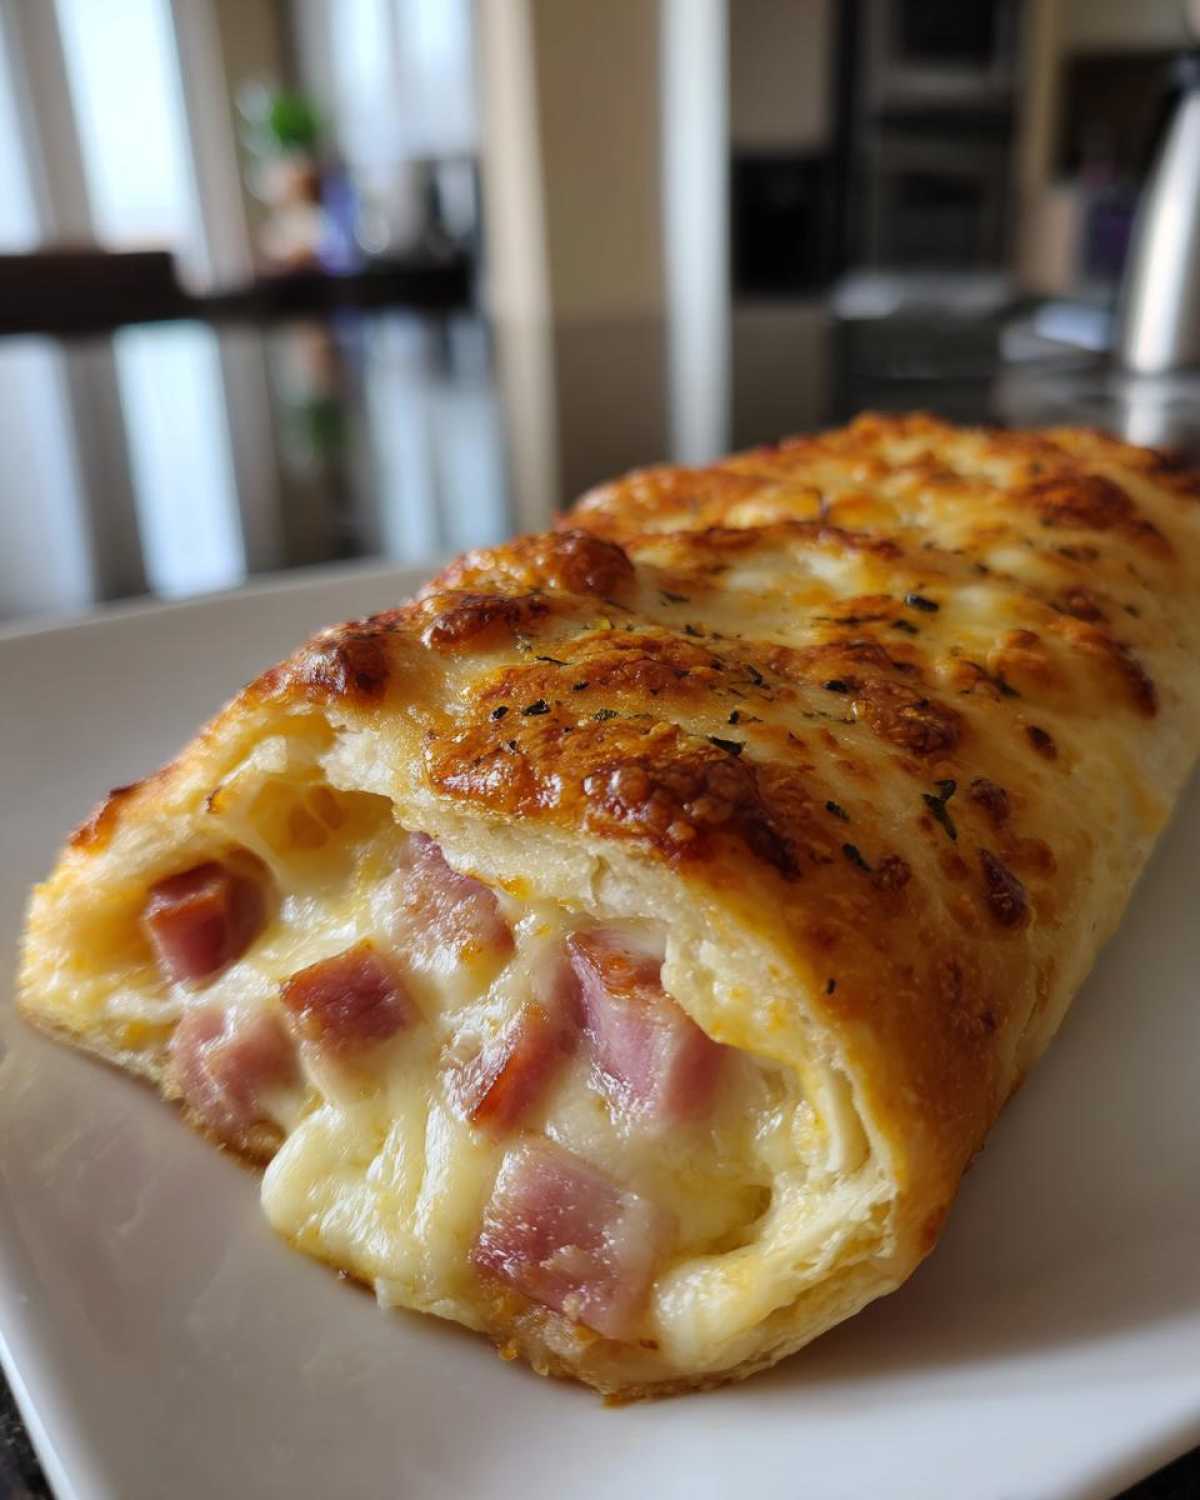
Making these roll-ups is super easy. First, preheat your oven. Set it to 375°F (190°C). Then, lightly grease a baking sheet. This stops them from sticking. Next, take each bread slice. Use a rolling pin to flatten it. Roll it as thin as you can. This helps them roll up nicely. Now, place one ham slice on the bread. Put one cheese slice on top of the ham. Make sure they cover the bread well. Starting from one end, roll the bread tightly. Keep it snug so it holds its shape. Place the roll-ups seam-side down. Put them on your prepared baking sheet. This keeps them from unrolling. Now, melt your butter. Brush it all over the outside of each roll-up. This helps them get golden. Bake for about 10 to 12 minutes. Watch for melted, bubbly cheese. The bread should be golden brown. Let them cool a little before serving. They will be hot! Enjoy your delicious ham and cheese roll-ups!
Pro Tips for Perfect Kid-Friendly Ham & Cheese Roll-Ups
Flattening the bread is key. Roll it out really thin. This makes for a great roll. Don’t be afraid to press firmly. Make sure your rolls are tight. This keeps the filling inside. For that perfect golden crust, brush the butter well. Get all sides! You can even get the kids involved. Leo loves flattening the bread. Mia helps brush on the butter. It makes cooking a fun family time. Plus, they are more likely to eat what they help make!
Customizing Your Kid-Friendly Ham & Cheese Roll-Ups
These roll-ups are so versatile! Try different deli meats. Turkey or pepperoni work wonderfully. Sometimes, I add a tiny sprinkle of dried herbs. Garlic powder is a good choice. You can also spread a thin layer of cream cheese. Mia loves cream cheese! These small changes can introduce new flavors. It’s a gentle way to expand their taste buds. Have fun experimenting with your own combinations!
Equipment Needed for Kid-Friendly Ham & Cheese Roll-Ups
Making these easy Kid-Friendly Ham & Cheese Roll-Ups needs just a few basic kitchen tools. You will definitely want a rolling pin. This helps flatten the bread. A baking sheet is a must for baking them. And a pastry brush helps spread the melted butter. That’s all you need to get started!
Serving and Storing Your Kid-Friendly Ham & Cheese Roll-Ups
Once your roll-ups are golden, let them cool a bit. They will be pretty hot inside! Serve them warm for the best taste. These are perfect on their own. You can also offer a side of ketchup for dipping. They make a great quick lunch. Or a super easy after-school snack. Leo loves finding these in his lunchbox. They travel really well!
If you have any leftovers, let them cool completely. Then, place them in an airtight container. They will stay fresh in the fridge for 2-3 days. To reheat, pop them in the microwave. A quick 30 seconds usually works. Or, warm them in a toaster oven. This keeps them nice and crispy. It’s like having them fresh again!
Frequently Asked Questions About Kid-Friendly Ham & Cheese Roll-Ups
Got questions about these yummy roll-ups? I’ve got answers!
Can I make these ahead of time? Yes, you can! You can prep them the night before. Just assemble them. Don’t bake them yet. Store them in the fridge overnight. Bake them fresh when ready. This saves time on busy mornings.
Can I freeze these roll-ups? I don’t recommend freezing them. The bread can get a bit soggy. They taste best fresh from the oven. They are so quick to make anyway!
What if my child is a picky eater? These are usually a hit! The familiar ham and cheese flavors help. You can also cut them into fun shapes. Use cookie cutters after baking. Sometimes a new shape makes all the difference. Mia loves star-shaped ones!
Can I use different types of bread? Absolutely! White bread or whole wheat works best. They are soft and roll easily. You can try brioche for a richer taste. Just make sure it’s fresh. A stale bread won’t roll well.
How can I make them healthier? Choose whole wheat bread. Opt for low-sodium ham. Use a reduced-fat cheese. You can also add a thin slice of tomato. Or a tiny bit of spinach. Just make sure it rolls up easily.
Estimated Nutritional Information for Kid-Friendly Ham & Cheese Roll-Ups
I know many parents like to consider nutrition. For one of these yummy roll-ups, here’s an estimate:
- Calories: 150
- Fat: 8g
- Carbohydrates: 12g
- Protein: 8g
- Sugar: 2g
- Sodium: 350mg
Please remember, these are just estimates! Your actual values might change. It depends on the exact brands you use. Different types of bread or cheese can affect it. Always check your specific product labels for the most accurate info.
Your Turn to Make Kid-Friendly Ham & Cheese Roll-Ups!
Now it’s your turn! I hope you give these amazing Kid-Friendly Ham & Cheese Roll-Ups a try. They truly make mealtime easier. Plus, your kids will love them! I’d love to hear how they turn out for you. Did your little ones enjoy them? What fun variations did you try?
Please share your experiences in the comments below. You can also rate the recipe. Or, even better, share your photos on social media! Tag ChildRecipe.com. Let’s build a community of happy, fed families. Welcome to our Child Recipe family!
Print
Amazing Kid-Friendly Ham & Cheese Roll-Ups: 1 Way to Conquer Mealtime Madness
- Total Time: 22 minutes
- Yield: 8 roll-ups 1x
Description
These ham and cheese roll-ups are a quick, easy, and kid-friendly snack or light meal. They are perfect for busy parents looking for simple recipes.
Ingredients
- 8 slices of bread (whole wheat or white)
- 8 slices of deli ham
- 8 slices of cheese (cheddar or mozzarella work well)
- 2 tablespoons butter, melted
Instructions
- Preheat your oven to 375°F (190°C). Lightly grease a baking sheet.
- Flatten each slice of bread with a rolling pin. This makes them easier to roll.
- Place one slice of ham on each flattened bread slice, followed by one slice of cheese.
- Starting from one end, tightly roll up each bread slice.
- Brush the melted butter evenly over the outside of each roll-up.
- Place the roll-ups seam-side down on the prepared baking sheet.
- Bake for 10-12 minutes, or until the cheese is melted and bubbly and the bread is golden brown.
- Let cool slightly before serving.
Notes
- You can customize these roll-ups with different fillings like turkey, pepperoni, or a sprinkle of herbs.
- For picky eaters, try cutting them into fun shapes after baking.
- These are great for lunchboxes or a quick after-school snack.
- Prep Time: 10 minutes
- Cook Time: 12 minutes
- Category: Snack, Lunch
- Method: Baking
- Cuisine: American
Nutrition
- Serving Size: 1 roll-up
- Calories: 150
- Sugar: 2g
- Sodium: 350mg
- Fat: 8g
- Saturated Fat: 4g
- Unsaturated Fat: 3g
- Trans Fat: 0g
- Carbohydrates: 12g
- Fiber: 1g
- Protein: 8g
- Cholesterol: 25mg