Oh, the never-ending question: “What’s for lunch?” As a mom to Leo and Mia, I’ve heard that one a million times. There are days I feel like a short-order cook, just trying to find something everyone will eat without a fuss. I used to pull my hair out over meal planning. It felt like a constant battle, especially with picky eaters.
But over the years, I’ve learned a few tricks. I’ve found that simple, comforting meals often win the day. That’s why I’m so excited to share one of our absolute family favorites with you today. It’s a true game-changer for busy parents.
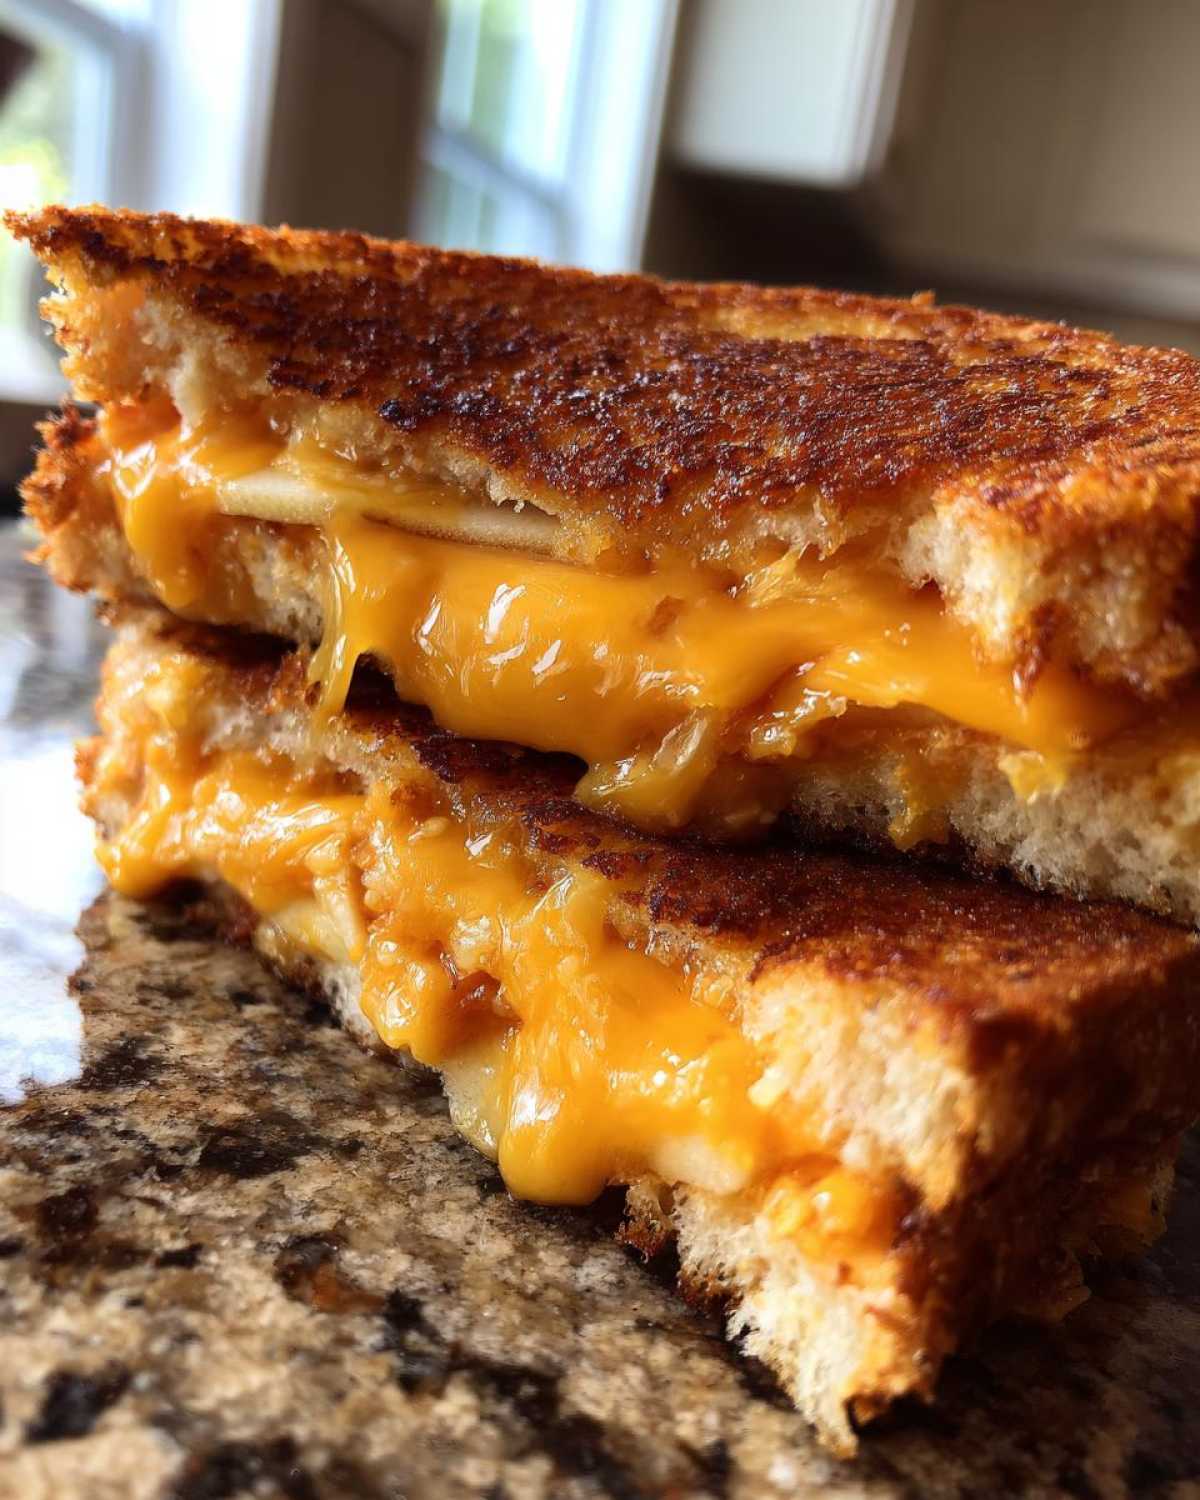
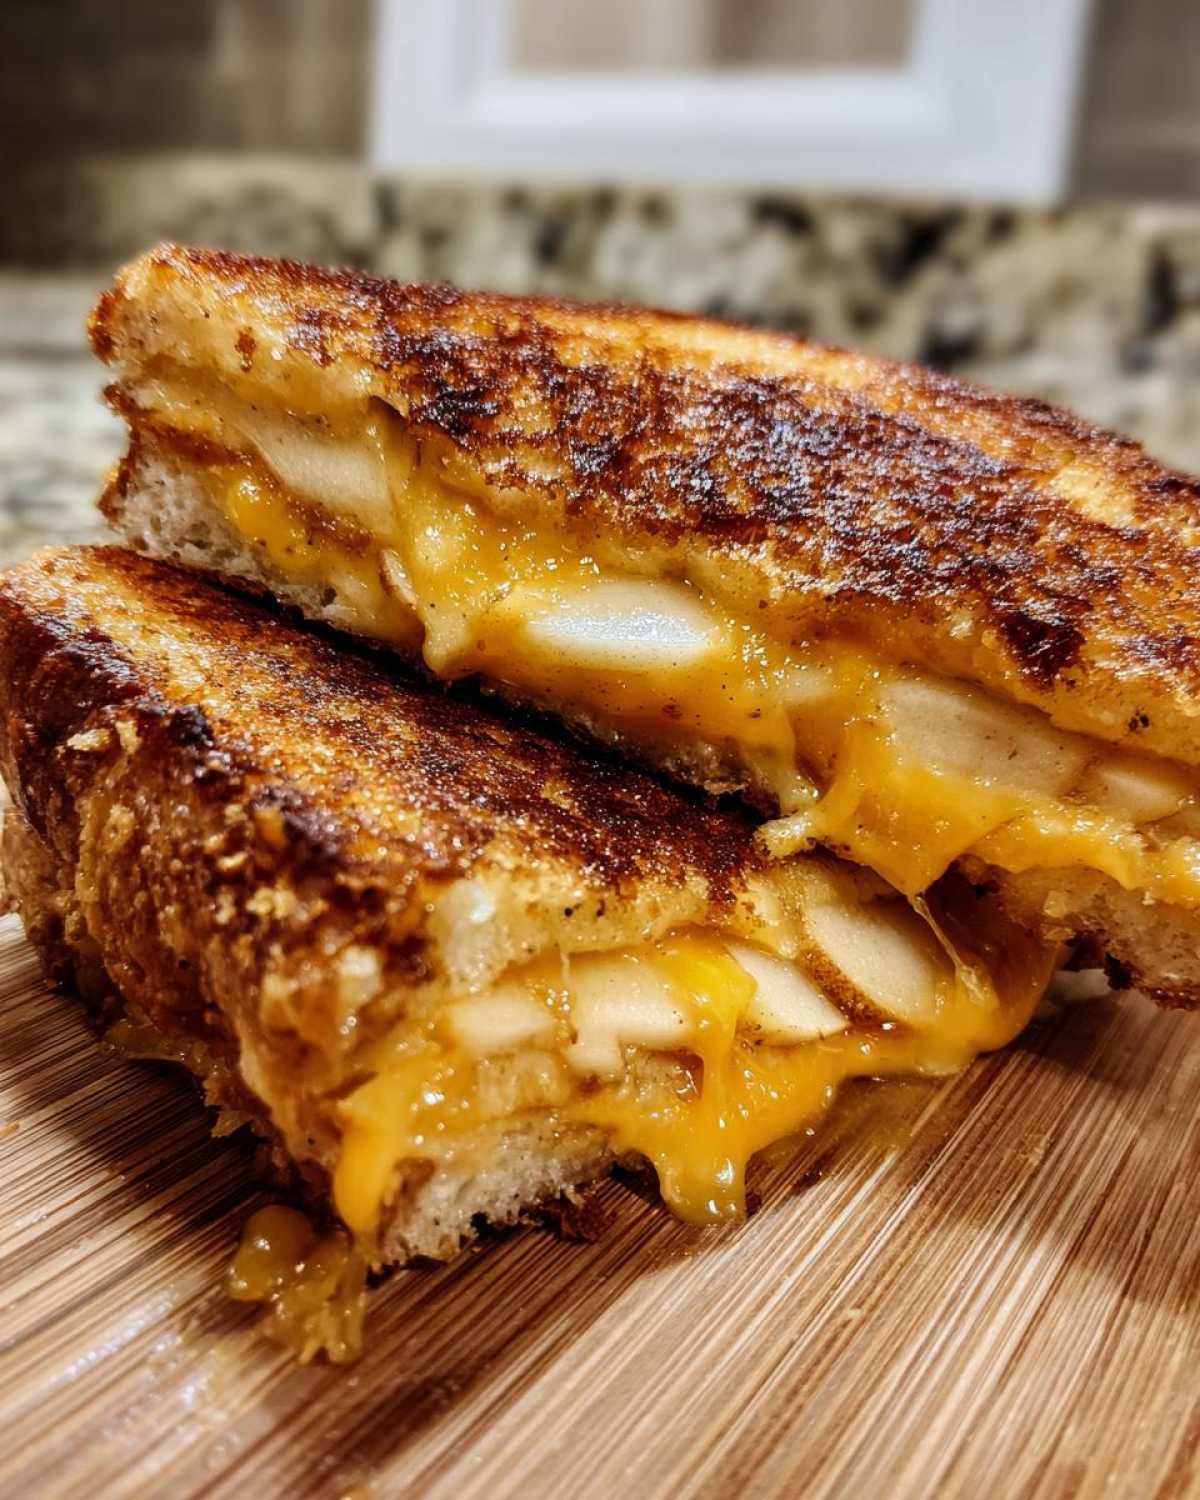
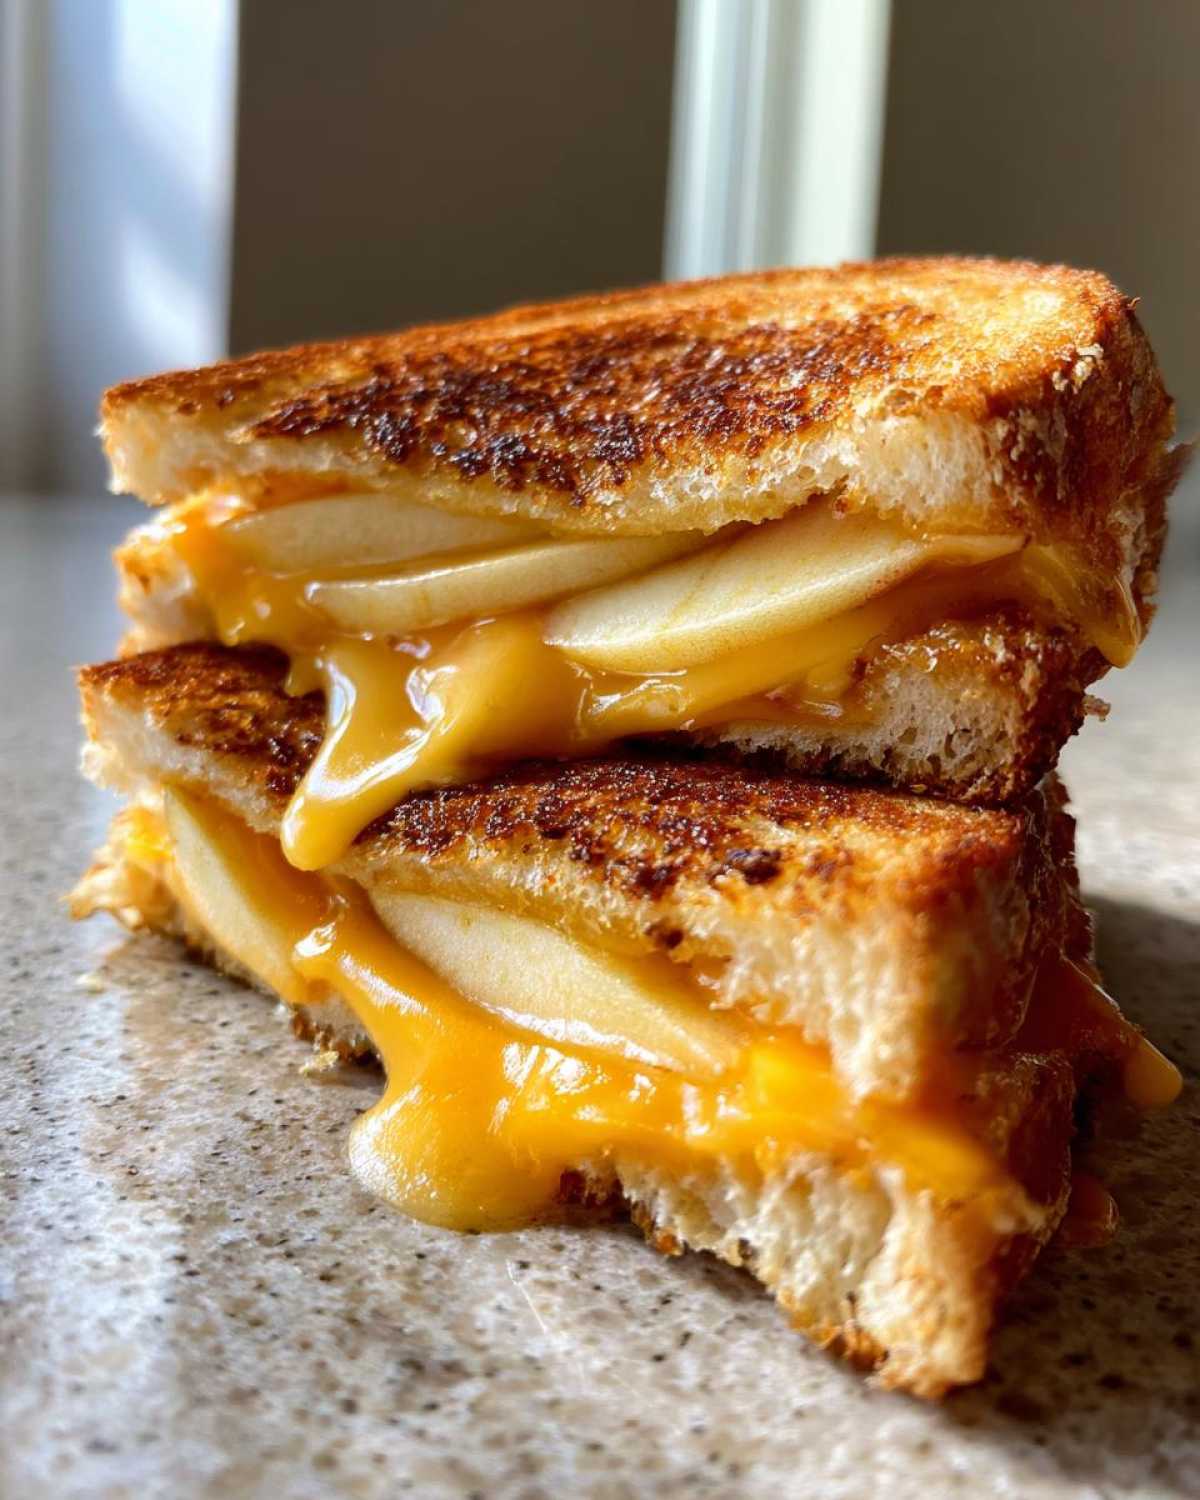
This recipe is for the most delicious Kid-Friendly Grilled Cheese & Apple Sandwich. It’s not just any grilled cheese. We add a little something extra that makes it special. This sandwich is quick to make, super easy, and surprisingly nutritious. It’s perfect even for the picky eaters. Mia, who usually inspects every speck of food, devours this one. Leo loves the sweet crunch of the apple.
From my kitchen to yours, here’s how we make mealtime a little less stressful and a lot more yummy!
Why You’ll Love This Kid-Friendly Grilled Cheese & Apple Sandwich
I know how tough mealtimes can be. That’s why I’m so excited about this recipe. It truly makes life easier for us parents. This Kid-Friendly Grilled Cheese & Apple Sandwich is a winner on so many levels. It’s quick to whip up, which is perfect for busy days. Plus, it’s packed with good stuff, so I feel good serving it to Leo and Mia.
Here’s why it’ll become a staple in your home:
- It’s super fast. You’ll have lunch ready in minutes.
- Kids actually eat it. Even my sometimes-picky Mia loves this one.
- It’s got a wonderful balance. The sweet apple and savory cheese just work.
- You can customize it easily for different tastes.
- It helps avoid those mealtime battles.
It’s a simple solution to the daily “what’s for lunch?” puzzle.
The Magic of a Kid-Friendly Grilled Cheese & Apple Sandwich
So, what makes this sandwich so special? It’s the perfect mix of textures and tastes. You get the gooey, warm cheese. Then there’s the crisp, sweet apple. That sweet-savory combo is just irresistible for kids. It’s a familiar favorite with a fun, fruity twist. This also helps introduce new flavors in a friendly way.
Essential Ingredients for Your Kid-Friendly Grilled Cheese & Apple Sandwich
Gathering your ingredients is the first step. You don’t need anything fancy for this delicious sandwich. I always have these on hand. Here’s what you’ll need to make your Kid-Friendly Grilled Cheese & Apple Sandwich:
- 4 slices of your child’s favorite bread.
- 2 tablespoons unsalted butter, softened.
- 4 slices cheddar cheese.
- 1 small apple, thinly sliced.
I find Fuji or Honeycrisp apples work best here. Their sweetness really shines through. Make sure your butter is nice and soft for easy spreading.
Choosing the Best Bread and Cheese for Your Kid-Friendly Grilled Cheese & Apple Sandwich
For bread, white bread is often a kid-pleaser. But whole wheat adds a nice nutritional boost. For cheese, mild cheddar melts beautifully. Sometimes I use a cheddar and Monterey Jack blend. It gets extra gooey, which Leo loves. Choose what your little one prefers.
How to Make Your Kid-Friendly Grilled Cheese & Apple Sandwich
Alright, let’s get cooking! Making this Kid-Friendly Grilled Cheese & Apple Sandwich is super simple. It comes together in just a few minutes. I promise, even on your busiest days, you can totally do this. Just follow these steps, and you’ll have a happy eater in no time. My kids often “help” me with this part. It’s a fun, low-stress cooking project.
First, get all your ingredients ready. This makes the process much smoother. Slice your apple thinly beforehand. Get your cheese slices out too. Having everything prepped saves so much time. This recipe is really forgiving. Don’t worry if it’s not perfect.
It’s all about creating a yummy meal for your little one. Let’s dive into the simple steps.
Preparing Your Skillet for the Perfect Kid-Friendly Grilled Cheese & Apple Sandwich
Start with a non-stick skillet or griddle. Place it over medium-low heat. This lower heat is key. It helps the bread toast evenly. It also makes sure the cheese melts slowly. A pan that’s too hot will burn the bread. We want golden perfection, not charcoal!
Assembling Your Kid-Friendly Grilled Cheese & Apple Sandwich
Now, butter one side of each bread slice. Make sure it’s a good, even layer. Place two slices of bread, butter-side down, in the warm skillet. Top each bread slice with two slices of cheese. Arrange a few thin apple slices over the cheese on one slice. Then, place the other cheese-topped bread slice on top. Make sure the butter-side is facing up.
Cooking Tips for a Golden Kid-Friendly Grilled Cheese & Apple Sandwich
Cook for 3-5 minutes per side. You’re looking for golden brown bread. The cheese needs to be melted and bubbly. Gently press down with a spatula. This helps the cheese melt perfectly. It also squishes the sandwich together. Mia likes hers extra gooey, so I press a bit more. Just keep an eye on it so it doesn’t burn.
Tips for Success with Your Kid-Friendly Grilled Cheese & Apple Sandwich
I’ve made this Kid-Friendly Grilled Cheese & Apple Sandwich countless times. I’ve picked up a few tricks along the way. To make it extra special, a tiny pinch of cinnamon on the apple slices before grilling is amazing. It really boosts that sweet flavor. Mia loves it this way.
If your child likes a crisper sandwich, lightly toast the bread first. This adds a lovely crunch. Sometimes, I use cookie cutters to make fun shapes. Leo thinks it’s so cool. It makes mealtime more like play. Don’t be afraid to experiment with different cheeses too. A little Monterey Jack can add extra gooiness. Have fun with it!
Frequently Asked Questions About the Kid-Friendly Grilled Cheese & Apple Sandwich
I get a lot of questions about this recipe. It’s such a popular one! Here are some common things parents ask me. I hope these answers help you make the best Kid-Friendly Grilled Cheese & Apple Sandwich ever. Don’t hesitate to reach out if you have more!
Making mealtime easy is my goal. These tips come from my own kitchen. I’ve tried many variations. Leo and Mia are my toughest critics. So, these answers are kid-tested and mom-approved. Let’s make some delicious sandwiches!
Can I Use Different Apples in My Kid-Friendly Grilled Cheese & Apple Sandwich?
Absolutely! I prefer sweet apples like Fuji or Honeycrisp. They soften nicely and add great flavor. Gala or Pink Lady apples work well too. Avoid tart apples if your child doesn’t like strong flavors. They might make the sandwich too sour.
How Can I Make This Kid-Friendly Grilled Cheese & Apple Sandwich More Nutritious?
To boost nutrition, use whole grain bread. It adds more fiber. You can also sneak in a thin slice of zucchini. Just make sure it’s very thin. Or add a tiny sprinkle of flax seeds to the butter. These small changes add vitamins. They won’t change the taste much.
Storing and Reheating Your Kid-Friendly Grilled Cheese & Apple Sandwich
Sometimes, we have a little leftover sandwich. It doesn’t happen often in my house! If you do, wrap your Kid-Friendly Grilled Cheese & Apple Sandwich tightly. Use plastic wrap or foil. Store it in the fridge for up to two days. To reheat, I like to use a toaster oven. A skillet works well too. Warm it on low heat until cheese is melted again. This keeps it from getting soggy.
Kid-Friendly Grilled Cheese & Apple Sandwich Nutritional Information
I know many of you are curious about the nutritional breakdown. Please remember, these numbers are just estimates. They can change based on the exact ingredients you use. Things like the type of bread or cheese will make a difference. Always check your specific product labels for the most accurate info. But this gives you a good idea!
Share Your Kid-Friendly Grilled Cheese & Apple Sandwich Creations!
I absolutely love hearing from you! Have you tried making this Kid-Friendly Grilled Cheese & Apple Sandwich? I’d love to know how it went. Please leave a comment below and rate the recipe. You can also share your creations on social media. Tag ChildRecipe.com! Let’s build a community of happy eaters together.
Print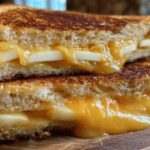
Genius Kid-Friendly Grilled Cheese & Apple Sandwich in 5 Minutes: No More Meal Battle
- Total Time: 15 minutes
- Yield: 2 sandwiches 1x
- Diet: Vegetarian
Description
This kid-friendly grilled cheese and apple sandwich combines classic comfort with a touch of sweetness. It’s a quick, easy, and nutritious meal, perfect for busy parents and picky eaters.
Ingredients
- 4 slices of your child’s favorite bread (whole wheat or white work great!)
- 2 tablespoons unsalted butter, softened
- 4 slices cheddar cheese (or a blend of cheddar and Monterey Jack)
- 1 small apple, thinly sliced (like Fuji or Honeycrisp for sweetness)
Instructions
- Heat a non-stick skillet or griddle over medium-low heat.
- Butter one side of each bread slice.
- Place two slices of bread, butter-side down, in the warm skillet.
- Top each bread slice with two slices of cheese.
- Arrange a few thin apple slices over the cheese on one of the bread slices.
- Place the other cheese-topped bread slice on top of the apple slices, butter-side up.
- Cook for 3-5 minutes per side, or until the bread is golden brown and the cheese is melted and bubbly. Gently press down with a spatula to help the cheese melt.
- Remove from skillet, let cool slightly, then slice and serve.
Notes
- For extra flavor, sprinkle a tiny pinch of cinnamon on the apple slices before grilling.
- If your child prefers, you can lightly toast the bread before adding the cheese and apple for a crispier sandwich.
- Cut the sandwich into fun shapes using cookie cutters to make it more appealing for little ones.
- Prep Time: 5 minutes
- Cook Time: 10 minutes
- Category: Lunch
- Method: Stovetop
- Cuisine: American
Nutrition
- Serving Size: 1 sandwich
- Calories: 350-450
- Sugar: 10-15g
- Sodium: 400-600mg
- Fat: 20-30g
- Saturated Fat: 10-15g
- Unsaturated Fat: 8-12g
- Trans Fat: 0.5-1g
- Carbohydrates: 30-40g
- Fiber: 2-4g
- Protein: 15-20g
- Cholesterol: 40-60mg