The Holiday Pavlova Wreath with Berries: An Experience in Edible Art

I’ve made many desserts in my life. Some were simple, some complex. But nothing quite compares to the joy of creating this stunning Holiday Pavlova Wreath with Berries. It truly transforms my Christmas table. This airy meringue centerpiece looks like edible snow. It’s my favorite festive bake. I want you to feel that same spark making it.
From Silent Lab to Culinary Stage: Our Story
When I first met Liam, his cooking felt too serious. Everything was precise, like a science test. His food tasted great, sure. But it lacked real heart. I am messy and playful. I teach little kids all day. So, I brought that joy to our kitchen. I became his muse here. We started to see food as an adventure. That’s why we call our recipes Child Recipe. They are inspiration for grown-up fun.
Why This Holiday Pavlova Wreath with Berries Makes the Perfect Light Christmas Dessert
Are you tired of heavy holiday meals? I know I am. This dessert is the perfect answer. It is incredibly light. The meringue base is just crisp air. It feels almost weightless on your tongue. Plus, it looks spectacular. The white wreath shape screams winter wonderland. Piling on those bright seasonal berries adds needed color. It’s a showstopper that won’t weigh down your guests.
Gathering Your Ingredients for the Holiday Pavlova Wreath with Berries
Gathering everything first makes the process smooth. We don’t want any scrambling mid-whip! Having your components ready helps keep the cooking fun. This recipe uses simple pantry staples. But their quality really matters here. Let’s look at what we need for this gorgeous light dessert.
Essential Components List
- Egg whites: 6 large ones are needed.
- Caster sugar: Use 1 1/2 cups of this fine sugar.
- Cornflour (cornstarch): Just 1 teaspoon is enough.
- White wine vinegar: We need 1 teaspoon of this.
- Vanilla extract: Add 1 teaspoon for flavor.
- Whipping cream: Measure out 1 1/2 cups.
- Mixed fresh berries: About 2 cups total.
- Optional: Icing sugar for that snowy dusting.
Baker’s Notes on Ingredient Preparation and Quality
Listen close, this is super important for your meringue. Make absolutely sure your mixing bowl is spotless. Any tiny bit of grease stops those egg whites from whipping up right. Seriously, no yolk allowed either! Also, choose the brightest berries you can find. They give the final Holiday Pavlova Wreath its festive pop.
Necessary Tools for Creating Your Holiday Pavlova Wreath with Berries
You don’t need fancy gadgets for this bake. Just a few basics work wonders. Having these tools ready makes shaping easy. It helps us create that perfect wreath form. Let’s check our kitchen drawers now.
Equipment Checklist
- Parchment paper is a must-have item.
- You need a pencil for drawing guides.
- A clean, grease-free bowl for whipping.
- An electric mixer makes whipping simple.
- A good rubber spatula for gentle folding.
- Baking sheet to hold the meringue shape.
Step-by-Step Instructions for Your Holiday Pavlova Wreath with Berries
Now for the fun part. Making this meringue is like conducting a quiet symphony. Follow these steps closely. You’ll have a stunning centerpiece ready fast. I promise this process is simpler than it looks.
Preparing the Meringue Base
First, preheat your oven to 300 degrees F. Line a baking sheet with paper. Draw your wreath guide right on the paper. Beat those egg whites until soft peaks show up. Slowly add the caster sugar, a spoonful at a time. Keep beating until the meringue looks stiff and super glossy. You shouldn’t feel any grit when you rub it.
Folding and Baking the Wreath Shape
Gently, using a spatula, fold in the cornflour and vinegar. Don’t stir too much here. Spoon the meringue onto your baking sheet. Make sure you follow that wreath outline you drew. Create a slight dip in the middle. Pop it into the hot oven right away. Then, drop the heat to 250 degrees F immediately.
The Crucial Cooling Process
Bake this beauty for about 1 hour and 15 minutes. Don’t peek too soon, okay? Once time is up, turn the oven right off. Prop the door open with a wooden spoon handle. Let the meringue cool down completely inside the oven. This slow cool prevents those awful cracks. Trust me on this technique.
Assembling Your Finished Holiday Pavlova Wreath with Berries
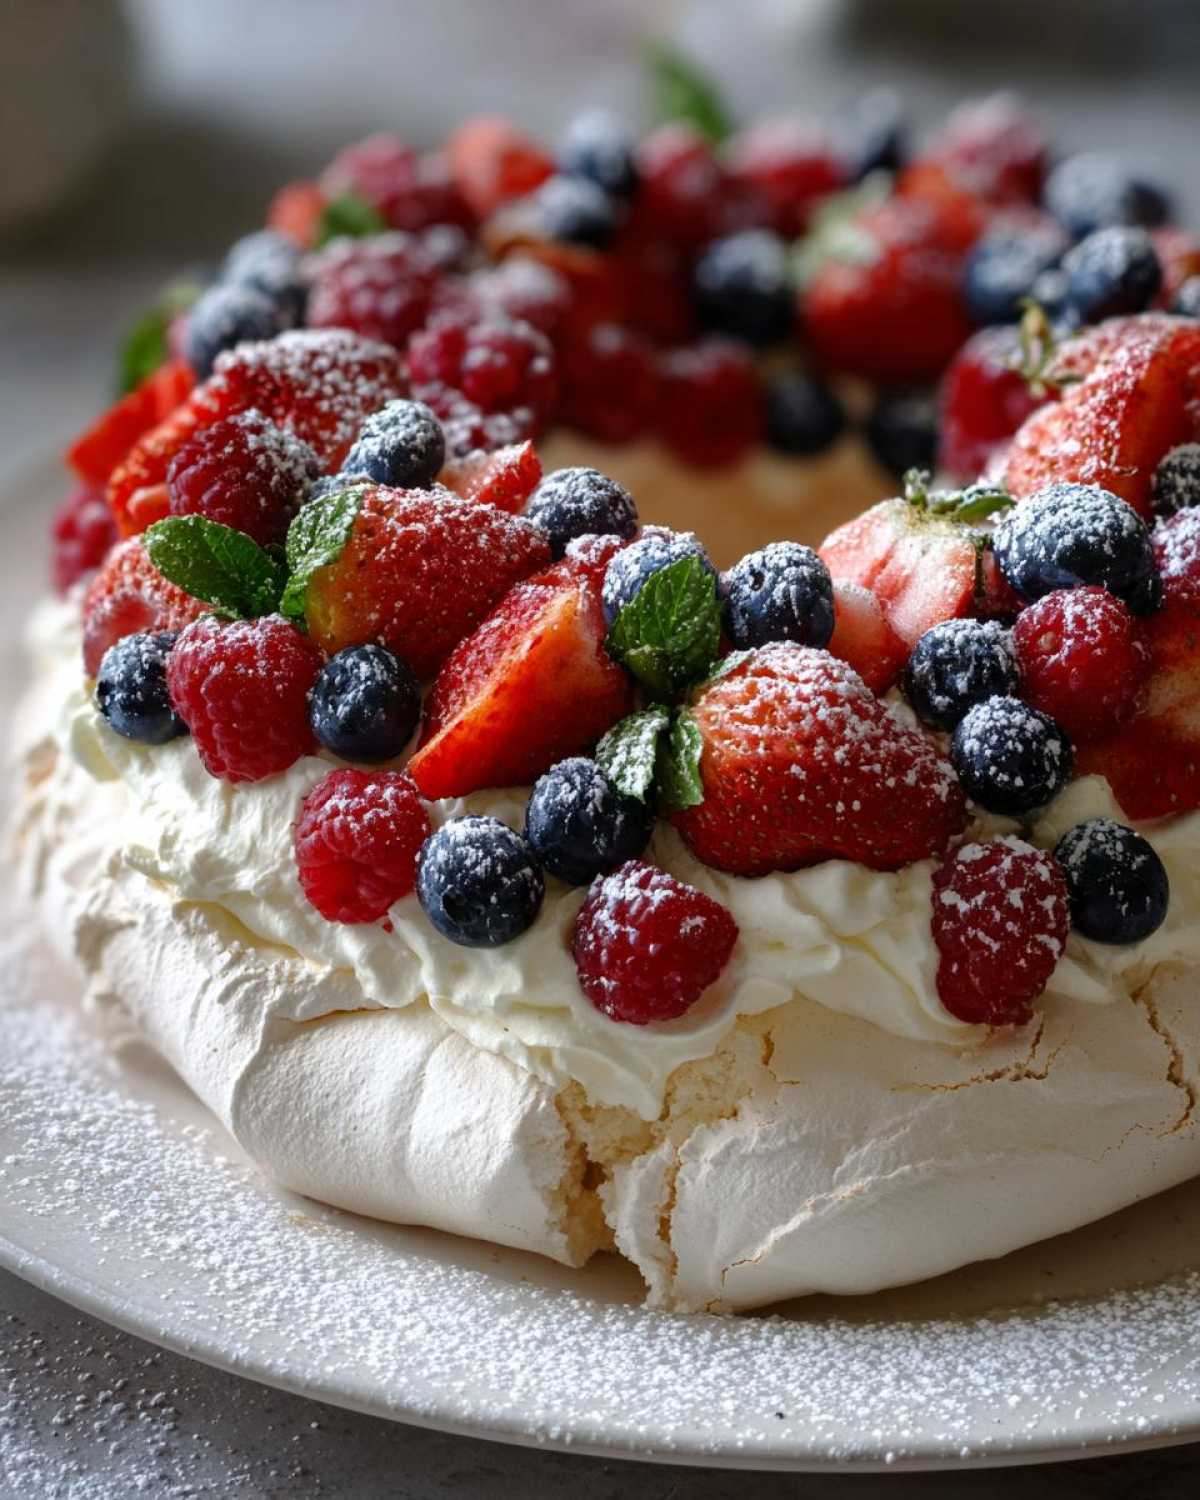
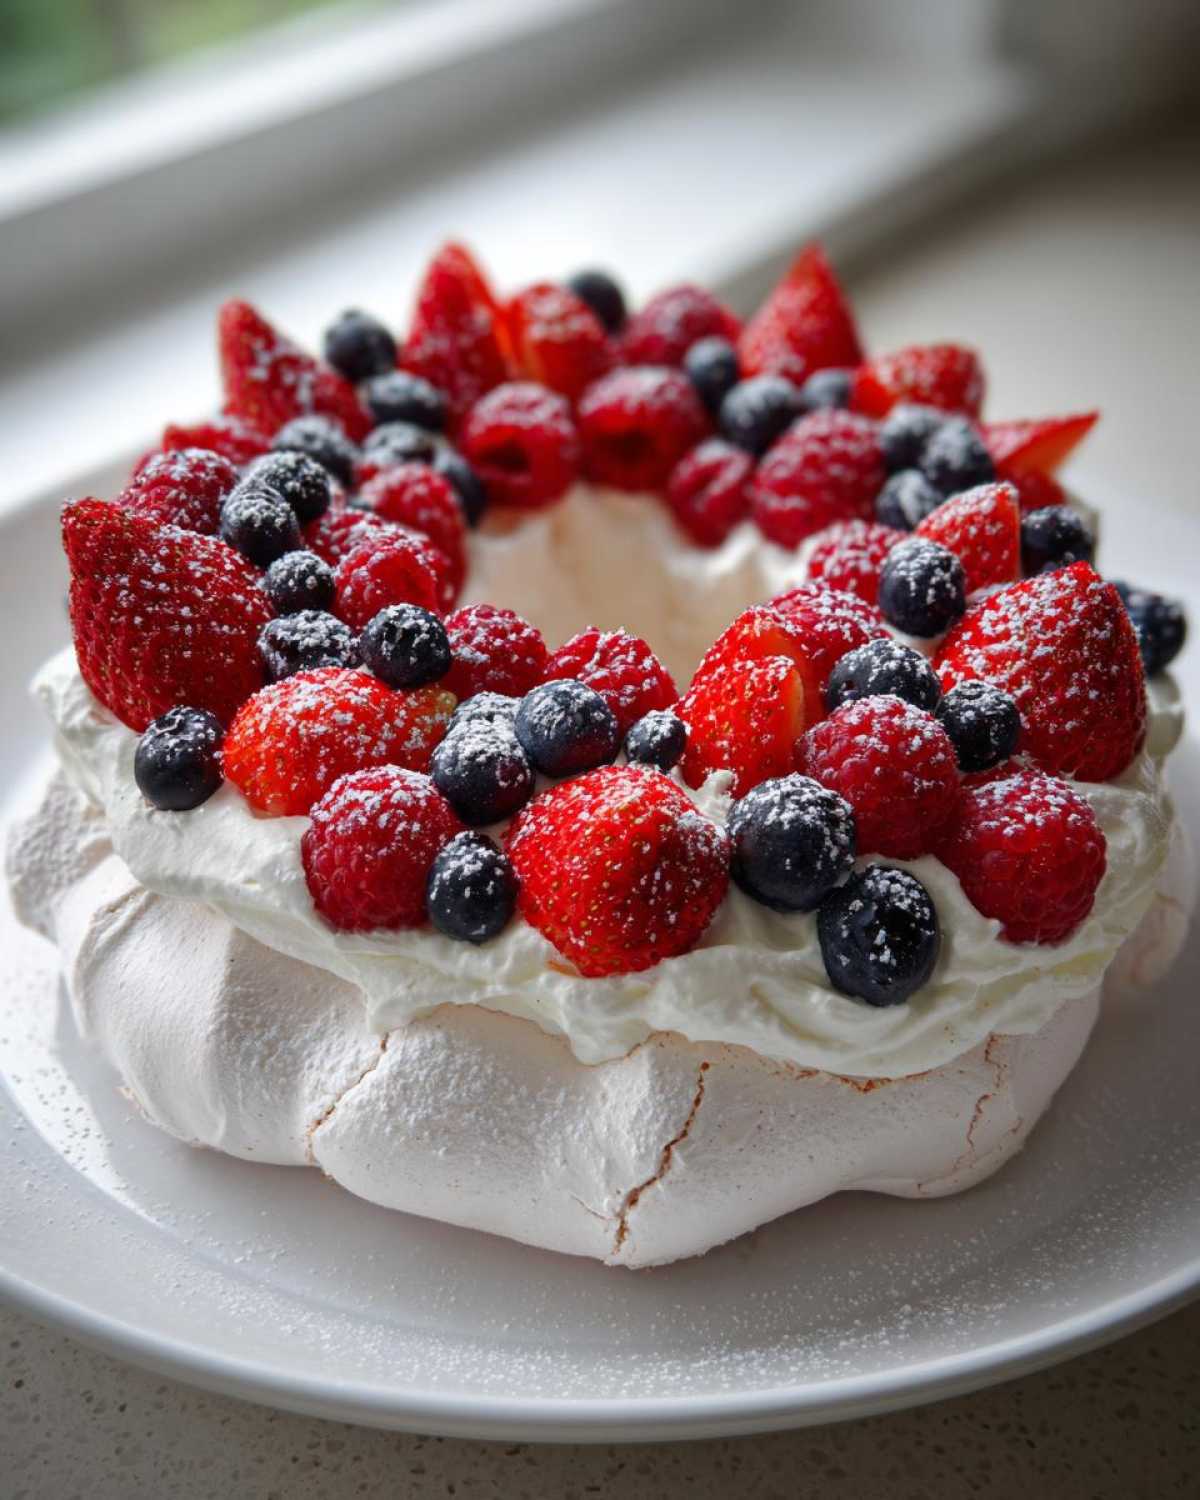
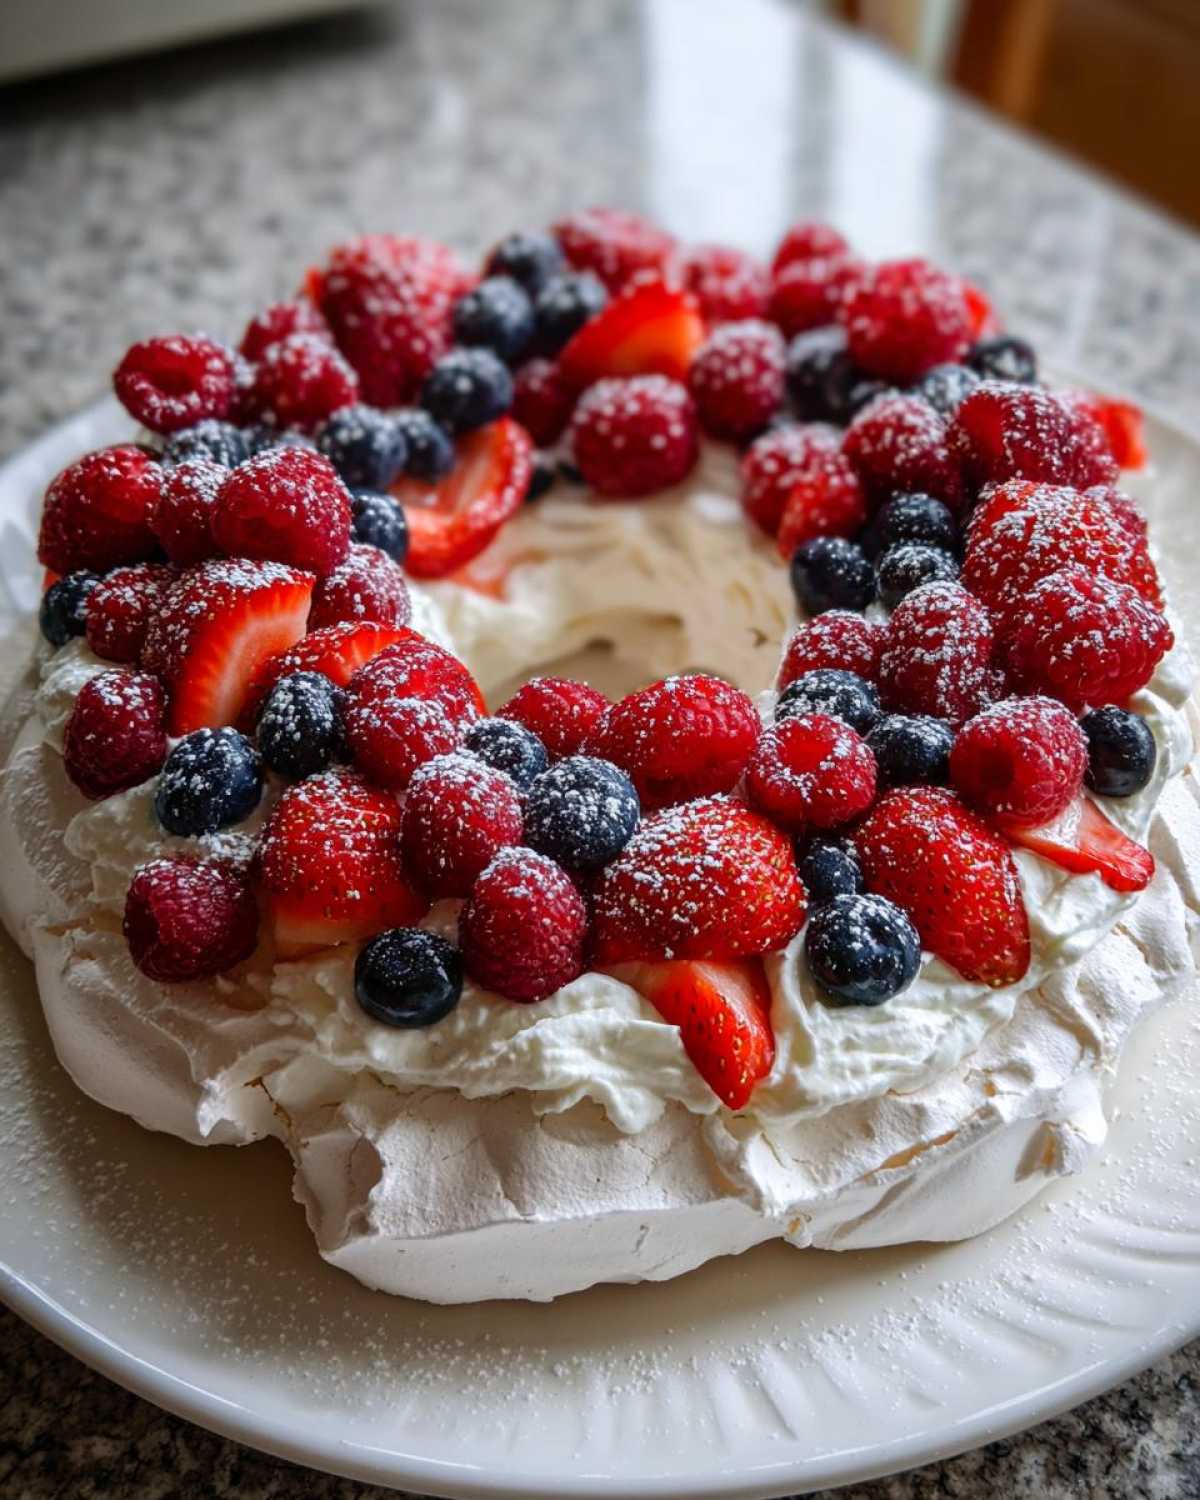
When it’s fully cool, move the meringue carefully. Whip your cream until soft peaks form nicely. Spread that fluffy cream over the cooled base. Arrange your colorful fresh berries all over the cream. Finish with a light dusting of icing sugar. It looks just like fresh snow falling on your Christmas dessert.
Tips for Success When Making a Holiday Pavlova Wreath with Berries
I want your meringue to sing, not sink! Baking is a bit like teaching. Patience brings the best results. Follow these quick tips. They really build trust in your baking skills. You’ll nail this centerpiece every time.
Achieving Stiff, Glossy Meringue
Remember that clean bowl rule? It’s non-negotiable. Even a speck of grease ruins everything. It stops the egg whites from getting that stiff structure. No yolk contamination either. We want pure, fluffy clouds.
Mastering the Low and Slow Bake
Baking low and slow is key for texture. We cook it gently for a long time. This gives you that perfect crunch outside. Inside, it stays soft like a marshmallow cloud. Don’t rush this part at all. For more on meringue science, you can check out resources on Serious Eats.
Timing the Final Assembly
Meringue hates humidity, truth be told. It soaks up moisture fast. This makes it sticky and chewy. Assemble your beautiful creation right before you serve it. This keeps your Holiday Pavlova Wreath perfectly crisp. If you are looking for other light dessert ideas, check out our recipe for classic tiramisu.
Common Questions About Your Holiday Pavlova Wreath with Berries
I get so many questions after I share this recipe. People worry about the meringue texture. Don’t let small things stress you out! This is supposed to be fun. Let’s tackle a few common worries about making this Christmas dessert.
Can I Make the Meringue Wreath Ahead of Time?
You can bake the meringue base a day early. Store it in a totally dry, airtight container. Keep it away from any moisture. Do not add the cream or berries yet. Assemble everything just before you plan to serve it. This keeps your light dessert crisp.
What If My Meringue Cracks?
Oh, cracks happen to the best of us bakers! Don’t panic if it splits a little. It just means your meringue is getting ready to be a perfect light dessert. Think of it as rustic charm. The cream and berries will cover most small fissures beautifully. For general baking tips on preventing cracks, resources like the King Arthur Baking site offer great guidance.
Substitution Options for Berries
If you can’t find perfect berries, swap them out! Use segments of peeled citrus fruit. Kiwi slices look lovely against the white. Even roasted nuts mixed with dried cranberries work well. Use what looks good to you right now.
Estimated Nutritional Data for This Light Christmas Dessert
We’ve talked about making art. Now let’s look at the numbers. Remember, these figures are just estimates for this delicious Holiday Pavlova Wreath with Berries. Your exact amounts will vary slightly. This dessert remains a wonderfully light option for your festive spread.
Serving Size and Key Values
One slice gives you a sweet treat.
- Serving Size: 1 slice
- Calories: Around 350 total.
- Sugar: About 45g is present.
- Fat: Roughly 18g per slice.
- Carbohydrates: Near 48g total.
- Protein: About 5g is included.
Share Your Culinary Performance
Did you bring this Holiday Pavlova Wreath to life?
I just love seeing your creations shine.
Tell us how your wreath turned out below!
Rate this recipe with stars if you loved it.
We can’t wait to see your edible art.
Print
3 Amazing Holiday Pavlova Wreath with Berries Secrets
- Total Time: 2 hours 35 minutes (includes cooling time)
- Yield: 8 servings
- Diet: Vegetarian
Description
Create a stunning Holiday Pavlova Wreath dusted with powdered sugar and adorned with fresh seasonal berries. This light, airy dessert is perfect for making your Christmas table look spectacular and tastes as wonderful as it looks.
Ingredients
- Egg whites: 6 large
- Caster sugar: 1 1/2 cups
- Cornflour (cornstarch): 1 teaspoon
- White wine vinegar: 1 teaspoon
- Vanilla extract: 1 teaspoon
- Whipping cream: 1 1/2 cups
- Mixed fresh berries (strawberries, raspberries, blueberries): 2 cups
- Optional: Icing sugar for dusting
Instructions
- Preheat your oven to 300 degrees F (150 degrees C). Line a baking sheet with parchment paper.
- Draw a 9-inch circle on the parchment paper, then draw a 3-inch circle inside it to create a wreath shape guide. Flip the paper over.
- In a clean, grease-free bowl, beat the egg whites until soft peaks form.
- Gradually add the caster sugar, one tablespoon at a time, beating well after each addition until the meringue is stiff and glossy. You should be able to rub a little meringue between your fingers without feeling any sugar grains.
- Gently fold in the cornflour and white wine vinegar using a spatula. Do not overmix.
- Spoon the meringue onto the baking sheet, following the wreath outline you drew. Create a slight dip in the center of the wreath.
- Place the meringue in the preheated oven. Immediately reduce the oven temperature to 250 degrees F (120 degrees C).
- Bake for 1 hour and 15 minutes.
- Turn off the oven, prop the door open slightly with a wooden spoon, and let the meringue cool completely inside the oven. This prevents cracking.
- Once completely cool, carefully transfer the meringue wreath to a serving plate.
- Whip the cream until soft peaks form. Spread the whipped cream over the cooled meringue wreath.
- Arrange the fresh berries decoratively over the cream.
- Lightly dust with icing sugar before serving for a snowy holiday look.
Notes
- Make sure your bowl and whisk are completely free of grease or yolk; this prevents the egg whites from whipping properly.
- Bake low and slow for a crisp exterior and a marshmallow-soft interior.
- Assemble the pavlova just before serving to keep the meringue crisp.
- Prep Time: 20 minutes
- Cook Time: 1 hour 15 minutes
- Category: Dessert
- Method: Baking
- Cuisine: Modern European
Nutrition
- Serving Size: 1 slice
- Calories: Approx. 350
- Sugar: Approx. 45g
- Sodium: Approx. 40mg
- Fat: Approx. 18g
- Saturated Fat: Approx. 10g
- Unsaturated Fat: Approx. 8g
- Trans Fat: 0g
- Carbohydrates: Approx. 48g
- Fiber: Approx. 2g
- Protein: Approx. 5g
- Cholesterol: Approx. 80mg