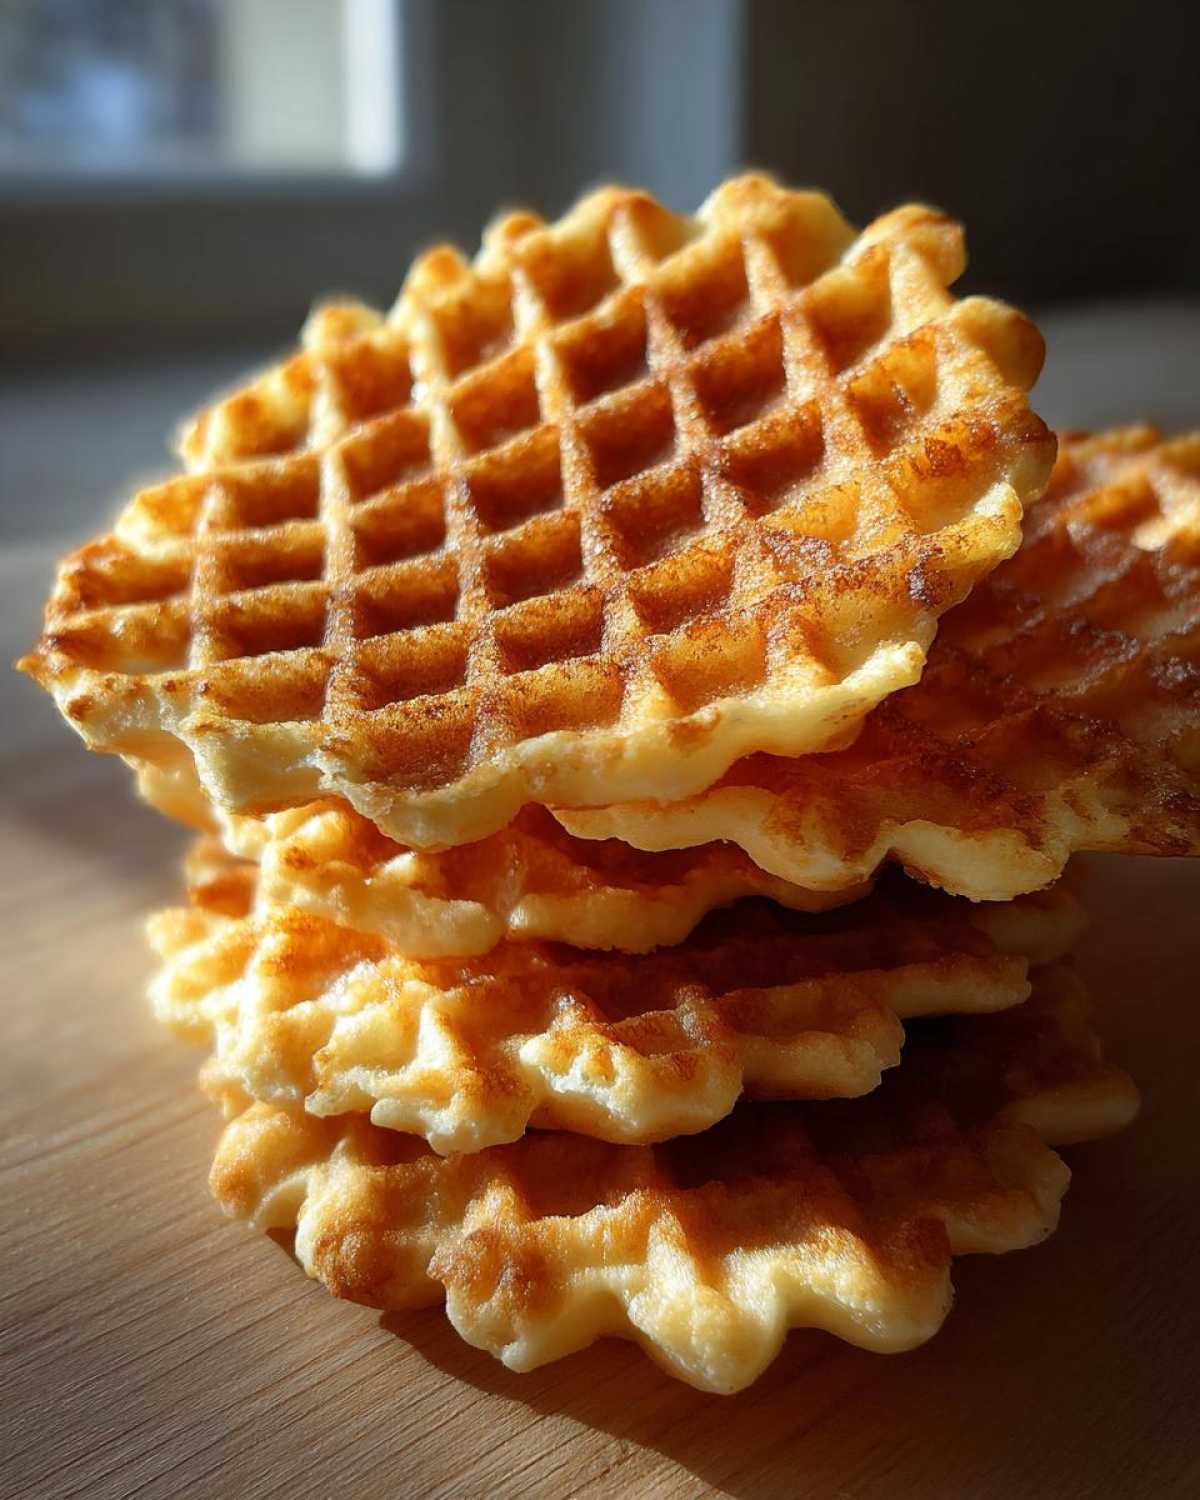
If you’ve ever walked past an Italian bakery around the holidays, you know that unforgettable, slightly sweet, perfectly crisp aroma. That’s the magic of a freshly pressed pizzelle! I remember the first few times I used my iron; I was terrified of burning the batter or ending up with sad, floppy disks instead of beautiful, delicate patterned cookies. It took some practice, but trust me, I’ve figured out the foolproof way to make them every time. This recipe for classic vanilla and anise pizzelle cookies is my absolute go-to. It’s unbelievably easy, and it guarantees that incredible, buttery thin cookie texture that just shatters perfectly when you bite into it. Forget the store-bought stuff; homemade is the only way to go for real Italian waffle cookies, and this recipe proves it!
Why This Easy Pizzelle Cookies Recipe Delivers Crispy Homemade Cookies
When people ask me what makes this recipe the best for pizzelle cookies, it always comes down to two things: ease and texture. Seriously, if you can mix a pancake batter, you can nail these. We stick to the traditional vanilla and anise profile because it just tastes like home. And hey, if you ever need a break from these crispy wonders, my soft and chewy snickerdoodles are always there!
- So quick to make—the batter comes together in minutes.
- The final result is that perfect delicate, crispy homemade cookie texture you want!
- This formula keeps them wonderfully buttery and thin.
Achieving the Best Crisp Pizzelle Technique
Crispness happens right at the end, folks! It’s all about minimizing moisture after cooking. The butter and egg ratio in this recipe creates a batter that sets fast. But the real trick? You have to shape them while they are piping hot and then let them cool completely, undisturbed, on a wire rack. That lets all the steam escape so they don’t go soft!
Essential Ingredients for Classic Vanilla Pizzelle Instructions
You don’t need fifty fancy things for amazing pizzelle cookies; you just need good quality basics handled correctly! When you look at the ingredient list, notice that we use melted butter instead of creamed butter. That’s a big difference, and it’s part of what makes this batter so easy to work with and ultimately results in those beautifully delicate patterned cookies.
Make sure your eggs are at room temperature—it helps them mix up lighter and fluffier with the sugar. And always, always use real vanilla extract; none of that imitation stuff in this recipe, okay? It really makes a difference in the buttery thin cookies.
- 3 big eggs
- 3/4 cup white sugar—keep it simple here!
- 1/2 cup unsalted butter, melted down and cooled slightly
- 1 teaspoon good vanilla extract
- 1 3/4 cups all-purpose flour
- 2 teaspoons baking powder (our puff helper!)
- 1/4 teaspoon salt to balance the sweetness
Ingredient Notes and Substitutions for Pizzelle Cookies
Okay, let’s talk about the flavor heroes. The recipe calls for anise extract, and while that’s the true traditional flavor for many Italian families, I know some people aren’t fans. If you skip the 1/2 teaspoon of anise extract, go ahead and bump up your vanilla to 1 1/2 teaspoons total. That gives you a beautiful vanilla pizzelle you can still use for everything!
For a bright, summery twist, swap the vanilla entirely and add the zest of one whole lemon right into the wet ingredients. Just remember, if you change the flavor profile, you’re moving away from the classic anise flavored cookies, but the crisp structure of the dough holds up perfectly, which is the real win here!
Step-by-Step Vanilla Pizzelle Instructions Using Your Pizzelle Iron Recipes
Getting started with your pizzelle cookies is all about preparation—especially getting that iron screaming hot! Before you mix anything, pull out that tool and get it preheating. In a big bowl, whisk those eggs and sugar together until they get light and fluffy. Don’t rush this part; that initial mixing incorporates the air we need for structure. Then, gently whisk in the melted butter—remember, it has to be cooled a bit so you don’t scramble your eggs!
Once your wet ingredients are chatting nicely, slowly fold in the dry stuff: flour, baking powder, and salt. I can’t stress this enough: mix only until you stop seeing flour streaks! If you overmix this batter, your delicate patterned cookies will turn dense, and nobody wants that. The final batter should be quite thick, much thicker than pancake batter, but still easily scoopable.
Now, the crucial moment! You’re going to drop about one teaspoon right onto the center of the hot iron. Close it up fast! Those beautiful Italian waffle cookies cook incredibly quickly—usually 30 to 60 seconds—until that blast of steam stops. Slide that fresh cookie out immediately with your thin spatula. If you wait even five seconds, it solidifies and sticks! If you want a crispy cone for dipping, make sure you wrap it around a dowel while it’s hot enough to bend. Trust me on this one; check out how I use a similar gentle touch in my meringue creation—timing is everything!

Tips for Success When Making Pizzelle Cookies
You want your pizzelle cookies to look perfect, right? Here are my three must-do tips. First, check your iron. Even if it says non-stick, I rub a little melted butter on there with a pastry brush before I drop the very first spoonful of batter, just for insurance.
Second, look for the steam. When the heavy cloud of steam coming from the iron completely stops, the cookie inside is done cooking and is ready to be removed. That’s more reliable than watching the color sometimes!
And third, just like Grandma taught me: shape immediately. Don’t set the hot round cookies down on the counter waiting for the next one. They go straight from the iron to the shaping tool or cooling rack. This keeps them crunchy and flat—the sign of a truly great crispy homemade cookie!
Flavor Variations: Beyond Classic Anise Flavored Cookies
The base dough for these pizzelle cookies is seriously versatile, which is why it’s such a keeper! While the anise-vanilla combo hits that traditional note perfectly, you absolutely must experiment. If you’re craving something deep and decadent, switch things up completely and make chocolate pizzelles.
To do that, you just substitute a quarter cup of your flour with unsweetened cocoa powder. Mix it right in with the other dry ingredients. Wow, those look fantastic dusted with powdered sugar against the dark color!
And if you want something bright for spring or summer gatherings, ditch the extracts entirely and lean into the citrus. We mentioned lemon pizzelle flavors earlier—just add the zest of one big lemon and stick to pure vanilla. It makes for an incredibly light, almost fragrant cookie. When you want that nutty, bakery vibe, a teaspoon of almond extract can replace the vanilla for lovely almond pizzelle variations.
It’s so fun to make a huge batch of these buttery thin cookies and have three different flavors ready on the cooling rack. Everyone loves having choices! If you need a great recipe to use up some leftover citrus, check out my super bright lemon meringue pie; that tanginess is addictive!
Storage and Reheating Instructions for Delicate Patterned Cookies
Keeping your beautiful pizzelle cookies perfectly crisp after all that work is just as important as making them! The biggest enemy here is humidity, so you need a sealed environment. Once these buttery thin cookies are totally cool—and I mean stone-cold—slide them immediately into something truly airtight.
I keep a few of those little food-safe silica gel packets that come in bottles of vitamins on hand. Toss one in the bottom of your cookie tin before you stack them up. Absolutely, under no circumstances, put your pizzelles in the refrigerator! That’s a guaranteed way to make them go soft and sad way too fast.
If they somehow lose their crunch the next day (maybe you didn’t close the lid tightly enough, oops!), don’t toss them! Just warm them up for about 30 seconds back on your pizzelle iron—no batter needed. They come right back to life!
Serving Suggestions: Pairing Buttery Thin Cookies with Coffee
These delicate, crispy homemade cookies are just begging to be paired with something warm! Honestly, the absolute best way to enjoy my pizzelle cookies is by dipping that thin, buttery edge into a hot cup of strong black coffee or a rich espresso. The slight sweetness of the cookie softens up just perfectly where it hits the hot liquid.
But if you aren’t a coffee person, don’t worry! They look gorgeous dusted with powdered sugar alongside a fresh bowl of berries or even crushed on top of some vanilla ice cream. If you’re looking for a great cold beverage that pairs just as well, try making an iced vanilla chai tea latte!
Understanding Traditional Italian Desserts and Holiday Cookie Traditions
It always warms my heart thinking about where these cookies come from. When you make these, you aren’t just baking; you’re participating in really old, wonderful holiday cookie traditions. For generations, these buttery thin cookies were made to celebrate Easter and Christmas in Italy.
It’s part of what makes them such fantastic festive Italian treats. They were originally made on celebratory days because of the effort required for the special iron! I love that we are keeping that history alive in our modern kitchens.
If you want to try another classic regional staple, you should check out this amazing coquito recipe—it’s perfect for winter celebrations too!
While they aren’t the same as cannoli, they belong to that wonderful family of traditional Italian desserts that rely on simple, quality ingredients to achieve a fantastic final product. It’s all about that beautiful authentic Italian baking!
Frequently Asked Questions About Pizzelle Cookies
I get so many questions about these pizzelle cookies after people try them for the first time! They are surprisingly simple once you get the hang of the iron, but there are definitely a few things that trip people up at first. I try to answer everything I can over on my contact page, but here are the big ones I hear all the time.
Can I make these Italian waffle cookies without a special iron?
Oh, I wish I could tell you yes, but unfortunately, no! The magic of pizzelles relies entirely on the iron. A regular waffle maker just won’t work the same way because pizzelles need to be pressed incredibly thin and cook super fast. You really need that small, traditional iron, whether it’s an old-fashioned stovetop one or a modern electric version, to get those beautiful impressions and achieve the right crispness.
How do I keep my pizzelle cookies from getting soft overnight?
This is the most common worry about these crispy homemade cookies! As I mentioned before, the key is zero humidity. You must store them only after they are 100% cool, in an airtight container at room temperature. I toss a dry paper towel or those tiny food-safe seasoning packets in there just to absorb any stray moisture. Don’t leave them out on the counter!
What is the difference between pizzelle and a standard waffle cone?
That’s an excellent question! Both use a waffle iron, but the batter is completely different. Pizzelles use a much higher fat content (butter!) and don’t have as much rise from leavening agents, making them inherently thinner and more delicate. Also, cone batters have much more sugar compared to these buttery thin cookies, which is why cones stay pliable longer before you shape them. Pizzelles are baked to be crisp right away.
Are these gluten-free or can I adapt them easily?
The classic recipe isn’t gluten-free, but honestly, because the structure is so reliant on the flour, heavy gluten-free blends can sometimes make them crumbly or slightly soft. If you want to try it, start by substituting just 1/3 of the four with a good 1-to-1 GF blend, but be prepared that the texture might lean slightly different than the perfect crispness you get from traditional flour!
Estimated Nutritional Data for Pizzelle Cookies
Now, I know some of you are going to ask about the numbers because we all want treats that fit our lifestyles, right? Here is the estimated nutritional breakdown for one of these glorious, buttery thin cookies. Remember, this is just a guide based on how I mix up this easy pizzelle recipe. If you add extra chocolate or use a different sugar, those numbers scootch around a little bit!
- Serving Size: 1 cookie
- Calories: About 85
- Total Fat: 4g
- Carbohydrates: 11g
- Protein: 1.5g
- Sugar: 5g
It’s crazy how few calories are in these delicate patterned cookies, considering how rich they taste! That’s because they bake up so light and thin because of the **pizzelle iron recipes**. But seriously, this data is based on the standard vanilla version. For the full scoop on how we calculate these things—because we take transparency seriously around here—please take a peek at our full disclaimer here: You can read all the details on how we measure nutrition here.
Share Your Crispy Pizzelle Cookies Experience
Alright, I’ve shared all my secrets for getting those perfectly crisp, buttery thin cookies, and now I want to hear from you! Making these pizzelle cookies is always better when we talk about them afterwards.
Did you stick with the classic vanilla and anise combo, or did you get adventurous with chocolate or lemon? Tell me down below what you decided on! I love seeing photos of your finished cookies, especially the pretty patterns your iron made. If you’ve got a favorite shape you wrap them into, let the rest of us know!
Seriously, don’t be shy. Leave a rating for this recipe right here on the page if you loved how easy it was to nail that crispy texture. Happy baking, everyone!
Print
Easy Classic Vanilla and Anise Pizzelle Cookies: The Perfect Crispy Italian Waffle Cookie Recipe
- Total Time: 40 min
- Yield: About 3 dozen 1x
- Diet: Vegetarian
Description
Make traditional, crispy Italian pizzelle cookies using this straightforward recipe featuring classic vanilla and anise flavors. Perfect for holidays or any time you want a delicate, buttery waffle cookie.
Ingredients
- 3 large eggs
- 3/4 cup granulated sugar
- 1/2 cup unsalted butter, melted and cooled
- 1 teaspoon vanilla extract
- 1/2 teaspoon anise extract (optional)
- 1 3/4 cups all-purpose flour
- 2 teaspoons baking powder
- 1/4 teaspoon salt
Instructions
- Gather your ingredients and preheat your pizzelle iron according to the manufacturer’s directions.
- In a large bowl, whisk the eggs and sugar together until the mixture is light yellow and slightly thickened.
- Whisk in the cooled melted butter, vanilla extract, and anise extract, if using.
- In a separate bowl, whisk together the flour, baking powder, and salt.
- Gradually add the dry ingredients to the wet ingredients, mixing until just combined. Do not overmix the batter. The batter will be thick.
- Lightly grease the pizzelle iron if your model requires it.
- Drop one teaspoon of batter onto the center of the hot iron. Close the lid immediately.
- Cook for 30 to 60 seconds, or until the steam stops escaping and the cookie is golden brown. Cooking time varies by iron.
- Carefully remove the cookie using a thin spatula. It will be soft.
- Immediately shape the cookie. You can leave it flat for a crisp texture or quickly wrap it around a cannoli form or dowel to create a cone or tube shape before it cools completely.
- Place shaped cookies on a wire rack to cool and crisp up fully.
- Repeat with the remaining batter, adding more butter to the iron as needed.
Notes
- For a strong anise flavor, use the full 1/2 teaspoon. For a milder taste, reduce to 1/4 teaspoon or omit.
- If you prefer a vanilla-only cookie, substitute the anise extract with an extra 1/2 teaspoon of vanilla extract.
- To achieve the crispiest texture, let the cookies cool completely on a wire rack away from humidity.
- For chocolate pizzelles, substitute 1/4 cup of the flour with 1/4 cup of unsweetened cocoa powder.
- For lemon pizzelles, add the zest of one lemon to the wet ingredients and use only vanilla extract.
- Prep Time: 15 min
- Cook Time: 25 min
- Category: Dessert
- Method: Waffle Iron
- Cuisine: Italian
Nutrition
- Serving Size: 1 cookie
- Calories: 85
- Sugar: 5
- Sodium: 35
- Fat: 4
- Saturated Fat: 2.5
- Unsaturated Fat: 1.5
- Trans Fat: 0
- Carbohydrates: 11
- Fiber: 0.2
- Protein: 1.5
- Cholesterol: 30