Oh, honey, let’s talk about the nightmare that is soggy oven wings. We’ve all been there, right? You put them in the oven trying to be healthy for game day, and they come out looking pale, weeping grease, and feeling more like boiled bird than a satisfying appetizer. I swear I wasted pounds of chicken trying to crack this code!
But after what felt like a decade of testing temperatures and dredging methods, I finally nailed it. I’m here to tell you the absolute best way to get truly **crispy baked chicken wings** that rival the deep-fried versions, and guess what? It happens completely in your oven. Forget special equipment; this relies on one tiny, magnificent pantry staple!
The Science Behind Truly Crispy Baked Chicken Wings
If you want that perfect crunch, you have to fight the enemy: moisture. Chicken skin is naturally full of water, and when you bake it, that water steams out, resulting in that dreaded weak, floppy texture. My breakthrough moment came when I realized we needed to create a drier surface *before* the wings ever saw the oven heat.
It’s not about temperature alone, although that matters! The real game-changer is adding baking powder to our light coating. This simple trick chemically changes the pH balance on the skin’s surface, making it far more alkaline. This alkalinity is what encourages the skin to dehydrate rapidly and brown beautifully when it hits the heat. That’s the key to achieving **crispy wings no fry** results!
I even learned that you can check out how certain frying methods work over at katsu curry recipes to see how surface texture is achieved, and the principle is similar! It’s all about manipulating the surface tension.
Why Baking Powder is the Secret to Crispy Wings No Fry Success
This is, hands down, the **best technique for crispy baked chicken** that exists. Baking powder isn’t a spice; it’s a chemical helper. When applied to dry skin, it creates tiny, microscopic bubbles that actually lift the skin ever so slightly. As the wings bake, this lifted, alkaline skin releases steam much faster than untreated skin would.
Trust me on this one—this hack is non-negotiable for getting that satisfying shattering crunch we all crave from my **oven baked chicken wings** recipe!
Essential Ingredients for Perfect Crispy Baked Chicken Wings
Okay, you don’t need a giant shopping list for this to work. Seriously! What we need are simple building blocks, and the star is that magical leavening agent. You’ll need two pounds of wings, separated into drumettes and flats, just like the recipe calls for, plus salt, pepper, and garlic powder for flavor.
But listen closely: if you can find aluminum-free baking powder, grab it. It just gives a cleaner taste, though regular works fine if that’s what you have on hand. Because this method is designed to be a **healthier chicken wings recipe**, we skip heavy oils and rely on the dry rub!
Ingredient Notes and Substitutions
When you buy those two pounds, make sure they are separated, or take the few minutes to cut them apart yourself. Keeping the drumettes and flats separate helps them cook evenly, which is key for true crispiness!
For seasoning, salt and pepper are classics, and garlic powder adds that great savory background note. You could try onion powder or a pinch of smoked paprika if you want to tweak it, but the baking powder—that’s the non-negotiable ingredient for this **baking powder chicken wings hack**. Don’t even think about swapping it out!
Step-by-Step Instructions for Crispy Baked Chicken Wings
Alright, let’s get cooking! This is where the magic happens, and I promise you, these instructions are straightforward. We are going to take those seasoned wings, get them set up perfectly, and then let the oven do the heavy lifting. Just follow the method exactly, especially regarding the heat changes, and you’ll have the best batch of **crispy baked chicken wings** you’ve ever made!
The entire process takes about an hour, which is honestly way better than dealing with hot oil splattering everywhere. Once the wings are done, you can decide if you want to toss them in some heat, like my favorite spicy appetizer recipe dipping flavors.
Preparation: Drying and Coating for Maximum Crispiness
Listen to me: Step one is the most important thing you will do for **how to make wings crispy in oven**. Grab every single paper towel you own and pat those wings until they are bone dry. I mean aggressively dry! When I first tried this method years ago, I got impatient and only patted them quickly. Big mistake! They came out damp on one side.
Once they are dry, mix your baking powder, salt, and spices together. Toss those wings in that coating mixture until every nook and cranny is covered. You want an even, pale dusting over everything. This dry coat is doing all the hard work to get you that perfect crisp!
Baking Technique: Temperature and Rack Placement for Crispy Baked Chicken Wings
For air circulation, you absolutely must use a wire rack placed right over your baking sheet. If the wings sit directly on the metal pan, the moisture they release turns into steam underneath them, making them soggy—no matter how much baking powder you used! This elevates your **oven baked chicken wings** instantly.
We start hot! Preheat your oven to 425°F (220°C). Bake them like that for 25 minutes. Then, flip every single wing over. Now, drop the heat down to 400°F (200°C) and bake for another 20 to 25 minutes. If you want that final, shattering shatter—that ultimate sign of the **best oven temperature for crispy wings**—switch the oven to the broiler for the very last minute, but you MUST stand there and watch them like a hawk so they don’t burn!
Tips for Achieving Juicy Inside Crispy Outside Chicken
We’ve covered the baking powder trick, but getting that perfect texture balance—tender meat inside and crackly skin outside—takes a few extra little attentions to detail. Think of these as the final polish on your **crispy baked chicken wings**!
First, size matters! If you mix monstrously large drumettes with tiny little flats, they won’t cook at the same rate. Try to use wings that are as uniform in size as possible. This ensures that when the outside is perfectly golden brown, the inside has reached that safe 165°F without drying out. Uniformity equals perfection here!
Second, and I cannot stress this enough: never, ever overcrowd the rack. If those wings are touching, they are steaming each other rather than crisping! You need air flowing all the way around every single piece. If you have too many wings, use two baking sheets, or honestly, work in batches. It’s better to have two perfect batches than one large, sad, partially soggy batch. This dedication to space is what secures that **juicy inside crispy outside chicken** texture we’re aiming for.
When you’re done, you can check out my wonderful chicken ramen recipe for a completely different way to enjoy chicken later in the week!
Serving Suggestions for Your Crispy Baked Chicken Wings
Now that you have achieved the impossible—truly **crispy baked chicken wings** straight from the oven—it’s time to dress them up! These are perfect as a main event, but they truly shine as a fantastic **game day chicken wings appetizer**. You didn’t use a ton of oil, so feel good about them!
When serving, I always put out the classics: celery sticks and carrot sticks, along with a big bowl of ranch or blue cheese dip. The cooling dip is the perfect contrast to the heat and spice of the wings. And if you need a delicious, hearty side that keeps the appetizer vibes going, you can check out how I make my mashed potato balls—they are dangerous!
Saucing Options: Buffalo Style Baked Wings and Garlic Parmesan Baked Wings
Here’s the golden rule about saucing: Do it immediately! As soon as those hot, crispy wings come off the rack, toss them directly into your sauce bowl. The heat helps the sauce stick instantly, sealing in that crunch before it has a chance to steam away. This is true for making classic **buffalo style baked wings**.
If you prefer a dry rub flavor, like amazing **garlic parmesan baked wings**, just toss the hot wings with the dry cheese/garlic mixture instead of a wet sauce. Either way, applying the flavor right out of the oven is *the* move to protect the crispiness you worked so hard for!
Storage and Reheating Crispy Baked Chicken Wings
So, what happens if you actually have leftovers? (Which is rare in my house, honestly, because these are *that* good!) You want to store them properly so you can enjoy them the next day without feeling like you’re eating sad little rubber tires. Don’t even think about the microwave; that’s the enemy of crunch and will just steam them into sogginess.
For the best results, let the wings cool completely, then store them in a single layer in an airtight container in the fridge. A zip-top bag works great too, just press out all the air. This keeps the moisture trapped away from the skin as much as possible.
When you’re ready for round two, you gotta bring back that crisp! Pop them back on a wire rack over a baking sheet (I told you that rack was important!) and reheat them in a 400°F oven for about 8 to 10 minutes. If you have an air fryer, that’s even faster! This quick blast of dry heat will crisp them up beautifully. You can even check out how I use leftovers in my minestrone soup, but for wings, oven time is the way to go!
Frequently Asked Questions About Crispy Baked Chicken Wings
I know you probably have a couple of lingering doubts, especially if you’ve struggled with soggy wings before! It’s okay. I’m going to tackle the most common questions I get about making these **oven baked chicken wings** work perfectly every time.
A lot of people ask about timing when they’re planning for a party. If you skip that final 1-2 minute broil at the end, the wings will still be perfectly cooked and very crispy, just maybe not quite *shattering* level crispy. Leave out the broiler if you’re making a huge batch and can’t watch them constantly, but for a small batch, that blast of heat just takes them over the top!
If you’re looking for side dishes, check out my simple teriyaki turkey lettuce wraps—a lighter option that keeps the meal feeling fresh and healthy!
Can I use baking soda instead of baking powder for crispy wings no fry?
Please don’t! While both agents help with browning, they act differently. Baking soda is too strong on its own and can leave a soapy or metallic taste on your **baking powder chicken wings hack**. Baking powder already has the acid needed for the perfect chemical lift on the skin, making it the absolute winner for this method.
How do I ensure a juicy inside crispy outside chicken experience?
Two things: don’t overcrowd the pan so they bake instead of steam, and use a meat thermometer! Once the thickest part hits 165°F, pull them out immediately. The residual heat will carry them to a safe temperature, ensuring the inside stays juicy while the outside stays perfectly crunchy.
Do I have to use aluminum-free baking powder?
No, you don’t *have* to, but I strongly recommend it. Standard baking powder sometimes has a slight bitter aftertaste if you use a lot, and since we’re using a whole tablespoon for this **healthy baked wings recipe**, I find the aluminum-free gives a cleaner flavor profile for those **easy oven fried wings**!
Recipe Details and Quick Facts
I know sometimes you just need the facts quickly, especially when you’re running around the kitchen trying to get everything ready for the party! Here is a quick rundown of what you need to know about how long this delicious recipe takes and how much it makes. It’s surprisingly fast for something this crispy!
I tried to structure this so you can see exactly how much time you need to dedicate to these **crispy baked chicken wings**.
- Prep Time: 15 min
- Cook Time: 50 min
- Total Time: 65 min
- Yield: 4 servings (about 24 pieces, depending on size)
- Category: Appetizer
- Method: Baking
- Cuisine: American
- Diet: Low Fat
See? Under an hour total! And we didn’t even need that fryer oil. If you want to get a jump start on sides that go well with these, you might enjoy my recipe for mashed potato balls; they disappear almost as fast as the wings do!
Nutritional Estimate for This Healthier Chicken Wings Recipe
Now, I want to be super clear here: since these are **healthy baked wings recipe** style without any extra oil dunking, they are much lighter than traditional wings! But remember, these numbers are just an estimate based on the wings and our dry rub. If you decide to toss them in a heavy butter-based sauce after they come out, those numbers are going to change fast!
This tracking helps you see how great they are as a leaner **party finger food chicken** option. For a full breakdown, check out how I sneak in veggies into my mac and cheese recipe—it’s amazing how much better you feel eating lighter versions of comfort food!
- Serving Size: 4 wings
- Calories: 250
- Sugar: 0
- Fat: 15g
- Protein: 26g

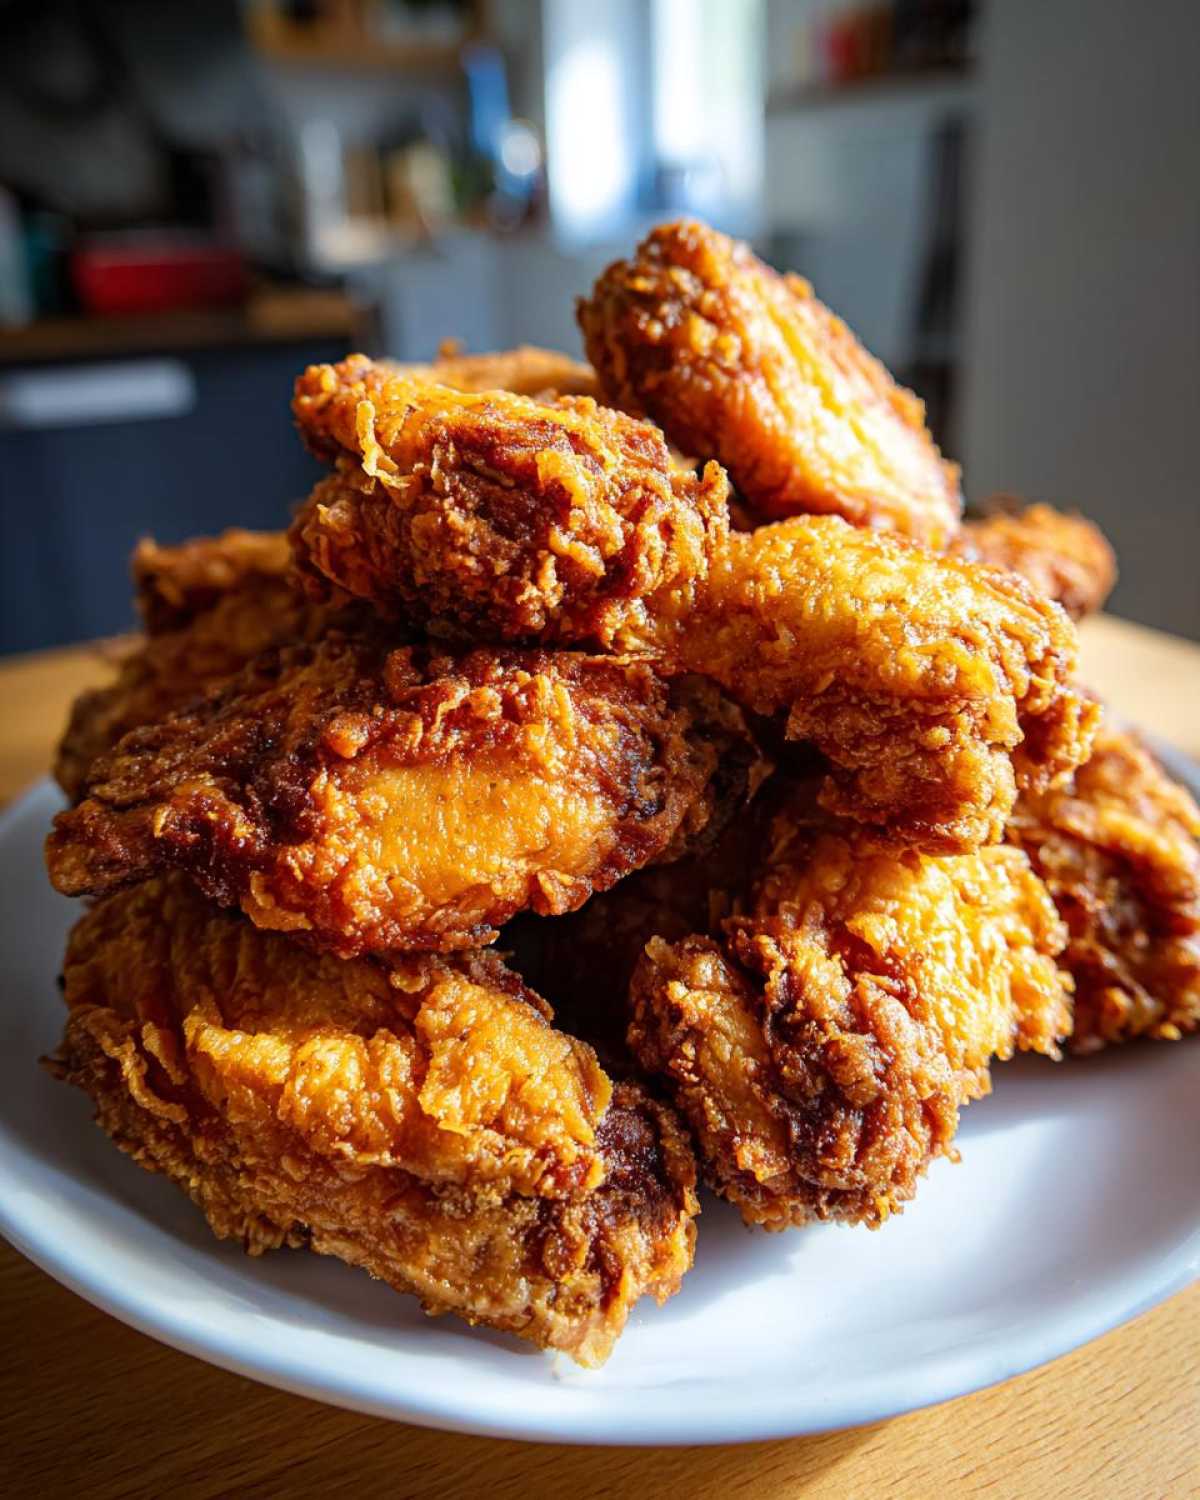
The Ultimate Secret to Truly Crispy Baked Chicken Wings (No Frying Needed)
- Total Time: 65 min
- Yield: 4 servings 1x
- Diet: Low Fat
Description
Follow this method to achieve juicy chicken wings with perfectly crispy skin using only your oven. This technique uses baking powder to dry the skin for maximum crunch without deep frying.
Ingredients
- 2 lbs chicken wings, separated into drumettes and flats
- 1 tablespoon baking powder (aluminum-free preferred)
- 1 teaspoon salt
- 1/2 teaspoon black pepper
- 1/2 teaspoon garlic powder
- Cooking spray
Instructions
- Pat the chicken wings completely dry using paper towels. This step is crucial for crispiness.
- In a large bowl, combine the baking powder, salt, pepper, and garlic powder.
- Add the dried wings to the bowl and toss until every piece is evenly coated with the dry mixture.
- Arrange the wings on a wire cooling rack placed over a baking sheet. Do not let the wings touch each other.
- Preheat your oven to 425 degrees Fahrenheit (220 degrees Celsius).
- Bake the wings for 25 minutes.
- Flip the wings over. Reduce the oven temperature to 400 degrees Fahrenheit (200 degrees Celsius) and bake for another 20 to 25 minutes, or until the internal temperature reaches 165 degrees Fahrenheit (74 degrees Celsius) and the skin is deeply golden and crisp.
- For extra crispiness, switch the oven to the broiler setting for the last 1 to 2 minutes, watching closely to prevent burning.
- Remove from the oven and immediately toss with your favorite sauce, if desired, or serve plain.
Notes
- Using a wire rack allows air to circulate completely around the wings, preventing the bottom from becoming soggy.
- Ensure your baking powder is fresh; old powder will not help dry the skin effectively.
- If you plan to toss the wings in sauce, do so immediately after they come out of the oven so the sauce adheres to the hot, crisp skin.
- Prep Time: 15 min
- Cook Time: 50 min
- Category: Appetizer
- Method: Baking
- Cuisine: American
Nutrition
- Serving Size: 4 wings
- Calories: 250
- Sugar: 0
- Sodium: 350
- Fat: 15
- Saturated Fat: 4
- Unsaturated Fat: 11
- Trans Fat: 0
- Carbohydrates: 1
- Fiber: 0
- Protein: 26
- Cholesterol: 90