Oh, there’s nothing quite like that smell wafting from the oven when you pull out fresh, warm baked goods, is there? Forget the stuffy tea rooms—I’m here to let you in on the secret to making the absolute best, most tender, and buttery scones right in your own kitchen. Seriously, these aren’t those dry hockey pucks you sometimes find! I remember sneaking one straight off the cooling rack when I was little, slathered in jam, and it cemented my love for baking. This recipe is straightforward, uses simple buttermilk, and guarantees flaky pastries that will make you feel like a true pastry chef.
Why This Classic Buttermilk Scones Recipe Works (Fluffy Scones Recipe)
People always ask me why my scones turn out so much lighter than theirs. It 90% comes down to making sure cold ingredients stay cold! If your butter melts before it hits the oven, you end up with dense, greasy little biscuits instead of that gorgeous, flaky stack you’re dreaming of. We need that butter to stay intact.
The real star here, besides the cold butter, is the buttermilk. It’s acidic, which reacts beautifully with the baking powder we use. This reaction helps create lift—those little pockets of air that give you that high rise and tender interior. It’s science working for your brunch table!
The Secret to Tender Scones: Ingredient Temperature
Listen, this is non-negotiable: your butter must be ice cold, straight from the fridge, and cut into little cubes. When those cold butter cubes hit the hot oven, they create instant steam. That steam forces the layers of dough apart, which is exactly how you get those beautiful flaky layers instead of a solid mass.
The same goes for the buttermilk. If it’s lukewarm, it won’t create the necessary temperature shock. For the absolute best results, I actually chill my flour in the freezer for about ten minutes before I start combining things. It sounds fussy, but trust me, that chill factor is what separates a good bake from a spectacular one! If you want to see another bread recipe where chilling ingredients is key, check out my tips for Irish Soda Bread Muffins; the principle is the same!
Gathering Ingredients for Your Perfect Scones
Okay, let’s get organized because half the battle is prepping your components before you start mixing! When you gather these items for your classic buttermilk scones, pay close attention to the description of the butter and buttermilk—remember our talk about temperature? We need everything ready to go and already chilled down.
You’ll need the standard dry stuff: flour, sugar for a touch of sweetness, baking powder for that lift, and salt to balance everything out. The wet side is simple: cold buttermilk and an egg for washing the tops. Don’t forget to cut your butter into those tiny pieces before anything else!
Ingredient Notes and Substitutions for Scones
While this recipe is perfected with buttermilk, I know not everyone keeps it on hand. If you’re in a pinch, you can absolutely substitute heavy cream—it makes for incredibly rich scones, almost a hybrid between a biscuit and a true scone! You’ll just need to use slightly less, maybe about 1/2 cup, because cream is thicker than buttermilk.
Also, regarding the butter, if you see larger chunks remaining after you’ve mixed the dry ingredients, that’s wonderful! Those little islands of butter are what create those fantastic layers people talk about. Don’t try to mash them all down. If you’re adding fruit, like blueberries or chocolate chips, make sure they are mixed gently right after you add the buttermilk—treat that fruit delicately so you don’t crush it and bleed color into your dough.
How to Make Scones: Step-by-Step Instructions
This is where the magic happens, but remember that famous, gentle touch we talked about? The trick to fantastic scones is speed and minimal fuss. First things first: get your oven preheated to 400°F (that’s a hot, fast bake!) and line up a baking sheet with parchment paper. That parchment is your insurance policy against sticking later on.
When you mix the dry ingredients—flour, sugar, baking powder, salt—give them a good whisking so everything is evenly dispersed. Then, toss in your cold butter pieces. You absolutely must cut that butter in until it looks like coarse crumbs. I use my fingertips for this because I can really feel when the larger, pea-sized chunks of butter are suspended in the flour mixture. This step is crucial! Think of it like making a chunky, powdery sandcastle.
Once that’s done, pour in that gorgeous, ice-cold buttermilk. Mix it together with just a fork until it *barely* comes together. It should look shaggy, almost messy—this is good! Resist the urge to stir it smooth. If you stir too much, you develop gluten, and poof! Goodbye, fluffy scone. If you need a reminder on handling delicate dough, check out how I treat the dough for my focaccia bread; handling gently is key for quick bread success!
Mixing the Dough and Shaping Your Scones
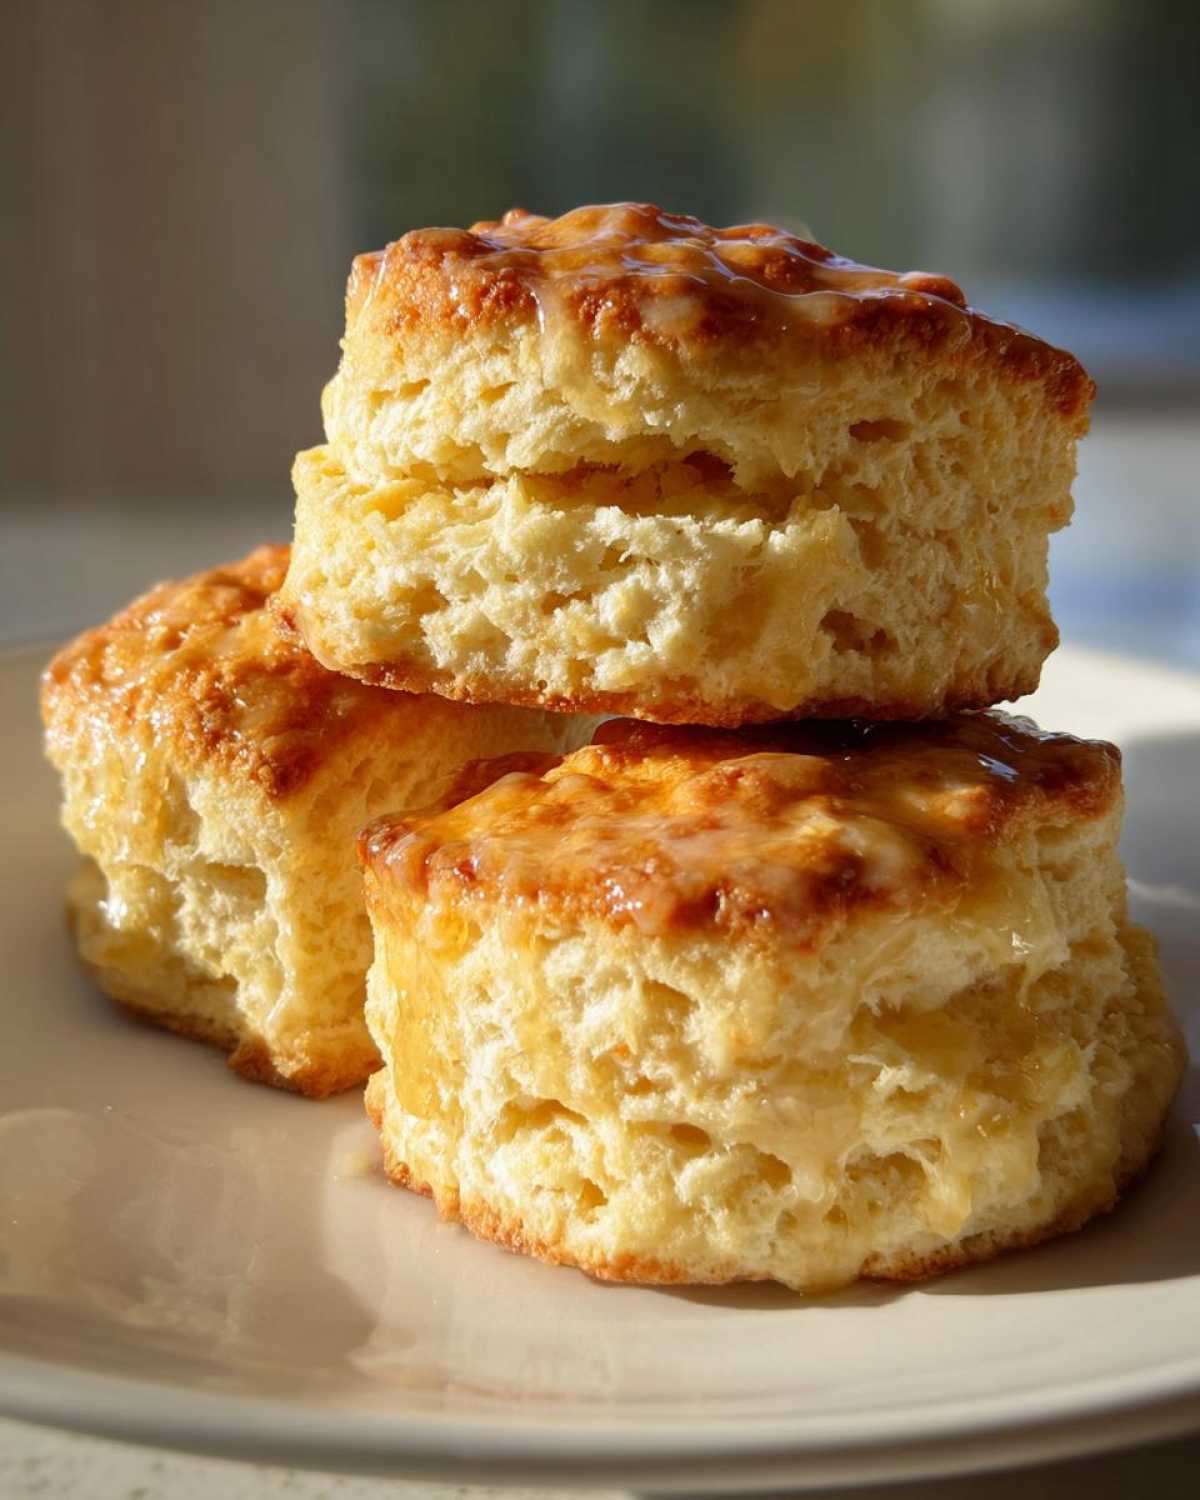
Turn that shaggy dough out onto a lightly floured counter. Seriously, just a tiny dusting of flour is enough. Now, gently work the dough together. You’re only allowed to handle it about three or four times total. Just press it together so it holds a cohesive shape. Pat it down or roll it gently until it’s about three-quarters of an inch thick. I usually cut mine into wedges, like a pizza, because they bake up looking so dramatic, but you can totally use a round cutter if you want perfectly uniform shapes.
Place those beauties close together on the parchment paper. If you want that gorgeous bakery sheen, mix your optional egg and milk together and brush it lightly over the tops. If you don’t like that step, a simple brush of plain milk works just fine too!
Baking Time and Achieving Golden Scones
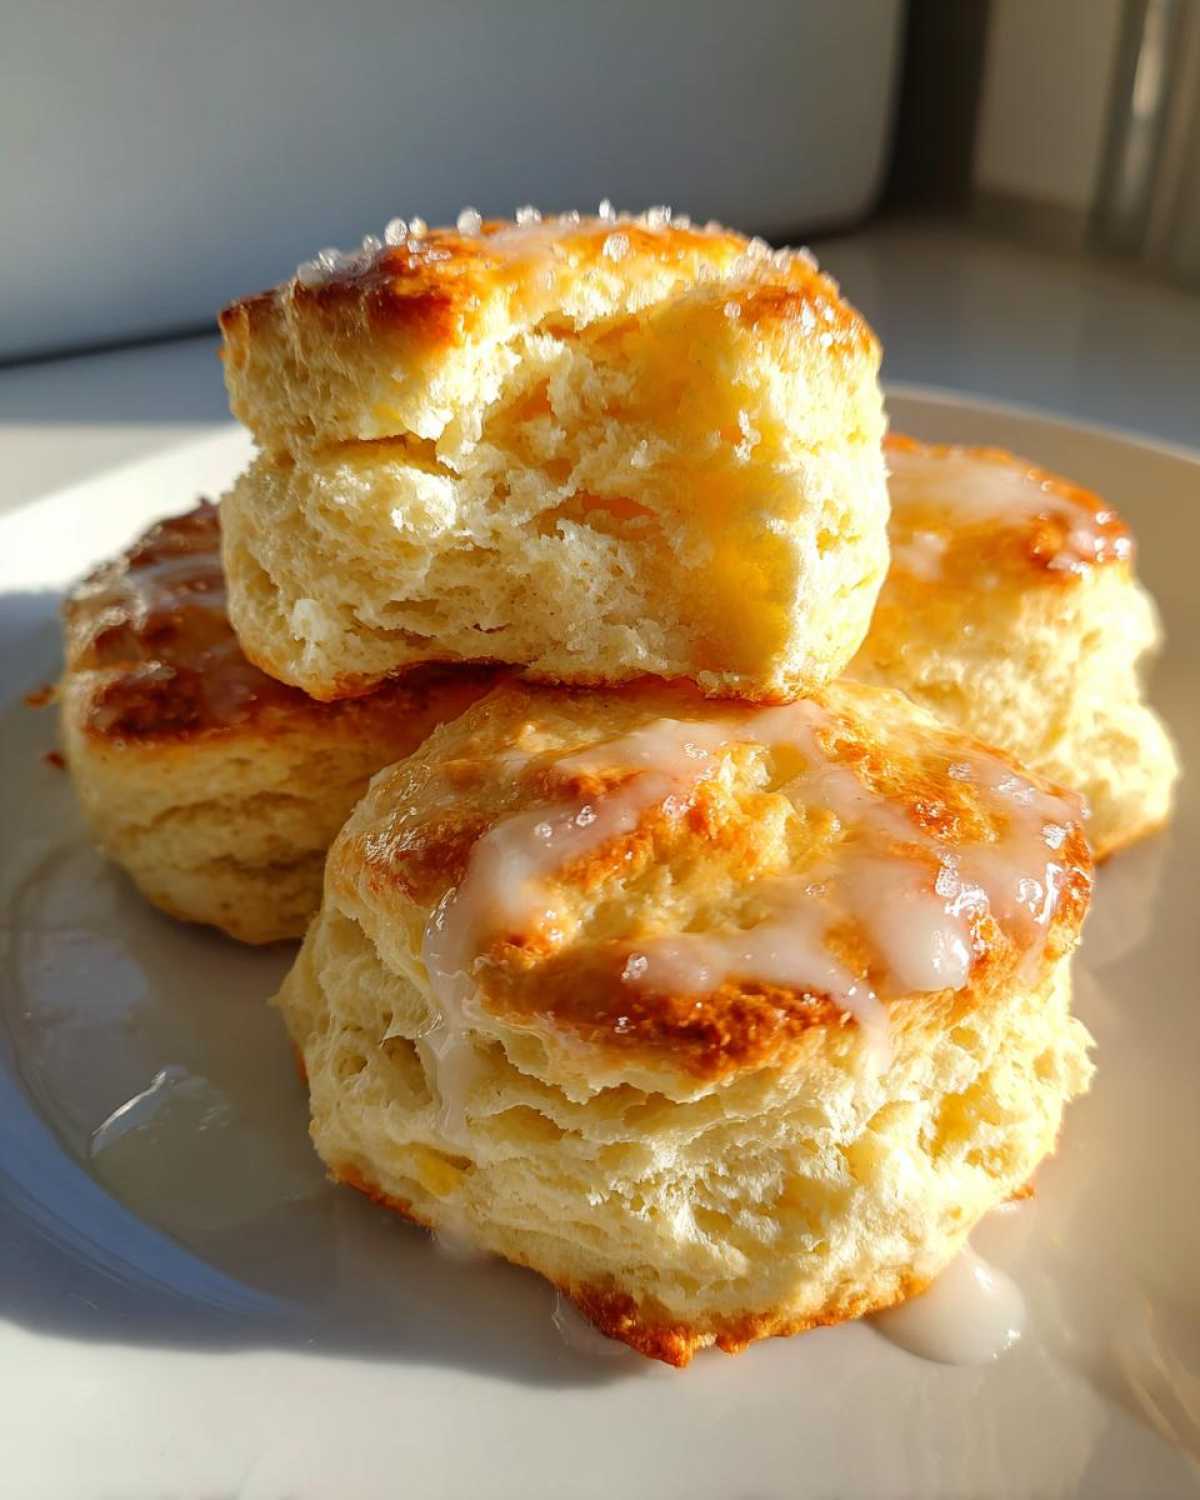
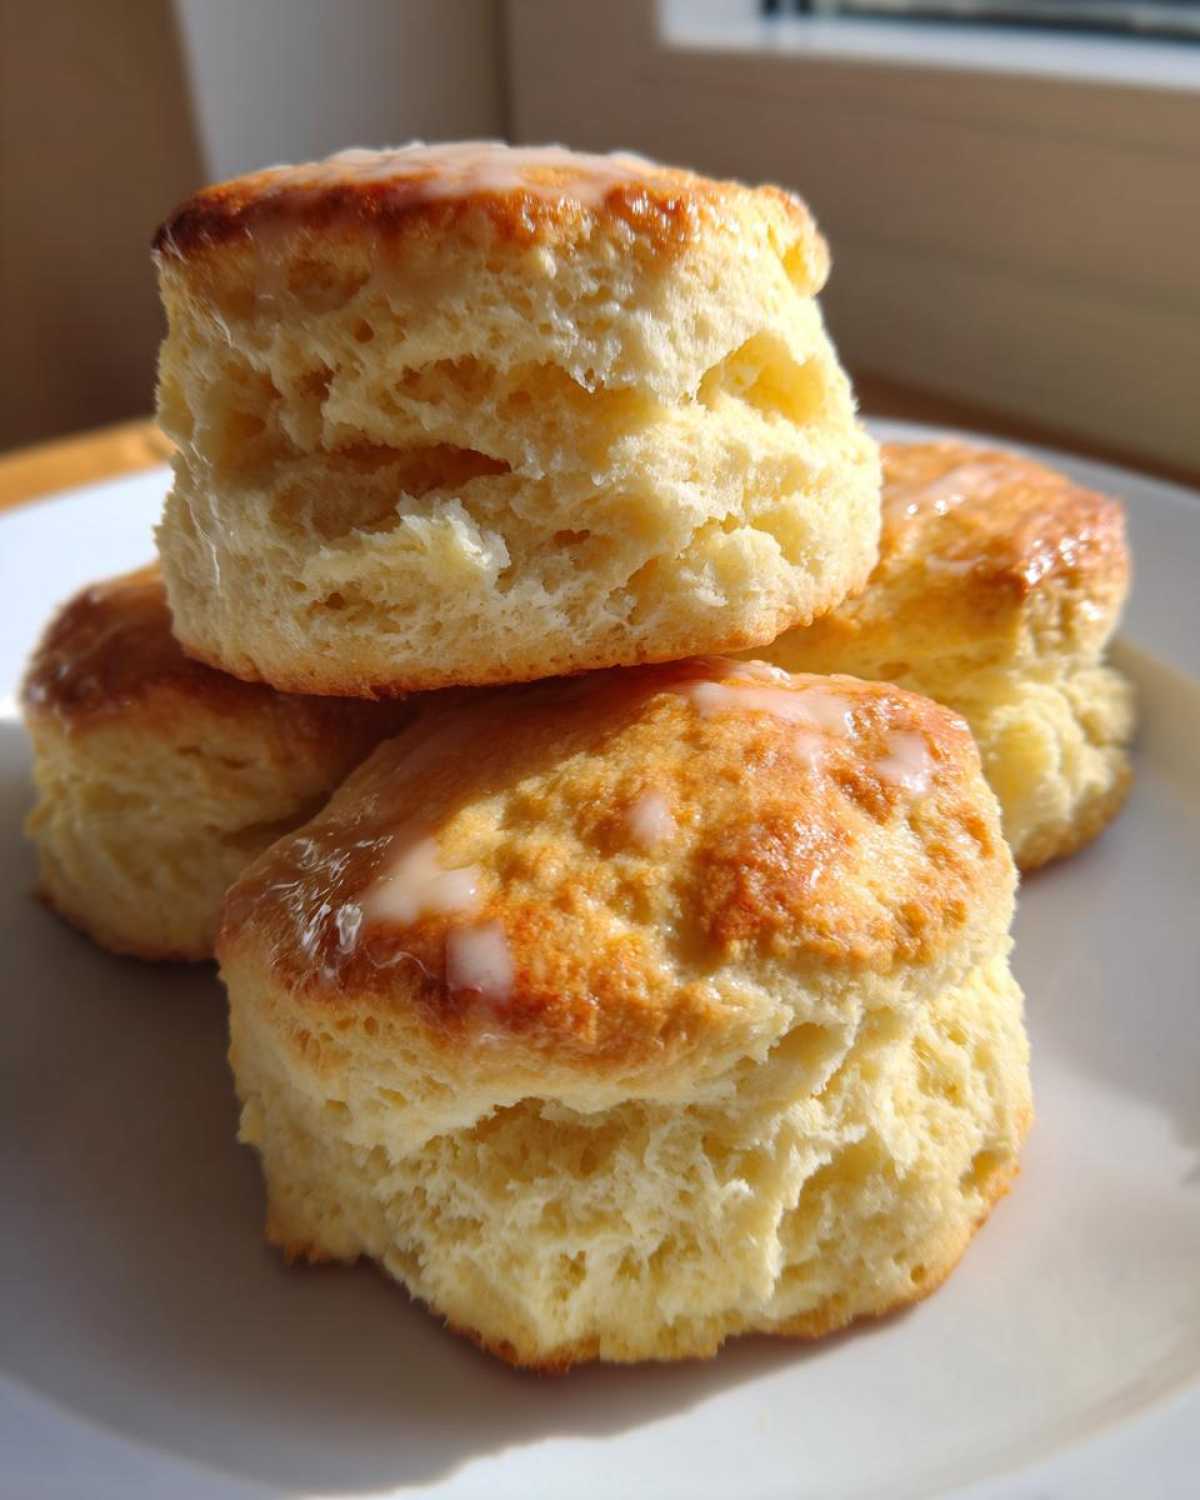
Pop those shaped pieces into the hot oven. They bake quickly—usually just 12 to 15 minutes. You’re looking for them to puff up nicely and turn a beautiful golden brown on top. If you’re unsure, check with a toothpick; you want moist crumbs clinging to it, not raw batter. Getting this timing right is essential for perfect scones!
Once they are done, let them cool down just a bit on a wire rack. These quick breads bake up wonderfully fast; it’s one of the reasons I love them so much!
Tips for Success: Mastering Buttery Scones
Even with the right recipe, timing and technique separate the good scones from the absolutely melt-in-your-mouth perfect ones. I’ve learned a few little tricks over the years that guarantee you get those ‘best homemade scones’ results every single time you bake.
First, if you are cutting rounds instead of wedges, try chilling your round cutter in the freezer for a few minutes before you start cutting the dough. Seriously! When you press that cold cutter deeply into your dough, it seals the edges instantly. This prevents the butter inside from warming up too fast where you cut, which keeps your flaky structure intact.
The second big tip is the touch. When you are folding that dough together or patting it into shape, pretend your hands are made of feathers! Any heavy squishing or kneading is your enemy. We want layers, not density. Light hands equal flaky layers—it’s the simplest rule for these quick bread recipes.
My final piece of advice for killer flavor is to use the best quality European-style butter you can find. Since there’s so much butter flavor in these scones, the higher fat content really shines through. It makes them smell incredible while baking—like the best bakery down the street! If you’re looking for another recipe where ingredient quality makes a huge difference, you have to check out my Chicken Katsu Curry; good ingredients matter!
Transforming Your Scones with Variations
The best part about mastering this base recipe is how easily you can turn it into different amazing treats! We made classic buttermilk scones, but they are begging for some extras. The recipe notes mention blueberry, and that’s my absolute favorite brunch flavor. If you’re using fresh or frozen blueberries, just gently fold them into the dough right after you pour in that cold buttermilk. Don’t stir too much, or you’ll end up with purple streaks everywhere!
If you want something warmer, try adding about a teaspoon and a half of cinnamon and a scant half-cup of dried cranberries before mixing the dry ingredients. Those flavors are just fantastic in a buttery scone; if you love that mix, you’ve got to check out the recipe for my Cranberry Orange Muffins! It’s that perfect sweet-tart balance.
Glazing Your Scones for Afternoon Tea
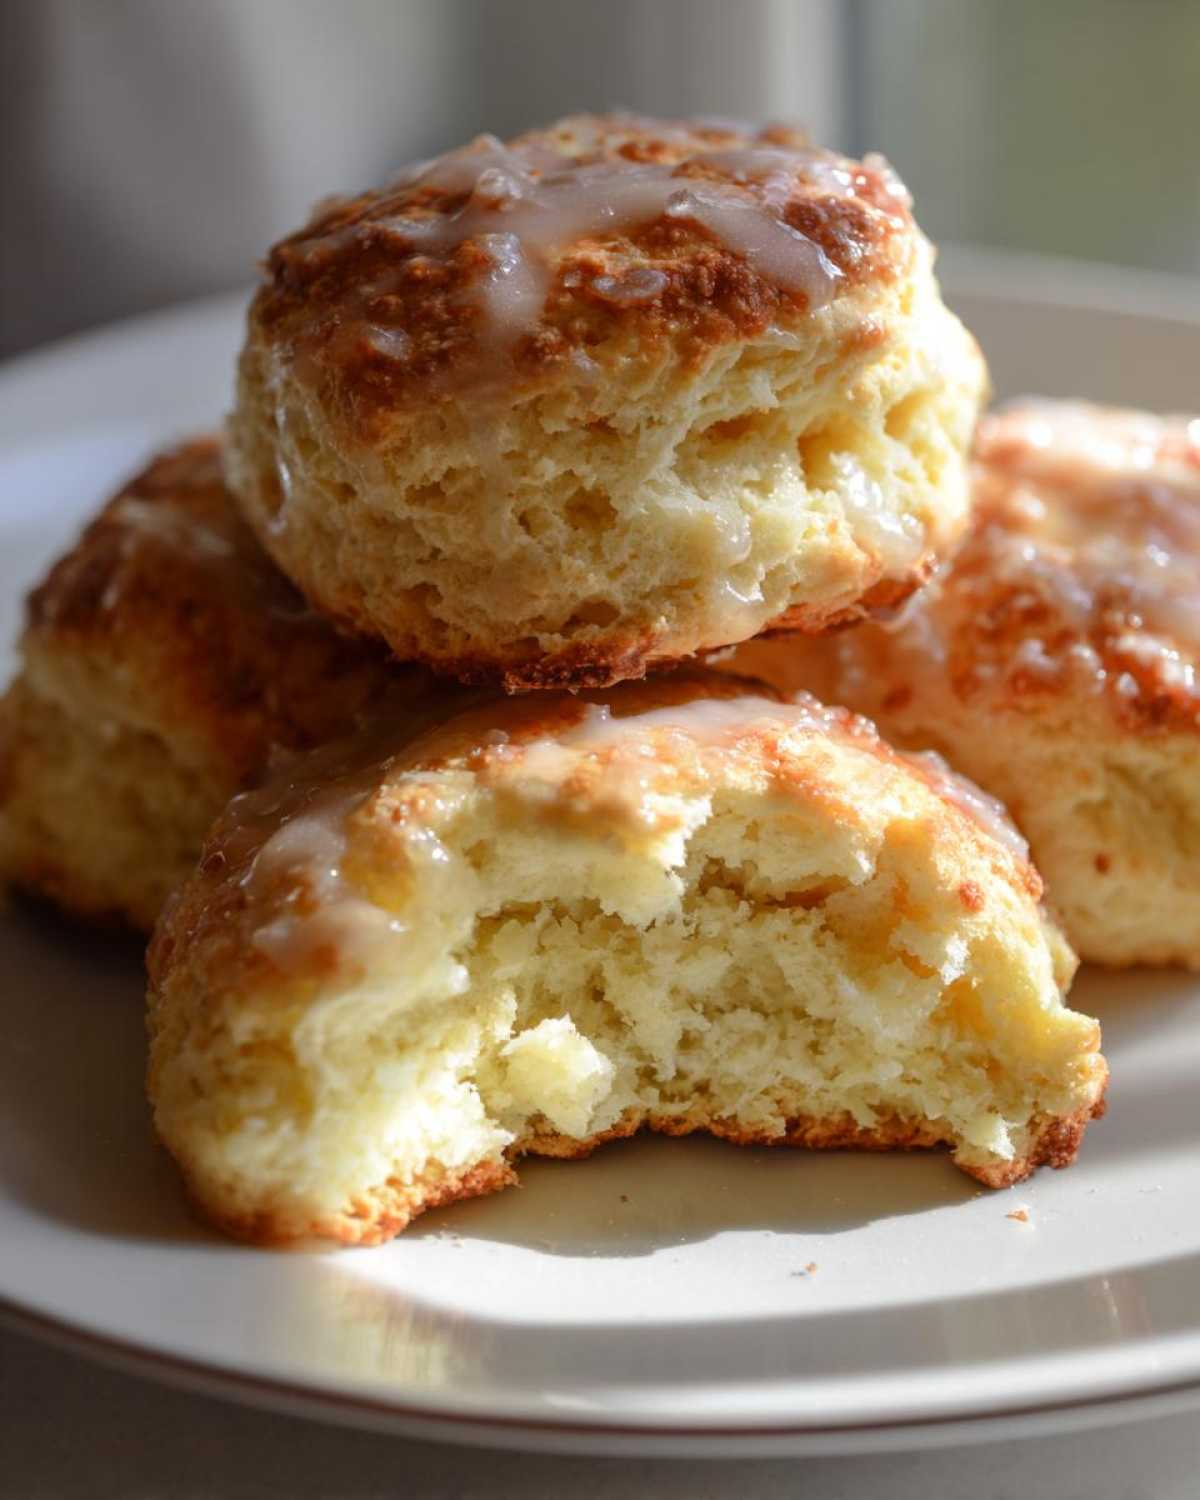
While plain scones are lovely, adding a simple glaze truly steps them up for that special occasion, especially if you are serving them for afternoon tea. And honestly, this glaze is so easy, you probably have the ingredients already!
Just whisk together a cup of powdered sugar with about two tablespoons of milk and a half teaspoon of vanilla extract. If it looks too thick to drizzle, add milk by the tiny drop until it’s pourable. You want a nice, smooth ribbon, not a thick frosting. Let the scones cool completely before drizzling this on top, or you’ll end up with a melted, sticky mess instead of beautiful white stripes!
Storage and Reheating Your Homemade Scones
Because these scones are so rich with butter, they do best when eaten the day they are baked, but a beautiful batch lasts a few days, which is great for grab-and-go breakfasts!
If you have leftovers, keep them in an airtight container at room temperature for up to three days. Do not refrigerate them unless you have an extreme heat wave, as the cold air can dry out the starches quickly. If they seem a little dull the next day, don’t worry!
To bring back that fresh-from-the-oven fluffiness, just pop them in a toaster oven or a regular oven set to 300°F for about five minutes. That little bit of heat melts the butter back into the crumb, and suddenly, they are tender and buttery all over again. It works like magic every single time!
Frequently Asked Questions About Scones
It’s normal to have questions when you’re diving into a new baking recipe, especially one like this classic scone recipe. I get asked the same things all the time! Hopefully, these common queries will clear up anything holding you back from achieving that perfect, fluffy texture.
Can I use regular milk instead of buttermilk for these scones?
You absolutely can, but you need to remember to ‘sour’ it first! If you just use regular milk straight from the fridge, it won’t react as strongly with the baking powder, and your scones won’t get that lovely lift. To make a quick buttermilk substitute, just mix 3/4 cup of regular milk with one tablespoon of white vinegar or lemon juice. Let it sit for about five to ten minutes until it looks slightly curdled. That’s what we need for the best brunch baking ideas!
What makes scones dry, and how can I prevent it?
Nine times out of ten, dryness is caused by two things: overmixing or using ingredients that aren’t cold enough. Remember when we talked about keeping that butter frozen? If you mix the dough too much after adding the liquid, you develop gluten, which makes the final product tough and dry. For the best moist scones tutorial, always mix gently until *just* combined. If you’re at my About Me page, you know I preach gentle handling for almost all my quick bread recipes!
The other major cause is messy measuring, especially of the flour. Don’t scoop the flour right out of the bag; use the spoon-and-level method to keep the measurements accurate. Too much flour means a dry scone, plain and simple!
Nutritional Estimates for Classic Scones
I always love sharing the details, but I have to give you a little heads-up before you dive into this breakdown. These numbers are just estimates based on the butter and buttermilk version of the recipe—they are the blueprint! If you decide to swap in heavy cream, or if you go heavy-handed with that optional vanilla glaze, those calorie and sugar counts are certainly going to tick up a bit.
For me, when I’m baking for brunch, I try not to fret too much over the specifics, especially since these are a treat! But it’s always good to have a general idea, right? These estimates are based on one scone (out of the eight the recipe makes) without the glaze applied, just brushed with the egg wash for that golden top.
- Serving Size: 1 scone
- Calories: 280
- Sugar: 10g
- Sodium: 250mg
- Fat: 14g
- Saturated Fat: 9g
- Carbohydrates: 34g
- Protein: 5g
Keep in mind that the fat content is mostly from that wonderful, cold butter we insisted upon—it’s what gives you the texture! As always, for the most accurate information regarding nutritional data regarding the ingredients used in your kitchen, please refer to the specific packaging or review my full disclaimer page.
Share Your Perfect Scones Creations
I poured my heart out telling you how to make these truly flaky scones, and now it’s your turn! Please come back and drop a comment below letting me know if you went classic or if you tried the blueberry variation. Did you use cream instead of buttermilk? I want to know all the details.
Rate this recipe five stars if it made your morning brighter, and if you shared a photo on social media, tag me! If you have any last-minute questions that I haven’t covered, pop over to my contact page, and let’s chat baking!
Print
Classic Buttermilk Scones with Optional Glaze
- Total Time: 30 min
- Yield: 8 scones 1x
- Diet: Vegetarian
Description
Make tender, buttery scones at home using this straightforward recipe. This base recipe works well plain or with your favorite fruit additions.
Ingredients
- 2 cups all-purpose flour
- 1/4 cup granulated sugar
- 1 tablespoon baking powder
- 1/2 teaspoon salt
- 1/2 cup (1 stick) cold unsalted butter, cut into small pieces
- 3/4 cup cold buttermilk
- 1 large egg, lightly beaten (for egg wash, optional)
- 1 tablespoon milk (for egg wash, optional)
- For Glaze (Optional): 1 cup powdered sugar, 2 tablespoons milk, 1/2 teaspoon vanilla extract
Instructions
- Preheat your oven to 400°F (200°C). Line a baking sheet with parchment paper.
- In a large bowl, whisk together the flour, sugar, baking powder, and salt.
- Cut the cold butter into the dry ingredients using a pastry blender or your fingertips until the mixture resembles coarse crumbs with some pea-sized pieces of butter remaining.
- Pour in the cold buttermilk. Mix gently with a fork until just combined. Do not overmix; the dough will be shaggy.
- Turn the dough out onto a lightly floured surface. Gently knead it 3 or 4 times until it comes together. Pat or roll the dough into a 3/4-inch thick circle or rectangle.
- Cut the dough into 8 wedges or use a round cutter to cut out scones. Place the pieces onto the prepared baking sheet.
- For a golden top, brush the tops lightly with the egg wash (whisked egg and milk).
- Bake for 12 to 15 minutes, or until the tops are golden brown and a toothpick inserted into the center comes out clean.
- Let the scones cool on a wire rack.
- If making the glaze, whisk together the powdered sugar, milk, and vanilla extract until smooth. Drizzle over the cooled scones.
Notes
- For Blueberry Scones, gently fold in 1 cup of fresh or frozen blueberries after adding the buttermilk.
- For a richer flavor, substitute heavy cream for the buttermilk.
- Keep all ingredients, especially the butter and buttermilk, very cold for the flakiest results.
- Prep Time: 15 min
- Cook Time: 15 min
- Category: Breakfast
- Method: Baking
- Cuisine: British
Nutrition
- Serving Size: 1 scone
- Calories: 280
- Sugar: 10
- Sodium: 250
- Fat: 14
- Saturated Fat: 9
- Unsaturated Fat: 5
- Trans Fat: 0
- Carbohydrates: 34
- Fiber: 1
- Protein: 5
- Cholesterol: 55