Oh, the never-ending quest for kid-friendly snacks! If you’re anything like me, you’re always looking for something that’s easy, doesn’t make a massive mess, and actually gets eaten. Especially in the warmer months, frozen treats are a huge hit, but sometimes I want something a little healthier than store-bought options. That’s where this Banana Nice Cream Cones for Kids: Healthy Frozen Fun Snack recipe swoops in to save the day!
I first stumbled upon the idea of nice cream when Leo was a toddler. He was going through a phase where he only wanted cold things, and I was desperate for an alternative to popsicles loaded with sugar. I tried blending frozen bananas, and honestly, I was amazed. It was so simple, yet it tasted surprisingly like soft-serve ice cream.
Mia, my little taste-tester extraordinaire, is also a big fan. We love making these together, letting them help spoon the nice cream into the cones and add colorful sprinkles. It feels like a special treat, but I know they’re getting the goodness of fruit. It’s truly a healthy frozen fun snack that makes everyone happy.
As a busy parent and the voice behind Child Recipe, I know how valuable quick, reliable recipes are. This one is a staple in our house, and I can’t wait for you to try it!
Why Banana Nice Cream Cones for Kids: Healthy Frozen Fun Snack?
So, why is this banana nice cream recipe a winner in my book (and in Leo and Mia’s)? It’s more than just a sweet treat. For busy parents, it ticks so many boxes.
- It’s lightning fast. Seriously, we’re talking minutes from freezer to cone. Perfect for those sudden snack attacks!
- Simple ingredients are key. You probably have what you need right now. Just bananas and a splash of milk!
- A healthier swap. It gives you that ice cream feel without all the added sugar and dairy, making it a healthy frozen fun snack.
- Kids absolutely love it. The creamy texture and the fun of a cone make it a huge hit. Mia calls it “banana ice cream!”
- So many ways to make it your own. You can easily add cocoa, peanut butter, or other fruits to change up the flavor.
It’s honestly a win-win. Easy for me, delicious for them!

Ingredients for Banana Nice Cream Cones for Kids
Okay, let’s gather our simple ingredients for this healthy frozen fun snack. This is one of those recipes where you likely have everything on hand!
- 2 very ripe bananas, sliced and frozen solid
- 1-2 tablespoons milk (dairy or non-dairy, I always start with just 1)
- Optional add-ins: 1 tablespoon unsweetened cocoa powder for a chocolate twist, or 1/2 teaspoon vanilla extract
- Ice cream cones (sugar cones are our favorite!)
- Optional toppings: sprinkles, mini chocolate chips, or some finely diced fresh fruit
That’s it! See? Super simple for a delicious treat.
Equipment for Making Banana Nice Cream Cones
You don’t need fancy gadgets for this healthy frozen fun snack! The main thing you’ll need is something to blend those frozen bananas into creamy goodness.
- A food processor is my go-to. It handles the frozen fruit like a champ.
- A high-powered blender can work too, but you might need to stop and scrape more often.
Just make sure your equipment is clean and ready to go before you start. It keeps things quick and easy!
How to Prepare Banana Nice Cream Cones for Kids
Alright, let’s turn those frozen banana slices into a delightful healthy frozen fun snack! This part is really simple, which is exactly what we need as busy parents. Just follow these steps, and you’ll have nice cream ready in minutes. It’s almost magic how frozen fruit becomes so creamy!
First, grab your food processor or high-powered blender. Make sure it’s empty and ready for action. We’re going to add the frozen banana pieces in there. Don’t overcrowd it; work in batches if you need to, especially with a regular blender. This helps everything blend evenly.
Next, add just one tablespoon of milk to start. You can always add more if needed, but it’s easier to add than take away! This little bit of liquid helps things get moving in the processor. Now, put the lid on tight and get ready to blend.
You’ll need to process it. At first, it will look crumbly, almost like snow. Keep going! You’ll need to stop a few times to scrape down the sides. This is important to make sure all the banana gets smooth. Use a spatula to push everything back towards the blades.
Keep blending and scraping until it starts to look creamy, like soft-serve ice cream. If it’s still too thick and not blending smoothly, add the second tablespoon of milk, just a tiny bit at a time. You want it smooth and scoopable, not watery.
Once it’s got that perfect creamy texture, you can add any fun flavors you like! We’ll talk more about that in a moment. Then, it’s time to spoon it into those waiting ice cream cones. This is a great step to let the kids help with, though it can get a little messy!
Add your favorite toppings right away and serve! This healthy frozen fun snack is best enjoyed immediately because it melts pretty fast. Enjoy watching those happy faces!
Blending Your Perfect Banana Nice Cream
Getting the right consistency for your banana nice cream is key. It starts with those frozen bananas! Make sure they are truly frozen solid. When you first start processing, it will look like frozen crumbs. Don’t worry, that’s normal!
Just keep blending, stopping often to scrape down the sides of your processor or blender. This helps incorporate all the pieces. Start with just one tablespoon of milk. Only add the second tablespoon if absolutely necessary to get a smooth, soft-serve texture. Patience here pays off!
Adding Flavor to Your Banana Nice Cream
This is where you can get creative with your healthy frozen fun snack! Once your basic banana nice cream is smooth and creamy, you can add extra flavors. This is when I’d add a tablespoon of unsweetened cocoa powder if we want chocolate nice cream.
Or, you could add a half teaspoon of vanilla extract for a little extra sweetness. Some families like adding a spoonful of peanut butter too! Just add your chosen flavorings to the processor and blend again briefly until everything is mixed in. It’s a simple way to change things up!
Tips for Success with Banana Nice Cream Cones for Kids
Making this healthy frozen fun snack is pretty straightforward, but a few simple tips can make sure you get the best results every time. I’ve learned these through trial and error in my own kitchen with Leo and Mia!
First, always use very ripe bananas. The riper they are, the sweeter your nice cream will be, meaning you won’t need to add any extra sugar. Look for bananas with lots of brown spots!
Before freezing, break or cut your bananas into smaller chunks. This makes it so much easier on your food processor or blender. Trying to blend whole frozen bananas is a battle you don’t want!
Remember that nice cream melts faster than regular ice cream. Have your cones ready and serve it immediately after blending. It’s part of the charm!
And finally, get the kids involved! Let them help add the banana pieces to the processor (with supervision, of course!) or spoon the nice cream into the cones. Leo and Mia love adding their own sprinkles. It makes it more fun for everyone.
Variations for Banana Nice Cream Cones
While the classic banana version of this healthy frozen fun snack is wonderful, you can totally switch things up! Getting creative with variations is part of the fun. My kids love experimenting with different flavors.
Try adding a handful of frozen berries, like strawberries or blueberries, along with the banana for a fruity blend. A spoonful of peanut butter or almond butter makes it extra creamy and adds protein. For a tropical twist, blend in some frozen mango or pineapple. You could even add a pinch of cinnamon or nutmeg for warmth. The possibilities are really endless!
Serving Suggestions for Your Banana Nice Cream Cones
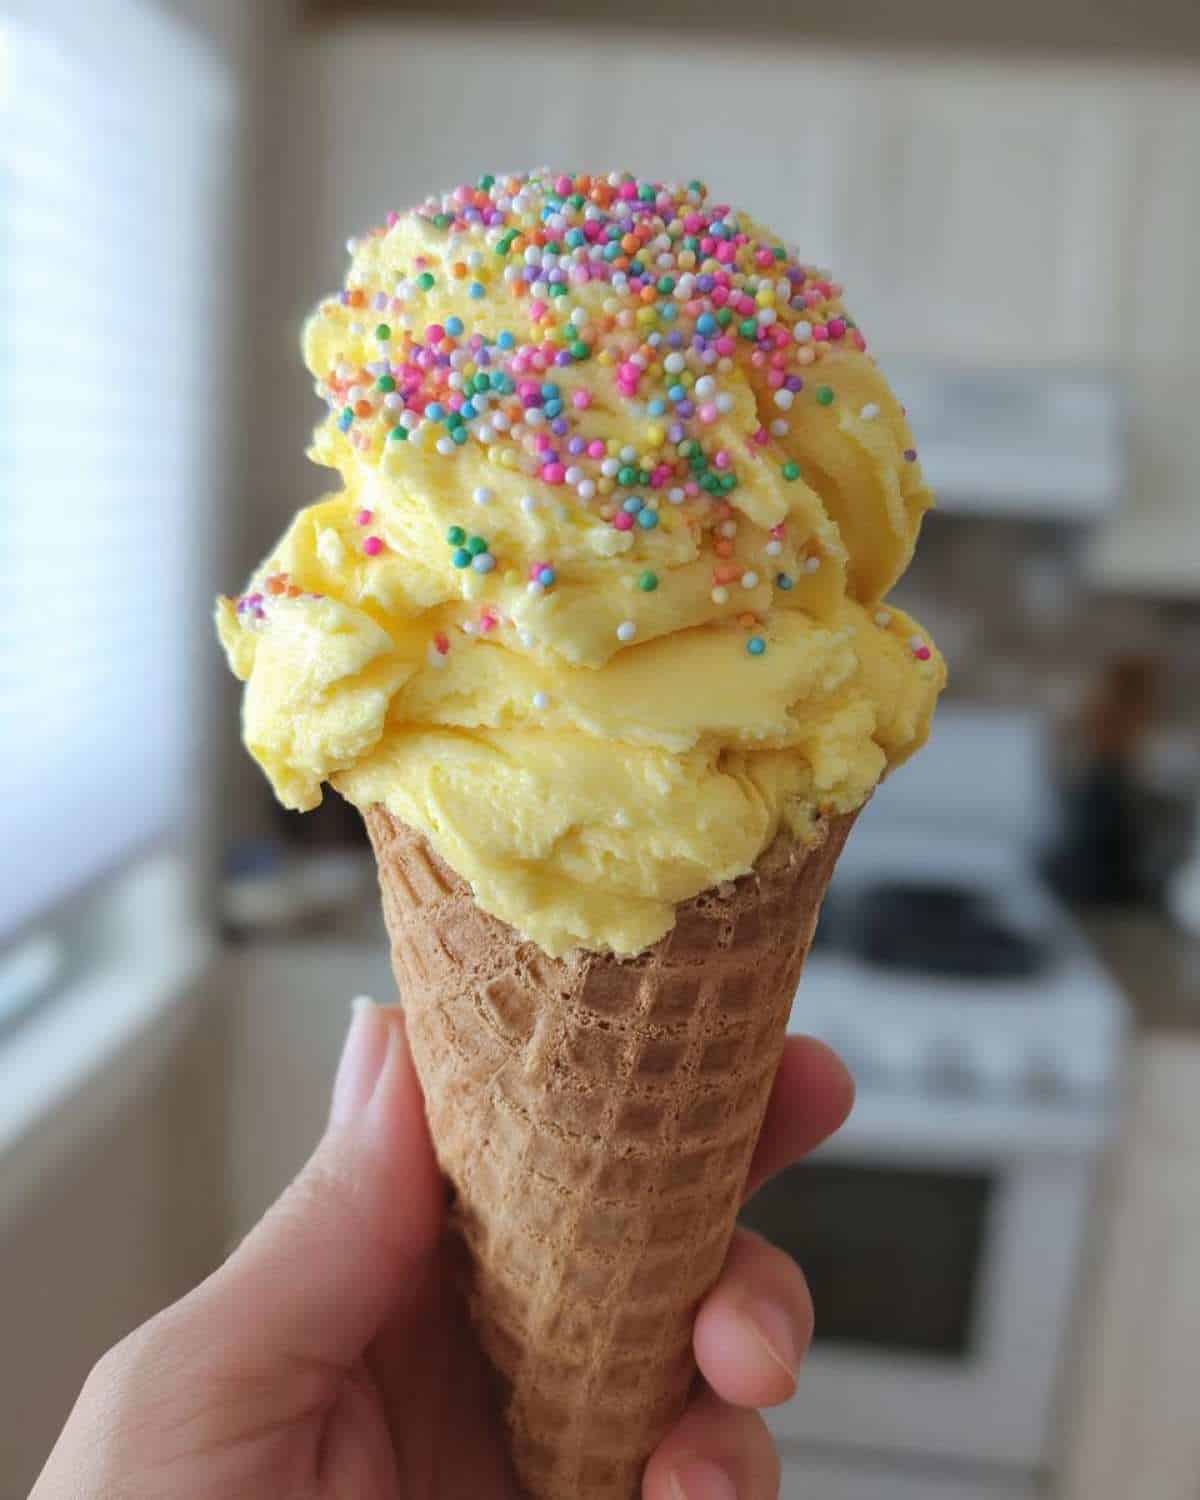
Serving this healthy frozen fun snack is all about making it appealing to little eyes and tummies! Once your nice cream is blended to perfection, quickly spoon it into your ice cream cones. Don’t worry if it’s not perfectly swirled; kids don’t mind!
The best part is the toppings! This is where you can really make it fun. Colorful sprinkles are always a hit at our house. A few mini chocolate chips or some finely diced fresh fruit like strawberries or blueberries also work great. Serve them right away to enjoy that lovely creamy texture!
Storage and Reheating
Because this is a healthy frozen fun snack made from just fruit, it’s really best enjoyed right away. Nice cream doesn’t have the stabilizers that regular ice cream does.
If you do have leftovers, you can scoop them into a freezer-safe container and pop them back in the freezer. Just know that when you take it out later, it will be quite hard, like a block of frozen fruit. You’ll likely need to let it soften on the counter for a bit or even give it a quick re-blend to get that creamy texture back. Reheating isn’t really a thing for this!
Nutritional Information Disclaimer
Just a quick note about the nutrition for this healthy frozen fun snack. Because we’re using simple, whole ingredients like bananas and milk, the exact nutritional values can change a bit.
Things like the type of milk you use (dairy vs. non-dairy) and any optional add-ins or toppings will affect the final nutrition numbers. I haven’t provided a precise nutritional breakdown here, as it really depends on what you put in and the specific brands you choose. It’s meant to be a generally healthier treat compared to traditional ice cream!
Common Questions About Banana Nice Cream Cones
I get asked a few questions often about this healthy frozen fun snack! It’s understandable; when you’re trying a new recipe, especially for kids, you want it to work out. Here are some common things parents wonder about making banana nice cream cones.
Can I freeze leftover Banana Nice Cream?
Yes, you absolutely can freeze any leftovers! Just scoop the remaining banana nice cream into an airtight container. Pop it in the freezer. When you want to enjoy it again, you’ll notice it freezes quite hard. It’s like a solid block of frozen goodness! You’ll need to let it sit out on the counter for 10-15 minutes to soften up a bit before scooping. Sometimes, I even give it a quick whirl back in the food processor to get some of that creamy texture back.
What if my Banana Nice Cream is too thick or too thin?
This is a common one! If your nice cream is too thick and isn’t blending smoothly, add a tiny splash more milk, maybe half a tablespoon at a time. Don’t add too much at once! If it ends up too thin, which usually happens from adding too much liquid, you can try adding a few more frozen banana slices and blending again. It can be a balancing act, but starting with less milk helps prevent it from getting too thin.
Can I use fresh bananas instead of frozen?
Unfortunately, no. Using frozen bananas is the secret to getting that thick, creamy, soft-serve texture that makes this a healthy frozen fun snack. Fresh bananas will just blend into a smooth puree, which is delicious, but it won’t have that lovely frozen consistency. So, make sure those bananas are sliced and completely frozen before you start!
Make Memories with Banana Nice Cream Cones
Making these banana nice cream cones isn’t just about a healthy frozen fun snack; it’s about making happy memories in the kitchen. It’s simple enough for little hands to help, and the smiles you get when you hand over that cone are just priceless. I hope you give this recipe a try with your own kids!
Let me know how it goes in the comments below. Did your kids love it? What fun toppings did you use? I’d absolutely love to see your creations!
Print
Awesome Banana Nice Cream Cones for 1 Joyful Kid Smile
- Total Time: 5 minutes
- Yield: 2-3 servings 1x
- Diet: Vegan
Description
Easy and healthy frozen banana nice cream cones perfect for kids.
Ingredients
- 2 frozen bananas, sliced
- 1–2 tablespoons milk (dairy or non-dairy)
- Optional add-ins: cocoa powder, vanilla extract, peanut butter, fruit
- Ice cream cones
- Optional toppings: sprinkles, chocolate chips, fruit
Instructions
- Add the frozen banana slices and 1 tablespoon of milk to a food processor or high-powered blender.
- Process until smooth and creamy, scraping down the sides as needed. Add the second tablespoon of milk only if necessary to reach a soft-serve consistency.
- If adding optional ingredients like cocoa powder or peanut butter, add them now and process until combined.
- Spoon the ‘nice’ cream into ice cream cones.
- Add optional toppings if desired.
- Serve immediately.
Notes
- Ensure bananas are very ripe before freezing for the best flavor and sweetness.
- Cut bananas into smaller pieces before freezing to make blending easier.
- This nice cream is best enjoyed immediately as it will melt quickly.
- Get creative with add-ins and toppings based on your kids’ preferences.
- Prep Time: 5 minutes
- Cook Time: 0 minutes
- Category: Dessert, Snack
- Method: Blended
- Cuisine: American
Nutrition
- Serving Size: 1 cone
- Calories: Calculated based on ingredients used
- Sugar: Calculated based on ingredients used
- Sodium: Calculated based on ingredients used
- Fat: Calculated based on ingredients used
- Saturated Fat: Calculated based on ingredients used
- Unsaturated Fat: Calculated based on ingredients used
- Trans Fat: Calculated based on ingredients used
- Carbohydrates: Calculated based on ingredients used
- Fiber: Calculated based on ingredients used
- Protein: Calculated based on ingredients used
- Cholesterol: Calculated based on ingredients used