Okay, friends, listen up! Are you tired of having to choose between hitting your macros and enjoying a seriously decadent treat after dinner? Me too! That’s why Liam and I channeled our best energy into this recipe. Forget boring protein bars for a minute because this Protein Cheesecake is here to rescue your sweet tooth. We’ve taken the classic, creamy dream of cheesecake and made it macro-friendly, easy enough for me (Sara, the resident chaos agent!) to whip up in 15 minutes flat, and packaged it perfectly in jars so Liam (the artist!) doesn’t freak out about messy pans. You can read more about our little kitchen dynamic over on our About Page. Trust me, keeping dessert fun while staying on track is the absolute key to longevity, and this recipe is pure, guilt-free joy.
Why This No-Bake Protein Cheesecake Jars Recipe Works for Your Goals
When I’m trying to keep everything balanced—for my energy in the classroom or Liam’s energy in the studio—I need snacks that pull their weight! This little dessert-in-a-jar is perfect because it ticks all the boxes without making me feel like I’m missing out on anything special.
Macro Friendly Dessert Power
I mean, getting around 30 grams of protein in one small, glorious serving? That’s insane! We designed this specifically so you get that unbelievably creamy texture you crave from real cheesecake, but scaled back on the sugar and fat until it’s truly a Macro Friendly Dessert. It helps keep you full and supports all that hard work you’re putting in.
The Ease of a No Bake Protein Dessert
Seriously, you just blend and chill. That’s it! Liam loves how precise the measuring is, but I love that there’s zero oven time involved, which keeps the kitchen cool during the summer!
This is the classic No Bake Protein Dessert you didn’t know you needed for easy meal prep. You can find more fantastic ideas for prepping sweet treats over on our meal prep page!
Gathering Ingredients for Your Protein Cheesecake Filling and Crust
Alright, team! Before we get this magic show started, we need our props—I mean, ingredients! The list might look a little different than your regular cheesecake, but that’s how we pack in the flavor and the protein without any of the heavy guilt. When I was laying everything out, I tried to keep Liam’s precision in mind, so everything is listed out clearly for this amazing Protein Cheesecake!
Here is what you need to pull together for four jars:
- 1 cup low-fat cottage cheese
- 1 cup plain non-fat Greek yogurt
- 1/2 cup vanilla or unflavored whey protein powder
- 1/4 cup powdered erythritol or preferred sugar substitute
- 1 teaspoon vanilla extract
- 1/4 cup water or unsweetened almond milk (adjust for consistency)
- For the Crust: 1 cup almond flour
- 2 tablespoons melted light butter or coconut oil
- 1 tablespoon powdered erythritol
- For Topping (Optional): 1/2 cup mixed berries
Ingredient Notes and Substitutions for Perfect Protein Cheesecake
Now, listen close because this is where the texture happens. Liam always insists we use low-fat cottage cheese here because when blended, it breaks down so completely, giving us that authentic ‘cheesy’ density without needing tons of actual cream cheese. Don’t skip that step!
For your sweetener, you want powdered erythritol or monk fruit blend—anything powdered, honestly. If you use granular sugar substitutes, your filling will feel gritty, and that’s just unacceptable. If you want a different protein flavor, I find a pea/whey blend works best for the texture, but pure whey is usually fine too. If you find your filling is too runny, just toss in one more tablespoon of your protein powder to tighten it up. If you’re playing around, check out how we use cottage cheese in our Cloud Bread recipe for another fun, healthy swap!
Step-by-Step Instructions for Creamy Protein Cheesecake in a Jar
Okay, this is where the culinary performance really begins! We’ve got our ingredients ready, and we know this is going to be an amazing Protein Cheesecake, clocking in with just 15 minutes of active prep time needed. Liam always says that the magic isn’t just in what you use, but exactly when and how you combine it. Since this is a no-bake situation, chilling time is pretty crucial too, so plan for about 2 hours minimum before you dig in.
Mastering the Crust Layer for Your Easy No Bake Dessert
This crust is so simple, but it needs to hold up to that thick filling! Grab a small bowl—just one bowl, because I hate dishes—and mix all your crust ingredients together: the almond flour, the tablespoon of sweetener, and that melted light butter. You want it to look like wet sand, crumbly but definitely holding together if you squeeze a little pinch. If you want to check out some other no-bake foundations, take a peek at how we handle sticky bases in our no-bake peanut butter oat bars recipe!
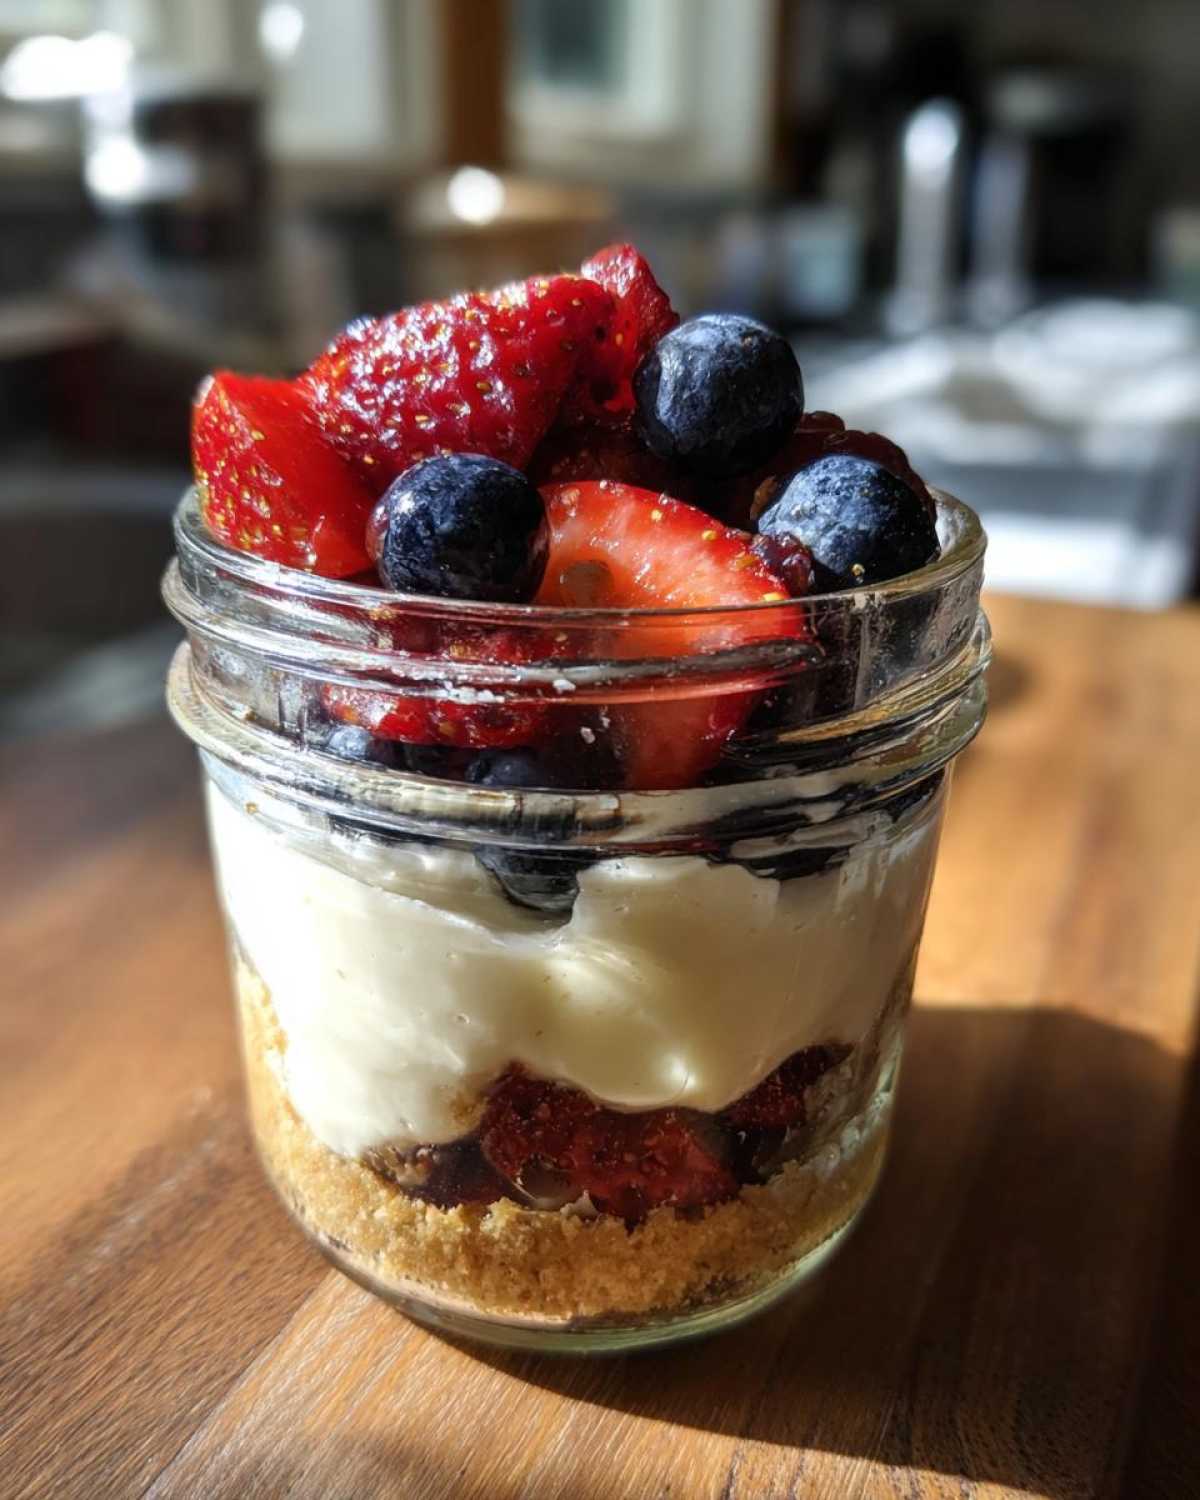
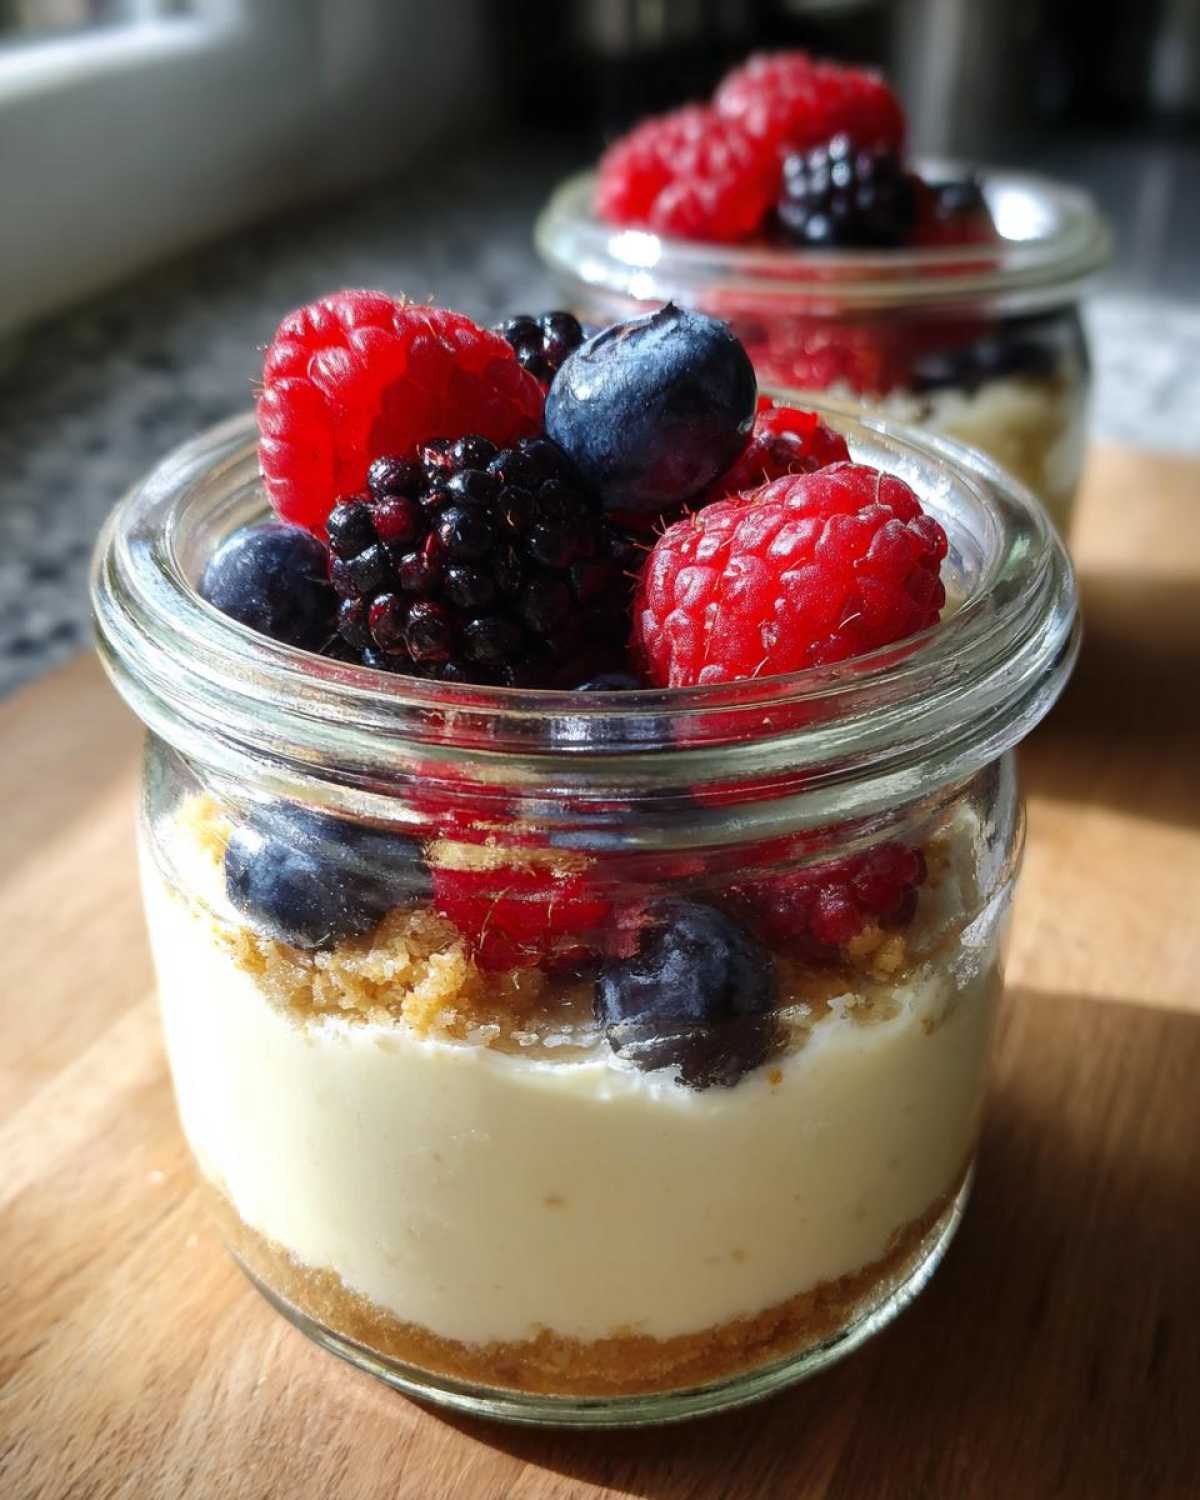
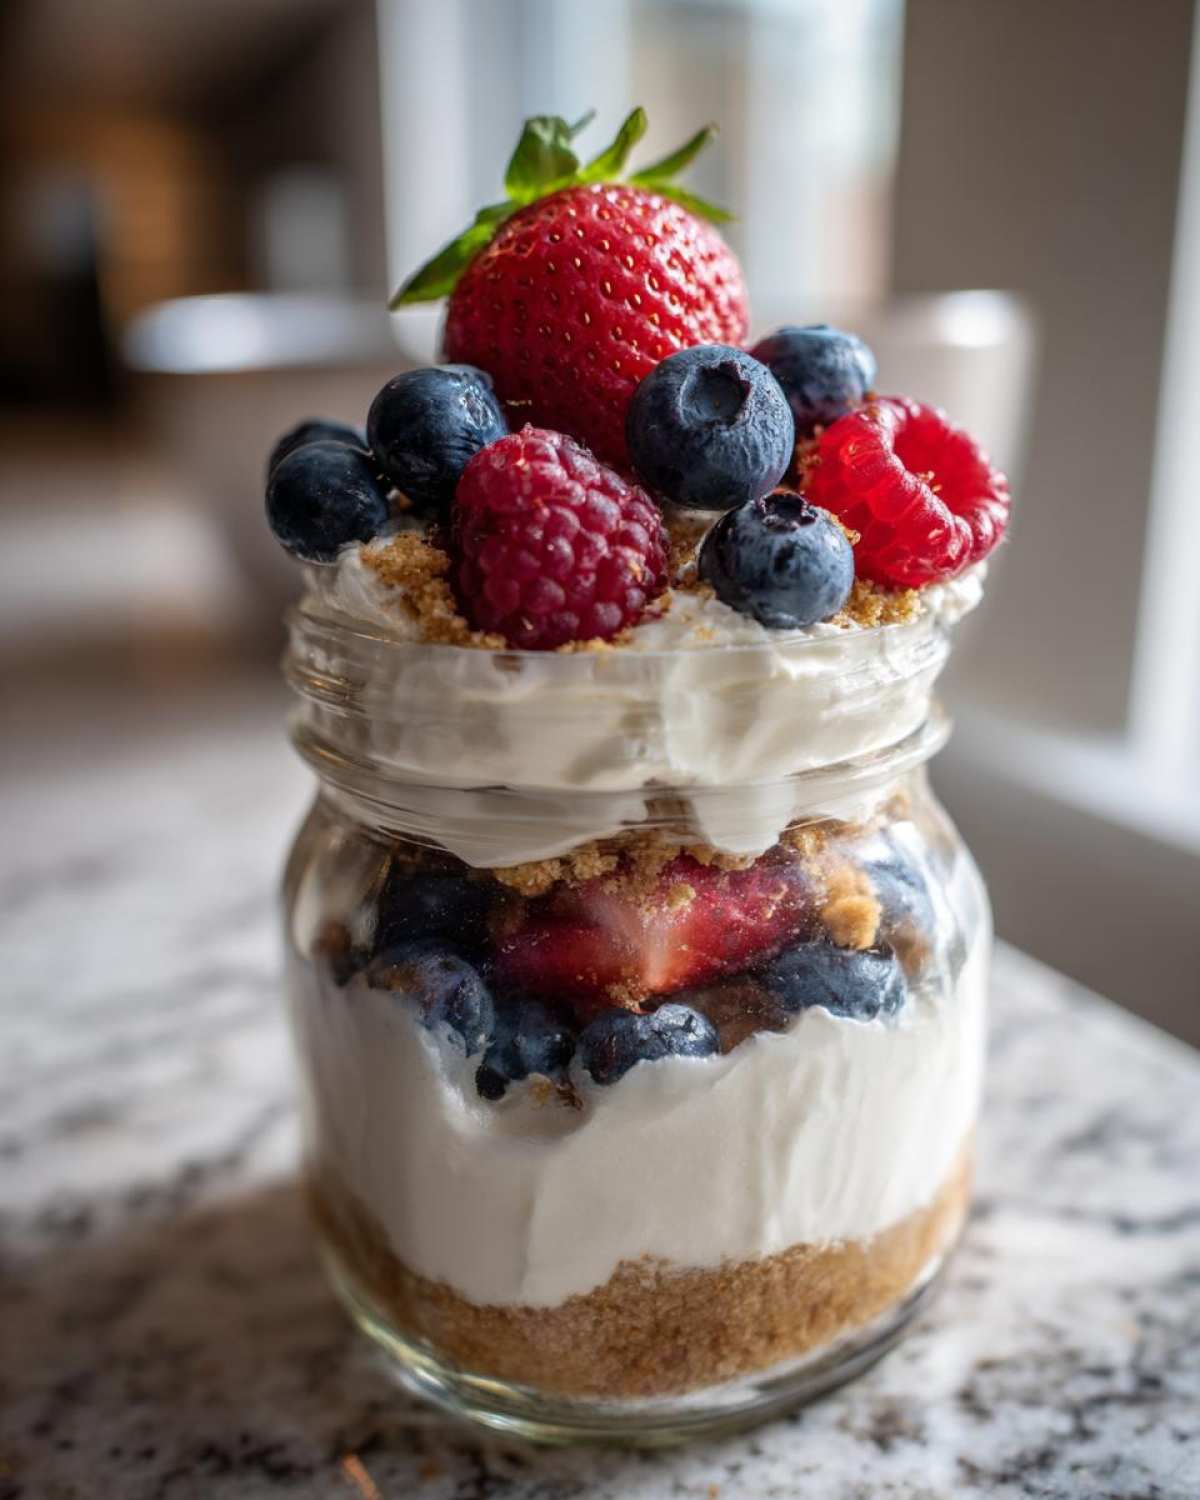
Next, divide that crumbly mix evenly between your four little jars or glasses. Use the back of a small spoon or even your fingers to press it down gently. Don’t mash it like you’re setting concrete; just press enough so it forms a nice, firm base for our creamy topping in this Easy No Bake Dessert.
Achieving the Signature Smooth Texture in Your Protein Cheesecake Filling
Now for the star of the show! This step is non-negotiable, promise me you’ll pay attention. Get your cottage cheese, Greek yogurt, protein powder, vanilla, and the rest of your sweetener into your food processor. If you don’t have a powerhouse blender or processor, you’ll be stirring for ages, trust me!
You need to blend until it is *absolutely* silky. I mean, check the sides of the bowl, scrape it down, and blend again. If you see any tiny cottage cheese curds, it’s not ready! Once it looks like thick, smooth yogurt, slowly start drizzling in that small amount of water or almond milk while the machine is running. This careful addition is how we keep that gorgeous thickness that sells this whole Protein Cheesecake experience. We are aiming for thick cream, not soup!
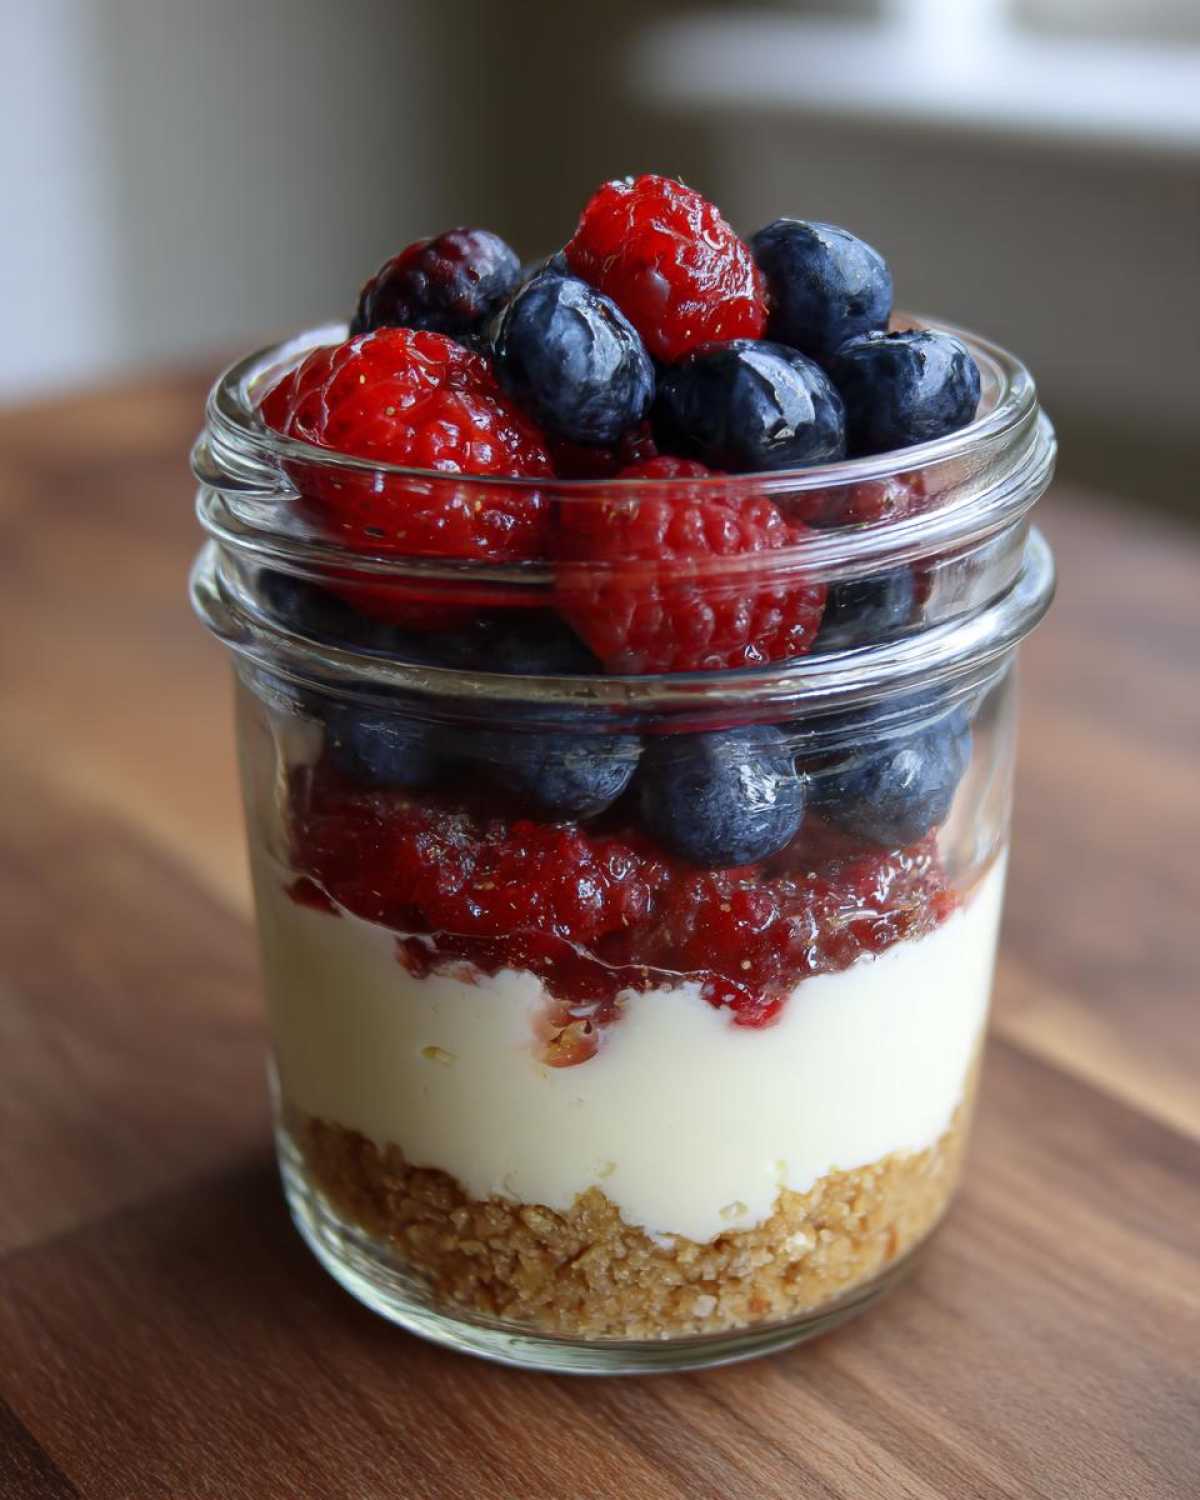
Once it’s perfectly blended, spoon or pipe that gorgeous filling right over your crusts in those jars. Then cover them up and pop them in the fridge to set for at least two hours. Time to watch the magic happen while you go do literally anything else! Easy peasy.
Flavor Variations for Your High Protein Dessert Recipes
Just because the base recipe for this Protein Cheesecake is vanilla doesn’t mean we stop there! Liam and I love playing with flavor profiles, and because these are already in individual jars, they are the perfect test kitchen item! You can easily shift these into entirely new experiences with just one or two extra simple ingredients. These are all about keeping your **High Protein Dessert Recipes** exciting so you never get bored.
We’ve been looking at all the fantastic ideas out there—think about those beautiful Strawberry Protein Cheesecake concepts! It’s all about simple swaps, and since we aren’t baking, it’s super safe to experiment. Try swirling in some jam or folding in some crushed nuts!
Creating a Chocolate Protein Cheesecake Delight
If you’re anything like me, sometimes you just need deep, dark chocolate. It’s so easy to turn this plain base into an absolute chocolate lover’s dream. Just take those creamy filling ingredients when you blend them up and toss in about two tablespoons of unsweetened cocoa powder. You might need just a tiny splash more liquid—maybe half a tablespoon—because cocoa powder tends to soak things up quickly.
A little tip from the muse: If you want to elevate that chocolate flavor (and who wouldn’t?), sometimes I melt a tiny bit of sugar-free dark chocolate and drizzle it on top before chilling. That sets into a nice little shell. For more ideas on baked twists, check out our thoughts on baked recipes like the white chocolate cranberry cheesecake, though remember, this jar recipe is strictly no-bake for maximum convenience!
For those of you looking for inspiration from other healthy baking artists, you should definitely see what folks are doing with baked versions; I spotted one great inspiration piece on another site dedicated to healthy treats that really shows how versatile this approach can be to create a great healthy cheesecake.
Tips for Success Making Guilt Free Cheesecake
Even though this is a super simple, no-bake situation, there are a few little nuggets of wisdom I’ve picked up that stop the flavor or texture from going sideways. Liam always says that these small details are what separate the lovely performance from the kitchen oopsie!
First up: Temperature control! Make sure your cottage cheese and Greek yogurt are nice and cold when they go into the blender. If the base gets too warm while you are whipping it up, it throws off the final density. Blend quickly and efficiently!
Second, and this is crucial for a flawless set: Don’t rush the chill time! I know waiting is the toughest part when dessert is staring at you from the counter, but you absolutely need that minimum two hours. If you try to eat it after only 45 minutes, you’ll end up with soupy disappointment. Let that gelatin/protein structure solidify properly.
Lastly, when you are adding your liquid (the water or milk), add it a teaspoon at a time. I know the recipe says 1/4 cup, but your protein powder might be thirstier than mine! You want the blender blade to keep moving smoothly, but not smoothly like water—smoothly like really thick, slow-moving frosting. If you’re ever experimenting with different ingredients, remember to keep that texture in mind, kind of like how we manage the moisture in our Cloud Bread recipe!
Storage and Meal Prep Dessert Planning for Your Protein Cheesecake
You know I’m all about making food that works for my busy weeks, so planning ahead is just second nature to me now. The best thing about this Protein Cheesecake being in little jars? It is practically built for meal prep dessert! This recipe is so sturdy and holds up beautifully.
The notes say this keeps well for about four days in the fridge, which is perfect for my weekday lunches or those late-night cravings that sneak up on you. Make a batch of four on Sunday, and you’ve got dessert covered until Wednesday or Thursday. It’s practically set-it-and-forget-it deliciousness!
Make sure the jars are sealed tightly—a little plastic wrap pressed right onto the filling before you put the lid on works wonders to keep things fresh. Also, I find that since the crust is almond flour based, it doesn’t get soggy nearly as fast as a graham cracker crust would. That’s a happy accident Liam insists is science!
If you’re planning on making your weekly meal prep schedule work smoothly, check out some of my tips in my post about meal prep lunch planning; the same organizational theory applies to keeping your desserts fresh!
And hey, if you end up trying these out for your week, I’d love to see your jar setup! If you post pictures, make sure to tag us, or even check out what other people are doing with their jar desserts over on this collection of jar recipes for some extra inspiration.
Frequently Asked Questions About Healthy Cheesecake
I knew you’d have questions! When we start tinkering with classic desserts to make them healthier, it always opens up a few interesting doors about technique. Liam and I get asked these questions constantly, especially from folks just starting out on their journey to find a great Low Calorie Cheesecake that still tastes amazing. Ask away, I love helping out!
Can I bake this Protein Cheesecake recipe?
That is a fantastic question! The short answer is: please don’t! This recipe is tailor-made as a no-bake situation, relying entirely on the chilling time to let the protein powder and the fats firm up for that signature dense, creamy texture. If you try to bake it, you risk heating the dairy and protein too much, ending up with something more crumbly or curdled, not that velvety experience we are aiming for here.
What is the best protein powder to use for a Creamy Protein Treat?
This is where I get a little chaotic, but stick with me! For the absolute creamiest mouthfeel—that true Creamy Protein Treat vibe—I prefer a good quality whey/casein blend. The casein helps lend some body, almost like it’s thickening the mixture even before chilling. Pure whey works fine, especially if you’re using Greek yogurt, but sometimes it can feel a *tiny* bit grainier if you don’t blend it for ages.
If you are using a strictly plant-based powder, you might need to cut back on your liquid even more because those powders can absorb liquid differently. No matter what you pick, just make sure it’s a flavor you enjoy since it’s such a main component here! If you like experimenting with flavors, you might want to look at how we work spices into our pumpkin spice oatmeal bake; the principle of flavor layering is the same!
I also get asked a lot if this is a good Greek Yogurt Protein Dessert substitute for breakfast—and yes, it absolutely can be! Just swap out the crust for some high-fiber cereal or even skip the crust entirely if you want to keep the calories super low for a quick snack.
Estimated Nutritional Snapshot for This Macro Friendly Dessert
Okay, Liam always insists on accountability, even when we are talking about dessert! Since we are using protein powder and specialized sweeteners, the numbers here look fantastic for keeping things aligned with your fitness journey. Remember, these are just estimates, right? The protein powder you choose or whether you use almond milk instead of water can nudge these figures a little bit, so take this as your guiding star, not the absolute law!
We calculated these macros based on the ingredients listed above, aiming for that perfect four-serving yield. I think you’ll agree that these stats are pretty unbelievable for something that tastes like a full-fat, sugar-laden treat!
Here is what you’re looking at per jar:
- Calories: About 280
- Protein: A whopping 30 grams! Yes, you read that right!
- Fat: Around 12 grams
- Carbohydrates: Roughly 15 grams
See? This is why I call this my secret weapon for staying on track. Thirty grams of protein is more than most standard chicken breasts! You get fantastic satiety from this little treat. If you’re looking at alternative, possibly baked versions, you know you should always cross-check the numbers, just like taking a peek at how Katie handles her amazing recipes when you check out her protein cheesecake recipe!
Share Your Culinary Performance
And that, my friends, is how we turn guilt into glee! I sincerely hope you give these No-Bake Protein Cheesecake Jars a try. Liam and I put so much joy into creating these scripts for the kitchen, and nothing makes us happier than hearing that you’ve tried one, improvised a little bit, and loved the performance!
When you finish yours—whether you stuck to the vanilla base or went wild with a chocolate swirl—please, please let us know how it went! We thrive on that feedback. If you managed to create a fantastic new topping, or maybe you figured out a way to make this into amazing little Mini Protein Cheesecakes, share the inspiration!
Drop a rating down below so everyone knows this recipe is a certified hit. And if you post a picture to social media—maybe showing off your perfectly layered jar or how you’re taking yours for a quick protein snack on the go—tag us! We always love seeing your beautiful culinary moments that bring a little childlike joy back into adult eating. If you ever have trouble posting or want to send us a private note, you can always reach out via our Contact Page. Happy blending, and bravo!
Print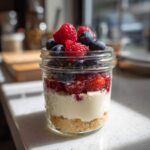
No-Bake High-Protein Cheesecake Jars
- Total Time: 2 hours 15 min
- Yield: 4 servings 1x
- Diet: Low Fat
Description
Make these creamy, macro-friendly cheesecake jars for a quick, satisfying, and healthy dessert that fits your fitness goals. This recipe uses Greek yogurt for a major protein boost.
Ingredients
- 1 cup low-fat cottage cheese
- 1 cup plain non-fat Greek yogurt
- 1/2 cup vanilla or unflavored whey protein powder
- 1/4 cup powdered erythritol or preferred sugar substitute
- 1 teaspoon vanilla extract
- 1/4 cup water or unsweetened almond milk (adjust for consistency)
- For the Crust: 1 cup almond flour
- 2 tablespoons melted light butter or coconut oil
- 1 tablespoon powdered erythritol
- For Topping (Optional): 1/2 cup mixed berries
Instructions
- Prepare the crust: In a small bowl, mix the almond flour, 1 tablespoon of sweetener, and melted butter until crumbly.
- Divide the crust mixture evenly among four small jars or glasses. Press the mixture down lightly to form the base.
- Prepare the filling: Place the cottage cheese, Greek yogurt, protein powder, vanilla extract, and remaining sweetener into a food processor or high-speed blender.
- Blend until the mixture is completely smooth and creamy. Scrape down the sides as needed.
- Slowly add the water or almond milk while blending until you reach a thick, smooth, cheesecake-like consistency. Do not over-thin the mixture.
- Spoon or pipe the protein cheesecake filling over the crust layers in the jars.
- Top each jar with fresh or thawed berries, if using.
- Cover the jars and chill in the refrigerator for at least 2 hours to allow the filling to set firmly.
- Serve cold directly from the jar.
Notes
- For a Chocolate Protein Cheesecake variation, mix 2 tablespoons of unsweetened cocoa powder into the filling mixture before blending.
- If you prefer a thicker, more decadent texture, reduce the added liquid slightly or use only Greek yogurt instead of mixing with cottage cheese.
- This recipe is excellent for meal prep dessert; it keeps well in the refrigerator for up to four days.
- Prep Time: 15 min
- Cook Time: 0 min
- Category: Dessert
- Method: No Bake
- Cuisine: American
Nutrition
- Serving Size: 1 jar
- Calories: 280
- Sugar: 4
- Sodium: 250
- Fat: 12
- Saturated Fat: 4
- Unsaturated Fat: 8
- Trans Fat: 0
- Carbohydrates: 15
- Fiber: 3
- Protein: 30
- Cholesterol: 25