Okay mamas and papas, let’s talk real life for a sec. Between school pickups, after-school activities, and just trying to keep the house from looking like a tornado went through it, packing lunch can feel like one more huge chore, right? And don’t even get me started on the picky eaters! I remember when Leo went through a phase where he’d only eat things shaped like dinosaurs. Or Mia, who suddenly decided all sandwiches were “too pointy.” It felt like a daily battle just to get them to eat something, anything, that wasn’t coated in sugar.
That’s where my secret weapon comes in: Kid-Friendly DIY Lunchables Snack Trays! I started making these out of pure desperation, honestly. I needed something fast, something my kids would actually look forward to, and something that didn’t involve elaborate cooking.
As a home cook and a mom who’s navigated the choppy waters of feeding little ones for years, I’ve found these simple snack trays are a total game-changer. They take hardly any time to put together, you can customize them a million ways, and the best part? Kids love them! It turns lunch from a potential meltdown into a fun, interactive experience.
Think of them as a deconstructed lunch box adventure. They’re perfect for busy parents who want an easy, reliable way to pack appealing lunches. Let’s dive into how to make these awesome trays!
Why You’ll Love These Kid-Friendly DIY Lunchables Snack Trays
Trust me, these Kid-Friendly DIY Lunchables Snack Trays are going to make your life easier. They really do take the stress out of packing lunches.
- They’re super quick to put together.
- You can change them up every day.
- Kids feel like they’re getting a special treat.
- No more fighting about what’s in the lunch box!
- They make mealtime fun for everyone.
Simple Ingredients for Kid-Friendly DIY Lunchables Snack Trays
The beauty of these snack trays is that you probably have most of the stuff you need in your kitchen right now. We’re talking about simple, everyday foods that are easy to find at any grocery store. You can mix and match based on what your kids like and what you have on hand.
How to Assemble Your Kid-Friendly DIY Lunchables Snack Trays
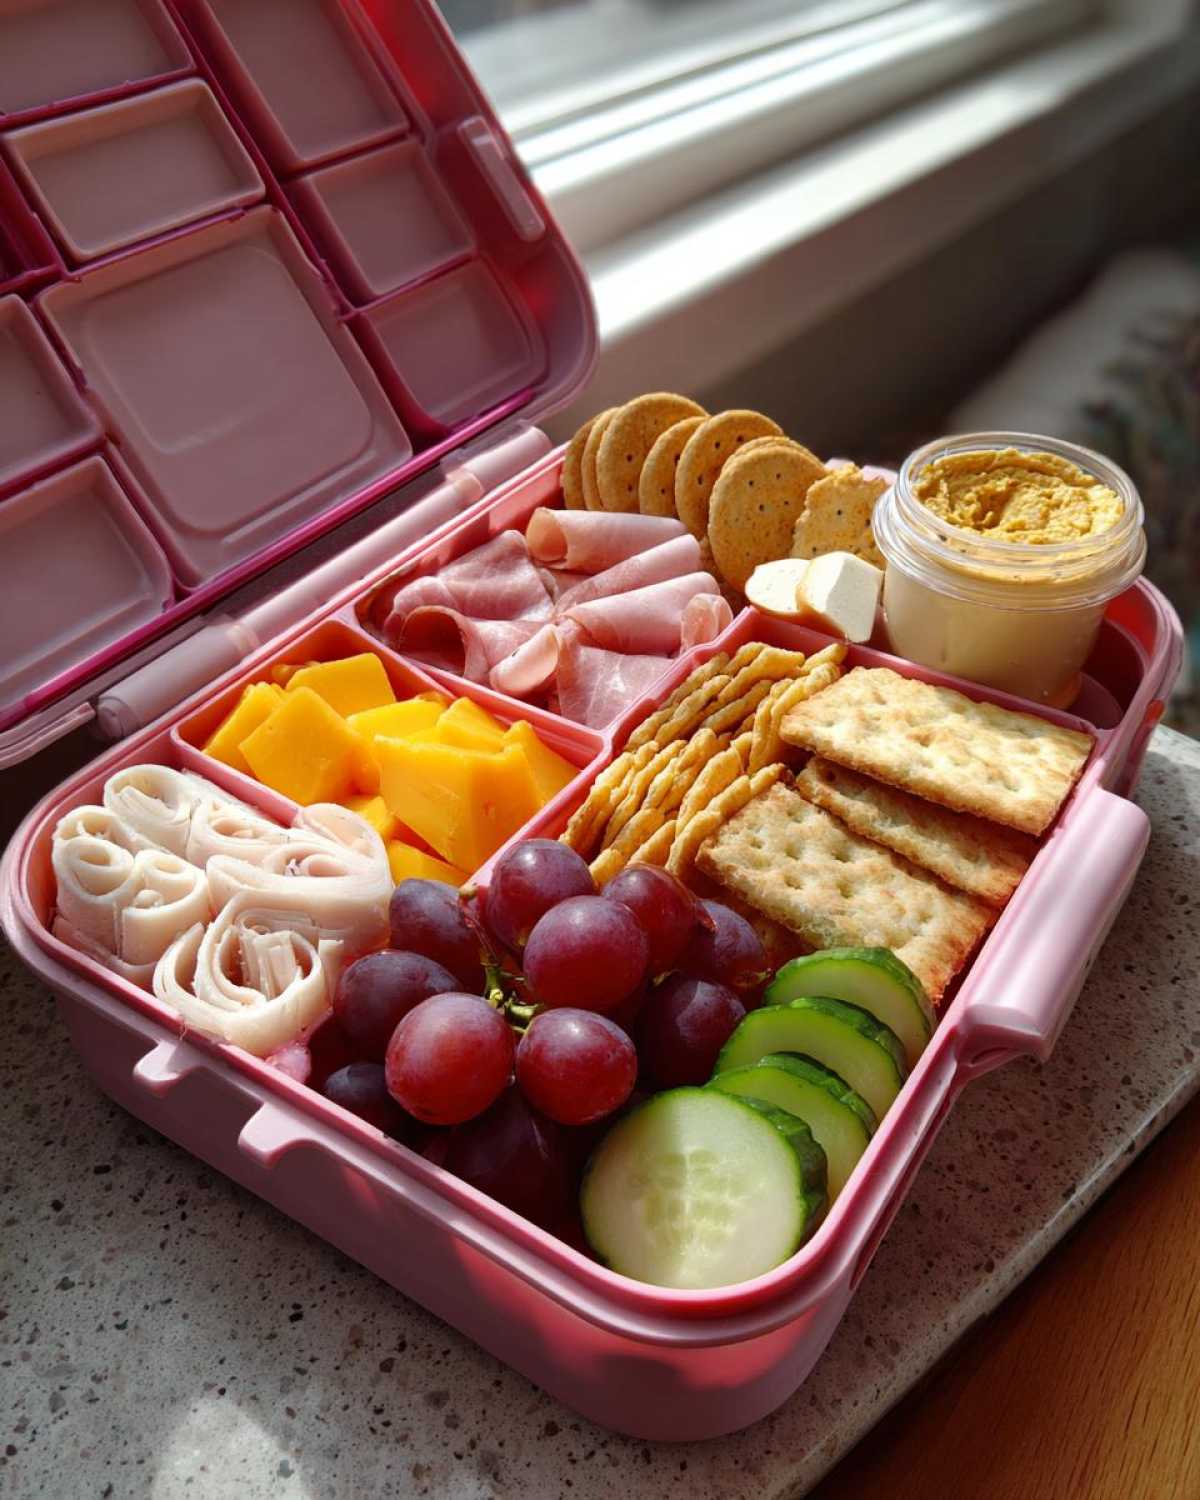
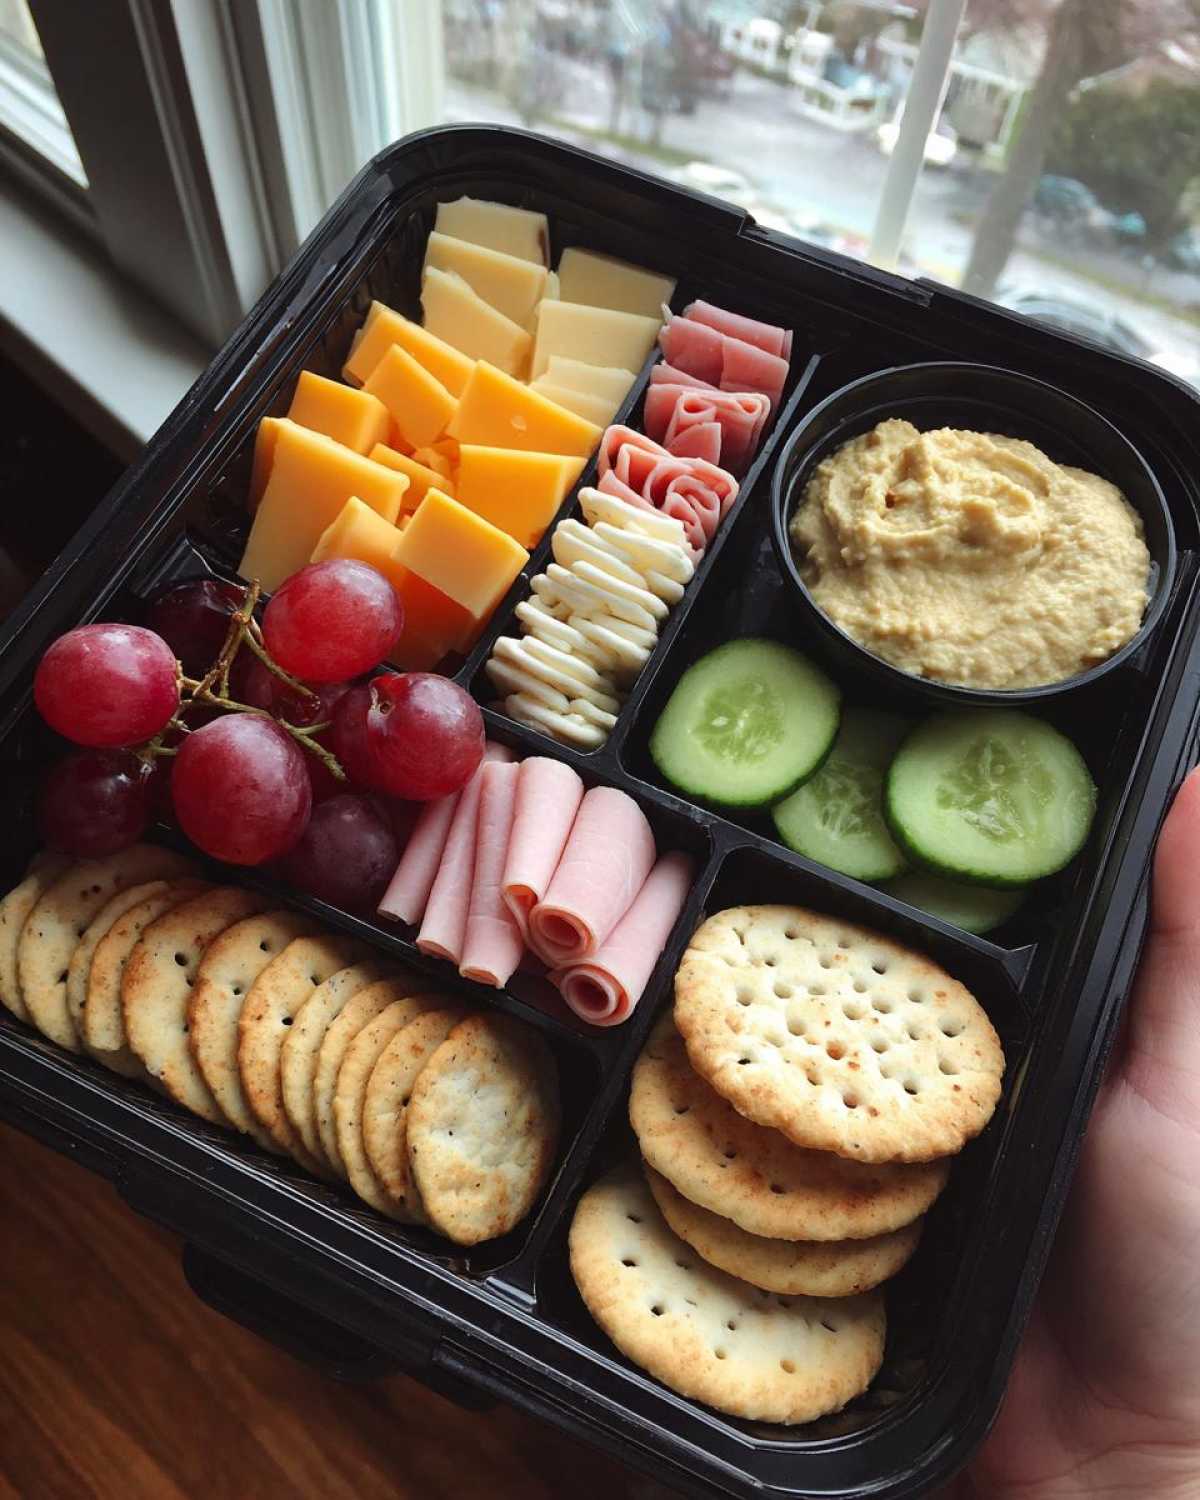
Putting together these Kid-Friendly DIY Lunchables Snack Trays is really the fun part! It’s almost like building a little edible puzzle. You’ll want to start with a good bento-style lunch box or tray that has separate compartments. These are perfect because they keep everything neat and tidy, preventing the crackers from getting soggy from the fruit.
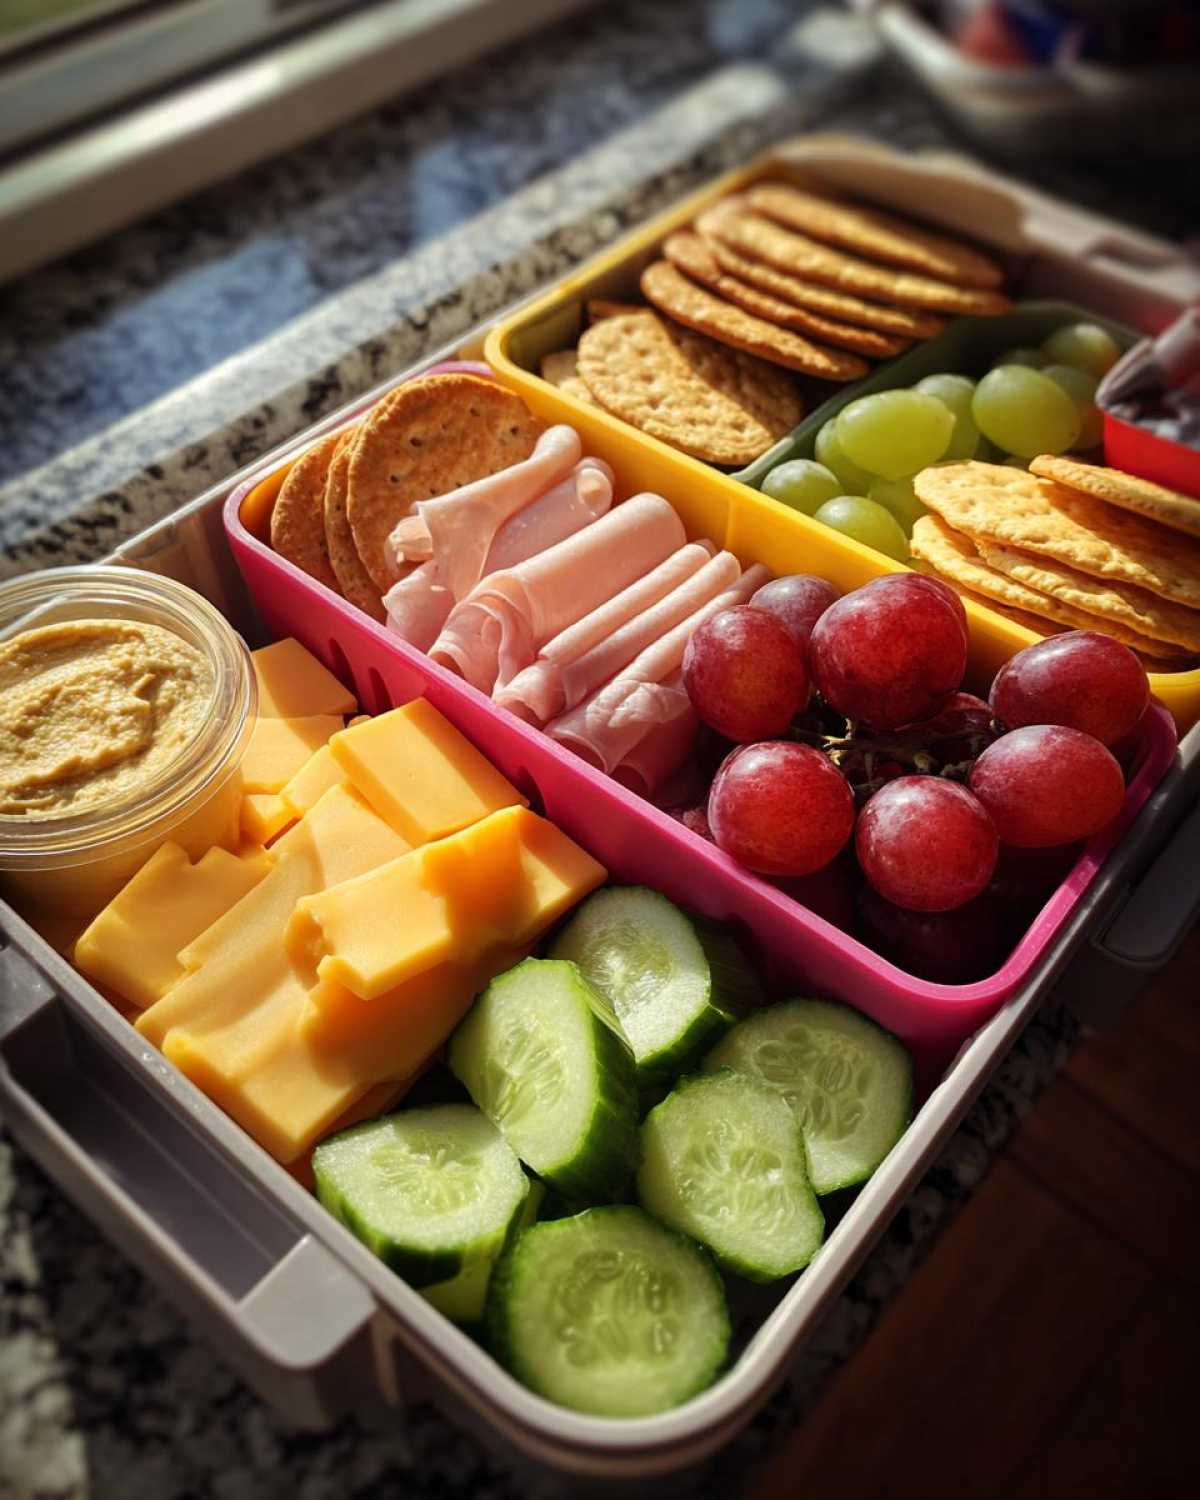
Next, you just start filling those little sections! I like to think of it like creating a mini buffet. In one spot, add some crackers. In another, pile up those cheese slices. Then, add your protein – maybe some rolled-up deli meat or a few hard-boiled egg slices. Don’t forget the fruit and veggies! Grapes, berries, cucumber slices, bell pepper strips… whatever your little one enjoys.
A key step is offering choices within each category. Instead of just one type of cheese, maybe put in a couple of different kinds. If you have apple slices and orange segments, offer both! This gives them a little bit of control over their meal, which can make them more likely to eat it.
For my younger one, Mia, I always make sure to pre-cut everything into bite-sized pieces. This makes it so much easier for her to manage and less messy. If you’re adding something like yogurt or a dip, put it in a small, sealed container. A tiny treat is always a nice surprise at the end! And remember to pack a fork or spoon if they’ll need one.
Tips for Perfect Kid-Friendly DIY Lunchables Snack Trays Every Time
After making countless snack trays for Leo and Mia, I’ve picked up a few tricks. One of the best things you can do is get your kids involved! Let them help choose what goes in or even help assemble the trays. Leo takes so much pride in packing his own.
Don’t be afraid to mix things up! I try to rotate the ingredients each week so they don’t get bored and so they’re exposed to different foods. Using fun cookie cutters on cheese or deli meat is a guaranteed hit. Remember that phase Leo had with dinosaur shapes? This works!
Always pack an ice pack, especially if the tray contains perishable items. It keeps everything fresh until lunchtime. These trays aren’t just for school either. We love them for picnics, long car rides, or just a fun snack at home on a rainy day.
Ingredient Notes and Smart Substitutions for Kid-Friendly DIY Lunchables Snack Trays
Let’s talk about the building blocks for these amazing Kid-Friendly DIY Lunchables Snack Trays. Crackers are a classic, but you can use mini bagels, pita bread cut into triangles, or even rice cakes. For cheese, sliced cheddar is a favorite, but string cheese, cheese cubes, or even cream cheese spread on crackers works too.
Deli meat is easy, just make sure it’s thinly sliced. Turkey, ham, or chicken are popular. For fruit, grapes should be halved for younger kids. Apple slices are great, just toss them with a little lemon juice to prevent browning. Cucumber slices, bell pepper strips, and cherry tomatoes (halved!) are good veggie options. Hard-boiled eggs are packed with protein.
Yogurt tubes are convenient, or use a small cup of yogurt. For dips like hummus or ranch, a little goes a long way. And those small cookies or treats? Just a little something fun!
Common Questions About Kid-Friendly DIY Lunchables Snack Trays
I get asked a lot about these Kid-Friendly DIY Lunchables Snack Trays, so here are a few common questions.
How far in advance can I make these?
I usually make them the night before. They hold up really well in the fridge overnight.
What if my child doesn’t like one of the ingredients?
That’s the beauty of DIY! Just swap it out for something they do like. This is where those simple ingredients come in handy.
Are there any allergy considerations?
Absolutely. Be mindful of allergies like nuts, dairy, or gluten. There are tons of allergy-friendly crackers and substitutes available now.
Can I pack warm food in these?
These trays are really designed for cold or room temperature foods. If you want to pack something warm, you’d need a separate insulated container.
Estimated Nutritional Information Disclaimer for Kid-Friendly DIY Lunchables Snack Trays
Just a quick note on nutrition for these Kid-Friendly DIY Lunchables Snack Trays. The nutritional information you see is really just an estimate.
It can change a lot depending on the specific brands you use, the exact ingredients you choose, and how much of each item goes into the tray. Because of all those variations, I can’t give you super precise nutritional data here. Think of it as a general idea!
Storing and Reheating Your Kid-Friendly DIY Lunchables Snack Trays
Storing your assembled Kid-Friendly DIY Lunchables Snack Trays is super easy. Just pop them into the refrigerator as soon as you’ve finished packing them.
Make sure the lids are on tight to keep everything fresh. They’ll stay good in the fridge for a day or two, which is perfect for making them the night before school. As for reheating, you usually don’t need to! These trays are meant to be enjoyed cold or at room temperature.
Share Your Kid-Friendly DIY Lunchables Snack Trays
I would absolutely love to see your Kid-Friendly DIY Lunchables Snack Trays! It makes me so happy to see how you put your own spin on them.
Did your little one help you pack? What fun combinations did you come up with? Please share your creations on social media and tag me, or just leave a comment below. Don’t forget to rate the recipe too! Happy packing!
Print
Stop the 1 lunch battle with Kid-Friendly DIY Lunchables Snack Trays
- Total Time: 15 minutes
- Yield: 1 serving
Description
Easy and fun DIY lunchable trays for kids, perfect for busy parents.
Ingredients
- Assorted crackers
- Sliced cheese
- Sliced deli meat (turkey, ham, chicken)
- Fruit (grapes, berries, apple slices)
- Vegetables (cucumber slices, bell pepper strips, cherry tomatoes)
- Hard-boiled eggs
- Yogurt tubes or cups
- Small cookies or treats
- Dips (hummus, ranch)
Instructions
- Choose a bento-style lunch box or tray with compartments.
- Fill each compartment with a variety of the suggested ingredients, ensuring different food groups are represented.
- Offer choices within each category to cater to your child’s preferences. For example, include a couple of types of cheese or fruit.
- For younger children, pre-cut ingredients into bite-sized pieces.
- Add a small dip if desired.
- Include a fun treat as a surprise.
- Pack a fork or spoon if needed for yogurt or fruit.
Notes
- Get your kids involved in assembling their own trays to encourage ownership and excitement.
- Rotate the ingredients weekly to keep things interesting and expose kids to new foods.
- Use cookie cutters to make fun shapes out of cheese or deli meat.
- Pack a small ice pack to keep the lunch cool until lunchtime.
- These trays are also great for picnics, road trips, and snacks at home.
- Prep Time: 15 minutes
- Cook Time: 0 minutes
- Category: Lunch
- Method: No Cook
- Cuisine: American
Nutrition
- Serving Size: 1 tray