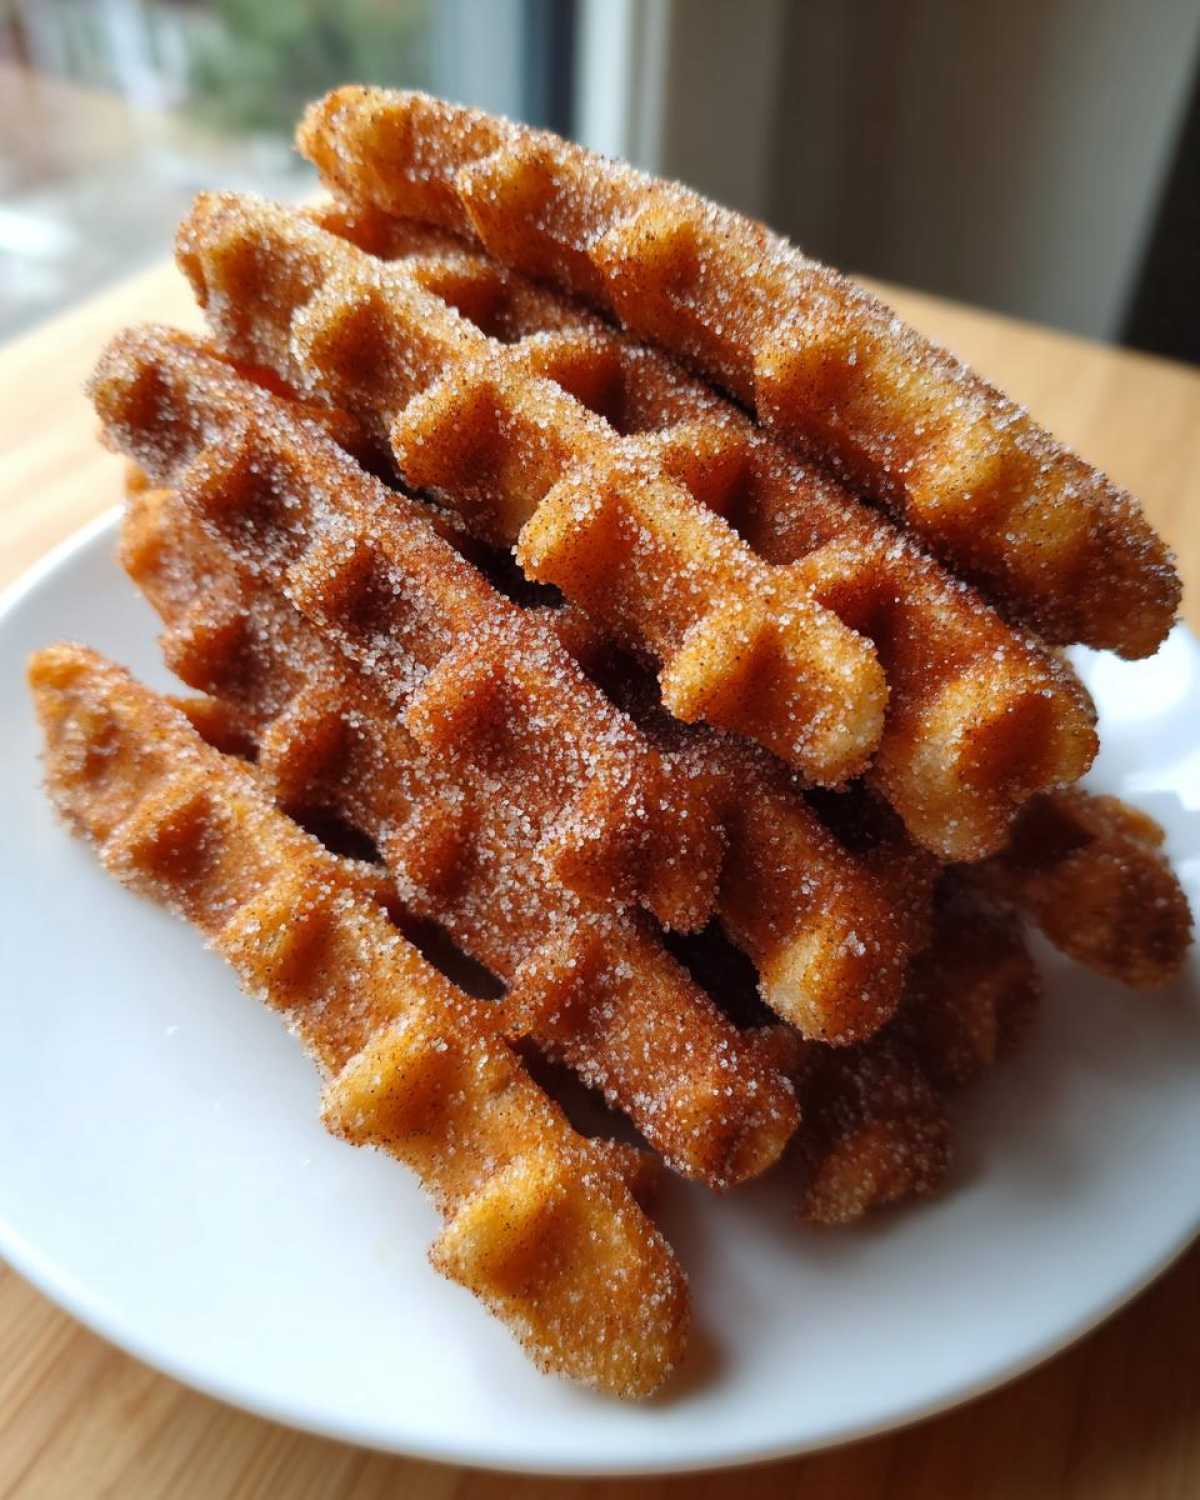
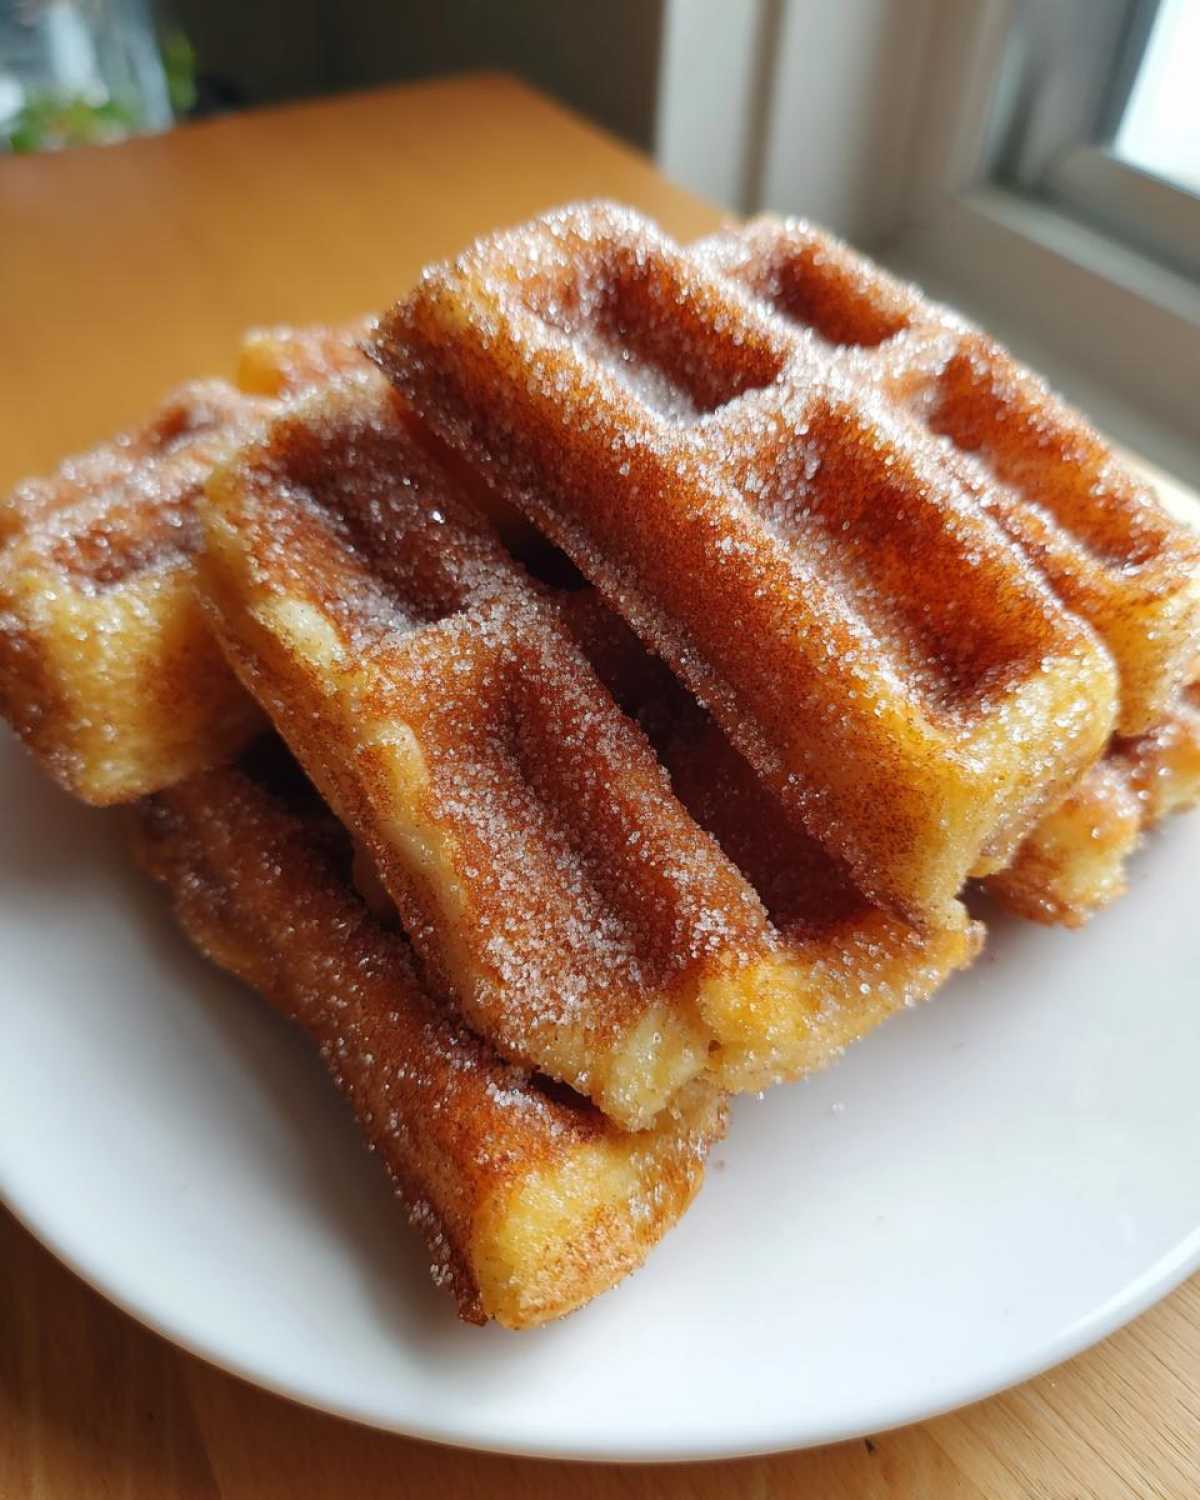
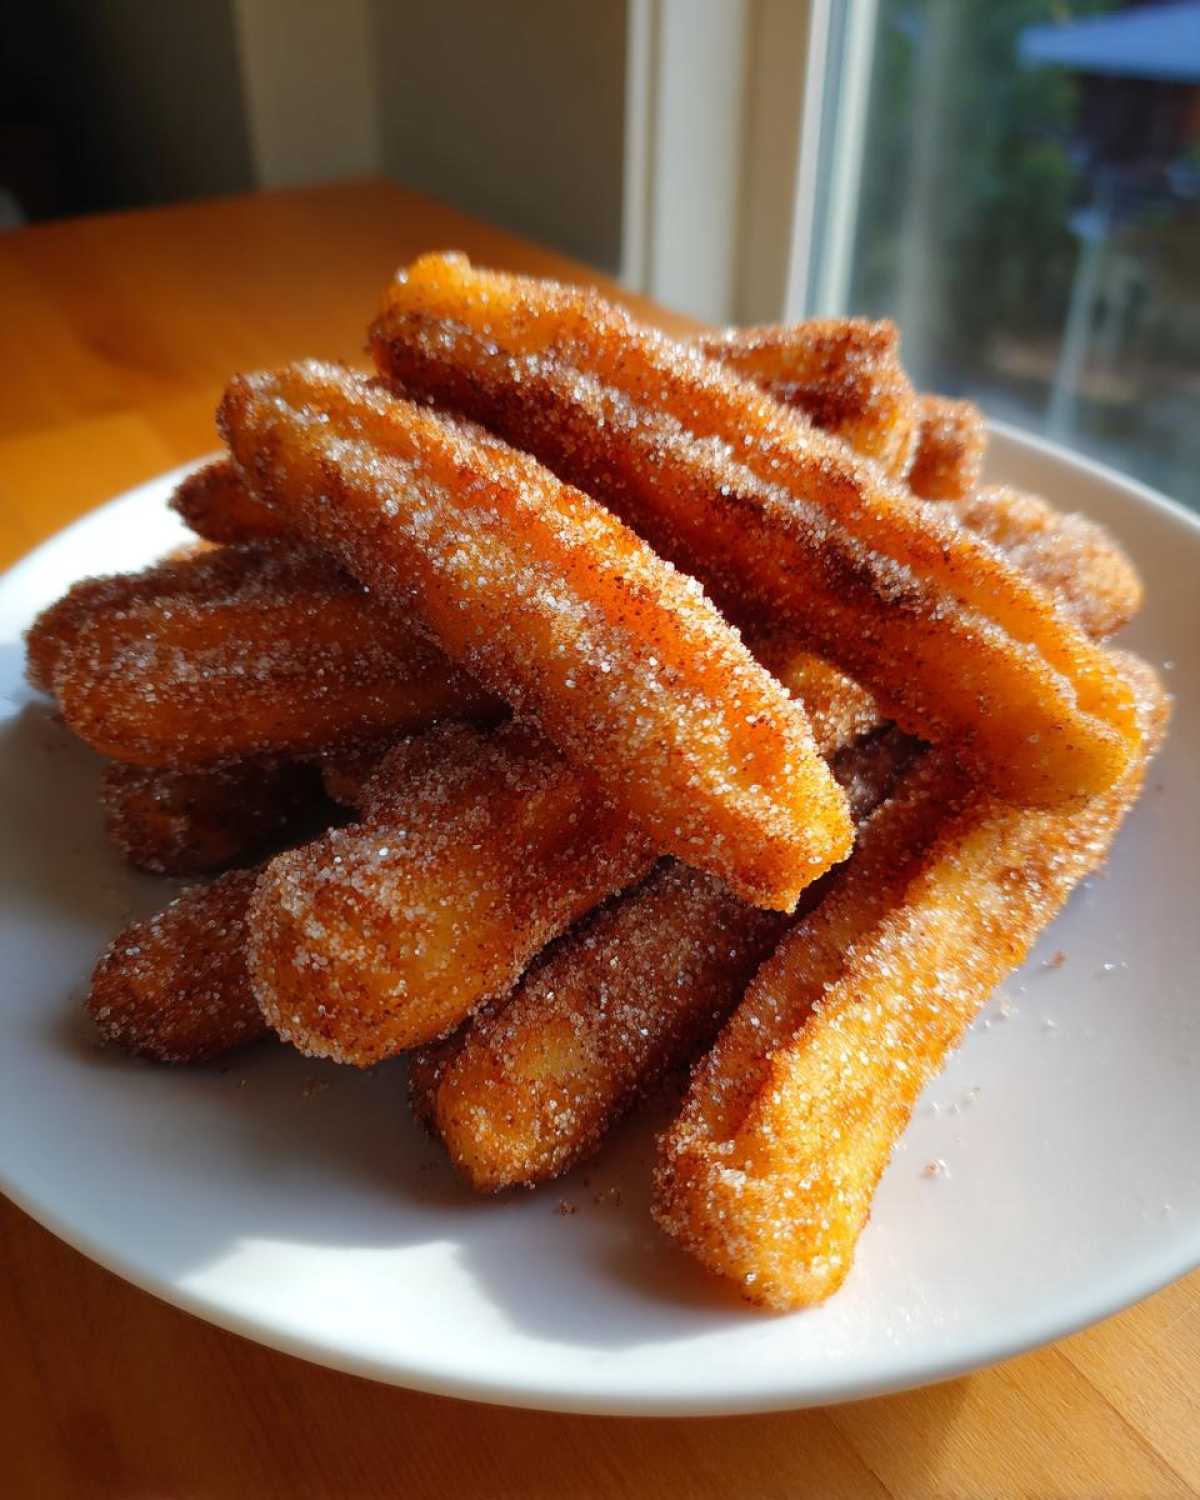
Okay, listen up! If you think going gluten-free means giving up on those fun, crispy, dippable breakfast treats, you’ve got it all wrong. I went through *so* much trial and error getting my gluten-free waffle game right—I mean, one batch was pure sadness dust! But trust me on this one; I finally nailed the secret to perfectly crispy **Gluten-Free Cinnamon Sugar Waffle Sticks**. They come out golden brown, sturdy enough to handle a serious dunk in syrup, and coated in that glorious warm spice combo. It’s the easiest GF waffle recipe you’ll ever try, and honestly, making them into sticks just makes them way more fun. Say goodbye to crumbly sadness and hello to your new favorite morning snack!
Why You Will Love This Gluten-Free Cinnamon Sugar Waffle Sticks Recipe
I know what you’re thinking: gluten-free waffles end up tasting like cardboard rectangles. Not this time! I made sure this recipe focuses on pure indulgence while keeping things simple. You are going to be obsessed with these for so many reasons:
- Unbelievably Crispy Texture: This batter is formulated specifically to crisp up beautifully in the iron. When you cut them into sticks, you get maximum surface area for that amazing crunch. They don’t crumble and fall apart like so many other GF recipes I’ve tried.
- Ready in Under 30 Minutes: Seriously! From grabbing the flour to the first bite, we’re looking at about 25 minutes total. This makes them perfect for a busy weekday breakfast or a last-minute sweet treat.
- It’s Super Kid-Friendly: Anything shaped like a stick in our house gets devoured instantly. My little ones love holding them, dipping them, and begging for extra coating. They make a fantastic kid-friendly gluten-free apple cinnamon muffins alternative when you need something fast!
- Customizable Coating: While the cinnamon sugar is divine, this method works perfectly if you want to try coarse turbinado sugar or even a light dusting of cocoa powder instead.
- No Weird Ingredients: Everything in here is standard pantry fare, no obscure binders or specialty flours required. If you have a reliable GF blend, you are good to go!
Ingredients for the Perfect Gluten-Free Waffle Batter
This is where the magic starts! Getting the batter right is absolutely everything when you’re working without wheat, especially if you want those gorgeous, sturdy sticks. Since we aren’t using traditional flour, the blend matters a lot. If you’re using a reliable GF all-purpose blend, make absolutely certain it already includes xanthan gum. This is super important for structure!
If your blend happens to be missing it—and you can check the bag, I always do!—you need to add 1 extra teaspoon of xanthan gum to the dry ingredients to make sure these waffle sticks don’t turn into something resembling edible sand. We need structure to hold that cinnamon sugar coating!
We also use a touch of sugar in the batter itself; it helps with browning. If you love dipping these into syrup, you might want to reduce that batter sugar down slightly, but I keep it in for that signature **Cinnamon Sugar Breakfast** flavor base. These proportions work beautifully with desserts, so you know they are robust enough for waffles!
- 1 1/2 cups gluten-free all-purpose flour blend (must have xanthan gum, or add 1 tsp separately!)
- 1 tablespoon baking powder (this gives them that lift!)
- 1/2 teaspoon salt
- 2 tablespoons granulated sugar (for the batter base)
- 1 large egg (room temp is best, but honestly, just crack it in!)
- 1 1/4 cups milk (any kind works—dairy or non-dairy is fine)
- 1/4 cup melted unsalted butter or oil (I use melted butter for flavor, zero regrets)
- 1 teaspoon vanilla extract
Homemade Cinnamon Sugar Coating Ingredients
Don’t skip these steps, or the coating won’t stick! The butter brush ensures we create a surface that grabs all that spicy goodness right when the waffle comes off the iron. You’ll need this ready to go before the first waffle is even done cooking.
- 1/4 cup granulated sugar (keep this separate from the batter sugar!)
- 1 tablespoon ground cinnamon
- 2 tablespoons melted butter (reserved specifically for brushing the hot sticks)
Essential Equipment for Making Gluten-Free Cinnamon Sugar Waffle Sticks
Okay, for this **Waffle Stick Recipe No Wheat**, you don’t need a dozen fancy gadgets, but having the right tools definitely makes the difference between a good waffle and an absolutely perfect, dunk-able stick. Since we are transforming a standard waffle, the iron itself is the star performer here!
Your main piece of equipment is obviously your waffle maker. I personally love using my Belgian-style iron because the deeper pockets give me nice, defined squares that cut into four perfect sticks cleanly. If you have a classic, flatter iron, it works just fine too—you’ll just get thinner sticks. And hey, if you happen to have a specialized waffle stick maker, well, why didn’t you tell me sooner?! Skip a few steps!
Here is the equipment I absolutely swear by for this recipe to come out crispy (and not stick to the sides!):
- Waffle Iron: Any style works, but make sure it’s preheated properly. A well-greased iron is the key to avoiding sticking, which is extra important with GF batter.
- Sharp Knife and Cutting Board: This is crucial! You have to cut the waffles while they are still piping hot right off the iron—if you wait even 60 seconds, the steam gets trapped, and you lose all that crispness you worked so hard to build.
- Two Small Shallow Dishes: You need one dish for the batter (obviously!) and a second, shallow plate or bowl specifically for rolling the hot sticks in the cinnamon sugar mixture. A pie plate works perfectly for the coating!
- Pastry Brush: You need a cheap brush for quickly sweeping the melted butter onto the hot sticks before rolling them in sugar. Don’t try using a spoon; you need an even, thin coat for the sugar to cling to.
If you’ve been looking for inspiration on other great fried or coated treats, check out my recipe for Air Fryer Cinnamon Sugar Donuts—it uses a similar coating concept!
Step-by-Step Instructions for Crispy Gluten Free Sticks
Alright, let’s put this amazing **Easy GF Waffle Recipe** into action! Remember, the secret to making these **Crispy Gluten Free Sticks** is taking action fast once the waffle is done cooking. Don’t let it sit and steam! We want structure so they hold up to dipping, so I always cook mine a little longer than the standard setting on my iron until they look deeply golden.
I’ve broken this down into tiny steps, because honestly, when dealing with gluten-free bakes, timing is everything. And hey, if you’re looking for another great go-to that stays fluffy, I always fall back on my easy fluffy oatmeal pancakes recipe when I’m not feeling Waffle Stick mode!
Mixing the Best Gluten Free Waffle Batter
We start by getting everything organized! Make sure your waffle iron is heating up on its highest setting—we want maximum heat for crispness. While that warms, we work on the batter, and it’s a classic two-bowl method.
- First, grab a large bowl and whisk together all your dry magic: the GF flour blend, baking powder, salt, and that little bit of sugar we added to the base batter. Whisk it up really well to distribute the leavening agents evenly.
- In a separate, smaller bowl, whisk your egg, milk, melted butter (or oil), and vanilla extract until they look nice and combined.
- Now, the important part: Pour the wet mixture directly into the dry mixture. Use a spatula and mix until things are *just* incorporated. I mean it—stop mixing as soon as you don’t see big streaks of dry flour anymore. If you overmix GF batter, you develop all the gummy texture we are trying to avoid! A few visible small lumps are totally fine, promise.
Cooking and Cutting Your Waffle Sticks
This is where we earn that crisp texture. Grease your iron one last time if you need to, and start pouring the batter in. Don’t overcrowd it; if your iron is smaller, you might have to do two or three batches!
- Cook the waffles following your iron’s guide, but if you are aiming for sticks, lean toward cooking them until they are a dark, satisfying golden brown. This extra cooking time evaporates moisture and builds that sturdy exterior.
- As soon as the waffle is done, you need to be quick! Use tongs or a silicone spatula to transfer the hot waffle straight onto your cutting board.
- Using a sharp knife, immediately begin slicing the waffle into sticks. I usually get three or four sticks per round waffle. You have to move fast because the second they cool down, they lose that steam-softness that allows for a clean cut.
Applying the Homemade Cinnamon Sugar Coating
This coating step needs to happen immediately after cutting, while the stick is still radiating heat. That heat is what melts the thin butter layer and makes that glorious **Homemade Cinnamon Sugar Coating** stick perfectly!
- While the waffle is still on the cutting board, grab your pastry brush and swipe all sides of the newly cut sticks lightly with that reserved 2 tablespoons of melted butter. Don’t soak them, just a nice light coating.
- In your shallow dish, quickly mix that final 1/4 cup of sugar with the 1 tablespoon of cinnamon until it’s perfectly uniform.
- Take your buttered sticks and toss or roll them immediately into that cinnamon sugar mix. You want every surface covered in that sweet, spicy goodness.
- Place the finished, coated sticks on a plate and repeat the entire cooking/cutting/buttering/rolling sequence with the rest of your batter. Resist the urge to eat them until you have a whole batch ready to go!
Tips for Achieving Perfect Crispy Gluten Free Sticks
I really want you to succeed here. Anyone can make a waffle, but making one that stays crunchy when it’s gluten-free? That takes a little insider knowledge! If your first batch felt a bit too soft once it cooled down, don’t stress. That’s just gluten-free flour getting cozy. We need to fight that sogginess with high heat and fast action!
The single most important thing—and I mentioned it before but I’ll shout it again—is cooking duration. You need to cook these waffles longer than you think you should. I set my iron for three minutes, but I usually let it go for four, turning it manually if needed, until the steam coming out of the iron almost completely stops. That steam is moisture trying to escape, and you want it gone!
If you are using a specific GF flour that you find tends to be heavy or cakey, you might need to give the batter a little texture boost. This is an optional tweak, but it works wonders for that snack-stick texture we are aiming for:
- Try Adding Starch: If you know your blend is heavy on rice or bean flours, try whisking in 1 to 2 tablespoons of tapioca starch or cornstarch right in with your dry ingredients. This helps maintain a lighter, crispier exterior rather than a dense, chewy one. It really firms up the structure so you get that satisfying snap when you bite into your **Gluten Free Waffle**!
- Waffle Iron Temperature is Key: Never underestimate preheating! Your iron needs to be actively hot before the batter even hits the plates. If you pour cold batter onto a lukewarm iron, you trap moisture instantly, and you’re doomed to soft sticks. Blast that iron!
- Immediate Cooling Surface: Once you cut those sticks, if you aren’t coating them right away, place them on a wire cooling rack instead of a plate. Plates trap heat and steam, which immediately softens the exterior again. A rack allows air circulation all the way around, locking in that crispness while you prepare the next batch.
These tips are the same tricks I use when making sure my snickerdoodles stay chewy and don’t spread too much. It’s all about texture management! Taking these extra moments for crisping ensures these **Sweet Gluten Free Snacks** feel light and airy, not heavy!
Serving Suggestions for Your Sweet Gluten Free Snacks
Now that you have a beautiful mountain of warm, spicy, crispy sticks, you have to decide how you’re going to eat them! Since they are so perfectly sized, they are just begging to be dipped. Honestly, just eating them plain is a treat, thanks to that amazing coating, but why stop there?
When I make these for a **Gluten Free Brunch Ideas** spread, I always put out a few dipping options. It makes the whole experience feel more fun and interactive. Plus, if you have picky eaters, having a dip available makes even the most suspicious child try a bite!
If you are craving something decadent, I highly recommend whipping up a quick chocolate sauce or maybe a fruit puree, but for the ultimate pairing that keeps with the cinnamon sugar theme, you need that simple glaze I mentioned in the notes!
- The Easiest Glaze Ever: This is so quick, you can make it while the second batch of waffles is cooking. Just take about 1/2 cup of powdered sugar, slowly whisk in maybe 1 to 2 tablespoons of milk (start with less, you want it thick), and a tiny dash of vanilla extract. If you want to get fancy, add a tiny squeeze of fresh lemon juice—it cuts the sweetness perfectly! If you made my Cinnamon Swirl Banana Bread recently, you probably have the ingredients for this already on hand.
- Syrup for Days: You can’t go wrong here. Warm up your favorite maple syrup. If you want to make it extra special, melt a spoonful of butter into the warm syrup. Yes, it’s extra fat, but it makes the maple flavor so much richer.
- Cream Cheese Frosting: If you have leftover cream cheese frosting from a birthday cake, use it! A thick, tangy frosting is unbelievable with the warm cinnamon spice on these sticks.
- Fruit Yogurt Dip: For a slightly healthier option, mix plain Greek yogurt with a spoonful of fruit jam—strawberry or raspberry works beautifully. It gives you that cool, creamy contrast to the warm, crispy waffle.
Honestly, these **Gluten Free Morning Treats** are fantastic on their own, but giving people an option to dip just turns breakfast into a celebration!

Storage and Make Ahead Gluten Free Breakfast Options
One of my biggest struggles with any waffle recipe is that they seem to go soft the second they hit room temperature. That’s no good when you’re dealing with these **Gluten Free Waffle Sticks** because we worked so hard to get them crispy! The good news is, while they are definitely best right off the iron, they store beautifully if you follow one crucial rule: they must be completely cooled before you put them away.
If you try to store them warm, the trapped steam will liquefy that lovely cinnamon sugar coating and turn your crispy sticks into a soggy pile. Trust me, I’ve ruined entire batches doing that when I was too impatient! Once they are totally cool—give them at least 15 minutes on a wire rack—then you can stash them away.
How to Store Leftover Waffle Sticks
For short-term storage (up to three days), place the cooled sticks into a sturdy, airtight container. You can layer them up, but I usually put a small piece of parchment paper between layers just to be safe, especially if you had a very heavy coat of butter and sugar.
For longer storage, like if you made a massive batch for a weekend brunch, these freeze like a dream! Lay the cooled sticks in a single layer on a baking sheet and pop that sheet into the freezer for about an hour. Once they are individually frozen solid (this stops them from clumping together), transfer them to a heavy-duty freezer bag. You can use these for quick **Make Ahead Gluten Free Breakfast** options for up to a month!
Reheating for Maximum Crispness
Okay, so they are cold or frozen—how do we bring back that glorious crunch we worked for? Forget the microwave; microwaves are the enemy of crispness! We need dry heat to pull the moisture back out.
- In the Toaster: This is my favorite hack! If you have a toaster oven, toss one or two sticks in for about two to three minutes on medium heat until they are warm through and you can hear them start to crackle gently. If you have a regular slot toaster, be super careful, as the sticks might be too thick. Watch them closely!
- In a Conventional Oven: If you have a bunch, spread the sticks out on a baking sheet. Pop them into a preheated 350°F (175°C) oven for about 5 to 7 minutes. This warms them through, dries out any residual steam, and makes them crispy again.
If you’re looking for awesome ways to prep entire breakfasts in advance, you should check out my recipe for Make Ahead Breakfast Burrito Bites! They use a similar freezer-then-reheat concept.
Can I Make the Batter Ahead of Time?
This is tricky with the **Gluten-Free Batter**. Because GF flours absorb liquid much faster than regular flour, leaving the batter sitting for more than 20 minutes often results in a very, very thick, almost unworkable paste. The baking powder also starts losing its oomph while it sits around waiting.
So, my advice is no on making the batter ahead, unless you plan to use it within 15 minutes of mixing. It’s so fast to whisk together—only about 5 minutes—that I really recommend doing it fresh right before you start cooking. You’ll get a much fluffier, lighter result for your sticks this way!
Frequently Asked Questions About Gluten-Free Cinnamon Sugar Waffle Sticks
I know you might have a few little questions swirling around, especially if you’re new to baking gluten-free things that need to hold their shape. I tried to build this recipe to be super straightforward, but here are the top things folks ask me when they make these! Don’t worry, the answers are easy!
Can I use a different GF flour blend or substitute ingredients in this recipe?
That’s the eternal gluten-free question, isn’t it? Look, if you are swapping out the specific GF blend I suggested, you need to be careful. If your new blend doesn’t have xanthan gum, you absolutely must add 1 teaspoon (as noted earlier!). That gum is the scaffolding for these sticks; without it, they’ll be too crumbly to shape. Also, I strongly recommend using melted butter over coconut oil if you can—it keeps the flavor profile closer to that traditional bakery taste. These **Gluten Free Morning Treats** rely on that fat for texture!
How do I stop my waffle sticks from getting soggy on the plate?
This is the main enemy of any crispy GF bake! The key is high heat while cooking and cooling them properly right away. If they’re soft, it means they are holding onto steam. The minute they come off the iron, you must cut them and then place them on a wire cooling rack for about 10 minutes *before* you toss them in the butter and sugar. Do not stack them on a plate! That’s how you lock the moisture in. If you do this, they stay delightfully crunchy. If they do get a little soft later on, just pop them in the toaster oven for a minute or two!
Can I skip the butter brush step and just roll them straight in the cinnamon sugar?
Oh, you *could* technically skip it, but I really, really advise against it if you want the best result. That light coating of melted butter acts as the glue! Gluten-free flour doesn’t always have the natural stickiness of wheat flour, so when you toss the hot waffle stick, the sugar won’t adhere properly. You’ll end up with very little sugar sticking and a lot of dry sugar left behind in the dish. A light butter brush means you get that perfectly even, slightly gooey, **Homemade Cinnamon Sugar Coating** wrap!
Are these the best kid friendly gluten free breakfast option?
Absolutely, 100%! They are the definition of **Kid Friendly Gluten Free Breakfast** in my house. They are perfectly portioned, easy to hold (less mess!), and the dipping options make them an event. If you are serving these to younger toddlers, you might want to skip the heavy cinnamon sugar coating and instead dip them in a plain yogurt or a mild fruit sauce, like the one in my recipe for Kid Friendly Cinnamon Apple Baked Cups. They are a total win for busy mornings!
Estimated Nutritional Value for Gluten-Free Waffles
I always feel a little bit sheepish putting nutritional information up because, honestly, when I’m making these **Gluten-Free Cinnamon Sugar Waffle Sticks**, I’m not thinking about the macros; I’m thinking about how fast my family can devour them! But, I know some of you lovely readers like to keep track of things, so I ran the standard ingredients through the calculator to give you a rough idea.
Please remember this is just an *estimate* based on the recipe as written, using standard substitutions for the milk and oil. If you use tons of heavy dipping syrup or richer butter, those numbers are going to jump up, so consider this the baseline for a plain, coated stick!
Here’s what the nutrition looks like based on the serving size of 3 sticks:
- Serving Size: 3 sticks
- Calories: 320
- Fat: 14g
- Saturated Fat: 5g
- Carbohydrates: 45g
- Sugar: 18g (This includes the sugar in the batter AND the coating, so keep that in mind!)
- Protein: 7g
- Sodium: 250mg
If you are looking to cut down on that sugar count, the easiest way is definitely by adjusting the **Homemade Cinnamon Sugar Coating**. For example, you could try dropping the sugar in the coating from 1/4 cup down to just 2 tablespoons, and you’ll save a good chunk right there without losing too much of that delicious sweetness. Enjoy them, don’t stress too much, and remember these are a wonderful treat!
Print
Gluten-Free Cinnamon Sugar Waffle Sticks
- Total Time: 25 min
- Yield: 4 servings 1x
- Diet: Gluten Free
Description
A straightforward recipe for making crispy, sweet waffle sticks using gluten-free flour, perfect for breakfast or a snack.
Ingredients
- 1 1/2 cups gluten-free all-purpose flour blend (with xanthan gum)
- 1 tablespoon baking powder
- 1/2 teaspoon salt
- 2 tablespoons granulated sugar (for batter)
- 1 large egg
- 1 1/4 cups milk (dairy or non-dairy)
- 1/4 cup melted unsalted butter or oil
- 1 teaspoon vanilla extract
- 1/2 cup cinnamon sugar coating (1/4 cup granulated sugar + 1 tablespoon ground cinnamon)
- 2 tablespoons melted butter (for coating)
Instructions
- Preheat your waffle iron according to the manufacturer’s directions. Lightly grease the plates if necessary.
- In a large bowl, whisk together the gluten-free flour blend, baking powder, salt, and 2 tablespoons of sugar.
- In a separate bowl, whisk the egg, milk, 1/4 cup melted butter or oil, and vanilla extract until combined.
- Pour the wet ingredients into the dry ingredients. Mix until just combined; do not overmix the batter. A few small lumps are acceptable.
- Cook the batter in the preheated waffle iron until golden brown and crisp, following your iron’s timing instructions.
- Immediately remove the cooked waffle and place it on a cutting board. While the waffle is still hot, use a sharp knife to cut it into three or four stick shapes.
- In a small, shallow dish, mix the 1/4 cup sugar and 1 tablespoon cinnamon for the coating.
- Brush the warm waffle sticks lightly with the 2 tablespoons of melted butter reserved for coating.
- Roll or toss the buttered sticks immediately in the cinnamon sugar mixture until fully coated.
- Serve the waffle sticks warm. Repeat the cutting and coating process with the remaining waffles.
Notes
- For extra crispness, cook the waffles slightly longer than usual until they are deep golden brown.
- If your gluten-free flour blend does not contain xanthan gum, add 1 teaspoon to the dry ingredients.
- You can make a simple dipping sauce by mixing 1/2 cup powdered sugar with 2 tablespoons milk and 1/4 teaspoon vanilla extract.
- Prep Time: 10 min
- Cook Time: 15 min
- Category: Breakfast
- Method: Waffling
- Cuisine: American
Nutrition
- Serving Size: 3 sticks
- Calories: 320
- Sugar: 18
- Sodium: 250
- Fat: 14
- Saturated Fat: 5
- Unsaturated Fat: 9
- Trans Fat: 0
- Carbohydrates: 45
- Fiber: 2
- Protein: 7
- Cholesterol: 55