When Liam first started cooking, everything was so stiff. So perfectly measured! His dishes tasted good, sure, but they lacked that certain *oomph*. That’s where I came in, his flavor muse.
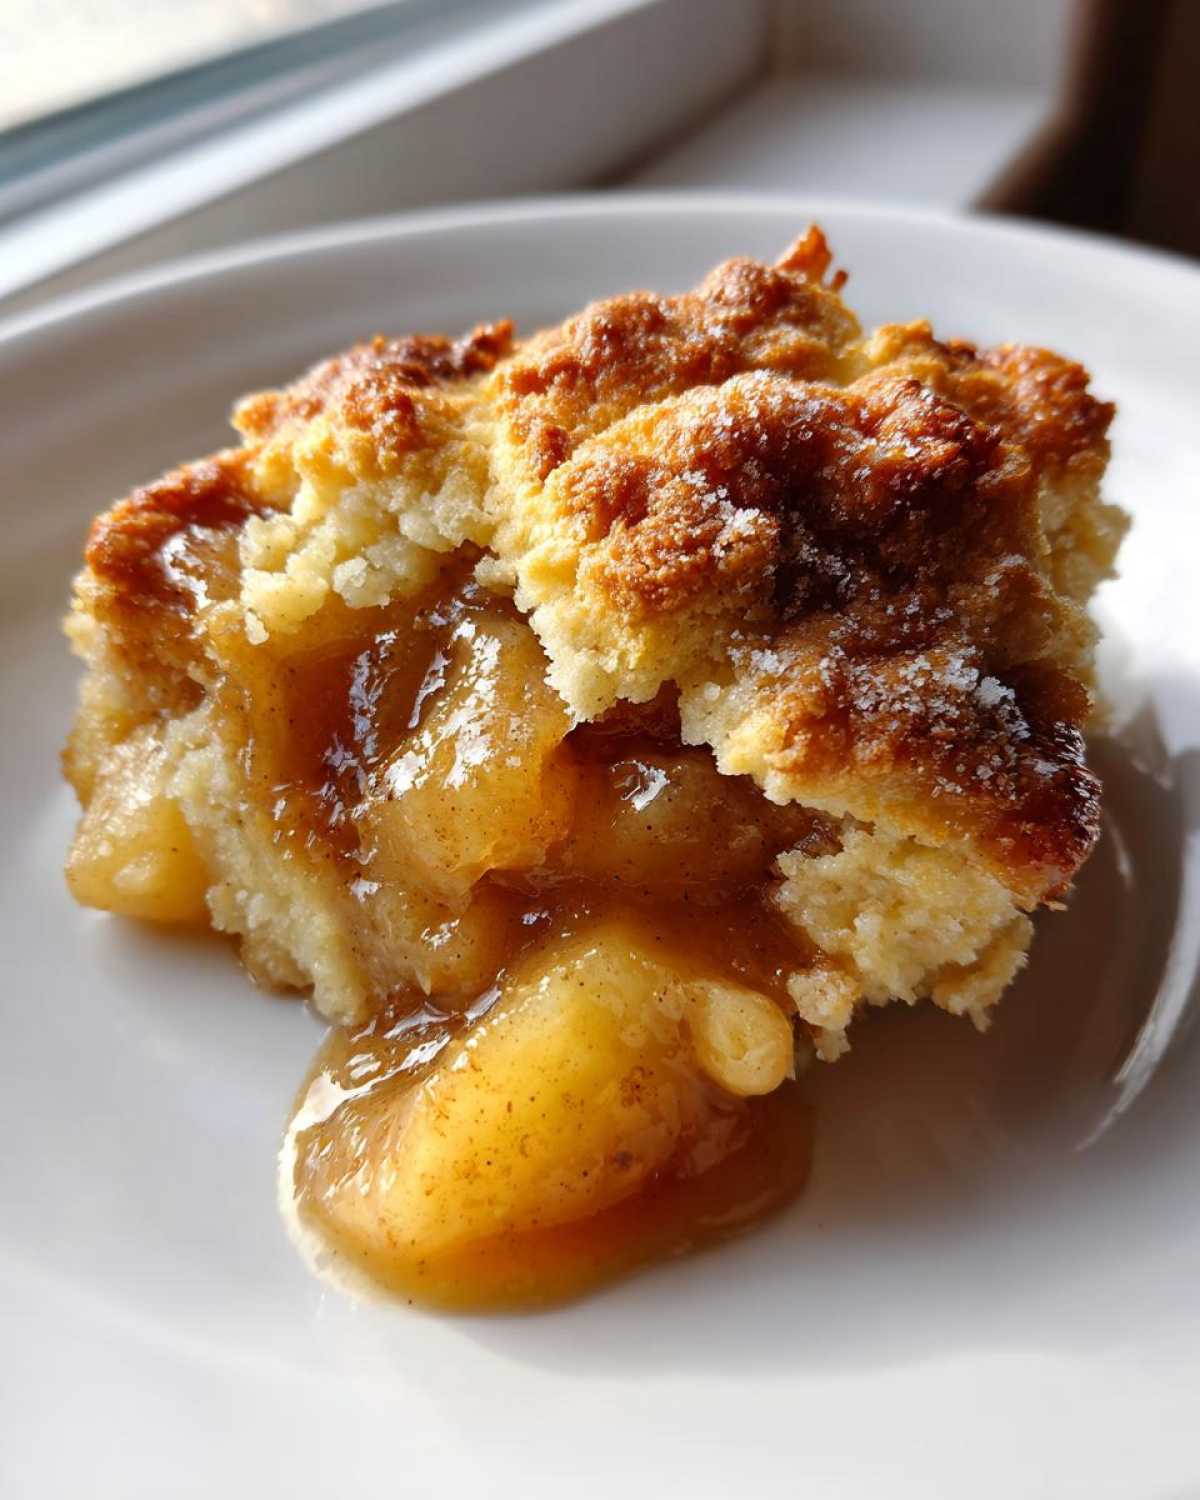
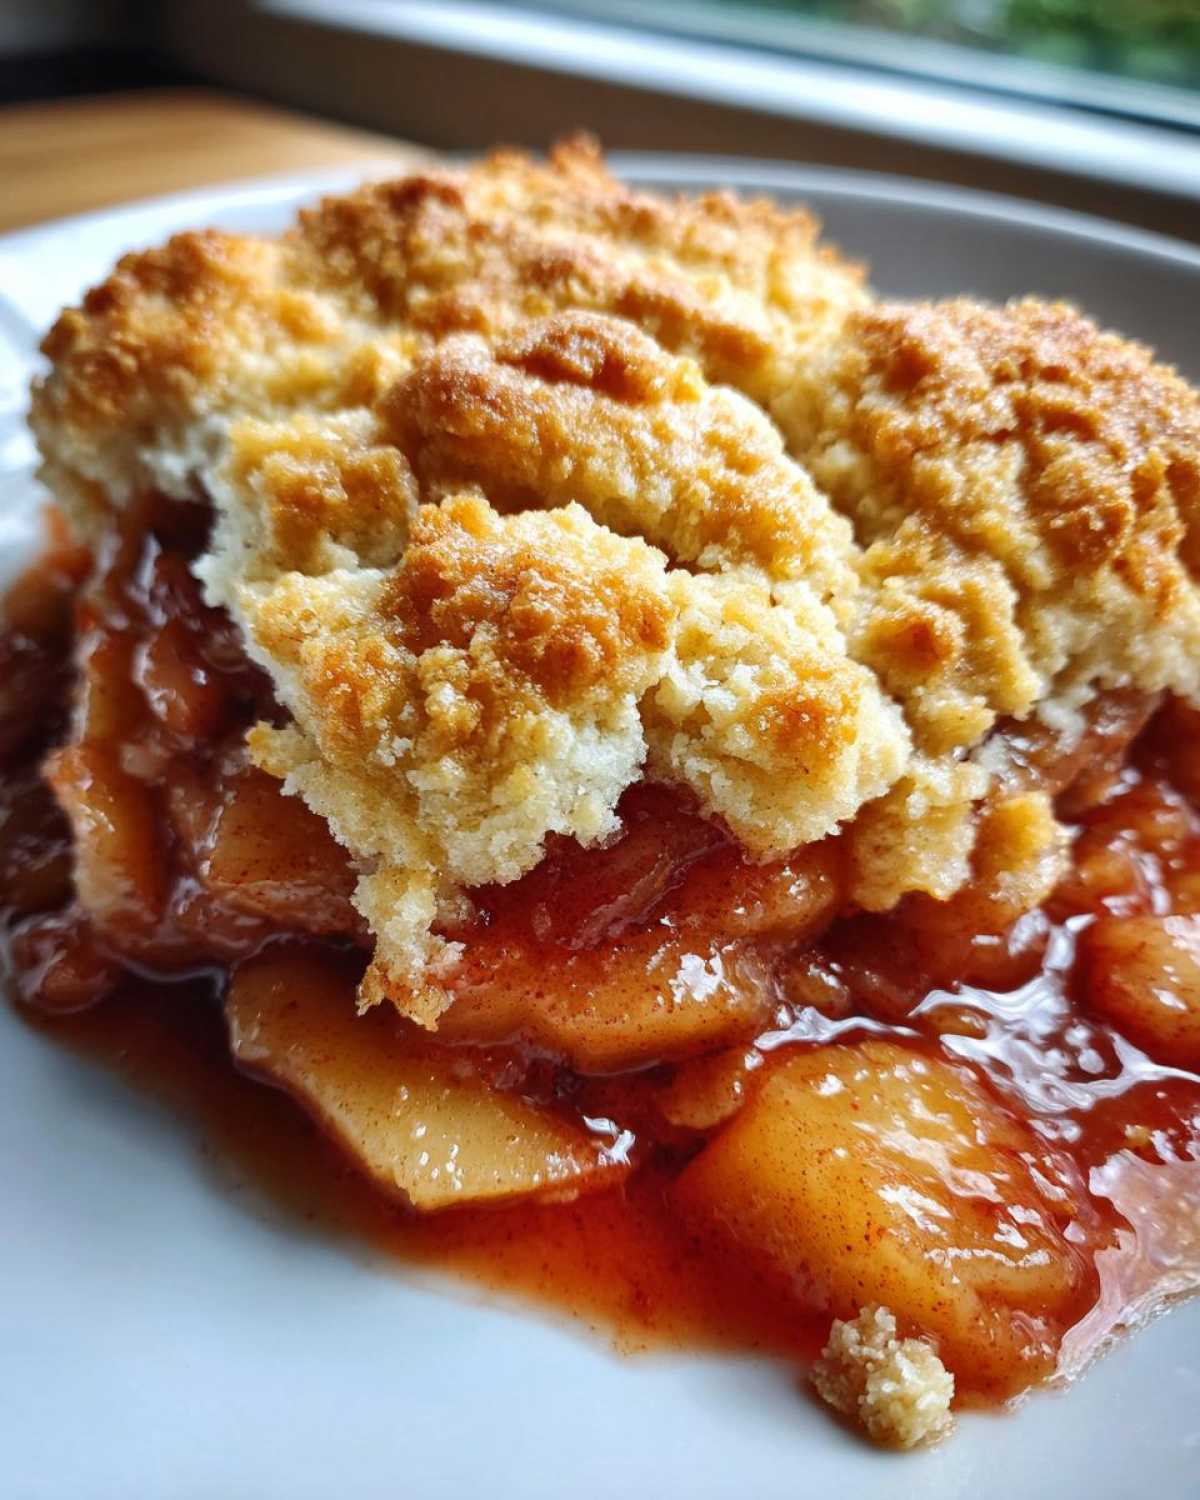
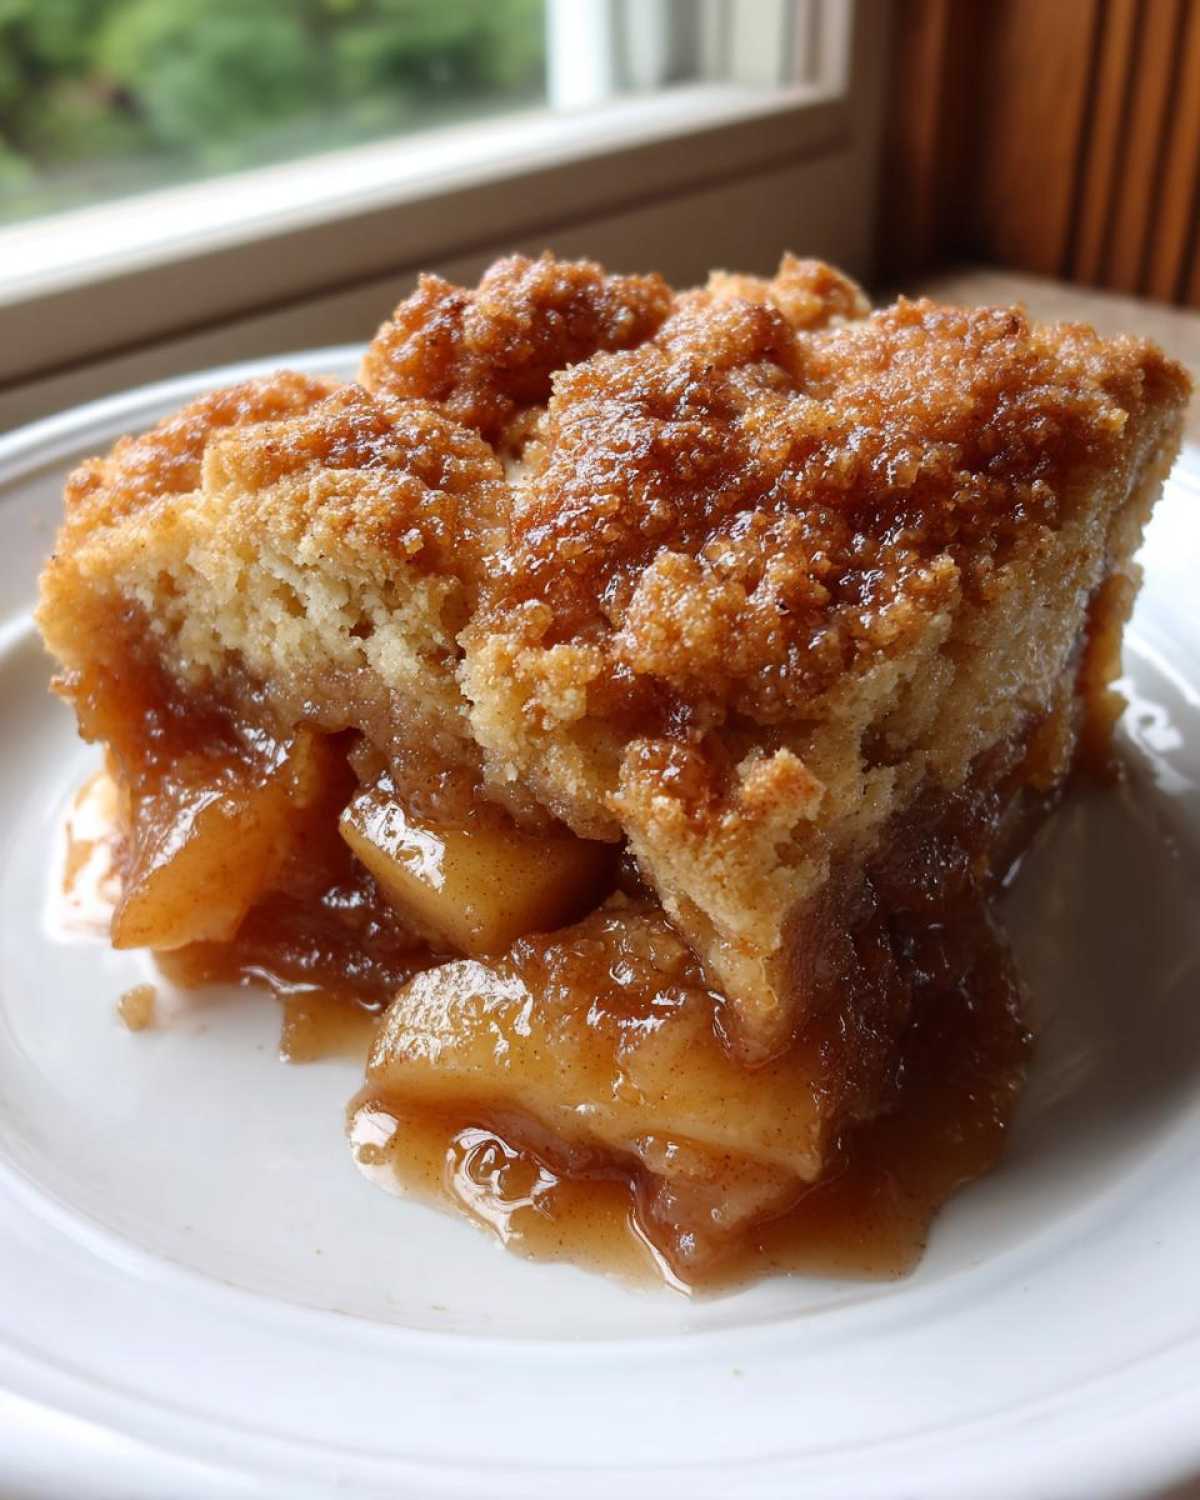
Now, we’re making things that feel like a warm hug. This Best Ever Easy apple cobbler recipe is exactly that feeling. It’s pure comfort food.
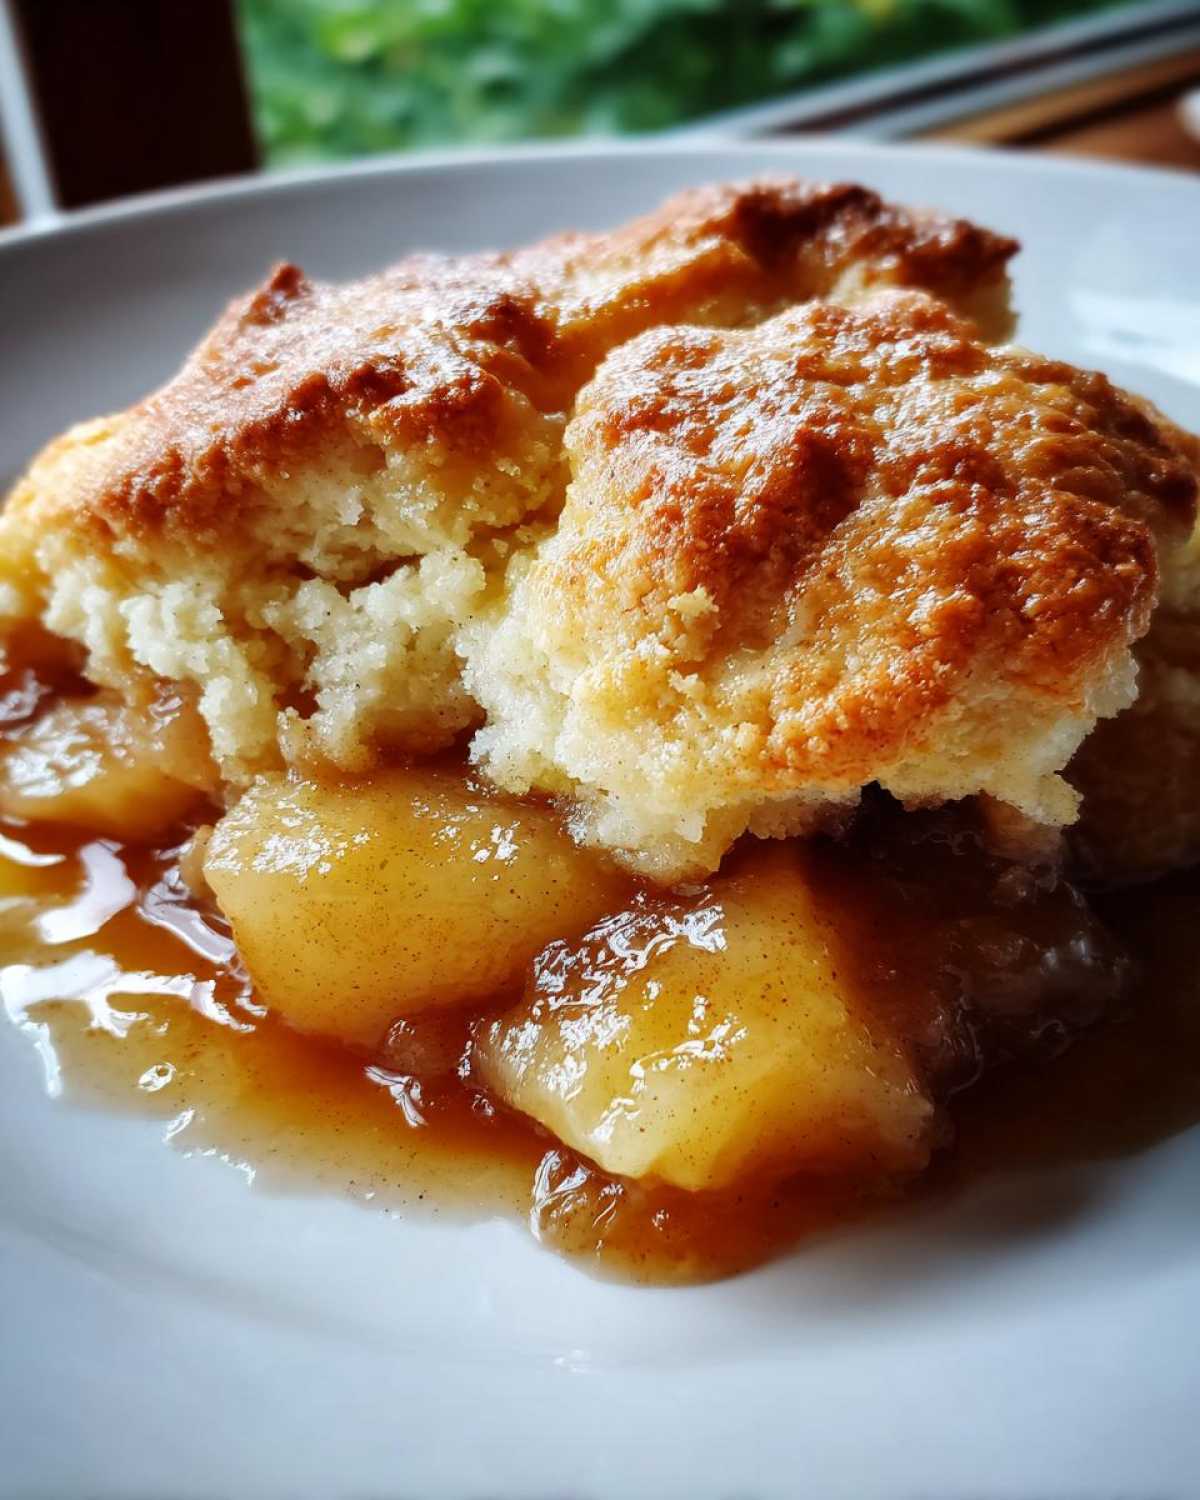
Forget fussy pastry; we’re using simple, tender, cinnamon-spiced apples. They bake beneath a rich, buttery topping. It’s slightly crisp, almost like a biscuit.
This apple cobbler is quick enough for a weeknight treat. It’s also amazing for sharing with friends. It truly captures the joy we bring to our kitchen now.
Why You Will Love This apple cobbler
This dessert is a guaranteed crowd-pleaser. I promise you will make it again and again. It hits all the right notes.
- It comes together super fast.
- The flavor is pure, warm nostalgia.
- It’s perfect for feeding a group.
Quick Prep Time for Your apple cobbler
You only need about 20 minutes to get this into the oven. Seriously! That quick prep time makes it ideal for busy evenings. No stress here.
Perfect Textures and Flavors
Imagine sweet, soft apples. They bubble up under a golden, buttery biscuit topping. That contrast? It’s everything. The cinnamon spice makes it smell divine.
Equipment Needed for Your apple cobbler
Getting ready is half the fun, right? I like to make sure my tools are out first. It keeps my flow going strong. Liam used to skip this step!
You don’t need fancy gadgets for this easy dessert. Just the basics will get you perfect results every time. Here’s what you’ll want handy.
Baking Dish Size
Grab your standard 9×13 inch baking dish. This size gives the filling and topping nice, even layers. It bakes beautifully in this pan.
Mixing and Cutting Tools
Make sure you have a couple of large mixing bowls ready. A whisk is great for the topping dry ingredients. You’ll also need something to cut in the butter.
I often just use my clean fingers for the butter. It feels more connected, you know? A pastry blender works too, if you have one.
Unambiguous Ingredients for the apple cobbler
Clarity matters when you bake. I learned this from Liam, of course. Getting the ingredients right sets the stage. For this apple cobbler, we want perfect texture.
Here are the exact items I always gather. They create that signature warm, spiced apple base. The topping comes together simply after this.
Apple Filling Components
- Six large Granny Smith apples. Peel, core, and slice them well.
- One cup of granulated sugar goes right in.
- One tablespoon of fresh lemon juice brightens things up.
- One teaspoon of ground cinnamon for deep warmth.
- One quarter teaspoon of ground nutmeg adds depth.
- One quarter cup of all-purpose flour thickens the juices.
Buttery Topping Components
- One half cup of cold unsalted butter. Cut this into small bits.
- One and a half cups of all-purpose flour for structure.
- One quarter cup of packed light brown sugar.
- One tablespoon of baking powder for lift.
- One half teaspoon of salt balances the sweetness.
- One half cup of cold milk binds the dough.
Finishing Touches
These last bits make all the visual difference. They add shine and crunch!
- One large egg, lightly beaten, for the wash.
- One tablespoon of coarse sugar for sprinkling over top.
Step-by-Step Instructions for Making apple cobbler
Ready to make some magic? Follow these steps closely. This is where the transformation happens. We move from ingredients to pure comfort food.
Preparing the Apples
First, get your oven heating up to 375\u00b0F. Grease your 9×13 inch dish well. Toss your sliced apples with sugar and spices. Add the lemon juice and flour too. Mix gently. Pour this apple mix into your prepared dish. Now, dot the top with half of your cold butter pieces. This melts into the fruit beautifully.
Creating the Biscuit Topping
In a separate bowl, whisk the topping dry ingredients. That means flour, brown sugar, baking powder, and salt. Next, cut in the rest of that cold butter. Work it in until it looks like coarse crumbs. Pour in the cold milk slowly. Stir just until a shaggy dough forms. Stop stirring right there! Overmixing ruins the texture.
Assembling and Baking the apple cobbler
Drop spoonfuls of that dough over the apples. Cover most of the surface, but let some fruit peek through. Brush the tops with your beaten egg. Sprinkle on the coarse sugar for crunch. Bake this beauty for 40 to 45 minutes. Look for bubbly sides and a golden-brown top.
The Essential Rest Period
This part is tough but crucial. Let the cobbler rest for 15 minutes. This cooling time lets the filling settle down. It thickens up nicely. Then, serve it warm. That first warm bite is pure bliss.
Tips for Perfect apple cobbler Success
Even though this recipe is easy, a few tricks help it shine. I learned these lessons the hard way! Remember Sara’s chaos versus Liam’s precision? These tips bridge that gap.
Follow these small steps closely. They make a huge difference in texture. Your final dessert will taste like it came from a fancy bakery.
Ingredient Temperature Matters
Keep your butter truly cold for the topping. Cold butter creates steam pockets. This gives you that light, biscuit-style lift. Warm butter just melts in. Use cold milk too. These temperatures are not suggestions, they are rules! Cold butter is essential for flaky pastry.
Controlling the Topping Consistency
When adding milk, stir minimally. You want a shaggy, uneven dough. This means you have pockets of flavor waiting to bloom. Overmixing develops gluten too much. That makes your topping tough, not tender. Stop stirring when you see dry spots disappear. That’s the secret to a great topping.
Variations on Classic apple cobbler
We love tradition, but Liam and I believe cooking should invite play. This recipe is a fantastic base. Think of it as our starting canvas.
Don’t feel stuck using only apples and cinnamon. Bring your own muse into the kitchen! Changing just one thing makes it feel brand new.
These little changes are easy explorations. They keep our comfort food exciting for us.
Flavor Swaps for Your apple cobbler
Want to try something different next time? I have two favorite simple swaps.
First, try swapping out some apples. Use ripe pears along with the Granny Smiths. Pears soften beautifully. They add a lovely, subtle floral note.
Second, make it taste like a snickerdoodle. This is so simple! Just add an extra half teaspoon of cinnamon to the dry topping mix. That extra spice really sings.
You could even add a drizzle of caramel sauce. Drizzle it over the apples before you top them. That makes a quick caramel apple crisp oat topping.
Frequently Asked Questions About apple cobbler
I always get questions after I post pictures of this dessert! People want to know the little secrets. I’m happy to share what I’ve learned.
Here are the common things readers ask about this easy dessert.
Can I make the topping ahead of time?
You can mix the dry topping ingredients beforehand. Keep them stored tight in the fridge. Don’t add the milk yet though! Add the milk just before you drop the dough. Cold ingredients are key for that biscuit texture.
What apples are best for baking?
I stick to Granny Smith apples mainly. They hold their shape well during baking. They also offer that needed tartness. That tartness balances the sweet sugar perfectly. You want firm apples.
How long does leftover apple cobbler keep?
Leftovers keep well for about three days. Store them covered on the counter. Room temperature is fine for a short time. For longer storage, use the fridge. Reheat slices gently in the oven or microwave.
Can I use frozen apples instead?
I haven’t tried frozen apples myself. I worry about too much liquid forming. If you test it, thaw them first. Pat them very dry with paper towels. This keeps your filling from getting soupy.
Is this dessert heavy?
It’s definitely rich because of the butter. But the light biscuit topping keeps it from feeling too dense. It’s comfort food, not diet food! It’s perfect for holidays like Thanksgiving. For other holiday favorites, check out our Holiday Club Sandwich with Cranberry Aioli.
Serving Suggestions for Warm apple cobbler
Serving this warm apple cobbler is almost as fun as baking it! The aroma alone makes everyone gather around the table. This dessert begs for something cold alongside it.
The contrast between the hot, spiced fruit and a cold topping is just magical. It’s the perfect ending to any meal. Think cozy fall nights or big holiday gatherings.
Here are my favorite ways to finish this easy dessert:
- Vanilla Ice Cream is classic for a reason. Let it melt right into those warm apple crevices.
- A dollop of fresh, lightly sweetened whipped cream works wonders. It adds lightness.
- Try a drizzle of salted caramel sauce over the top, too. That adds a nice complexity.
- For a tangier side, a spoonful of crème fraîche is fantastic. It cuts through the sweetness nicely.
Especially when serving a crowd, having these options ready is smart. Everyone gets to customize their perfect slice of comfort.
Storing Leftover apple cobbler
Even the very best apple cobbler rarely lasts past one day here. My family eats it fast! But sometimes we have a little bit left over.
Don’t worry if you have extra servings. Storing it correctly keeps it tasting great later. We want to save that buttery topping!
Here is my simple method for keeping your leftovers fresh.
- Let the cobbler cool down completely first. Warm baked goods create steam. Steam equals soggy topping later.
- Use an airtight container for storage. Glass containers work really well for this.
- Store the covered dish at room temperature. It lasts about three days this way.
- If you need it to last longer, put it in the fridge. It keeps well for about a week there.
Reheating is simple too. You want that topping crisp again. Avoid the microwave if you can. It makes the topping soft.
Try reheating individual slices in a toaster oven. Five minutes at 350\u00b0F works wonders. It brings back that fresh-baked warmth beautifully.
This ensures your second serving of apple cobbler tastes almost as good as the first!
Estimated Nutritional Data for apple cobbler
Let’s talk numbers for a moment. I know some of you are watching what you eat. I get that completely. Liam sometimes tracks things too.
Keep in mind these figures are estimates only. Your exact ingredients change the final count. Remember, this is a rich, comforting dessert.
It’s meant for enjoying, not for daily counting. Here is what our recipe generally yields:
- Serving Size: One slice of this easy dessert.
- Calories: Around 400 per serving.
- Sugar: Approximately 45 grams total.
- Fat Content: About 20 grams total fat.
- Saturated Fat: Roughly 12 grams of that fat.
- Carbohydrates: Expect about 58 grams here.
- Protein: Around 4 grams total protein.
This apple cobbler contains fiber and some essential nutrients. But it is definitely a treat! Enjoy every buttery bite of this classic apple cobbler.
I always try to serve it with a scoop of low-fat ice cream if I’m watching sugar. That small change helps balance things out. Have fun with your food! If you enjoy baking treats, you might also like our No Bake Peppermint Bark Cheesecake Magic.
Share Your apple cobbler Experience
Well, friends, that’s our script for this performance!
We poured our hearts into this recipe. We hope you feel the joy we do making it.
Now it’s your turn to take the stage in your kitchen. Did you try the snickerdoodle twist? For more fun flavor explorations, check out our Gingerbread Banana Bread.
Did your kids love this warm dessert?
I really want to hear all about it. Tell us how your apple cobbler turned out for you.
Leave a rating below so others know how amazing this is. Drop a comment if you have questions!
We love seeing your creations. Happy baking, and come back soon!
Print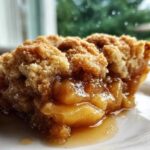
1 Amazing apple cobbler Recipe, Pure Joy
- Total Time: 65 minutes
- Yield: 8 servings 1x
- Diet: Vegetarian
Description
This is the Best Ever Easy Apple Cobbler recipe, featuring tender, cinnamon-spiced apples baked beneath a rich, buttery, slightly crisp biscuit-style topping. It is a comforting dessert perfect for sharing.
Ingredients
- 6 large Granny Smith apples, peeled, cored, and sliced
- 1 cup granulated sugar
- 1 tablespoon lemon juice
- 1 teaspoon ground cinnamon
- 1/4 teaspoon ground nutmeg
- 1/4 cup all-purpose flour (for filling)
- 1/2 cup (1 stick) cold unsalted butter, cut into small pieces
- 1 1/2 cups all-purpose flour (for topping)
- 1/4 cup packed light brown sugar (for topping)
- 1 tablespoon baking powder
- 1/2 teaspoon salt
- 1/2 cup cold milk
- 1 large egg, lightly beaten (for egg wash)
- 1 tablespoon coarse sugar (for sprinkling)
Instructions
- Preheat your oven to 375°F (190°C). Lightly grease a 9×13 inch baking dish.
- In a large bowl, combine the sliced apples, granulated sugar, lemon juice, cinnamon, nutmeg, and 1/4 cup flour. Toss gently until the apples are evenly coated.
- Pour the apple mixture into the prepared baking dish, spreading them into an even layer. Dot the top of the apples with half of the cold butter pieces.
- In a separate bowl, whisk together the 1 1/2 cups flour, brown sugar, baking powder, and salt for the topping.
- Cut in the remaining cold butter pieces using a pastry blender or your fingers until the mixture resembles coarse crumbs.
- Pour in the cold milk and stir just until a shaggy dough forms. Do not overmix.
- Drop spoonfuls of the dough evenly over the apple mixture, creating little mounds that cover most of the apples. It is okay if some apples show through.
- Brush the tops of the dough mounds lightly with the beaten egg and sprinkle with coarse sugar.
- Bake for 40 to 45 minutes, or until the topping is golden brown and the apple filling is bubbly and tender when pierced with a fork.
- Let the cobbler cool slightly for about 15 minutes before serving warm, perhaps with a scoop of vanilla ice cream.
Notes
- You can substitute some of the apples with pears for a different flavor profile.
- For a snickerdoodle style topping, add 1/2 teaspoon of extra cinnamon to the dry topping ingredients.
- If you prefer a more cake-like topping, mix the dough until just combined, rather than leaving it as rough crumbs.
- This dessert is best eaten the day it is made.
- Prep Time: 20 minutes
- Cook Time: 45 minutes
- Category: Dessert
- Method: Baking
- Cuisine: American
Nutrition
- Serving Size: 1 slice
- Calories: Approx. 400
- Sugar: Approx. 45g
- Sodium: Approx. 250mg
- Fat: Approx. 20g
- Saturated Fat: Approx. 12g
- Unsaturated Fat: Not specified
- Trans Fat: Trace
- Carbohydrates: Approx. 58g
- Fiber: Approx. 3g
- Protein: Approx. 4g
- Cholesterol: Approx. 50mg