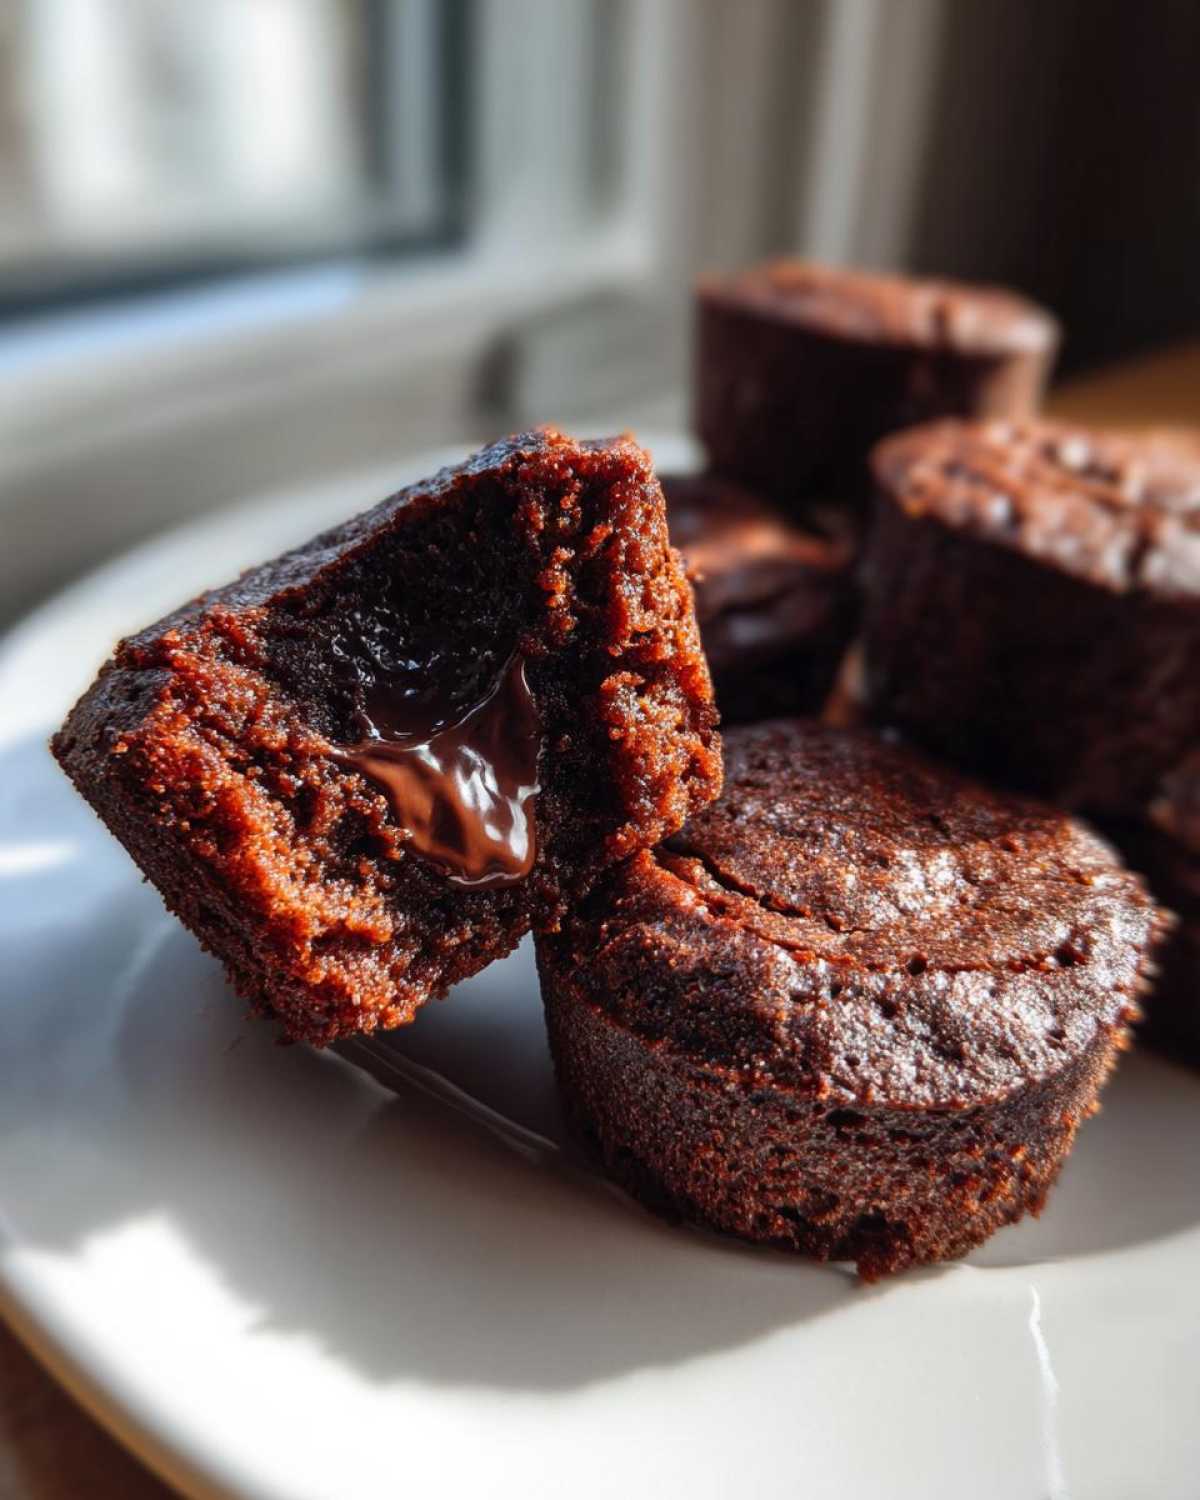
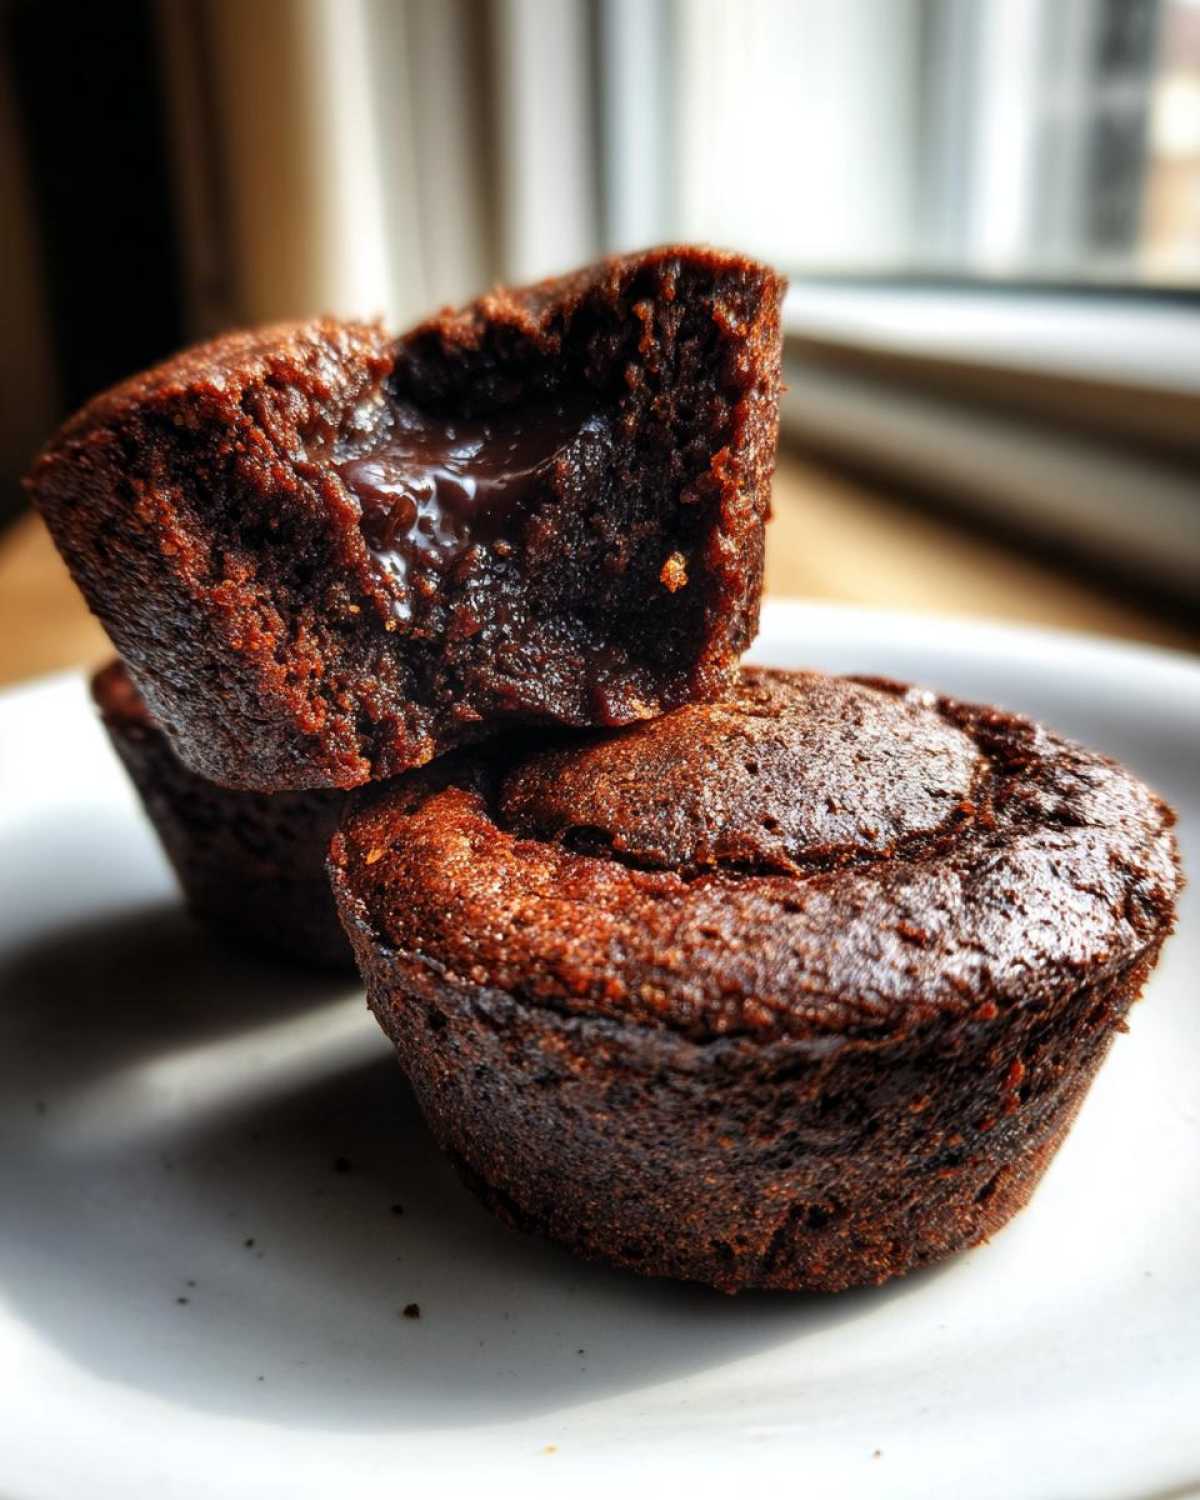
Listen, sometimes you just need chocolate. And not just any chocolate—I mean the kind that oozes out when you slice into it, the truly decadent, warm center experience. The problem, of course, is that baking gluten-free can sometimes mean sacrificing texture, right? Things get crumbly or just too dense, and you lose that magical molten effect. But friend, I cracked the code! Getting those perfect **Gluten-Free Chocolate Lava Brownie Cups** that are rich, dark, and gooey on the inside while holding their shape on the outside is totally achievable. Trust me, this recipe changed dessert night forever around here, and nobody will ever guess they are gluten-free!
Why You Will Love These Gluten-Free Chocolate Lava Brownie Cups
Honestly, what’s not to adore? I developed this recipe because I was tired of gluten-free desserts that tasted like cardboard, but this one delivers pure chocolate bliss. Quick, portion-controlled, and stunningly rich—you need these in your life for any chocolate craving.
- That unmistakable, gooey, molten center that screams indulgence!
- Perfectly portioned individual desserts—no messy slicing required.
- They bake up surprisingly fast for a decadent, quick chocolate fix.
- A reliable gluten-free structure that holds together beautifully.
- Absolutely perfect for desserts when you need an impressive single serving.
If you need more lava cake inspiration, check out my flourless decadent chocolate lava cake too!
Essential Ingredients for Perfect Gluten-Free Chocolate Lava Brownie Cups
Getting the right foundation is everything, especially when you’re working with gluten-free flour. We aren’t going for a light, fluffy cake here; we want dense, fudgy brownie layers with a molten heart! Everything listed below is crucial for making sure these cups set up properly and don’t crumble apart.
Here is what you need to gather before you even turn on the oven:
- 1/2 cup unsalted butter (Good quality makes a difference here!)
- 4 ounces unsweetened chocolate, chopped finely
- 1 cup granulated sugar
- 2 large eggs (Make sure they are room temperature if you can!)
- 1 teaspoon vanilla extract
- 1/2 cup gluten-free all-purpose flour blend (And this needs to contain xanthan gum, or we adjust later!)
- 1/4 teaspoon salt
- 2 ounces semi-sweet chocolate, chopped into 12 small, even pieces (These are our secret lava pockets!)
See? It’s not a huge list. But that gluten-free flour blend is key. If yours doesn’t have xanthan gum, don’t panic—we’ll talk about that simple add-in under the tips section. This ratio of chocolate to flour is what guarantees you get those rich, fudgy edges.
Step-by-Step Guide to Making Gluten-Free Chocolate Lava Brownie Cups
Alright, let’s get baking! This process is surprisingly fast—we’re talking under an hour total, which is amazing for such a decadent treat. The main goal here is gentle mixing once the flour comes into play. Gluten-free flours can get gummy or overly dense if you whip them around too much, so we treat that flour with respect! Patience during the folding stages is what separates a fudgy cup from a hockey puck. You can check out my tips for keto fudgy brownies for another example of careful ingredient integration.
Preparing the Tin and Oven for Your Gluten-Free Chocolate Lava Brownie Cups
First thing’s first: get that oven breathing! Preheat it to 350 degrees Fahrenheit right away. Now, for the muffin tin—this is crucial because these are sticky guys! I grease my entire 12-cup tin really well with butter or baking spray. If you worry about sticking (and you should, those centers are delicate!), line the cups with paper liners, but know that I find the edges get just a little less crisp that way. Make sure your tin is completely ready to go.
Creating the Rich Chocolate Base for Your Gluten-Free Chocolate Lava Brownie Cups
We start by melting the butter and the main portion of the unsweetened chocolate together in a small saucepan over low heat. Keep that heat gentle! Once it’s smooth as silk, pull it off the fire and let it chill out for just a minute or two. We don’t want to scramble the eggs! Then, whisk that sugar right into the warm chocolate, followed by your eggs one by one. Whisk well after each egg so everything emulsifies perfectly before stirring in the vanilla.
Achieving the Gooey Center in Your Gluten-Free Chocolate Lava Brownie Cups
Time for the layering magic! Spoon just about one tablespoon of the batter into the bottom of each prepared cup. This creates our base crust. Now, take one of those small pieces of the good semi-sweet chocolate and press it right into the center of that batter layer. This little chunk is what melts into your lava center! After that, divide the rest of your batter evenly on top, making sure that center chunk is completely covered.
Tips for Baking Success with Gluten Free Lava Brownie Recipe
Baking these molten cups is all about timing, especially when you’re using a gluten-free flour blend. The biggest mistake people make is overbaking, which defeats the whole purpose! You are looking for edges that look perfectly set, maybe just slightly dry to the touch, but the middle should still look soft, almost wobbly. If you bake until a toothpick comes out totally clean, you’ve made a fantastic gluten-free brownie, but you haven’t made a lava cup.
Remember that xanthan gum? If your blend doesn’t have it, add that 1/4 teaspoon of gum to your dry mixture. Xanthan gum is our structure superhero in gluten-free baking; it mimics the stretchiness bread flour gives, preventing your cups from turning into chocolate sand when you pull them out. Also, don’t skip the cooling step in the pan! Those five minutes let the delicate gluten-free structure firm up just enough so they don’t collapse when you try to move them.
If you want more baking wisdom, check out my tips for easy homemade chicken katsu curry recipe—it’s amazing how much technique matters in all kinds of cooking!
Ingredient Notes and Substitutions for Gluten-Free Chocolate Lava Brownie Cups
Okay, let’s circle back to the flour situation because I know that’s where gluten-free baking can get tricky. If your bag of GF all-purpose blend bragged about having xanthan gum in it, you are good to go! If it didn’t, that’s why I underlined that 1/4 teaspoon in the recipe notes. Don’t skip it! That little bit of gum acts like the glue the wheat flour usually provides, keeping these rich centers from crumbling into dust when they cool.
Now, about substitutions—I love making these for friends who can’t have dairy, so I’ve tested this! You can absolutely make these **Dairy Free Gluten Free Lava Brownies Options** with great success. Just swap out the unsalted butter for your favorite stick-style dairy-free butter alternative. Make sure it’s the stick kind, not the spreadable tub stuff, because we need the fat content to be exact for the batter’s structure.
As for the chocolate chunks in the middle, if you use a dairy-free chocolate chip brand for those 12 hidden pieces, you’ve got a fully dairy-free, decadent dessert! I actually had a batch left over after a potluck last month, and I talk about how I stored them in my vegan lentil loaf recipe post, believe it or not, as the storage principles are similar!
Serving Suggestions for Decadent GF Dessert Cups
You just pulled off a perfect molten center—don’t ruin the presentation now! Since these **Decadent GF Dessert Cups** are so rich on their own, they really only need one perfect pairing. Honestly, the classic scoop of vanilla bean ice cream on top when they are still warm is non-negotiable for me; the hot fudge and cold cream are just heaven.
If you want something fresh, a handful of bright red raspberries sprinkled around the plate cuts through that deep dark chocolate flavor beautifully. For a simpler touch, just dust them with powdered sugar right before serving. It looks so elegant! If you need ideas for other simple, no-bake treats, you should check out my no-bake peppermint bark cheesecake for inspiration!
Storage and Reheating Instructions for Gluten-Free Chocolate Lava Brownie Cups
So, what happens if you actually manage to have leftovers? That’s rare in my house, but when it happens, you need to know how to keep those lava pockets perfect! Store any extra **Gluten-Free Chocolate Lava Brownie Cups** buried in an airtight container at room temperature for up to two days. If you put them in the fridge, the gluten-free structure might get a little too firm, and we can’t have that!
The absolute secret to bringing back that gooey feel is reheating. Just pop one cup on a small microwave-safe plate for about 10 to 15 very short seconds. That tiny bit of heat melts that hidden semi-sweet chocolate right back into a perfect molten pool. Don’t go too long, or you’ll lose the lava and end up with a dense, hot brownie, which is still good, but not what we aimed for! If microwaving isn’t your thing, a few minutes in a warm oven works too.
For other baked goods that need careful storage, I wrote a whole section in my chocolate chip zucchini bread recipe about keeping baked goods fresh that might help!
Frequently Asked Questions About Baking Gluten Free Molten Center Brownies
I get so many questions about these cups because getting that lava center just right is tricky! Here are the ones I hear most often. I hope they help you nail this **Gluten Free Lava Brownie Recipe** on your first try!
Can I make these ahead of time?
This is a tricky one because we want that warm, gooey center, right? For the absolute best experience, no, I recommend baking them the day you plan to serve them. If you absolutely must prep ahead, you can mix the batter and keep it covered in the fridge for up to 24 hours. Then, you’ll need to add about 2 to 3 extra minutes to the baking time since the batter will be cold. Remember, overbaking is the enemy of the molten center!
How do I know for sure when they are done baking?
This is the most critical part for these **Chocolate Molten Brownie Cups GF**! The edges should look set and firm, maybe even slightly pulling away from the sides of the muffin tin cup. However, the very center needs to look shiny and slightly underdone. If you gently tap the side of the pan, the center should still have a little jiggle to it. When in doubt, pull them out early—they keep cooking slightly as they cool in the pan. This is how you get the best **Gooey Chocolate Center Baking** result.
Can I use almond flour or coconut flour instead of the GF blend?
I really advise sticking to a good quality, 1:1 gluten-free all-purpose flour blend that contains xanthan gum for this particular recipe. Almond flour and coconut flour behave totally differently structurally. Almond flour is much higher in fat, and coconut flour soaks up tons of liquid. If you try to swap, you are essentially creating a completely different recipe, and you will most likely lose that brownie-like structure we are aiming for. For these **Individual Gluten Free Chocolate Cakes**, stick to the blend!
Can these be made dairy-free?
Yes, absolutely! As I mentioned earlier, this recipe works wonderfully for those needing **Dairy Free Gluten Free Lava Brownies Options**. Simply swap the butter for a high-quality stick-style dairy-free butter, and ensure the 2 ounces of chopped chocolate you use for the molten center are dairy-free as well. It’s an easy switch!
If you want to see how I handle other tricky baking conversions, check out some of the notes in my gluten-free apple cinnamon muffins post!
Share Your Best Gluten Free Brownie Cups Experience
I just love hearing from you all when you nail a tricky recipe like this! Seriously, please tell me how successful you were at keeping that molten center gooey—it’s my favorite part of the feedback!
Rate these **Best Gluten Free Brownie Cups** below right now and leave a comment sharing any adjustments you made to your baking time. Did you serve them warmed up or room temperature? If you snap a picture of your **Single Serving Gluten Free Chocolate Dessert**, tag me on social media! I can’t wait to see your chocolate creations!
Don’t forget to check out my chocolate chip zucchini bread recipe next!
Print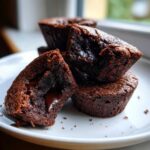
Gluten-Free Chocolate Lava Brownie Cups
- Total Time: 32 min
- Yield: 12 cups 1x
- Diet: Gluten Free
Description
Bake rich, individual chocolate brownie cups with a gooey, molten center using gluten-free ingredients.
Ingredients
- 1/2 cup unsalted butter
- 4 ounces unsweetened chocolate, chopped
- 1 cup granulated sugar
- 2 large eggs
- 1 teaspoon vanilla extract
- 1/2 cup gluten-free all-purpose flour blend (with xanthan gum)
- 1/4 teaspoon salt
- 2 ounces semi-sweet chocolate, chopped into 12 small pieces
Instructions
- Preheat your oven to 350 degrees Fahrenheit. Grease a 12-cup standard muffin tin well.
- In a small saucepan over low heat, melt the butter and the 4 ounces of unsweetened chocolate together, stirring until smooth. Remove from heat and let cool slightly.
- In a medium bowl, whisk the sugar into the chocolate mixture. Whisk in the eggs one at a time, then stir in the vanilla extract.
- In a separate small bowl, whisk together the gluten-free flour blend and salt. Gently fold the dry ingredients into the wet ingredients until just combined. Do not overmix.
- Spoon about 1 tablespoon of the batter into the bottom of each prepared muffin cup.
- Place one small piece of the semi-sweet chocolate directly in the center of the batter in each cup.
- Top with the remaining batter, dividing it evenly among the 12 cups.
- Bake for 15 to 17 minutes. The edges should look set, but the center should still look slightly soft.
- Let the cups cool in the muffin tin for 5 minutes before carefully removing them to a wire rack to cool slightly more. Serve warm for the best lava effect.
Notes
- If your gluten-free flour blend does not contain xanthan gum, add 1/4 teaspoon of xanthan gum to the dry ingredients.
- For easier removal, line the muffin tin cups with paper liners, though this may slightly affect the crispness of the edges.
- Baking time is critical for the lava center; check at 15 minutes.
- Prep Time: 15 min
- Cook Time: 17 min
- Category: Dessert
- Method: Baking
- Cuisine: American
Nutrition
- Serving Size: 1 cup
- Calories: 220
- Sugar: 18g
- Sodium: 85mg
- Fat: 14g
- Saturated Fat: 8g
- Unsaturated Fat: 6g
- Trans Fat: 0g
- Carbohydrates: 22g
- Fiber: 1g
- Protein: 3g
- Cholesterol: 55mg