Get ready for the best chocolate experience ever. I’m Sara, and my husband Liam makes these incredible oreo brownies. They aren’t just good. They are the definition of rich, fudgy bliss. We cracked the code for that gorgeous, shiny, crinkly top. My job is keeping Liam inspired. I am his flavorful muse in the kitchen.
This recipe turns baking into a real performance. Forget dry, cakey bars. We are aiming for pure, gooey indulgence here. Liam perfected this recipe for us. Now, we share our ultimate indulgent dessert with you. Prepare your kitchen for pure joy.
Why You Will Love Our Fudgy oreo brownies
These aren’t your average baked squares. We promise pure chocolate heaven. They are incredibly easy to make, too. You get amazing results fast.
- Quick Prep Time
- Guaranteed Crinkly Top
- Maximum Oreo Content
Quick Prep Time
You only need fifteen minutes to mix. Seriously fast prep work here. Get them into the oven quickly. Dinner is over, dessert is coming!
Guaranteed Crinkly Top
That shiny, crackly crust is key. Whisking the sugar and melted butter creates magic. This simple step gives you that signature look. Overmixing kills fudginess.
Maximum Oreo Content
We fold in lots of crunchy cookies. Every bite offers creamy crunch. It elevates this chocolate dessert beyond the usual.
Essential Equipment for Perfect oreo brownies
Gathering your tools first makes baking fun. Liam always says preparation is half the battle. You don’t need specialty gear here. Just the basics for success.
Having the right pan matters a lot. It helps these fudgy treats bake evenly.
Baking Pan Preparation
Grab one 9×13 inch baking pan. Line it with parchment paper. Make sure the paper hangs over the sides. This overhang is your handle later.
Mixing Tools
You’ll need a large mixing bowl. A medium bowl works too. Use a good whisk for the sugar step. Fold in ingredients gently later.
Ingredients for Your oreo brownies
Let’s talk about what you need for this showstopper. Liam insists on good quality cocoa powder. It really makes a difference in flavor depth. Remember, we want intense chocolate here. Good quality ingredients matter.
Having everything measured out helps the flow. This keeps the process quick and fun. Don’t skip the semi-sweet chips!
Dry Components
- One cup of all-purpose flour.
- Three-quarters cup of unsweetened cocoa powder.
- Just half a teaspoon of salt.
Wet Components and Binders
We use two full cups of granulated sugar. Yes, that much sugar helps the crinkles form. You need one cup of unsalted butter, melted first. Then, add four large eggs. Finish with one teaspoon of vanilla extract.
The Star Ingredient: Oreos
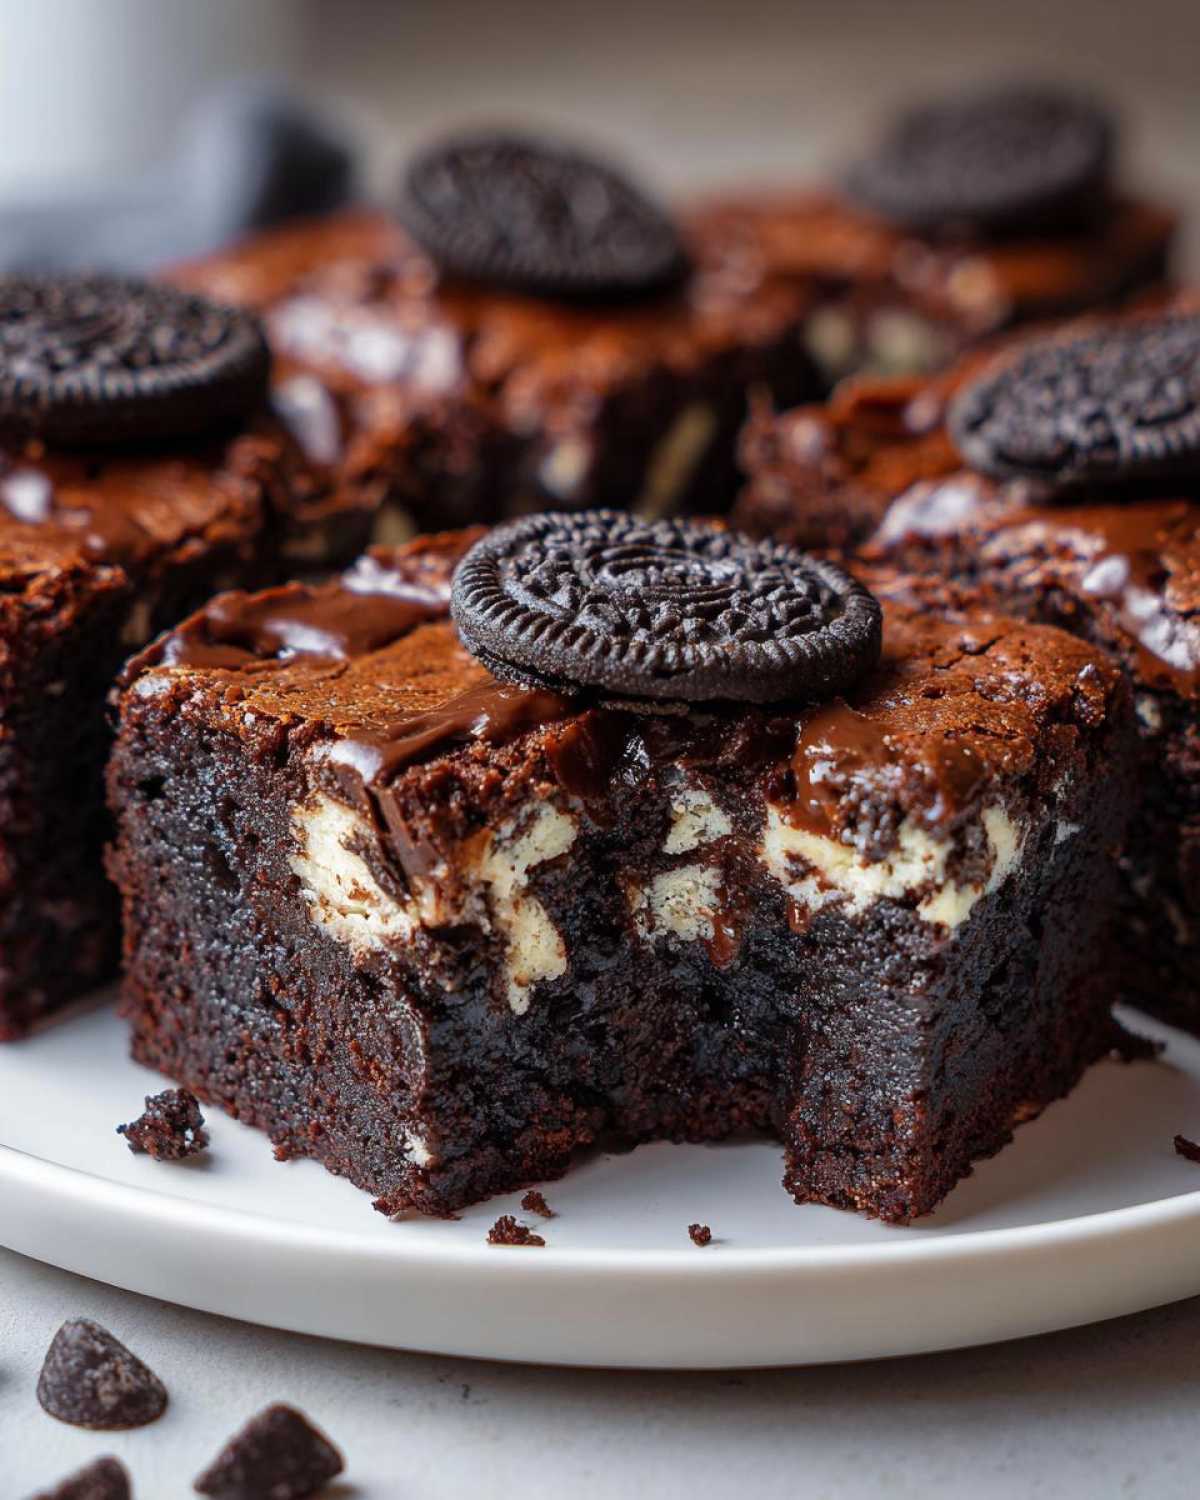
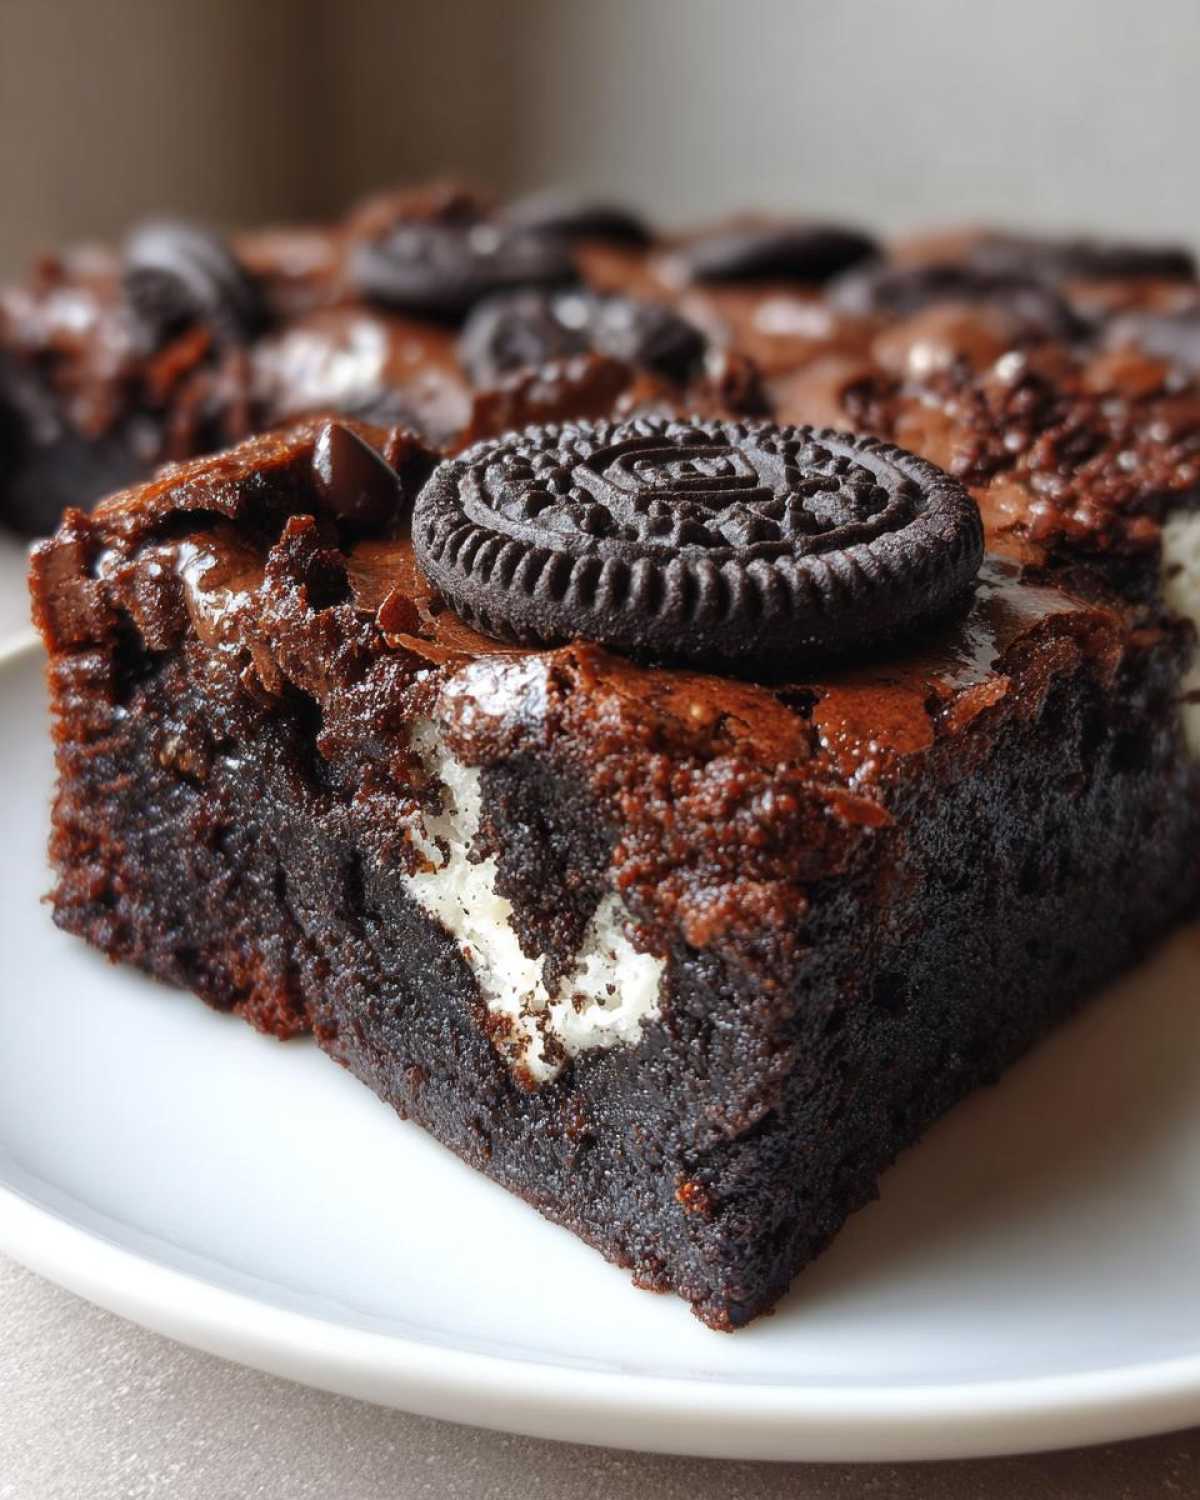
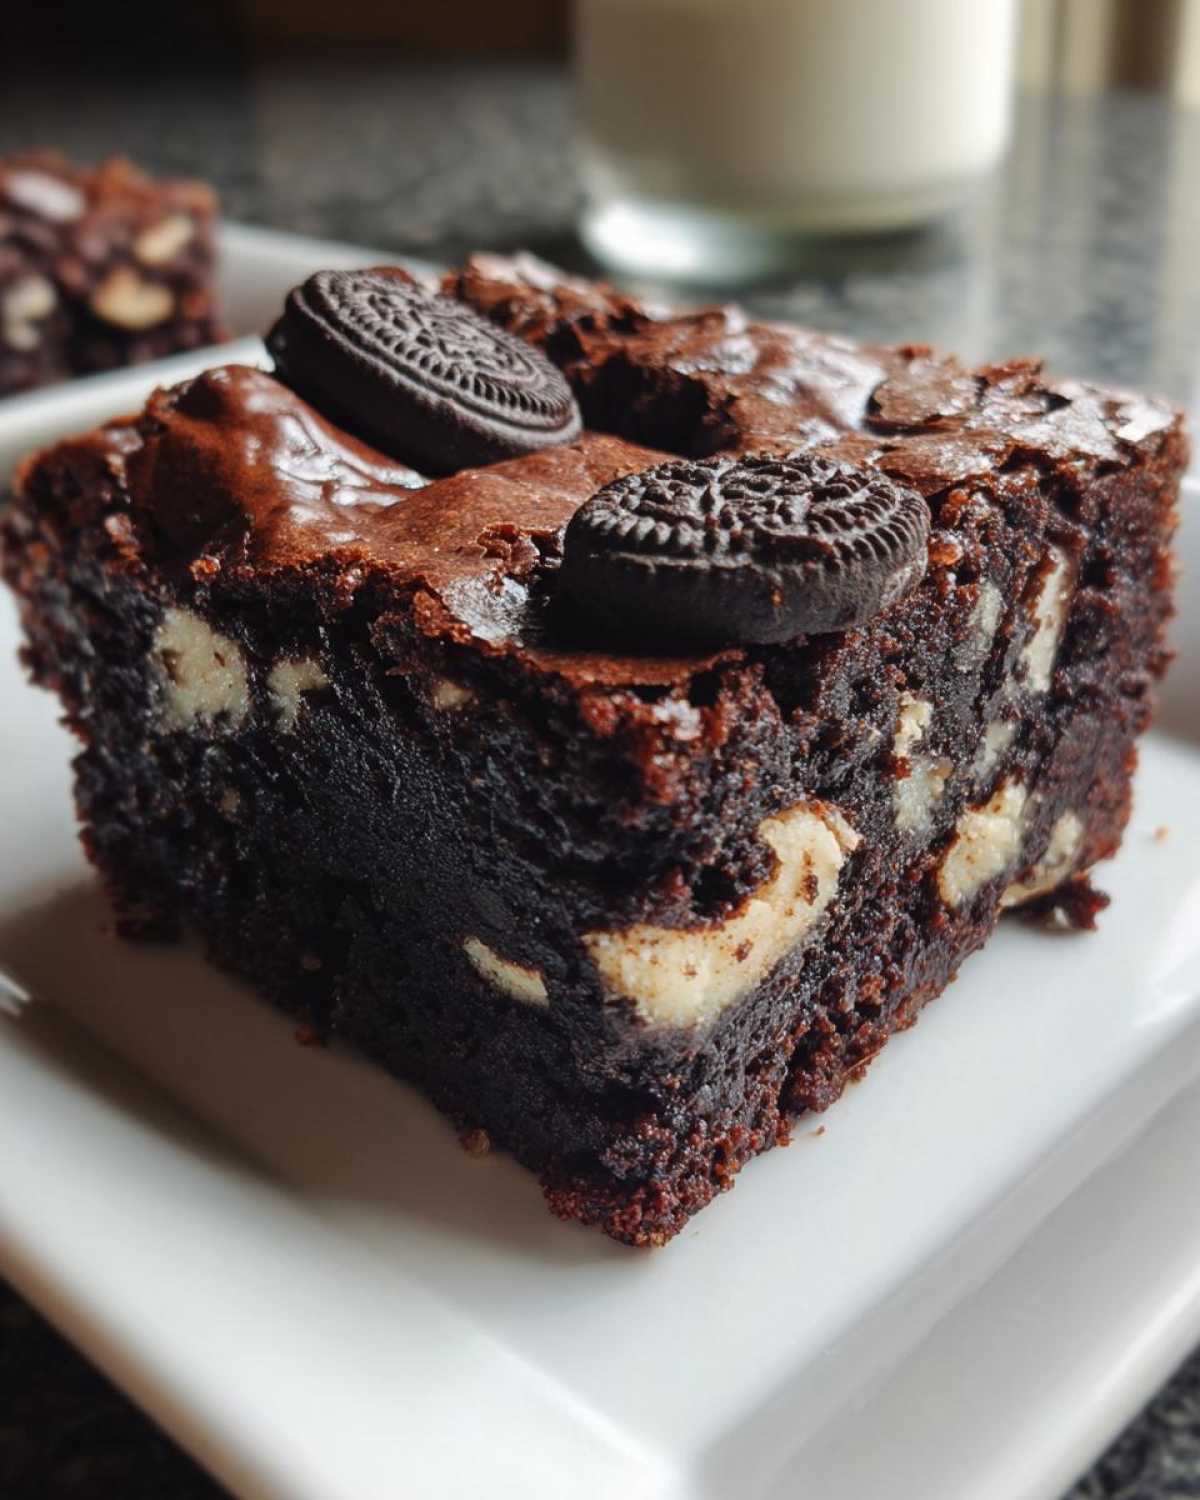
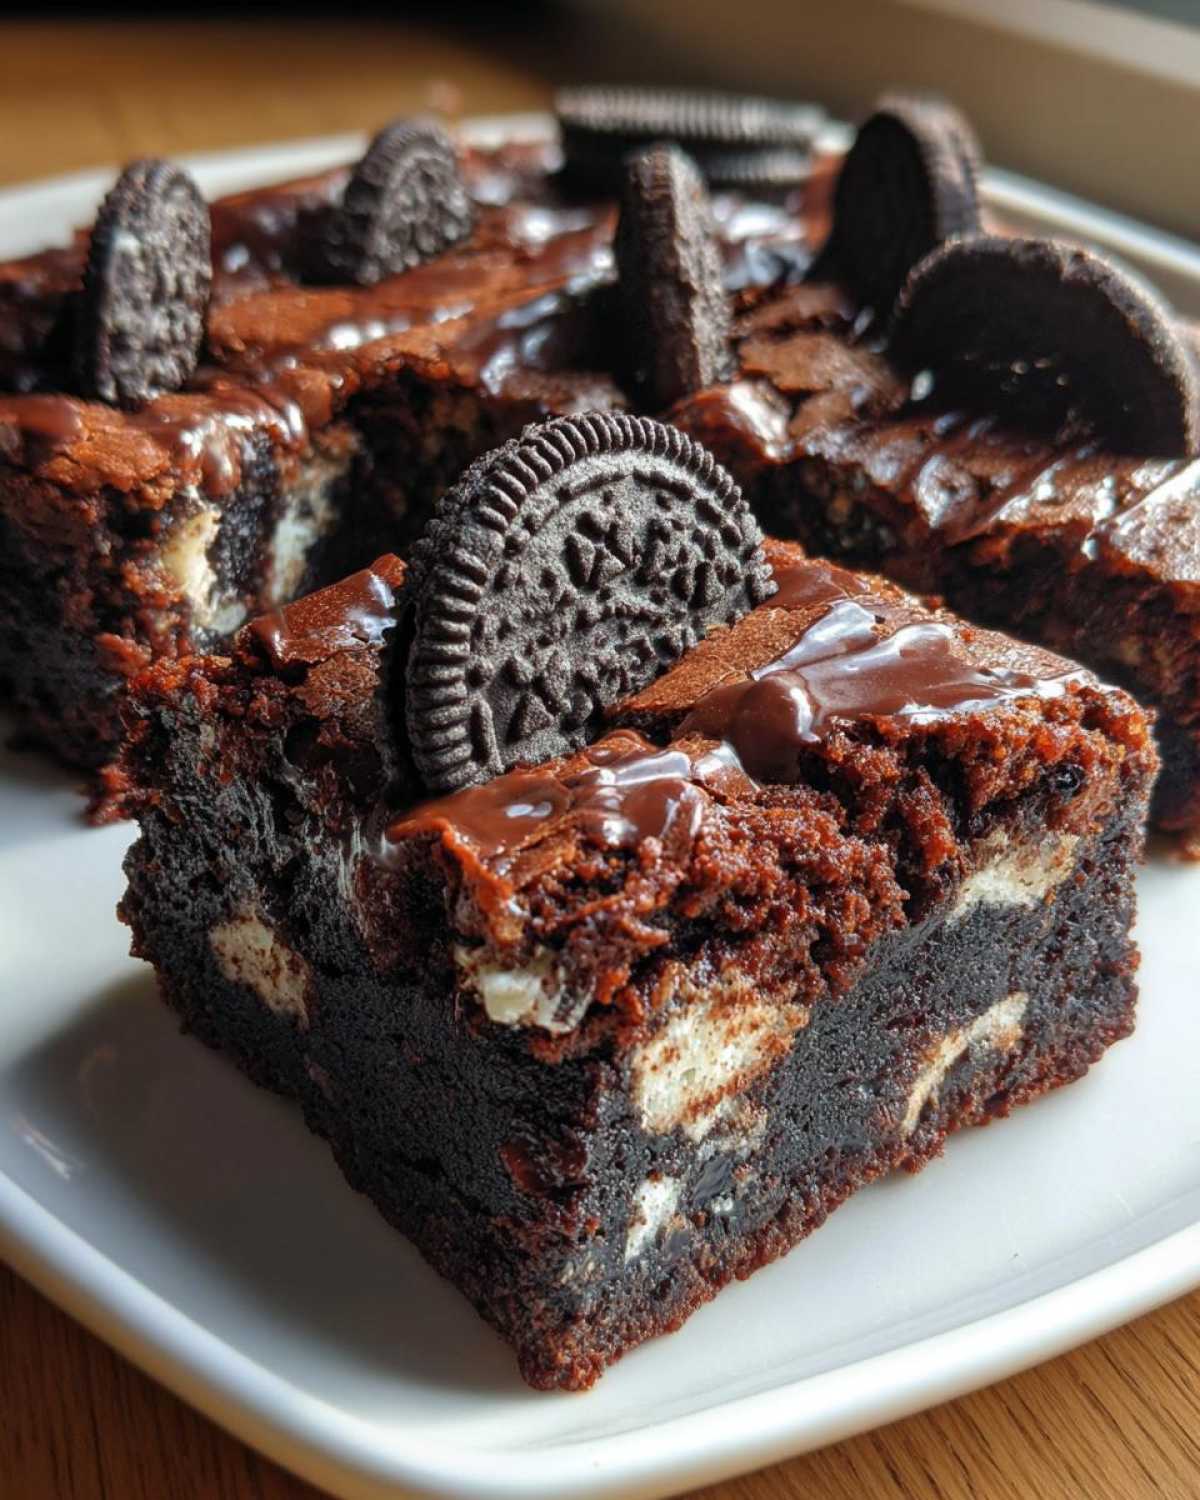
This is where the fun really begins. You need one full package of Oreos. Roughly chop most of them up. Save a few whole ones for the very top. They look so pretty there.
Step-by-Step Instructions for Fudgy oreo brownies
Now for the main event! This is where the magic happens. Follow these steps closely. Liam and I promise perfect results. Don’t rush the mixing process here.
Prep Work and Oven Setting
First, get that oven hot. Preheat it to 350\u00b0F (175\u00b0C). Line your 9×13 inch pan with parchment paper. Make sure the paper hangs over the edges. This overhang is your easy lift handle later.
Creating the Shiny Top Batter Base
In a big bowl, whisk the melted butter and sugar. Whisk them until they look totally combined. I mean really whisk them well. This action is key for that shiny, crinkly top you want. Baking science confirms whisking importance.
Next, add your eggs one by one. Whisk each one in fully. Don’t forget that vanilla extract. Keep mixing until smooth.
Combining Wet and Dry Mixtures
Mix your flour, cocoa, and salt in a separate bowl first. Now, slowly add these dry bits to your wet mix. Mix only until the streaks disappear. Stop right there! Overmixing kills fudginess.
Adding the Cookies and Baking
Gently fold in the chocolate chips. Then, fold in two-thirds of those chopped Oreos. Pour this thick batter into your prepared pan. Spread it out evenly across the bottom. Sprinkle the rest of the Oreos on top. Press them in just a little bit.
Bake for about 28 to 35 minutes. Check it near the center. You want moist crumbs on your toothpick. Never wet batter, though.
Cooling for Clean Slicing
Patience is a baker’s virtue here. Let these oreo brownies cool completely. Leave them right in the pan on a rack. Lifting them out early causes cracks. Wait until they are totally cool. Then, slice them for perfect squares.
Tips from Sara and Liam for Perfect oreo brownies
We’ve baked these a million times. Liam and I learned a few tricks along the way. These tips keep our brownies perfectly fudgy every single time. Follow our advice for success.
Baking is science, but flavor is feeling. We want you to feel the joy of a perfect bake.
Avoiding Dryness: The Bake Test
This is the secret to fudgy texture. Do not overbake these treats. Pull them out when the toothpick shows moist crumbs. Wet batter dripping off is bad. Totally clean means dry brownies. Find that sweet spot.
Achieving Cleaner Cuts
Slicing warm brownies is messy business. Trust me on this one. Let them cool completely first. Even better? Chill them for an hour. Cold brownies slice like a dream. You get those beautiful, sharp edges.
Pan Size Adjustments
We use a 9×13 inch pan usually. This makes them slightly thinner. If you crave super thick squares, use an 8×8 pan. Remember to increase the baking time then. Check them often if you change the pan size.
Serving Suggestions for Your Chocolate Dessert
These rich, fudgy squares are amazing alone. But pairing them changes the game! We love making dessert feel like an event. Think about balancing that deep chocolate flavor.
What goes best with pure indulgence? Something cold or something warm.
Ice Cream Pairings
A scoop of vanilla bean ice cream is classic. It melts beautifully over the top. Try salted caramel gelato for a salty-sweet kick. Mint chip also cuts through the richness nicely.
Warm Toppings
Drizzle warm caramel sauce over your plate. A little raspberry coulis adds needed brightness. A dusting of powdered sugar looks elegant too. Serve them slightly warm for extra ooze.
Storing Your Homemade oreo brownies
These rich treats disappear fast, I know! But if you have leftovers, storing them right keeps them fudgy. We want to protect that amazing texture. Don’t let them dry out on the counter.
Keeping them fresh is simple. Proper storage keeps the shine alive.
Room Temperature Storage
Keep the brownies in an airtight container. Store them at room temperature. They stay great for about four days this way. Avoid direct sunlight or heat. That melts the chocolate bits inside.
Freezing Instructions
For longer storage, freezing works wonders. Wrap individual squares tightly in plastic wrap first. Then, place them in a freezer-safe bag. They last well for up to three months. Thaw them on the counter before serving.
Frequently Asked Questions About oreo brownies
We get so many questions about these rich squares! Baking can bring up lots of queries. Let’s clear up a few common ones about our oreo brownies recipe.
Liam and I try to answer everything we can. We want your baking performance to be a huge success. Here are a few things people often ask us.
Can I use different types of Oreos?
Absolutely! Feel free to switch things up. Double Stuf Oreos add extra creaminess inside. Try mint or peanut butter flavored ones too. They bring a fun twist to the chocolate base.
How do I get the best crinkly top next time?
That shiny top comes from the first step. You must whisk the melted butter and sugar really well. Whisk until it looks smooth and glossy. Don’t skip that vigorous whisking action. It really makes the difference.
Are these considered Brookies?
That is a fun question! A true brookie is a cookie layer baked on top of a brownie layer. Our recipe mixes the Oreos right into the fudgy batter. It is an Oreo-loaded brownie. Not technically a brookie, but just as indulgent!
Estimated Nutritional Data
We are cooks, not nutritionists, folks! Liam focuses on flavor. I focus on fun.
Our estimates are just a starting point for you. Serving size is one large square.
Nutrition counts vary a lot. This depends on your specific brands used. We do not provide exact data here.
Share Your Culinary Performance
Did you nail that shiny top? I sure hope so!
We love seeing your creations come to life. Your kitchen is now a stage, too. Rate this recipe down below for us. Tell us how your performance went.
Share photos of your amazing squares. Seeing your joy makes our day. Happy baking, friends!
Print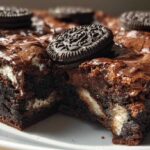
Fudgy oreo brownies: 28-Minute Bliss
- Total Time: 50 minutes (plus cooling time)
- Yield: 16 large brownies 1x
- Diet: Vegetarian
Description
You are making fudgy Oreo Brownies with a gorgeous, shiny, crinkly top. This recipe brings together the intense chocolate flavor of a perfect brownie with the creamy crunch of whole Oreo cookies mixed right in. Prepare for an ultimate indulgent dessert experience that fills your kitchen with joy.
Ingredients
- 1 cup (2 sticks) unsalted butter, melted
- 2 cups granulated sugar
- 4 large eggs
- 1 teaspoon vanilla extract
- ¾ cup unsweetened cocoa powder
- 1 cup all-purpose flour
- ½ teaspoon salt
- 1 cup semi-sweet chocolate chips
- 1 package (about 14.3 oz) Oreo cookies, roughly chopped (keep some whole for topping)
Instructions
- Preheat your oven to 350°F (175°C). Line a 9×13 inch baking pan with parchment paper, leaving an overhang on the sides for easy removal.
- In a large bowl, whisk together the melted butter and granulated sugar until completely combined. This step helps create that shiny top.
- Whisk in the eggs one at a time until fully incorporated. Mix in the vanilla extract.
- In a separate bowl, whisk together the cocoa powder, flour, and salt.
- Gradually add the dry ingredients to the wet ingredients, mixing only until just combined. Do not overmix.
- Gently fold in the chocolate chips and about two-thirds of the chopped Oreos.
- Pour the batter into the prepared pan and spread evenly. Sprinkle the remaining chopped Oreos and a few whole Oreos on top.
- Bake for 28 to 35 minutes. A toothpick inserted near the center should come out with moist crumbs attached, but not wet batter.
- Let the brownies cool completely in the pan on a wire rack before lifting them out using the parchment overhang.
- Cut into squares and serve. Enjoy your creation!
Notes
- For the best fudgy texture, resist the urge to overbake. Look for moist crumbs on the toothpick.
- If you prefer a thicker, denser brownie, use an 8×8 inch pan instead, adjusting the baking time accordingly (likely closer to 40-45 minutes).
- Chilling the brownies for an hour before cutting makes for cleaner slices.
- Prep Time: 15 minutes
- Cook Time: 35 minutes
- Category: Dessert
- Method: Baking
- Cuisine: American
Nutrition
- Serving Size: 1 brownie
- Calories: Estimate 350-400
- Sugar: Estimate 35g
- Sodium: Estimate 150mg
- Fat: Estimate 22g
- Saturated Fat: Estimate 13g
- Unsaturated Fat: Estimate 9g
- Trans Fat: Estimate 0g
- Carbohydrates: Estimate 40g
- Fiber: Estimate 1g
- Protein: Estimate 4g
- Cholesterol: Estimate 60mg