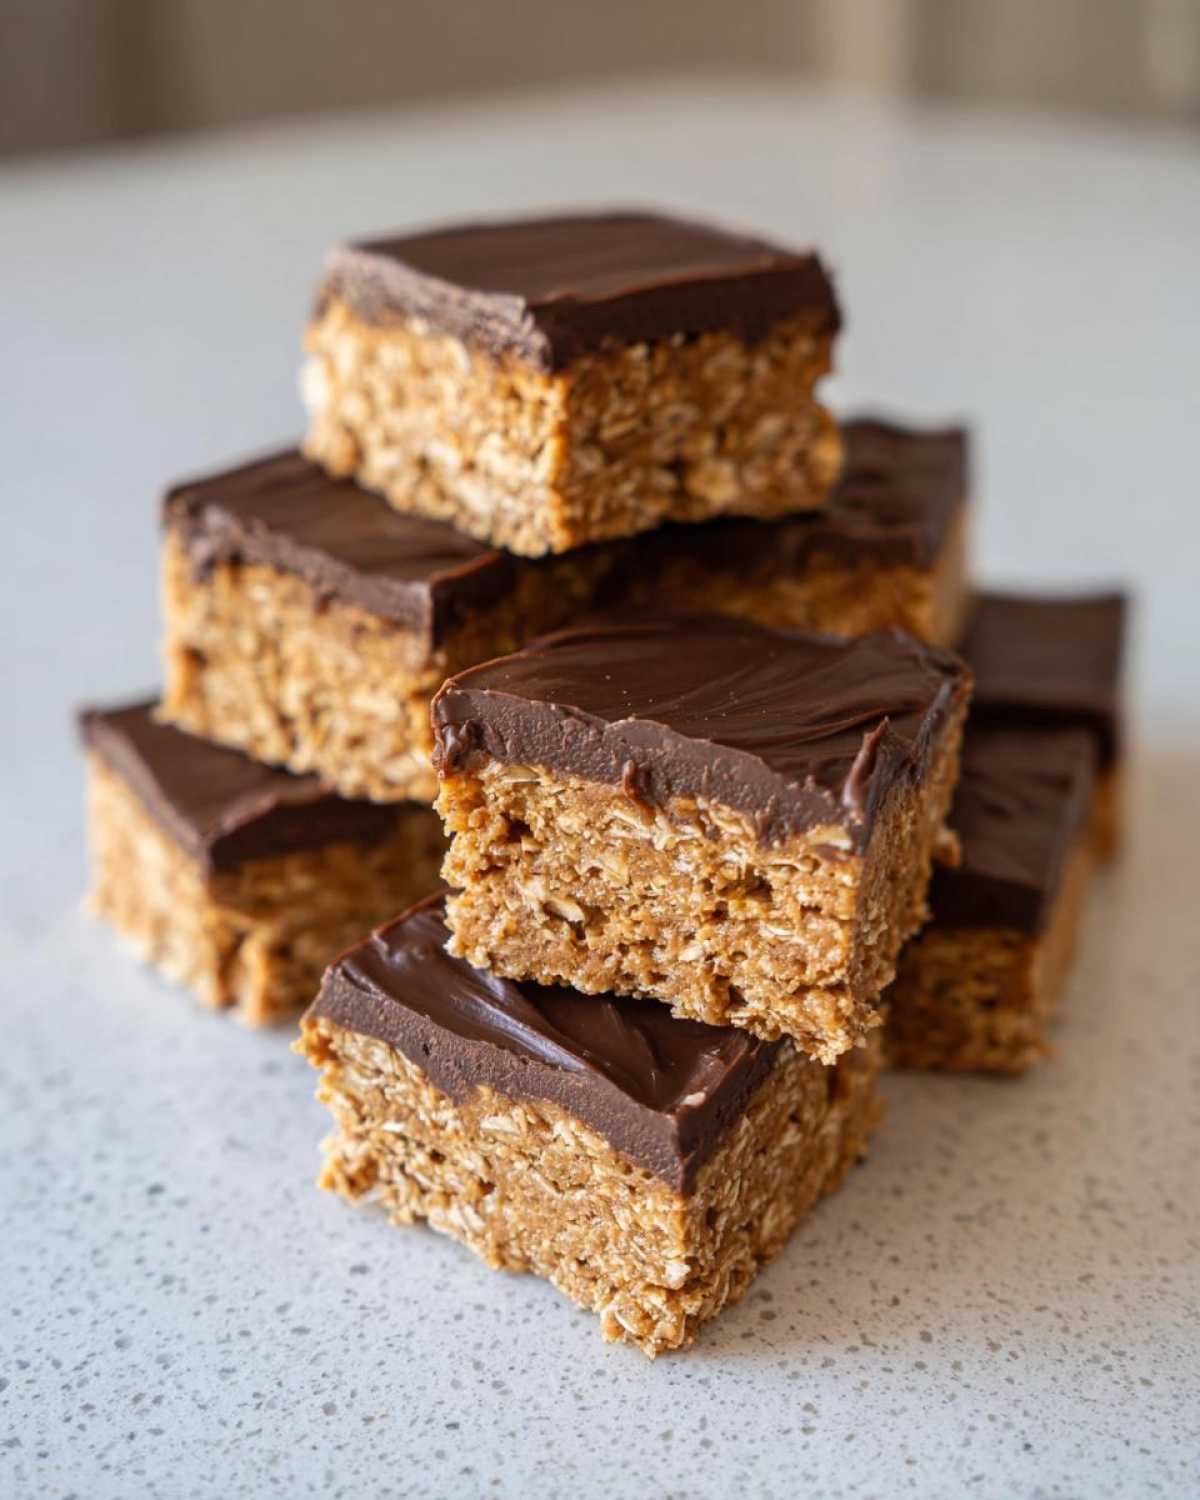
Isn’t it the absolute worst when you need a quick, healthy snack, but every shelf-stable option tastes like chalk mixed with regret? Liam and I run around so much trying to keep up with our days that we constantly need high protein fuel, and honestly, I was tired of the cost and the questionable ingredients in store-bought protein bars. That’s why we cooked up a real showstopper for you today: the Easy 5-Ingredient No-Bake Peanut Butter Protein Bars. Seriously, no oven time! These are quick, they are packed with protein, and oh my goodness, they are so wonderfully chewy. This recipe is pure Sara magic—fast, effective, and feeds that inner child who just needs a delicious energy blast! If you want to know a little more about how Liam and I ended up in the kitchen together, you can check out our story here.
Why These Are the Best Homemade Protein Bars You Will Ever Make
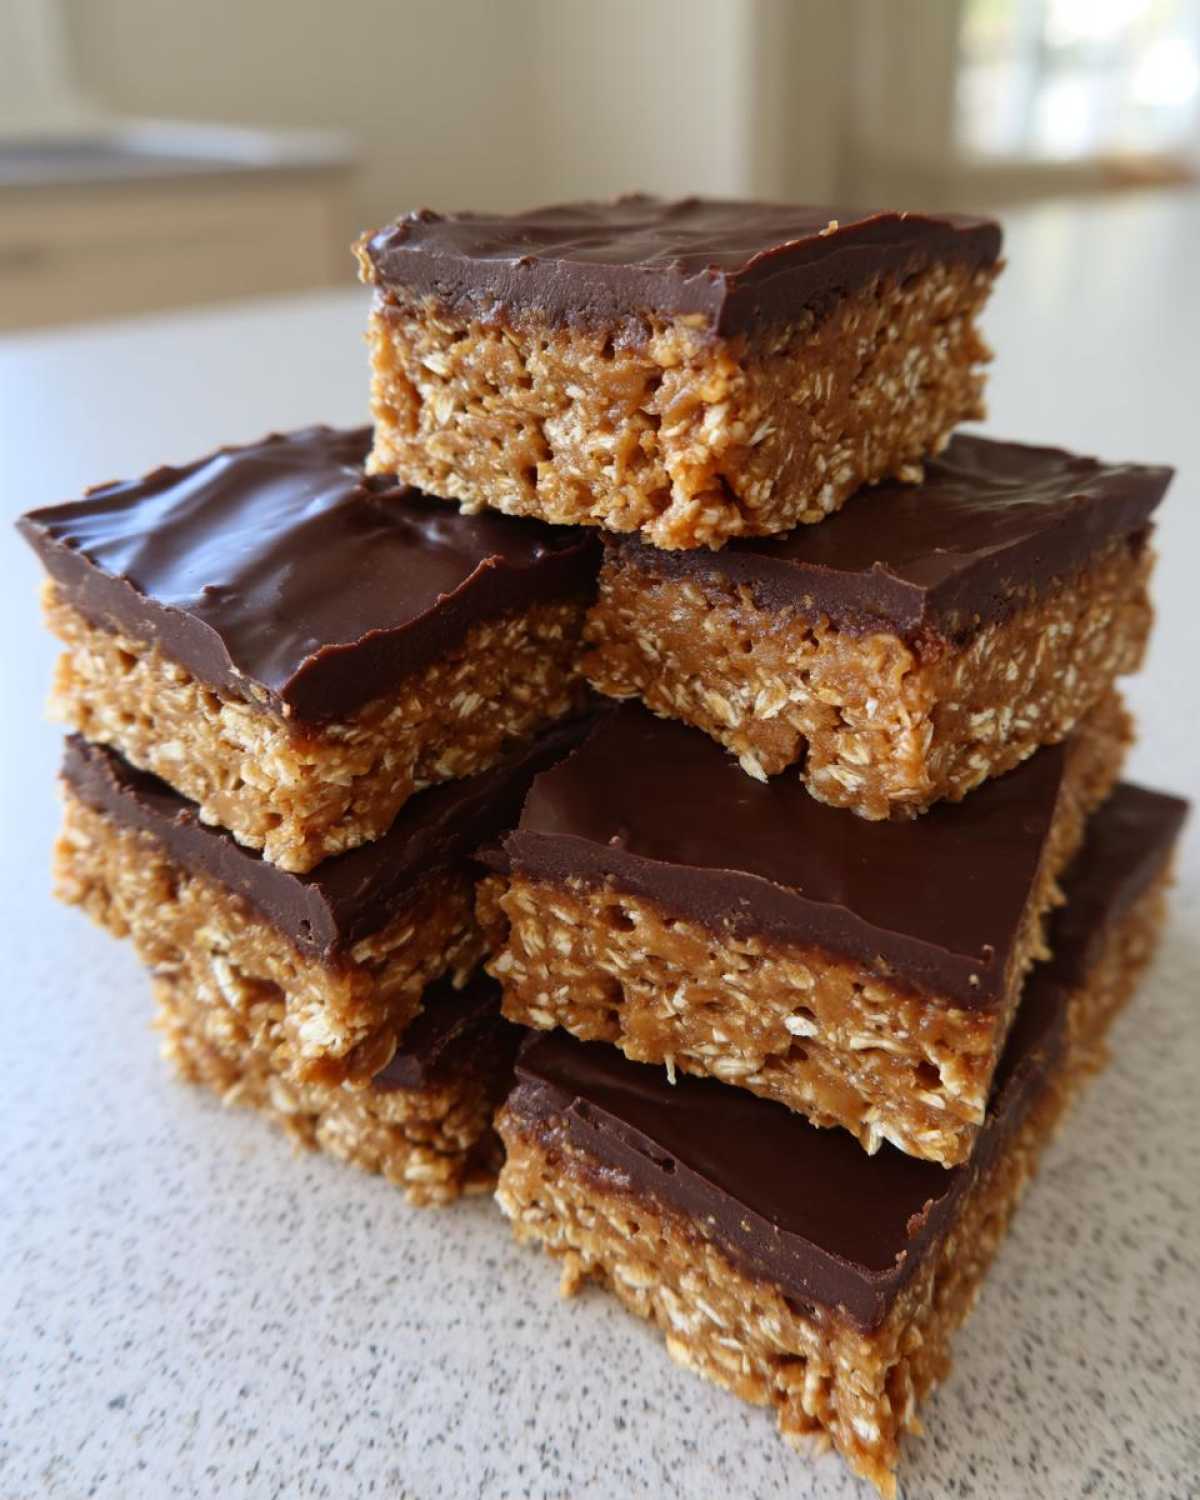
You know how most protein bars you try to make end up being hard as a hockey puck or just crumble into dust the second you look at them? Well, toss that kitchen tragedy out the window! These are hands-down the best homemade protein bars you’ll ever try, and I promise you, they’re not chalky. Liam says they have the best structural integrity out of anything we’ve developed lately, and that’s because we kept the ingredient list ridiculously short. Five things, that’s it! This recipe cuts out all the fluff and focuses on giving you maximum payoff for minimum effort. Plus, they are super satisfying for meal prepping all week long.
The No Bake Protein Bars Advantage
The absolute best part? There’s zero cooking required! We’re talking no cooking required snacks here. You mix it, you press it, you chill it—done! It takes maybe 10 minutes of active time, which is perfect for those days when you’re rushing out the door for a workout or just need a last-minute addition to your cooler for the week. These qualify as the ultimate quick protein snacks because when you’ve got these no bake protein bars waiting in the fridge, there’s no excuse for hitting that vending machine.
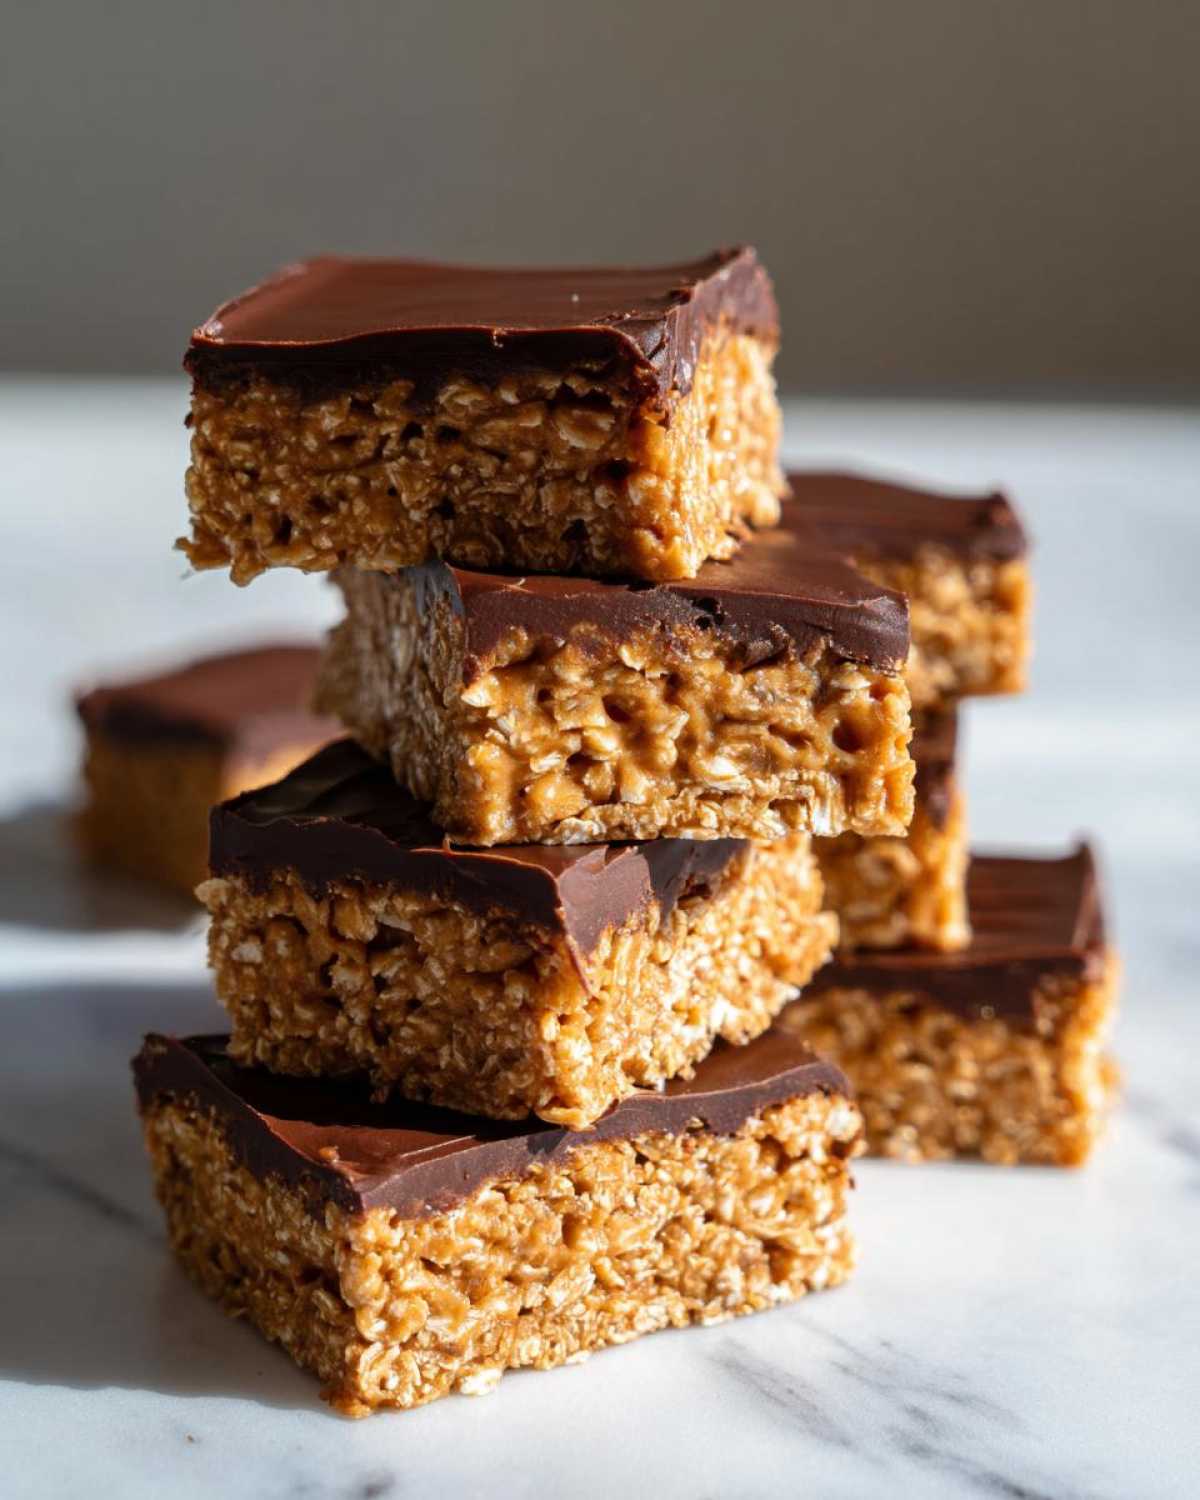
Achieving Perfect Chewy Protein Bars
Texture is everything when you’re dealing with protein bars, right? If they aren’t chewy protein bars, what’s the point? The secret is really in that peanut butter and the sticky sweetener binding the oats and powder. It creates this dough that holds together beautifully while still being soft. If you’re looking at what other genius cooks are doing with these kinds of snacks, some folks try complex additions, but trust us, keeping it simple here is what locks in that perfectly gooey bite. You can see another great approach to these kinds of snacks over at The Big Man’s World if you want an alternative flavor idea!
When you nail this ratio, you get that satisfying, dense bite that makes you feel nourished. If you love quick mixes that also taste incredible, you should definitely check out our recipe for No Bake Peanut Butter Energy Bites—it shares some of the same binding magic!
Essential Ingredients for Your Peanut Butter Protein Bars
Okay, we are down to the good stuff! Because these are homemade protein bars and we’ve got zero baking happening, every single ingredient has to pull its weight. We only use five main components to make this magic happen, but you can’t just swap anything willy-nilly. Liam always says that in no-bake recipes, the quality of the binder really dictates the final texture. If you want amazing protein bars that don’t fall apart, you need to pay attention to what you are grabbing from the pantry shelf.
Here’s the lineup we trust:
- 1 cup rolled oats – Make sure they are rolled, not the instant stuff!
- 1/2 cup natural peanut butter – Key word here is *natural*. The kind that separates the oil on top.
- 1/2 cup vanilla or unflavored protein powder – This is what gets you that big protein punch!
- 1/4 cup honey or maple syrup – Your sticky glue.
- 1/4 cup dark chocolate chips – This is totally optional, but come on, we have to add chocolate!
We need that natural peanut butter because the stabilizers in highly processed peanut butter can sometimes stop the mixture from setting up right. It’s small stuff like this that turns a good snack into one of the best homemade protein bars around. If you need inspiration for other flavor combos using basic ingredients—especially when thinking about binding agents—you might enjoy my Cranberry Orange Muffins—it’s all about quality components! And if you want to explore what the core building blocks for these snacks look like, take a peek at the ingredient suggestions on Aliana’s Recipes.
Ingredient Notes and Substitutions
Since everyone’s diet is a little different, let’s talk about swapping things out so you can perfect your own unique spin on this protein bar recipe. Remember, the goal is to keep it sticky and packed with fuel!
For my friends keeping it plant-based, this recipe is incredibly friendly! Just swap the honey for maple syrup (or agave if you prefer), and make absolutely certain your protein powder is plant-based, too. That makes it one of the best vegan protein bars you can whip up in minutes.
Now, the scary part: if your mixture seems way too stiff—like you’re trying to mix cement instead of dough—don’t panic! This usually happens if your protein powder is super absorbent. Just add liquid one teaspoon at a time. A splash of water, almond milk, or even a little bit of yogurt will usually loosen it up until you can get that perfect, thick dough. Trust me, fiddling with the moisture level is normal when you are working on your perfect protein bar recipe.
Step-by-Step Guide to Making Easy Protein Bars
Now for the performance part! This is where Liam usually puts on some loud jazz music because building these easy protein bars is all about momentum and a little bit of elbow grease. The main thing to remember is that since we aren’t baking, we rely entirely on the pressure we use and the chill time to set everything up right. We want these protein bars to be incredibly satisfying, not flimsy. Don’t worry at all about getting messy here; it’s part of the fun!
Preparing the Base for Your Homemade Protein Bars
First things first, you have to set the stage. Grab an 8×8 dish and line it really well with parchment paper. Make sure you leave some paper hanging over the sides—those are your ‘handles’ later. Pulling the whole block out at the end is so much easier than trying to hack chunks out while it’s still stuck in the pan, right?
Next, in a big bowl, toss in those rolled oats and your protein powder. Give them a quick swirl just to get them acquainted before you add the sticky stuff. Then, add your peanut butter and your sweetener—honey or maple syrup. Now, this is where you ditch the spoon if you have to! You need to mix this until it’s one uniform dough. I mean *really* mix it until you see no dry pockets left. If it looks crumbly, add a tiny splash of water.
This is Liam’s big tip for getting those perfect homemade protein bars: Once it’s mixed, dump it into the lined dish. Now, press. And I mean press! Use the bottom of a measuring cup or even just clean hands to really pack that mixture down evenly. The harder you press now, the less likely they are to crumble when you cut into them later. Seriously, compress it like you are trying to save space in a tiny trunk!
Finishing and Setting Your No Bake Protein Bars
If you opted for the chocolate top layer, now is the time to melt those chips (a quick 30 seconds in the microwave usually does the trick for me!) and spread that gorgeous layer over the top of your compacted base. It looks beautiful, and who doesn’t want that extra chocolate hit?
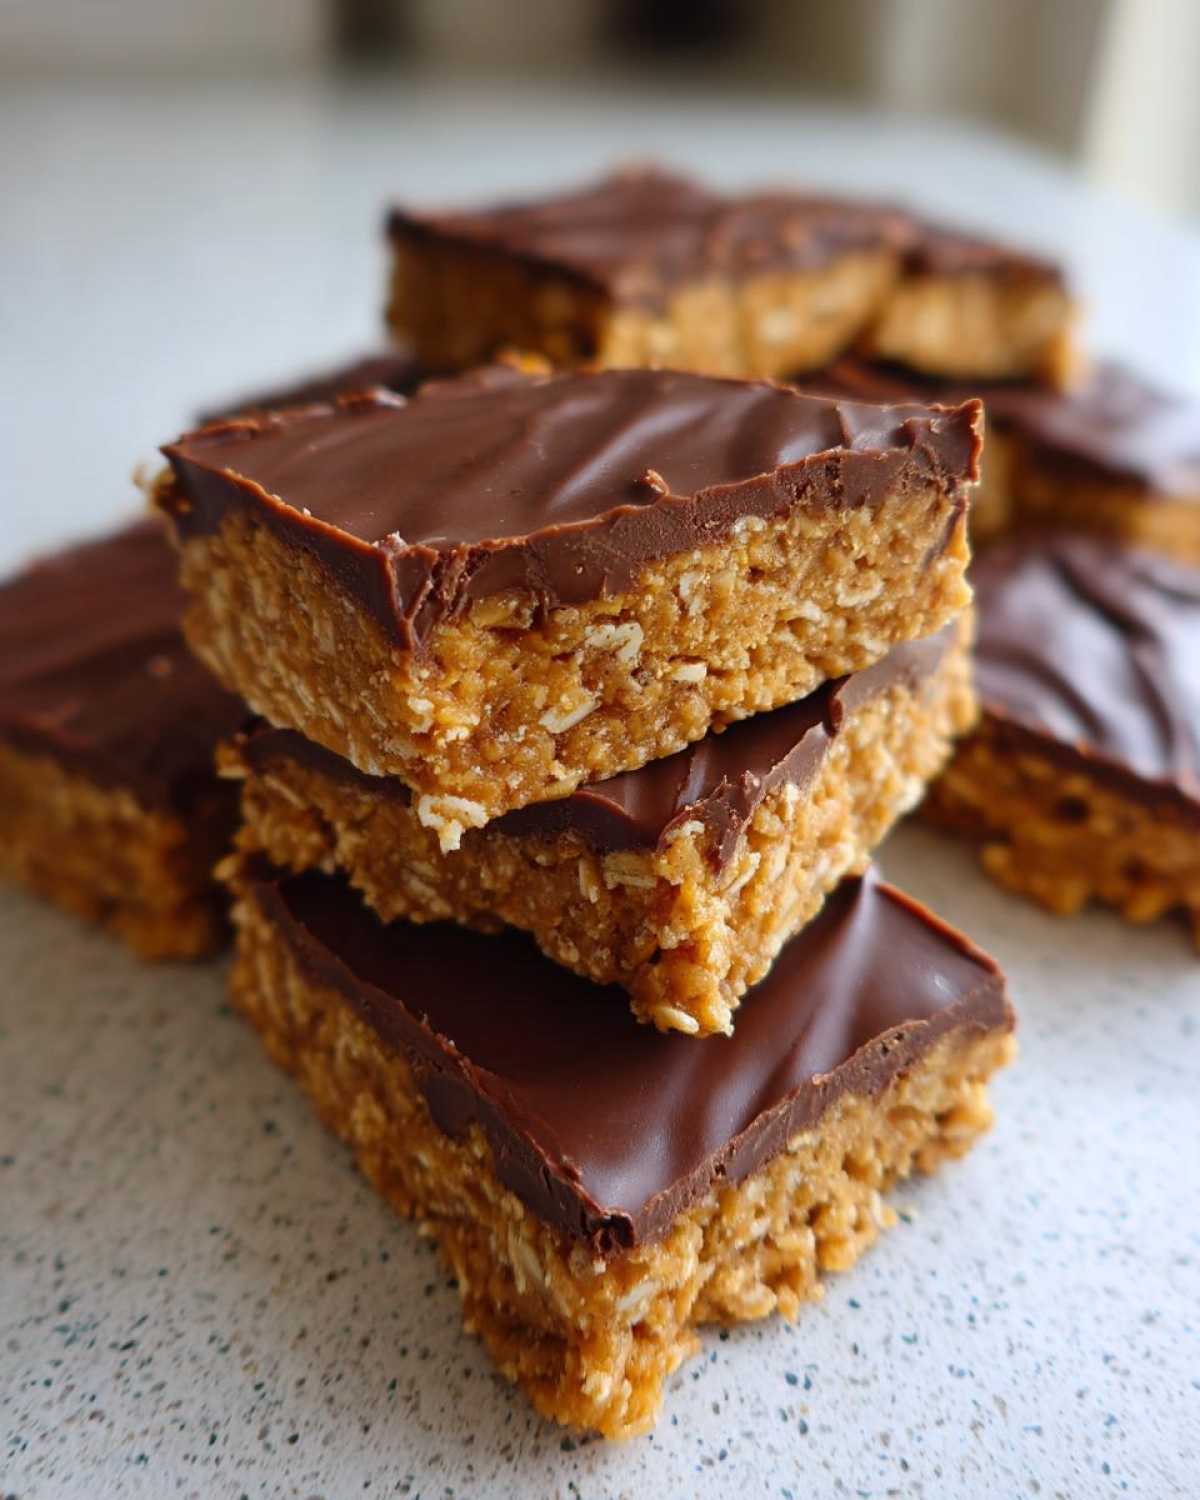
Then comes the hardest part of any no bake protein bars recipe: waiting! You absolutely must get this into the refrigerator for at least an hour. One hour, minimum. This chill time is crucial because it hardens up the peanut butter and syrup, turning your sticky goo into solid, sliceable bars. If you rush this part, you’ll just have a melted peanut butter mess.
Once they feel totally solid, use those parchment paper handles to lift the whole slab out onto a cutting board. Now, use a sharp knife to cut them into maybe 10 or 12 even servings. See? That looks way better than anything wrapped in foil from the gas station. You’ve just made incredible protein bars with zero heat required!
If you want to see another one of our favorite fast, no-heat recipes, check out how we make amazing Chocolate Chip Zucchini Bread—just kidding! That one needs the oven! But for more quick inspiration, take a look at our Chocolate Chip Zucchini Bread Recipe—wait, scratch that, you want FAST energy! Let’s just keep those chocolate chip vibes in mind for your topping instead!
Tips for Perfect Meal Prep Bars and Storage
You put in all that work mixing, pressing, and chilling—we definitely don’t want these amazing protein bars going bad on us, right? These are fantastic for meal prep bars because the refrigerator keeps them perfectly firm and fresh, kind of like little squares of culinary joy waiting for you.
The secret to longevity is proper containment. Always store your finished squares in an airtight container. I usually layer mine with a small square of parchment paper between each layer—Liam thinks I’m extra, but it stops them from sticking together in a giant, irresistible block, especially if it gets warm in the house! If you stack them properly, they keep wonderfully.
How long do they last? Honestly, we usually inhale ours within four days, but they are totally good for up to a full week in the fridge. That reliability is what makes them my go-to when I’m planning lunches for the week at school. You just grab one or two, toss them in your bag, and boom—instant, satisfying fuel. If you’re looking for other make-ahead lunch heroes, you should absolutely check out the tips on preparing my Cranberry Feta Grain Bowl for weekday lunches! They are perfect protein bars for busy schedules, and you can even freeze them if you make a double batch!
If you’re prepping for a longer haul or want a harder texture, I’ve heard of people wrapping individual bars tightly in plastic wrap and keeping them frozen. That makes them behave almost like a cold dessert bar. For more ideas on keeping snacks solid and fresh, check out the neat tricks over at Build Your Bite—they are pros at keeping things tight!
Variations for Your Protein Bar Recipe
I love how much joy people get from taking a basic, fantastic recipe like this protein bar recipe and making it their own! Liam always chuckles because I tend to throw things in just to see what happens, and usually, it works out! Since this base is so simple and relies on sticky binders, it’s perfect for customization. You don’t need a ton of extra steps or ingredients to completely transform the flavor profile of your protein bars.
If peanut butter isn’t your absolute favorite, don’t stress! You can swap it out evenly for almond butter, sunflower seed butter (great for school lunches if there are nut allergies!), or cashew butter. You’ll get a slightly different flavor, but the binding power stays about the same.
Want more texture? Try adding things in during the final mix—after the dough is formed but before you press it into the pan. A third of a cup of unsweetened shredded coconut adds a lovely chew. Or, if you want a major flavor change and are moving toward a dessert vibe, you can stir in two tablespoons of unsweetened cocoa powder along with the protein powder. That gives you a wonderful base that leans toward a chocolate protein bars flavor profile. I think next time I’m making a batch with dried cherries in mine! For more ideas on how to make something classic feel totally new, check out our Vegan Lentil Loaf recipe—it’s all about playful adaptation!
Making Keto Protein Bars or Vegan Protein Bars
We touched on vegan swaps above, but since so many people ask about dietary restrictions when making protein bars at home, let’s nail down the specifics. Keeping things vegan is super easy, as we already discussed: maple syrup instead of honey, and ensuring your powder is plant-based. That’s all there is to it!
Now, keto gets a little fussier because we rely on honey/maple syrup for structure, but it *can* be done if you’re aiming for genuinely keto protein bars. You’ll need to swap the liquid sweetener for a zero-calorie, low-carb option like monk fruit syrup or erythritol blend, but here’s the catch: these may not bind quite as strongly as honey. You might need to add a tablespoon of coconut oil or even a tiny bit of sunflower lecithin to help everything come together and set in the fridge. It requires a little more kitchen intuition, but totally doable if you love tinkering!
Serving Suggestions for High Protein Snacks
So, you’ve got your incredible batch of protein bars sitting pretty in the fridge. They’re ready, they’re waiting, but sometimes you want to do more than just grab one while running for the door. Liam and I like to turn these into mini-events, honestly. They are so versatile, and because they are real food, they feel so much more satisfying than those plastic-wrapped bars.
When we talk about making these high protein snacks work for you, think beyond just the car commute. On a chilly morning, I love heating mine up for about 10 seconds in the microwave. It gets the peanut butter and chocolate topping all melty—it’s like a warm brownie for breakfast! It pairs perfectly with my morning coffee. It’s a total game-changer for feeling energized but not wired.
Another way we use these is as a quick recovery fuel after my morning stretching class. Instead of a shake, I just cube one up and mix it right into a bowl of plain Greek yogurt. It adds texture, sweetness, and a huge protein boost without me having to blend anything! That combination of the creamy yogurt and the chewy texture of the bars makes for such a satisfying snack.
Honestly, because we focused on making these the best homemade protein bars possible, they taste amazing cold, room temperature, or slightly warmed up. They fit into every part of the day. If you need other ideas for comforting, yet healthy morning meals, you absolutely have to see our recipe for the Pumpkin Spice Latte Oatmeal Bake—it captures that warm, cozy feeling perfectly, even though ours are a little different than these no-bake protein bars!
Frequently Asked Questions About Homemade Protein Bars
I know you might have some lingering questions! When you’re moving away from store-bought stuff and trying out your first batch of protein bars, it’s totally normal to want to double-check the technique. Liam and I get tons of questions through our contact page, and I wanted to address the most common ones right here so you can move forward with confidence. This is where you get to be the master of your kitchen performance!
Can I make these protein bars without protein powder?
Oh, you absolutely can, but you need to know what you’re trading! If you skip the protein powder, you aren’t really making true protein bars anymore; you’re making fantastic, delicious energy bars homemade instead. The protein count will drop way down, but the flavor will still be great!
If you want to try it without the powder, I suggest replacing that missing volume with a blend of extra rolled oats and maybe a tablespoon or two of ground flaxseed or chia seeds. That helps keep the texture dense and stops it from just turning into a sweet paste. Just remember, you’ll need to press it way harder into the pan!
How long do these easy protein bars last?
This is the beauty of going no-bake! Because we aren’t baking them, they need that refrigerator time to set up and stay firm. You should always store your finished easy protein bars in an airtight container in the fridge. If you layer them with parchment paper, they hold up great, separated nicely. We consistently find they stay perfectly delicious and chewy for up to one week. That’s why they are such amazing make ahead protein bars for busy weeks; you just make them once and you’re set!
Why are my homemade protein bars crumbly?
That is the texture nightmare! Usually, if your homemade protein bars are crumbling, it means one of two things happened during the mix. First, you might not have mixed long enough. You really have to get in there and work that peanut butter and sweetener into every single oat and speck of powder until it feels like a cohesive, thick dough. Second, maybe your binder wasn’t quite strong enough. If you notice it’s dry during mixing, just add liquid, teaspoon by teaspoon, until it sticks together firmly when you press a small bit between your fingers. That firm press into the pan is your final insurance policy against crumbles!
If you have any other technical questions about the process, don’t hesitate to reach out to us on our contact page. We love troubleshooting!
Estimated Nutritional Breakdown for These Protein Bars
Now, Liam always insists that we talk numbers, even if we are cooking mostly from the heart! Knowing what you’re putting into your body is part of that connection we talked about in our story. Since these protein bars are made with real, whole foods, the nutrition is fantastic—high protein, relatively low sugar if you use minimally sweetened powder.
I put together the estimates based on the 5-ingredient version we use most often. Keep in mind, this is totally dependent on the brands you use—if you use a higher-sugar peanut butter or a creamier protein powder, those numbers shift a little, which is why we always preach tasting as you go! But for general guidance, here is what you can expect per bar (based on 10 servings):
- Calories: 180
- Protein: 12g
- Fat: 10g (with 2g saturated fat)
- Carbohydrates: 16g (with 2g fiber)
- Sugar: 6g
See? Twelve grams of protein in something this easy and delicious? That’s a big win for a snack! This just reinforces why these are some of the best homemade protein bars around; they fuel you without bogging you down later. If you ever need to check in on the official guidelines for what we share on the blog—especially regarding food claims—you can always review our full site disclaimer here.
Share Your Culinary Performance of These Protein Bars
And just like that, the curtain closes on the performance of making your very own protein bars! Liam and I truly hope you had as much fun making these as we did talking you through them. Kitchen time should always feel like a show, right? It should be messy, inspiring, and result in something fantastic that nourishes you.
We absolutely live for seeing what you all create in *your* kitchens. Did you stick to the classic peanut butter and chocolate? Or did you throw in some chopped pecans and call it a day? Did you find a new way to make them even fudgier? Don’t keep that genius to yourself!
Please hop down below and leave a rating for the recipe—five stars if you think these are the ultimate protein bars! And if you made a variation, please drop a comment and tell us what you changed. We love hearing about how you are starring in your own kitchen performances!
If you take a picture of your beautiful, freshly cut batch—the ones that held their shape perfectly, mind you—we would be thrilled if you shared them! Tag us or send them over through our contact page. We can’t wait to see your take on the ultimate homemade protein bars!
Print
Easy 5-Ingredient No-Bake Peanut Butter Protein Bars
- Total Time: 70 min
- Yield: 10 servings 1x
- Diet: Vegetarian
Description
You can make these simple, chewy homemade protein bars without turning on the oven. They are perfect for quick meal prep and satisfying high protein snacks.
Ingredients
- 1 cup rolled oats
- 1/2 cup natural peanut butter
- 1/2 cup vanilla or unflavored protein powder
- 1/4 cup honey or maple syrup
- 1/4 cup dark chocolate chips (optional topping)
Instructions
- Line an 8×8 inch baking dish with parchment paper, leaving an overhang on the sides for easy removal.
- In a large bowl, combine the rolled oats, protein powder, and peanut butter.
- Pour in the honey or maple syrup. Mix everything together thoroughly until a thick, uniform dough forms. You may need to use your hands to fully incorporate the ingredients.
- Press the mixture evenly into the prepared baking dish. Press down firmly to ensure the bars hold their shape.
- If using, melt the chocolate chips in a microwave-safe bowl in 30-second intervals, stirring until smooth. Spread the melted chocolate evenly over the top layer.
- Place the dish in the refrigerator and chill for at least 1 hour, or until firm enough to cut.
- Use the parchment paper overhang to lift the block out of the dish. Cut into 10 to 12 bars. Store your no bake protein bars in an airtight container in the refrigerator.
Notes
- For a vegan option, use maple syrup and a plant-based protein powder.
- If the mixture seems too dry, add 1 teaspoon of water or milk at a time until it binds.
- These are excellent for make ahead protein bars and stay fresh for up to one week in the fridge.
- Prep Time: 10 min
- Cook Time: 0 min
- Category: Snack
- Method: No Bake
- Cuisine: American
Nutrition
- Serving Size: 1 bar
- Calories: 180
- Sugar: 6
- Sodium: 85
- Fat: 10
- Saturated Fat: 2
- Unsaturated Fat: 8
- Trans Fat: 0
- Carbohydrates: 16
- Fiber: 2
- Protein: 12
- Cholesterol: 0