Oh, the sheer *joy* of walking into a kitchen that smells like a real Italian bakery! Seriously, nothing beats that enveloping aroma. Liam always says that baking should be an experience, a performance, so when we tackle this Easy Crusty Homemade Italian Bread, the whole kitchen becomes our stage. Don’t let the word ‘bakery-style’ scare you; we’re making something gorgeous—that deep, crackly, golden crust and soft, yielding interior—with ingredients you already have sitting around. Forget those sad, plastic-wrapped loaves! This Italian bread is proof that you don’t need fancy equipment to make magic happen.
Why This Homemade Italian Bread Recipe is Your New Favorite
Honestly, I keep making this recipe because it checks every single box we look for when we crave something wonderful for dinner. You want that deep crunch when you slice it? You got it. You want a center that’s soft enough to sop up every last bit of sauce? That’s the goal! Liam always points folks to great resources, including this one when they ask about crispy crusts.
- It’s the definition of Easy Crusty Bread Baking—no fussy starter needed, just simple technique.
- We achieve that dreamy Soft Inside Crusty Outside Bread consistency thanks to a little trick with steam later on.
- It uses nothing scary! It’s all basic pantry staples, making it perfect for anytime you decide you absolutely *must* have fresh bread, right now, like for dipping or serving alongside that amazing pasta.
Achieving the Bakery Style Italian Loaf Texture
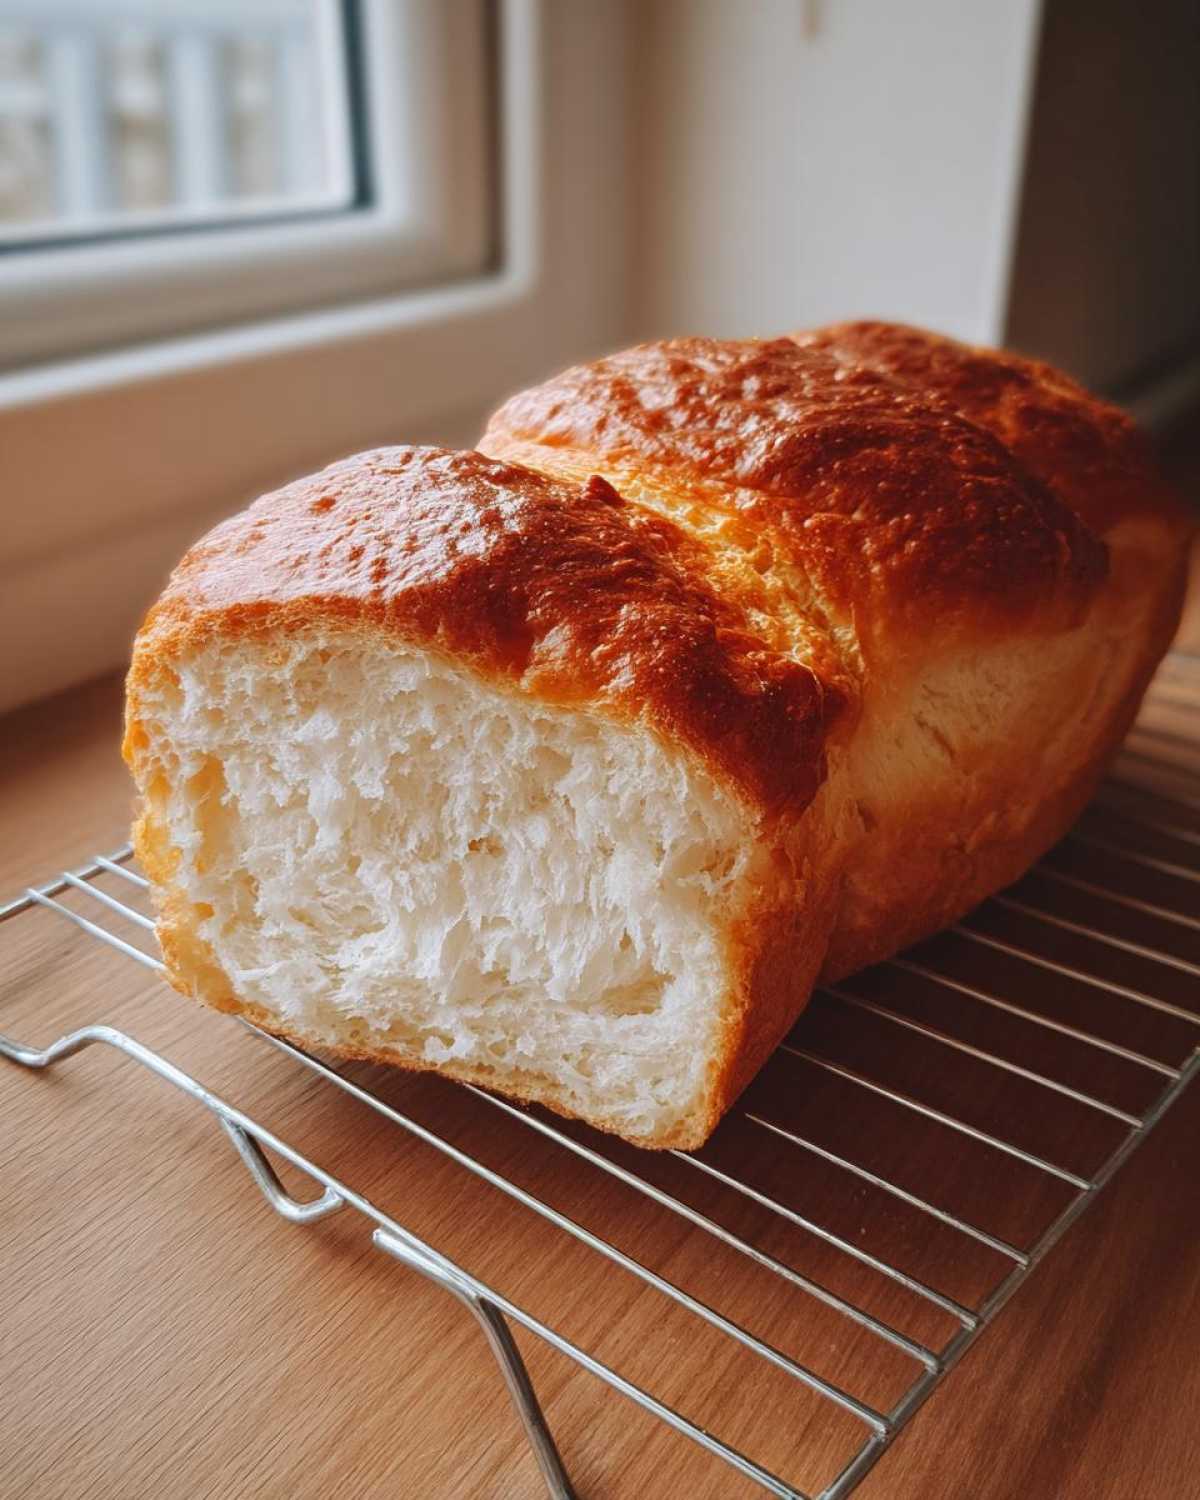
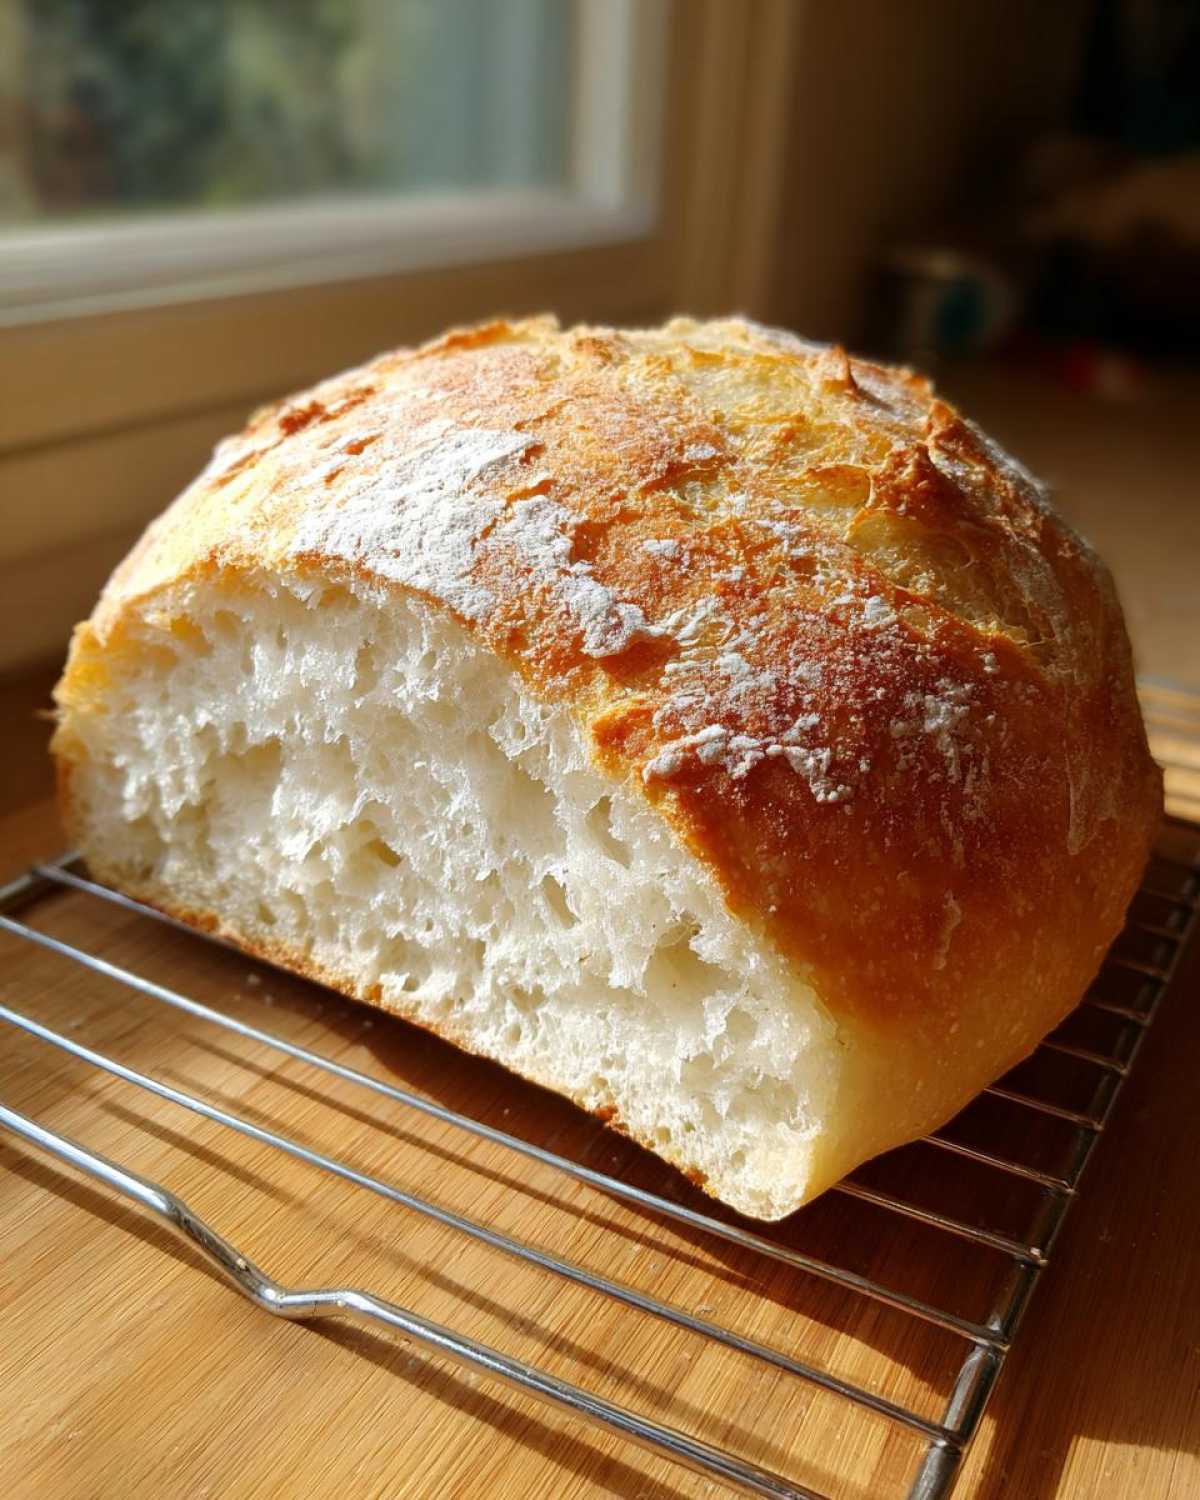
This is where the fun starts! We are aiming for that beautiful, deep, golden brown look that signals pure Italian goodness. The secret to making this loaf look like it came from a true artisan shop is the steam we use in the oven. When that hot, humid air hits the dough right when it goes in, it keeps the exterior pliable long enough to expand before hardening into a crackly shell. Inside? It’ll be light, airy, and perfectly chewy Italian loaf perfection. Trust Liam, he’s very particular about texture!
Simple Ingredients for Perfect Italian Bread
If you’re new to bread making, please don’t worry about complicated ingredients here. This isn’t one of those finicky recipes requiring specialty flour. We are happy bakers because we only need flour, yeast, water, salt, sugar, and olive oil to create incredible Italian bread. Seriously, that’s it! It all comes down to mixing correctly, which we cover in our next section. If you are looking for a great pairing, don’t forget to check out how we make our focaccia sometime too!
Gathering Supplies for Your Italian Bread Baking
Okay, before we get our hands completely covered in flour—and trust me, you *will* get flour everywhere—let’s make sure we have the right stage props for this show. Liam insists that baking is easier when you have the right tools ready to go. It keeps the chaos fun instead of frustrating! Since we are striving for that Artisan Bread at Home look, a few specific items really make the difference, even though it’s mostly a simple recipe.
Essential Equipment for Artisan Bread at Home
You don’t need a huge stand mixer for this recipe; honestly, your trusty wooden spoon and hands will do the heavy lifting, which I prefer! But here are the things you’ll definitely want pulled out:
- A couple of sturdy mixing bowls—one big enough to let your dough double in size without spilling over.
- Your favorite heavy-duty wooden spoon for bringing the shaggy dough together.
- A reliable baking sheet. We’ll line this with parchment paper later, so make sure it fits well in your oven.
- A very sharp knife or lame for scoring the top of the dough right before it goes into the oven. This lets the heat escape nicely and gives the loaf that professional look.
- Oh, and here’s Liam’s pro tip for E-E-A-T baking: If you have one, grab an oven thermometer! Ovens always lie about their temperature, and keeping this loaf at a steady 400°F is crucial for that perfect crust. Don’t skip that little gadget if you’re serious about golden results!
Ingredients for Your Easy Crusty Homemade Italian Bread Recipe
Alright, gather ‘round, because this is the fun part where we put all our simple treasures into one bowl. When I say this is an easy recipe for fantastic Italian bread, I mean it! There are no weird chemicals or hard-to-find spices here. It’s pure, foundational baking goodness. The trick isn’t what you use, but making sure you have the *right* amounts and treating the yeast right, which we’ll cover right here so you can nail that perfect rise!
Flour, Yeast, and Water: The Foundation
These three things are what gives the bread its structure, so precision matters here. I know Liam hates measuring, but for bread, you have to be a little bit of a scientist before you can be an artist!
You’ll need:
- All-purpose flour: 3 1/2 cups. Make sure you spoon it lightly into your measuring cup, don’t pack it down!
- Active dry yeast: Exactly 2 1/4 teaspoons of it, which is usually one standard packet. We’ll prove this little guy works in the next step, so don’t worry if it looks like nothing right now.
- Warm water: 1 1/2 cups. This is really important: the water needs to be warm—think bathwater temperature—between 105°F to 115°F. Too cold, and the yeast sleeps; too hot, and you kill it instantly!
Flavor and Texture Enhancers for Italian Bread
These little additions are what elevate our loaf from plain white bread to something you’d happily buy right out of the oven at a little shop downtown. They give us that slightly rich crumb that holds up beautifully for dipping or sandwiches. Don’t forget we keep some extra oil handy for the bowl!
Add these to your dry mix:
- Salt: 1 1/2 teaspoons. Salt is crucial for flavor, so don’t skimp or you’ll have bland bread!
- Granulated sugar: Just 1 teaspoon. This isn’t for sweetness, sweetie; it’s the yeast’s favorite snack, helping it wake up and get ready to work!
- Olive oil: 2 tablespoons mixed into the dough, plus a little extra in your hands and bowl to keep things from sticking later. We want that slightly tender texture that olive oil brings to the crumb. If you need some inspiration on what to dip this bread in later, check out our focaccia post—we share a couple of appetizer ideas there!
Step-by-Step Instructions for Perfect Italian Bread
This is it—the performance begins! Making your own Italian bread isn’t about rushing things; it’s about giving the ingredients time to mingle and grow, just like any good story. Liam and I follow these steps religiously because they take us from flour and water to a beautiful, rustic loaf every single time. Trust me, the smell alone is worth the wait, especially when you have great resources like this one to keep you focused!
Mixing and Kneading the Italian Bread Dough
First things first: we need to make sure our yeast is actually working! We don’t want any surprises later when the dough refuses to puff up. This is called proofing, and I can’t stress how much I love watching the foam appear.
- Get your dry stuff—flour, salt, and sugar—mixed up in that big bowl. Just a quick stir with the wooden spoon is fine.
- Now, take that warm water you tested (remember, 105°F to 115°F?) and sprinkle the yeast right over the top. Let it sit there quietly for about 5 minutes. When it gets foamy and bubbly on top, we know the yeast is alive and ready to throw a party in our dough!
- Pour that bubbly yeast mixture right into your dry ingredients, along with the 2 tablespoons of olive oil. Stir it with that spoon until it looks like a messy, shaggy creature—don’t worry, it won’t look smooth yet.
- Time to get tactile! Turn that messy dough out onto a lightly floured surface. Now, you need to knead this for a good 8 to 10 minutes. This is where you build the gluten structure, so really work it until it feels smooth and elastic under your palms. If it feels too sticky to handle, just add a tiny dusting of flour, but try your best to keep it soft and not overly stiff.
The First Rise and Shaping Your Italian Bread Loaf
Once the dough feels perfect, we let it rest and do its magic—proofing! This first rise is essential for developing the flavor that makes this Italian bread taste like it came from an old Italian grandmother’s kitchen. We use a little extra olive oil to keep things neat.
- Lightly oil a clean, large bowl. It saves on cleanup later!
- Place your smooth dough ball into the oiled bowl and turn it over just once so the top surface gets a little protective slick of oil too.
- Cover the bowl tightly with plastic wrap or a clean kitchen towel (I usually use a damp tea towel to keep the humidity up).
- Tuck it away in a warm, draft-free spot—like inside a slightly warm (but turned off!) oven—and let it rise for 1 to 1.5 hours, or until it has literally doubled in size. Wow!
- Once it’s huge, gently punch the air out of the center. Don’t smash it, just deflate it softly.
- Shape it quickly! Gently tuck the sides under until you have a nice, tight, oblong loaf shape sitting how you want it baked.
- Pop the shaped loaf onto a baking sheet lined with parchment paper. Cover it again, loosely this time, and let it rest for another 30 to 45 minutes until it looks nicely puffed up again.
Baking Techniques for a Golden Brown Crust Bread
Listen, if you skip this steaming step, you won’t get that crisp, bakery-quality shell we’re after. This is my favorite performance bit, where Liam turns into a mad scientist with hot water!
- Start preheating your oven *while* the dough is doing its second rise. We need it screaming hot: 400°F (200°C).
- Crucially, place a shallow metal pan (like an old roasting pan) on the bottom rack while the oven preheats. This pan is waiting patiently to create the steam!
- When the dough looks ready, gently brush the top of the loaf with plain water—this helps the scoring marks open up nicely. If you want that professional look, take a very sharp knife and make two or three shallow, diagonal slices across the top.
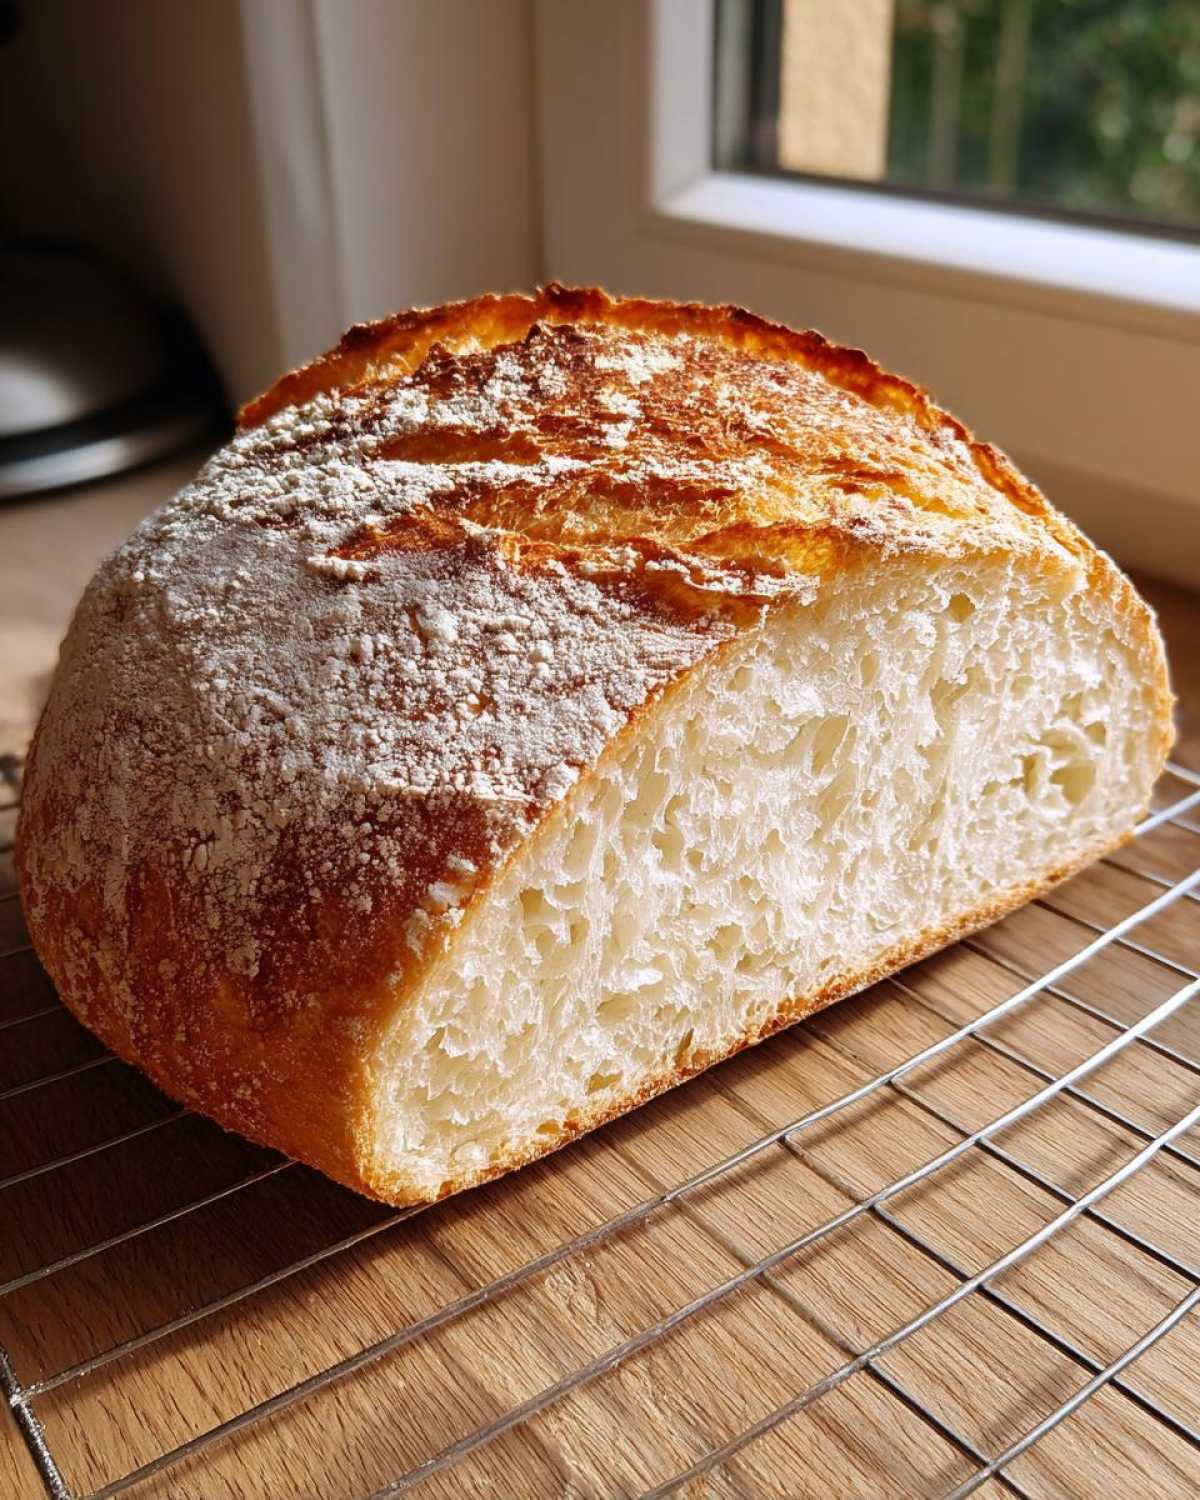
- Carefully slide your loaf (still on the parchment paper) onto the hot rack. Then, immediately and very carefully, pour about 1/2 cup of *hot* water into that preheated shallow pan down below. Stand back because it will steam up instantly! That burst of humidity is what gives you that incredible Golden Brown Crust Bread finish.
- Bake it for 30 to 35 minutes. You’ll know it’s done when the crust is that deep, rich brown color and the internal temperature hits 200°F (93°C). Trust me, the sound it makes when you tap the bottom after cooling is the most satisfying sound ever!
Now that we’ve finished the hardest part, you can see how this easy process turns into something amazing. For more instruction on getting great results, check out our chewy Naan recipe—though the techniques are different, the focus on proper texture building is the same!
Tips for Success Making Crusty Italian Bread
Even with a great recipe, sometimes bread needs a little extra nudge! These tips come straight from the times Liam perfected the crust or when I accidentally made a loaf that looked a bit pale. When you’re making homemade Italian bread, those last few minutes in the oven make all the difference between good and absolutely spectacular.
Mastering the Steam for Your Italian Bread
That shallow pan of hot water we put on the bottom rack? That’s non-negotiable for that golden, shattery crust! But if you want to go the extra mile—and really embrace that E-E-A-T for baking perfection—try this: right after you slide the dough in and pour the water, quickly open the oven door just a crack, grab a clean spray bottle filled with water, and give the walls of the oven about three quick spritzes. Careful not to spray the heating element! This just amps up the humidity instantly. Liam says that burst of steam is the key to mimicking a professional brick oven.
Now, if you wake up the next day, look at your loaf, and decide, “Nah, I want it softer for sandwiches,” you have an easy fix! You skip that entire steam setup for baking. Then, the moment the bread comes out of the hot oven, lightly brush the top crust with some melted butter. It softens it right up, though you lose that deep, audible crunch we love for dipping. It’s all about deciding what kind of experience you want your Italian bread to be!
The Importance of Cooling Your Fresh Baked Bread Aromas
When that loaf comes out, the temptation is overwhelming, right? You just want to grab a big knife and hack off a slice because the Fresh Baked Bread Aromas are driving you crazy! Please, hold your horses. This next part is crucial for the interior texture we worked so hard to create.
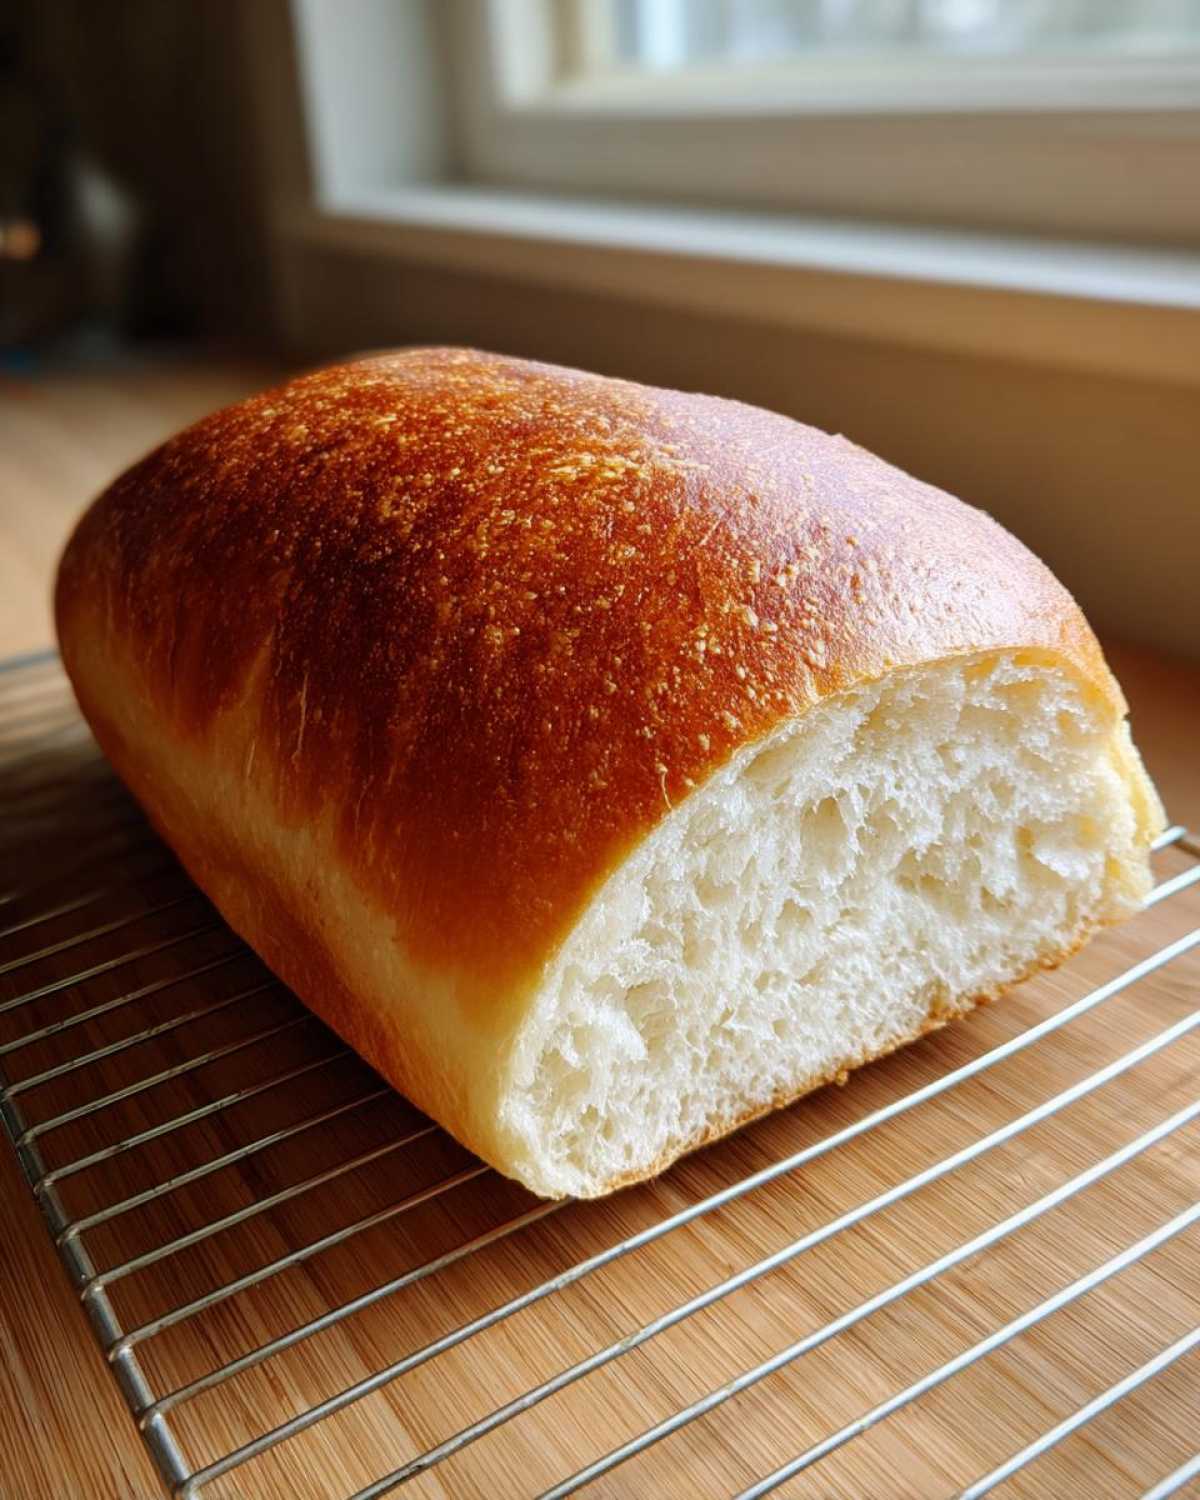
You have to let the bread cool completely on a wire rack. If you slice into it right away, all that steam and moisture trapped inside will rush out, making the center gummy and dense instead of soft and chewy. Think of it like letting a piece of meat rest after cooking. You need to wait at least an hour, maybe two, until the loaf feels completely cool to the touch. That way, when you cut into it, you get that perfect contrast: solid, crunchy crust giving way to that soft, springy middle. It’s worth the agonizing wait, I promise!
Variations on Classic Italian Baking
While I love the simple purity of the original recipe—just flour, water, and yeast making something incredible—sometimes our mood calls for something a little more dressed up! We don’t want to mess with the amazing crust development, but jazzing up the inside is simple and fun. Think of these additions as ways to quickly turn your weeknight loaf into a true piece of Artisan Bread at Home!
Adding Herbs and Cheese to the Italian Bread Dough
This is the best time to inject some of your personality into the dough! The critical rule here is when you add these extras: you want them incorporated right at the very end of the kneading process. We don’t want sticky cheese making the dough unworkable during the main 10-minute knead, and we don’t want delicate herbs breaking down too early.
So, after you’ve finished your 8-10 minutes of kneading and the dough is smooth and elastic, flatten it out slightly on your counter. Now is the time to sprinkle on your flavorings:
- Dried Rosemary or Oregano: About 1 teaspoon total for the whole loaf. Rosemary offers that wonderfully piney scent that is just divine when baked into a crusty loaf.
- Grated Parmesan Cheese: Around 1/3 cup, finely grated. It adds saltiness and a delicious savory depth that is fantastic for dipping later. You might want to reduce the salt in the main recipe if you go heavy on the Parmesan!
Gently fold the dough over the herbs or cheese a few times, just enough to disperse them evenly. Don’t knead them in vigorously; a few gentle folds will do the trick! Then proceed straight away to oiling your bowl for the first rise. You could even try using this herby version with the pesto recipe we posted last week—talk about an Italian flavor explosion!
Serving Suggestions for Your Chewy Italian Loaf
Now that you’ve made the most beautiful, fragrant loaf of Italian bread, what are you going to do with it? This is where I get really excited because this bread is so versatile! It shifts gears seamlessly from being a humble Dinner Side Bread Recipes star to the absolute hero of lunch. We want to celebrate that crusty outside and soft, chewy inside, so here are a few of our favorite ways to put this beauty to work.
First up, obviously, is dipping. If you bake this loaf and don’t tear off a hunk while it’s slightly warm for dipping in good olive oil, you’re missing a trick! We have so many great appetizers that scream for this texture. If you’re looking for proper Dipping Bread Recipes ideas, make sure you check out where we paired this bread with our soup recipes, too!
Making Simple Sandwich Bread with Homemade Italian Bread
Don’t think just because this loaf is sturdy and artisan in style that it can’t handle a sandwich—it’s actually the best kind of sandwich bread! The crust gives you that satisfying snap when you bite in, preventing your sandwich from becoming soggy right away, which is a huge win. Liam insists that for a hearty filling, you need a hearty slice.
My tip here is: wait until the bread is totally, completely cool before trying to slice it, like we talked about! If you rush it, the dough collapses weirdly. Once it’s cool, use a good serrated knife and cut slices that are maybe a little thicker than you normally would for standard sandwich bread. That thickness lets the crust shine through while still supporting everything you load onto it. Whether it’s a pile of cold cuts or just some fresh mozzarella and tomato slices, this loaf creates the ultimate Simple Sandwich Bread experience. You might never buy sandwich bread again!
If you want to see how another baker is using their perfect loaf, take a peek at this fantastic post—they really nail the crust texture we are aiming for here!
Storing Leftover Italian Bread
Liam and I always try to eat every crumb of our freshly baked Italian bread the day it comes out of the oven, but let’s be real, sometimes life happens, and we have leftovers. That hard crust, which we worked so hard to achieve, can sometimes turn a little sad by morning. But do not, I repeat, *do not* throw that bread away! You’ve put in the work, and we can bring that glorious crunch right back with minimal effort. This bread is meant to be enjoyed for days, not hours.
Reheating for Freshness
Okay, the biggest mistake people make is wrapping leftover bread in plastic bags. That traps moisture and just makes the crust instantly soft and chewy—the exact opposite of what we want! If you’re left with a day-old loaf of Italian bread, we are going to reverse the drying-out process by giving it a quick blast of dry heat.
Here’s the simple process I use:
- First, if the bread has been sitting out (wrapped loosely in a paper bag or just on the counter), you need to unwrap it completely.
- Set your oven to 350°F (175°C). It doesn’t need to be blazing hot like when we baked it!
- Place the entire loaf directly on the oven rack. Yes, right on the rack! We want air circulating all around it so the moisture trapped in the soft interior helps steam the crust slightly while it warms up.
- Heat it for about 8 to 10 minutes. If it’s a very long, skinny loaf, start checking around the 6-minute mark.
When you pull it out, the crust should be singing again—crispy, golden brown, and ready for dipping! If you only have half a loaf left, just cut the pieces you need and reheat those smaller sections for about 4 minutes. That way, the rest stays fresh for tomorrow. Happy snacking!
Troubleshooting Common Homemade Italian Bread Issues
Oh no! Sometimes, baking doesn’t go according to the script, and that’s totally normal, even for Liam when he’s trying a brand new technique. If your beautiful dough didn’t turn into the light, airy dream we envisioned, don’t stress about it! We’re not making art to impress invisible judges here; we’re learning and playing. Before you relegate that loaf to the compost bin, let’s walk through a few common hiccups that stop this Italian bread from reaching peak performance, because trust me, I’ve made every single one of these mistakes!
Why is my bread dense and not airy?
This is probably the number one call for help we get. You waited patiently, it smelled amazing, but when you cut it, it looks like a brick. Oops! Usually, this relates back to one of three key areas in our process. Did you activate your yeast properly? If the water was too chilly, the yeast just didn’t wake up enough to produce the bubbles we need for lift. That’s why proving it separately is so important—it confirms they are ready to party!
The next suspect is kneading. Did you knead long enough? We need that smooth, elastic dough because that’s the structure holding all those air pockets! If you stopped early, the structure is weak. On the flip side, if you added too much flour in a panic while kneading, you might have made it too stiff right from the start. The dough needs to be soft, just barely sticky.
Finally, check your proofing conditions. Bread loves warmth, but it hates drafts. If your kitchen was chilly during that main rise, the yeast worked slowly, and you ended up with a small, dense loaf instead of a beautifully doubled giant. Always double-check that warm spot, and give it that full 1 to 1.5 hours! Don’t rush the wait for quality bread!
My Crust is Pale, Not Golden Brown!
When the crust is pale, it feels like the oven lied to you! You did all the kneading and rising perfectly, but you didn’t get that gorgeous, signature golden color we want for dipping. I’ve seen this happen when the oven temperature isn’t quite hot enough, but the absolute biggest reason this happens with any crusty loaf is skipping the steam. Remember that shallow pan of hot water we put in the bottom rack? That steam is what allows the outside to stay moist long enough for the dough to expand fully (oven spring!), which deepens the color and gives it that crackle.
If your crust looks pale and it feels soft rather than sharp and crunchy, next time, you absolutely need to create that moisture explosion at the beginning of the bake. For the loaf you just made, if it’s cooled and still looks sad and pale, try brushing the top with a little milk or an egg wash (one egg mixed with a tablespoon of water) and flash-bake it for just 5 more minutes at 400°F until it gains some color. But for the *next* loaf, commit to that steam; it’s the secret weapon for that bakery look!
The Dough Stuck to My Hands During Shaping
You feel great because the dough doubled perfectly after the first rise. You punch it down gently, try to shape it, and suddenly, it feels sticky again, clinging to your fingers like glue! This usually happens because you didn’t oil that bowl generously enough for the first rise, or maybe you overworked it slightly when shaping. When you’re shaping, you’re trying to create surface tension, right? You want the outside tight so it holds its shape when it puffs again during the second rise.
If it’s sticking badly, you need to use flour on your hands sparingly, but the trick Liam taught me is to use a tiny bit of olive oil on your hands instead of flour when shaping. It prevents that doughy stickiness without adding extra dry flour to the outside, which can sometimes cause weird baking spots or prevent proper browning. A little slick surface tension goes a long way in keeping that loaf neat and tidy before it hits the heat!
Frequently Asked Questions About Baking Bread
Liam and I love hearing how all of you are doing with the baking performances! We get so many great questions, especially about shortcuts or tricky ingredients. Since we were chatting about yeast and time earlier, I wanted to round up a few of the most common things folks ask when they are trying to achieve that perfect, quick, crusty loaf!
Can I use instant yeast instead of active dry yeast?
Yes, absolutely! Instant yeast is fantastic for making a quick bread, and honestly, it simplifies things. When you use active dry yeast, like in our main recipe, we *have* to proof it in warm water first to make sure it’s alive and kicking. But with instant yeast? You just skip that step entirely!
Just dump the 2 1/4 teaspoons of instant yeast right into the dry flour mixture (Step 1). Then, when you add the wet ingredients (the water and oil in Step 3), the yeast starts working immediately. You might find that the dough rises just a tiny bit faster, but generally, the recipe timing stays the same. It is a wonderful shortcut for those moments when the craving strikes, and you need that bread fast!
How can I make this a Quick Italian Bread Tutorial?
I totally get this! Sometimes we need that crusty loaf in under two hours! While bread takes time to develop great flavor, you can definitely speed up the process. The biggest time-suck is the rising, so we focus there first.
For a faster rise, make sure your warm water is right on the hotter end of the safe temperature—maybe around 115°F if you have a thermometer. A slightly warmer proofing basket (like putting the bowl inside a slightly warm, turned-off oven) will encourage the yeast to work quicker. You might be able to cut your first rise down to 45 minutes instead of 1.5 hours. Remember, though, Liam always points out that flavor comes from time! The longer and slower the rise, the deeper and more complex the taste of the final loaf will be. You get speed, but you sacrifice a little bit of that deep, rustic flavor profile. You can see more tips on fast baking over at Carla’s site!
Why is my loaf so pale?
Ah, the pale crust dilemma! This means the dough didn’t get enough heat energy directed onto its surface, usually because of a lack of steam or not enough time in the heat. For the best ‘Golden Brown Crust Bread,’ you must make sure that pan in the bottom rack is screaming hot when you pour that water in! That burst of steam is what makes the dough’s surface color deepen beautifully. If you skipped the steam, you’ll likely end up with a softer, paler crust. Next time, commit to the steam trick; it’s the magic show that pays off in color and crunch!
Nutritional Estimates for This Loaf
Now, Liam would tell you that you shouldn’t worry too much about nutrition when the payoff is this delicious, but I know some of you like to keep track! Since we use simple, real ingredients like flour and olive oil in this homemade loaf, it’s actually quite straightforward. Please remember that these numbers are just estimates for one slice, heavily based on the ingredients listed in the recipe above. If you add cheese or brush a bunch of butter on top after baking, those numbers are obviously going to change!
Think of this as a happy little guide, not a strict nutritional analysis. The beauty of baking it yourself is that you absolutely control the quality of every bit that goes in!
- Serving Size: 1 slice (But who only eats one slice of this fresh bread, honestly?)
- Calories: Around 150 per slice. That’s pretty reasonable for a substantial, satisfying slice of fresh bread!
- Carbohydrates: About 30 grams. Hello, energy! Perfect before a big dinner.
- Fat: Just about 2 grams. Mostly the wonderful, heart-healthy fats from the olive oil we included.
- Protein: Around 4 grams. It’s a nice side boost to your meal.
- Sugar: Very low, only about 1 gram. That tiny bit of sugar is mostly there to help the yeast, not to sweeten the loaf!
For something this simple and rustic, I think those numbers look fantastic. It confirms that this loaf is perfect for serving alongside any of your favorite meals, from a light salad to a huge bowl of pasta sauce. Enjoy every single bite!
Share Your Culinary Performance
And just like that, the curtain closes on another performance! I truly hope you loved tackling this Easy Crusty Homemade Italian Bread. Liam and I pour so much heart into these scripts—these recipes—and honestly, the best part of the whole show for us is seeing what *you* bring to the stage when you take the loaf home.
Did you manage to get that perfect, crackly crust? Did you experiment with rosemary or Parmesan? Did your kids run into the kitchen the second they smelled it baking? We absolutely want to hear about it!
Please, come back down below, ditch the formal critique, and tell us what made your baking experience joyful. Leaving a rating helps other kitchen performers see this recipe, and honestly, reading your comments is what keeps me—the Muse!—inspired.
- Rate the Show: If you loved this recipe for that bakery-style crust, give it stars! It lets us know what scripts you want to see next from our theater.
- Leave a Note: Tell us if you used a new dipping oil or if you made a mistake and learned something fantastic. We are all about learning here!
- Share a Photo: If you snapped a picture of your finished loaf—especially if it looks rustic and golden brown—tag us! We love seeing your finished masterpieces posted online. You can check out more about us and our philosophy over on our About Page just to connect!
Thank you for joining our cast and bringing some fun, flavor, and glorious aromas back into your kitchen. Until the next curtain call, enjoy that fresh, chewy loaf!
Print
Easy Crusty Homemade Italian Bread: Bakery-Style Loaf in Your Kitchen
- Total Time: 2 hours 5 minutes
- Yield: 1 large loaf 1x
- Diet: Vegetarian
Description
You can bake bakery-quality Italian bread at home! This easy recipe gives you a loaf with a golden, crunchy crust and a soft, chewy interior using simple pantry ingredients. It is perfect for dipping in olive oil or serving with pasta.
Ingredients
- 3 1/2 cups all-purpose flour
- 1 1/2 teaspoons salt
- 1 teaspoon granulated sugar
- 2 1/4 teaspoons active dry yeast (one packet)
- 1 1/2 cups warm water (about 105°F to 115°F)
- 2 tablespoons olive oil, plus more for the bowl
Instructions
- In a large bowl, mix the flour, salt, and sugar.
- In a separate small bowl, dissolve the yeast in the warm water and let it stand for 5 minutes until foamy. This confirms your yeast is active.
- Pour the yeast mixture and the 2 tablespoons of olive oil into the dry ingredients. Mix with a wooden spoon until a shaggy dough forms.
- Turn the dough out onto a lightly floured surface. Knead the dough for 8 to 10 minutes until it becomes smooth and elastic. You want it soft, not sticky.
- Lightly oil a large bowl with extra olive oil. Place the dough in the bowl, turning it once to coat. Cover the bowl with plastic wrap or a clean kitchen towel.
- Let the dough rise in a warm spot for 1 to 1.5 hours, or until it has doubled in size. This first rise develops the flavor.
- Gently punch down the risen dough. Shape it into a tight loaf or oval shape.
- Place the shaped loaf on a baking sheet lined with parchment paper or in a prepared loaf pan. Cover loosely and let it rise again for 30 to 45 minutes, or until puffy.
- Preheat your oven to 400°F (200°C). Place a shallow pan on the bottom rack to create steam later.
- Just before baking, lightly brush the top of the loaf with water. Score the top of the loaf with a sharp knife if desired.
- Place the loaf in the preheated oven. Pour about 1/2 cup of hot water into the shallow pan on the bottom rack to create steam, which helps form the crust.
- Bake for 30 to 35 minutes, or until the crust is deep golden brown and the internal temperature reaches 200°F (93°C).
- Remove the bread from the oven and let it cool completely on a wire rack before slicing. Enjoy the aroma of your fresh baked bread!
Notes
- For an extra crispy crust, you can spray the oven walls with water a couple of times during the first 10 minutes of baking.
- If you want a softer crust, skip the steam pan and brush the loaf with a little melted butter immediately after it comes out of the oven.
- This bread is fantastic for making sandwiches or dipping into olive oil.
- Prep Time: 20 min
- Cook Time: 35 min
- Category: Baking
- Method: Baking
- Cuisine: Italian
Nutrition
- Serving Size: 1 slice
- Calories: 150
- Sugar: 1
- Sodium: 250
- Fat: 2
- Saturated Fat: 0.3
- Unsaturated Fat: 1.7
- Trans Fat: 0
- Carbohydrates: 30
- Fiber: 1
- Protein: 4
- Cholesterol: 0