Listen, I know the deal. You want that gooey, crispy, restaurant-quality Italian dinner on the table without spending your whole evening chained to the stove. Right? Me too! That’s why this Easy chicken Parmesan recipe is my absolute go-to. Seriously, I’ve tweaked countless versions over the years, trying to lock down that perfect balance between speed and that addictive crunch.
Forget complicated frying setups. We’re baking this beauty, which keeps cleanup simple and fits perfectly into a busy schedule. But don’t let the word ‘easy’ trick you; the flavor payoff is huge! You end up with golden, tender chicken cutlets smothered in rich sauce and bubbling mozzarella. If you’re looking for that perfect, dependable Italian comfort classic that tastes homemade but takes less than 40 minutes total? You’ve found it. Let’s get cooking!
Why This Easy Chicken Parmesan is Your New Weeknight Staple
Look, I’m not going to lie; store-bought chicken parm is convenient, but it usually tastes flat. My goal when developing this was to get that shatteringly crisp coating without the oil splatter mess. This recipe truly shines because it manages to deliver amazing texture in a fraction of the time. It’s my secret weapon for when I need a killer easy chicken dinner idea!
We keep the ingredients minimal, which is key to making it a reality for Tuesday night. You get that incredible cheesy goodness and perfect internal temperature every time. It’s legitimately a quick chicken parmesan that doesn’t compromise on flavor, promise! If you’re looking to spice up your mid-week routine, check out my creamy Tuscan garlic chicken sometime too—it’s another fast favorite.
Speed and Simplicity: The Easy Chicken Parmesan Advantage
The baked method is what truly sets this apart for weeknights. We skip the messy deep fry entirely! You are breading in about 15 minutes, and the oven handles the heavy lifting. The initial 15-minute blast in a hot oven sets that crust beautifully before we even add the heavy toppings. This two-stage baking is essential for getting that sought-after crunch without burning the cheese. It’s fast, it’s clean, and it’s unbelievably satisfying!
Gathering Ingredients for Easy Chicken Parmesan
Okay, let’s talk about what you need. The beauty of this easy chicken parmesan is that the ingredient list is short and sweet, meaning you probably have most of this kicking around already! We’re working with four chicken breasts, which we’ll pound down thin—that’s non-negotiable for fast, even cooking.
You need your breading station staples: flour, two eggs beaten up nicely, and then the breadcrumb mix. Remember, we are using the seasoned breadcrumbs here, combined with a quarter cup of that salty Parmesan. Don’t skimp on the sauce either; grab your favorite marinara jar, because that’s where a lot of the flavor magic happens when you serve this Italian comfort food at home.
Here is the full rundown:
- 4 boneless, skinless chicken breasts, pounded to 1/2 inch thickness
- 1 cup all-purpose flour
- 2 large eggs, beaten
- 1 1/2 cups seasoned breadcrumbs
- 1/2 cup grated Parmesan cheese, divided
- 1 teaspoon garlic powder
- 1/2 teaspoon dried oregano
- 1/4 teaspoon salt
- 1/4 teaspoon black pepper
- 2 tablespoons olive oil
- 2 cups marinara sauce
- 1 cup shredded mozzarella cheese
Ingredient Notes and Substitution Tips
The most important first step, hands down, is getting that chicken pounded perfectly to about a half-inch thickness. If you skip this, the outside will burn before the inside cooks, and nobody wants chewy chicken! I use a meat mallet, but flat the bottom of a heavy saucepan works in a pinch. Also, those seasoned breadcrumbs are your friend here; they carry all the herbaceous flavor. If you only have plain breadcrumbs, just mix in extra dried Italian seasoning or maybe a pinch of dried basil to compensate.
Now, about the crust: If you really want that craggy, restaurant-level crunch, you can absolutely swap half of those seasoned breadcrumbs out for Panko breadcrumbs. Panko is lighter and absorbs less oil, giving you a gorgeous texture when baked. Just trust me on the pounding—it makes all the difference in creating the perfect cheesy chicken cutlets.
Setting Up for Crispy Easy Chicken Parmesan
Alright, the prep work is half the battle, but once you have your station set up buffet style, this goes together lightning fast. First things first: get your oven hot! We need that heat ready to go, so preheat it to 400 degrees Fahrenheit. Get a baking sheet ready too—I just give mine a light grease, but parchment paper is always welcome if you’re worried about sticking later.
Now, we build the assembly line. This is my simple version of a breading station, and it guarantees you get those beautiful, fully coated cheesy chicken cutlets. You need three shallow dishes, lined up in order. Dish one is your flour. Dish two is for your well-beaten eggs. Dish three is where the real flavor comes from: the seasoned breadcrumbs mixed with a quarter cup of that grated Parmesan, plus the garlic powder, oregano, salt, and pepper.
The technique here is key to getting that lasting crispness. You dredge the pounded chicken first in the flour—shake off anything excess! Then, you quickly dip it in the egg wash, letting the drips settle. Finally, and this is what makes them stick, you press that cutlet *firmly* into the breadcrumb mix. I mean really push it in there on both sides so the crumbs lock onto the surface. This ensures a solid crust that holds up even under that sauce later. It’s almost like making my homemade chicken katsu—you need maximum adhesion for the crunch!
Step-by-Step Instructions for Easy Chicken Parmesan
Now that our chicken is perfectly breaded, it’s time to let the oven work its magic! Remember, this is a two-act show. We need to set that crust first before we weigh it down with sauce and cheese. Get all four prepared cutlets onto your greased baking sheet, making sure they have a little space around them—crowding isn’t our friend if we want them flat and crisp!
Now, take those two tablespoons of olive oil and lightly drizzle it over the top of each breaded piece. This little bit of fat helps that coating brown up nicely inside the oven. If you are really obsessed with crunch, take that cooking spray and give the tops a quick, even coat right now! Pop that sheet into the 400-degree oven immediately.
The First Bake: Achieving Crispy Breaded Chicken Breast
Bake them plain for exactly 15 minutes. This first stage is crucial because it cooks the raw flour coating and starts firming up the whole thing so it doesn’t get soggy later. When the timer goes off, pull them out gently. They should look set and slightly golden, but definitely not done yet!
Melting the Cheese: The Final Touch on Your Easy Chicken Parmesan
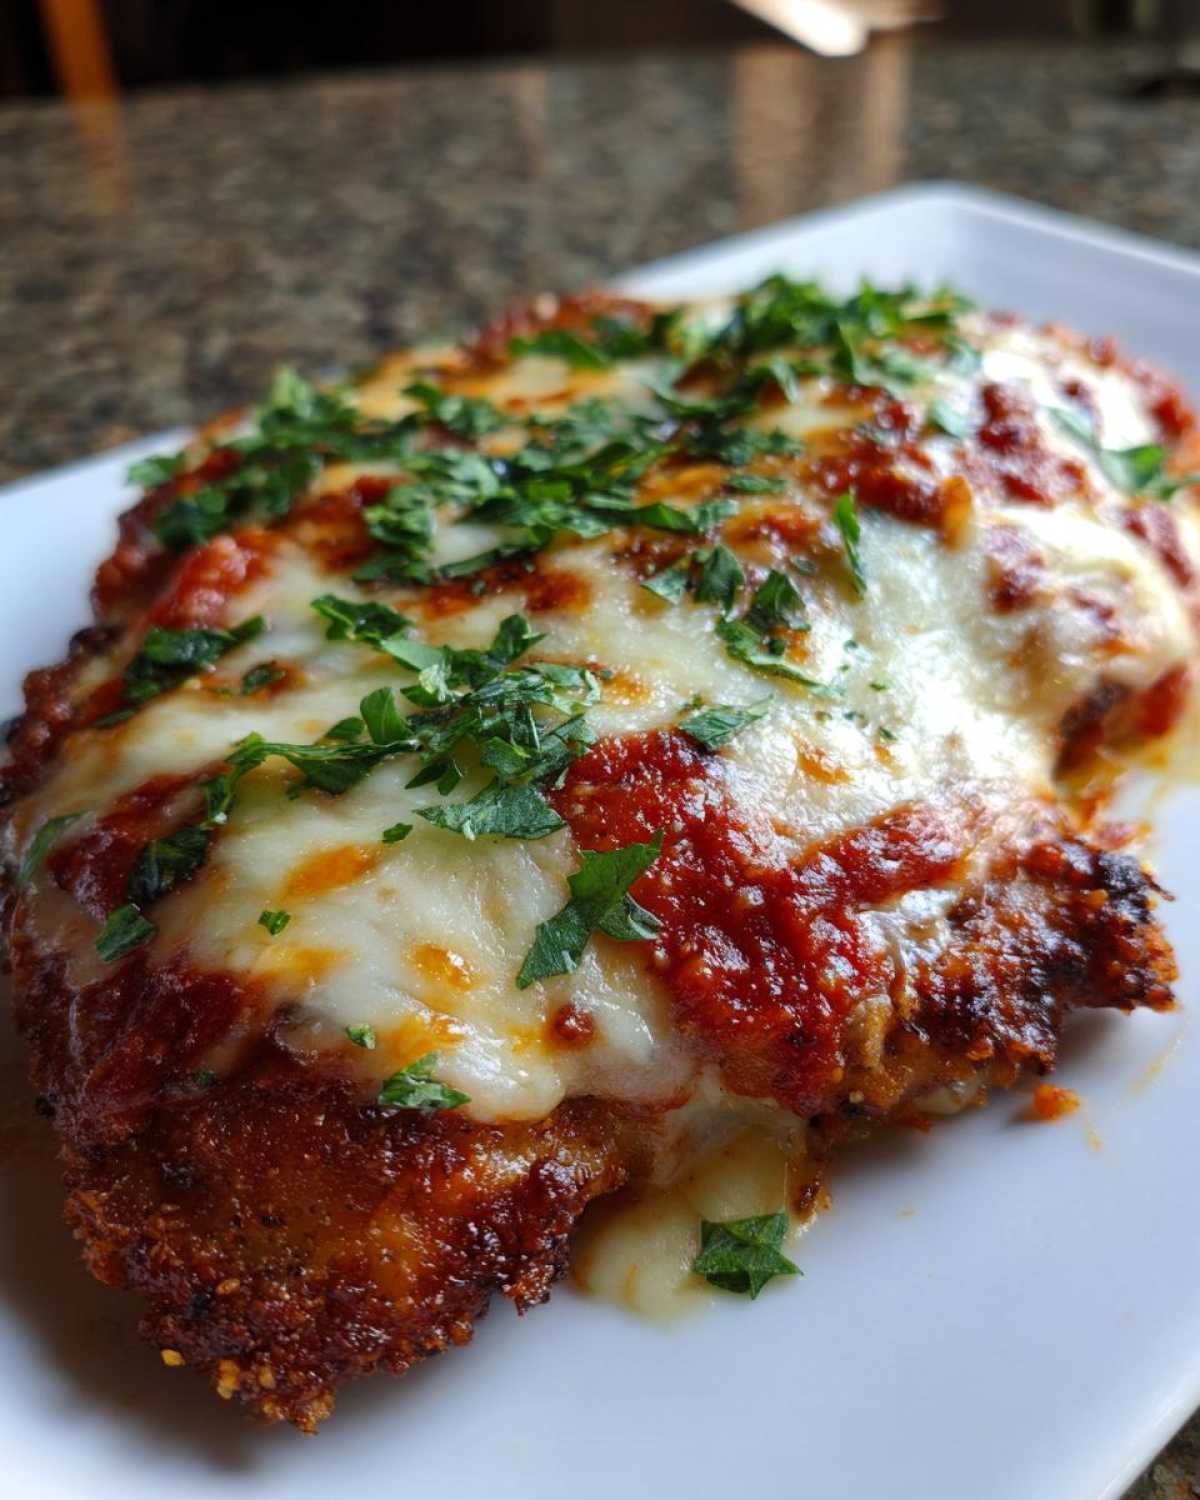
Time to turn this into Parmesan! Spoon about a quarter cup of your best marinara sauce right onto the center of each cutlet—don’t spread it right to the edges, or the crust will get mushy. Next, top generously with the mozzarella, and then sprinkle over that final quarter cup of Parmesan cheese. Back into the oven they go for another 5 to 8 minutes. You’re looking for that cheese to be totally melted, bubbly, and maybe just starting to spot brown. Always check, please: the center needs to hit 165 degrees Fahrenheit internally for safety. If you’re serving this over pasta, make sure you have some extra sauce warmed up nearby to pour over everything, maybe even mixing some into this amazing garlic parmesan chicken pasta bake recipe sometime!
Tips for Perfecting Your Easy Chicken Parmesan
Even with the best baked recipe, sometimes you just want that deep, satisfying browning you only get from oil. I get it! While this recipe shines baked, I totally understand if you want to go half-baked, half-skillet for ultimate flavor. We always want options, right? High-quality marinara sauce is another easy upgrade that pays off huge here. If you can find a jar with simple, recognizable ingredients, it makes this whole dish taste like it simmered all day!
Also, when you’re making this for leftovers—because you absolutely will have leftovers—a small spray of water on the crust before reheating in an air fryer or oven helps bring back a tiny bit of that original crispness so you don’t end up with sad, soggy cheese. Speaking of crispness, have you ever tried making a creamy mushroom pasta? It’s another dish where a little reheat trick goes a long way toward flavor revival!
Skillet Finish Option for Extra Browning
This is where we bring a little bit of traditional frying swagger back into our otherwise easy baked meal. If you want that deep, golden edge on your breading, you can absolutely pan-fry first! In a separate oven-safe skillet (cast iron is perfect), heat up about a quarter-inch of oil over medium-high heat. Once that oil is shimmering, lay your breaded cutlets in there—don’t crowd the pan, work in batches if you must!
You’ll fry for just about 3 minutes per side until you hit that beautiful golden-brown color. They won’t be cooked through yet, which is fine! Once they look gorgeous and crispy, just spoon the sauce and cheese right over the top, transfer that whole skillet right into your preheated 400-degree oven, and finish baking for about 8 to 10 minutes until the cheese is bubbling and the chicken hits 165°F inside. It’s the perfect mashup technique for a skillet chicken parm finish!
Serving Suggestions for Your Easy Chicken Dinner Idea
You’ve done the hard work. The chicken is crispy, that cheese is perfectly melted, and your kitchen smells like Nonna’s trattoria. Fantastic! But what are we serving this masterpiece alongside? Since this is the ultimate Italian comfort food at home, we have to go classic, right?
For me, there’s only one mandatory partner for chicken parm: pasta! A big mound of spaghetti or linguine tossed lightly with a little of the extra marinara means you get that perfect saucy coating on every single bite. Don’t drain the pasta too dry; a little starchy water left behind helps the sauce cling beautifully to the noodles!
If you’re trying to keep the carb count down a smidge, or just want something fresh to cut through the richness of that mozzarella, you absolutely need a green component. A simple, crisp Caesar salad with good, sharp Parmesan shavings is my personal favorite contrast. The crunch of the romaine really plays well with the crispy chicken crust.
And you cannot forget the bread! Seriously, what are you going to use to mop up all that extra sauce left on your plate? Homemade or store-bought garlic bread is essential. I like to brush thick slices of Italian loaf with softened butter mixed with garlic powder, dried parsley, and a whisper of oregano, then bake them for about five minutes until they are golden at the edges. They are perfect for soaking up every last drop.
If you are looking for a lighter, year-round option, you should definitely try pairing this with a hearty bowl of Italian minestrone soup. It’s warm, comforting, and packed with veggies, which feels like a necessary balance to our cheesy cutlets!
Storage and Reheating Instructions
This dish is just as good the next day, maybe even better because the flavors have really melded together! The trick is storage—you don’t want moisture getting trapped next to that beautiful crust. If you have leftovers of your cheesy chicken cutlets, the absolute best way to keep them fresh is to let them cool completely on a wire rack, not sitting directly in the sauce, before you store them.
Get yourself an airtight container. Here’s my pro move: I layer them with paper towels! Put a paper towel down in the bottom of the container, place one layer of chicken (no sauce touching each other if possible), then another paper towel on top of the cutlets, and then a final paper towel layer if you have more chicken stacks. This absorbs any residual steam that tries to make your gorgeous crust soggy overnight.
When it’s time to reheat, please promise me you won’t go straight for the microwave unless you absolutely must eat standing over the trash can! The microwave is the enemy of crispy breading. We need dry, radiant heat to wake that crust back up.
The Oven Revival Method
For the best texture, I always suggest the oven. Preheat your oven—or even better, a toaster oven—to about 350 degrees Fahrenheit. Pop those chicken pieces right onto a foil-lined baking sheet. You want them slightly spaced out so the heat circulates.
Bake them for about 10 to 15 minutes, depending on how thick they are. You’ll see the cheese start to melt again and the topping will look refreshed. That crust will be surprisingly firm and crispy again! If you want to add a little extra sauce right before serving, you definitely can!
Air Fryer for Quick Crisp
If you own an air fryer, you have the ultimate reheat weapon for this easy chicken dinner idea! Set your air fryer to 375 degrees Fahrenheit. Place the cutlets in the basket in a single layer—you might have to do this in batches, but it’s worth the time.
Cook for about 5 to 7 minutes. Check them after 5 minutes! The air fryer blows heat around so effectively that it crisps up the breading beautifully while melting that cheese. It usually takes less time than the oven, but it gives you that fresh-fried texture back. This is how I save my leftovers when I’m in a hurry—it’s truly fantastic for reviving any crispy breaded chicken breast!
Frequently Asked Questions About Easy Chicken Parmesan
I totally get it. When you find a winner like this easy chicken parmesan, you want to play around with timing and ingredients. I’ve wrestled with these questions myself over the years, trying to make this recipe work around soccer practices and late meetings! Here are the things people ask me most often when they try getting this classic on the table.
When it comes to cheese, please stick with real, whole milk mozzarella, shredded by hand if you can manage it! Pre-shredded cheese has anti-caking agents that stop it from getting that perfect, gooey melt. And yes, you can absolutely brown the chicken a day ahead of time and store the cooked cutlets in the fridge. Just don’t add the sauce or cheese until you are ready to bake them for the final time!
If you happen to be looking for something totally different but sticking to the Italian flavors, you might want to check out my keto chicken parmesan recipe sometime. It uses almond flour, which also helps keep things crispy!
Can I prepare the breading station for this quick chicken parmesan recipe in advance?
Prepping the station ahead of time is a great way to manage your schedule! You can totally mix up the breadcrumb/Parmesan mixture and measure out your flour a day before you plan to cook. Keep them stored in separate airtight containers at room temperature. However, I would absolutely *not* prepare the dipping dishes ahead of time.
Do not mix your raw egg wash until just before you plan to bread the chicken—raw eggs sitting around isn’t ideal for flavor or safety. More importantly, if you dip the chicken in the flour and egg, and then try to let *that* sit for too long before baking, the coating starts to get a little gummy. For the best results, keep the flour and breadcrumbs ready, but set up the full breading station right before you start pounding and dredging your chicken breasts. That way, this quick chicken parmesan still feels super speedy when it’s time to go!
What is the best way to ensure I get crispy breaded chicken breast when baking?
This is the million-dollar question for any baked breaded item! The number one mistake people make is letting the cutlets touch each other on the pan. Seriously, give them space! If they are piled up or touching, the steam gets trapped between them, which immediately turns the crust soggy. Let them breathe on that baking sheet.
Like I mentioned earlier, the olive oil drizzle or the optional cooking spray is vital because it mimics the effect of frying oil—it helps the crumbs crisp up and turn golden brown in the oven’s dry heat. Don’t be shy about that initial 15-minute bake before the sauce goes on! That first blast of heat sets that crust so when the wet sauce comes along, it’s only softening the breading slightly, not dissolving it completely. Follow those two steps—space and oil—and you’ll get a genuinely crispy breaded chicken breast every single time you make this version.
Share Your Italian Comfort Food at Home Success
Whew! I hope you are as excited as I am now that you have this incredible, easy chicken parm recipe in your back pocket. Seriously, the second you pull that bubbly, cheesy goodness out of the oven, you’ll realize what a huge win this is for your weeknight rotation! This is what Italian comfort food at home should feel like—simple ingredients, huge satisfaction.
Now, I need to know how it went! Did you try the skillet finish, or did you stick to the super-fast baked route? Please, please drop a comment below and let me know what you served it with. Were you a spaghetti purist, or did you go for a big green salad?
The best part about sharing recipes is seeing them come to life in your kitchens. If you made this Easy chicken Parmesan and loved it, give the recipe a quick star rating right here on the page—it genuinely helps other home cooks find reliable dishes!
And if you snapped a picture of your cheesy cutlets looking gorgeous, tag me on social media! I absolutely love seeing your creations. Seriously, send me photos! You can get in touch about recipe questions or just to share a kitchen win when you visit my contact page. Happy cooking, friends, and enjoy every cheesy bite!
Print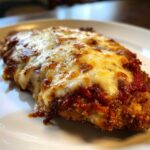
Easy Baked Chicken Parmesan
- Total Time: 38 min
- Yield: 4 servings 1x
- Diet: Vegetarian
Description
A simple recipe for crispy, cheesy chicken parmesan baked in the oven for a weeknight friendly Italian classic.
Ingredients
- 4 boneless, skinless chicken breasts, pounded to 1/2 inch thickness
- 1 cup all-purpose flour
- 2 large eggs, beaten
- 1 1/2 cups seasoned breadcrumbs
- 1/2 cup grated Parmesan cheese, divided
- 1 teaspoon garlic powder
- 1/2 teaspoon dried oregano
- 1/4 teaspoon salt
- 1/4 teaspoon black pepper
- 2 tablespoons olive oil
- 2 cups marinara sauce
- 1 cup shredded mozzarella cheese
Instructions
- Preheat your oven to 400 degrees Fahrenheit. Lightly grease a baking sheet.
- Set up a standard breading station: Place flour in one shallow dish. Beat eggs in a second dish. In a third dish, combine breadcrumbs, 1/4 cup of the Parmesan cheese, garlic powder, oregano, salt, and pepper.
- Dredge each chicken cutlet first in the flour, shaking off excess. Dip it into the egg mixture, allowing excess to drip off. Finally, press the cutlet firmly into the breadcrumb mixture to coat both sides completely.
- Place the coated cutlets on the prepared baking sheet. Drizzle the tops lightly with olive oil.
- Bake for 15 minutes.
- Remove the chicken from the oven. Spoon about 1/4 cup of marinara sauce over each cutlet. Top with mozzarella cheese and the remaining 1/4 cup of Parmesan cheese.
- Return the chicken to the oven and bake for another 5 to 8 minutes, or until the cheese is melted and bubbly and the chicken is cooked through (internal temperature of 165 degrees Fahrenheit).
- Serve immediately, perhaps over pasta with extra sauce.
Notes
- For extra crispy results, you can lightly spray the breaded chicken with cooking spray before the first bake.
- Use high-quality marinara sauce to improve the final flavor.
- If you prefer skillet cooking, brown the breaded cutlets in oil for 3 minutes per side before topping with sauce and cheese and finishing in the oven.
- Prep Time: 15 min
- Cook Time: 23 min
- Category: Dinner
- Method: Baking
- Cuisine: Italian
Nutrition
- Serving Size: 1 cutlet
- Calories: 450
- Sugar: 6
- Sodium: 650
- Fat: 18
- Saturated Fat: 7
- Unsaturated Fat: 8
- Trans Fat: 0
- Carbohydrates: 25
- Fiber: 2
- Protein: 45
- Cholesterol: 120