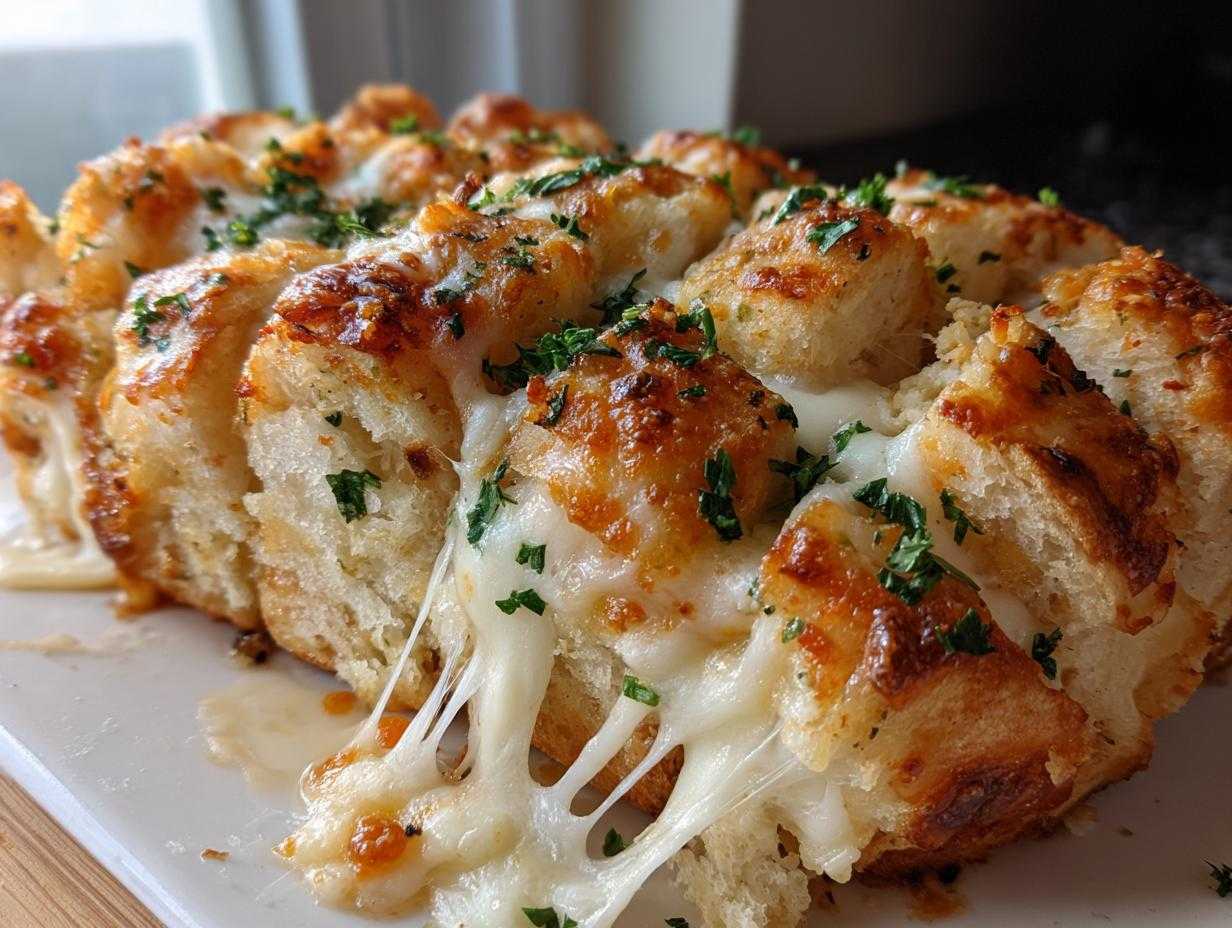
Oh, hello there! If you’re anything like me, when the world gets a little heavy, I immediately run to the nearest source of gooey, savory, warm comfort. And nothing screams ‘instant happiness’ quite like something swimming in melted cheese, right? Liam always focuses on that perfect sourdough structure, but for days when we need food that loves us back immediately, we turn to this recipe. Forget chasing fancy bakery-style loaves; this Cheesy Garlic Pull Apart Bread is the ultimate, easy cheese bread solution. It’s all about huge garlic flavor, incredible texture, and the absolute joy of pulling off a piece covered in cheese. It really captures that spirit of taking something simple and making it a fun, shareable performance, rather than a serious baking endeavor!
When I was first showing Liam how to loosen up in the kitchen, this was one of the first things I pulled out of the oven. You should have seen his face—eyes wide, forgetting his surgical precision for just a moment while reaching for a hunk. It was the catalyst for us realizing cooking should be about feeling good, not just following directions to the letter! If you need a showstopper for game night or just a side dish that guarantees everyone smiles, you grab your refrigerated biscuits and get ready.
For more inspiration on easy bread pairings that bring the fun back to your table, you can check out our thoughts on Focaccia Bread with Rosemary and Sea Salt. And if you are looking for another recipe that promises that same irresistible, melty quality, one of our favorite inspirations leads here for another take on cheesy goodness.
Why This Garlic Pull Apart Cheese Bread is Your New Favorite Party Appetizer Bread
Look, sometimes we don’t have hours for dough development, and that is totally fine! This is the beauty of using those perfectly soft refrigerated biscuits—we skip the heavy lifting, which means you have way more time for the important stuff, like debating where the best spot on the couch is for the movie.
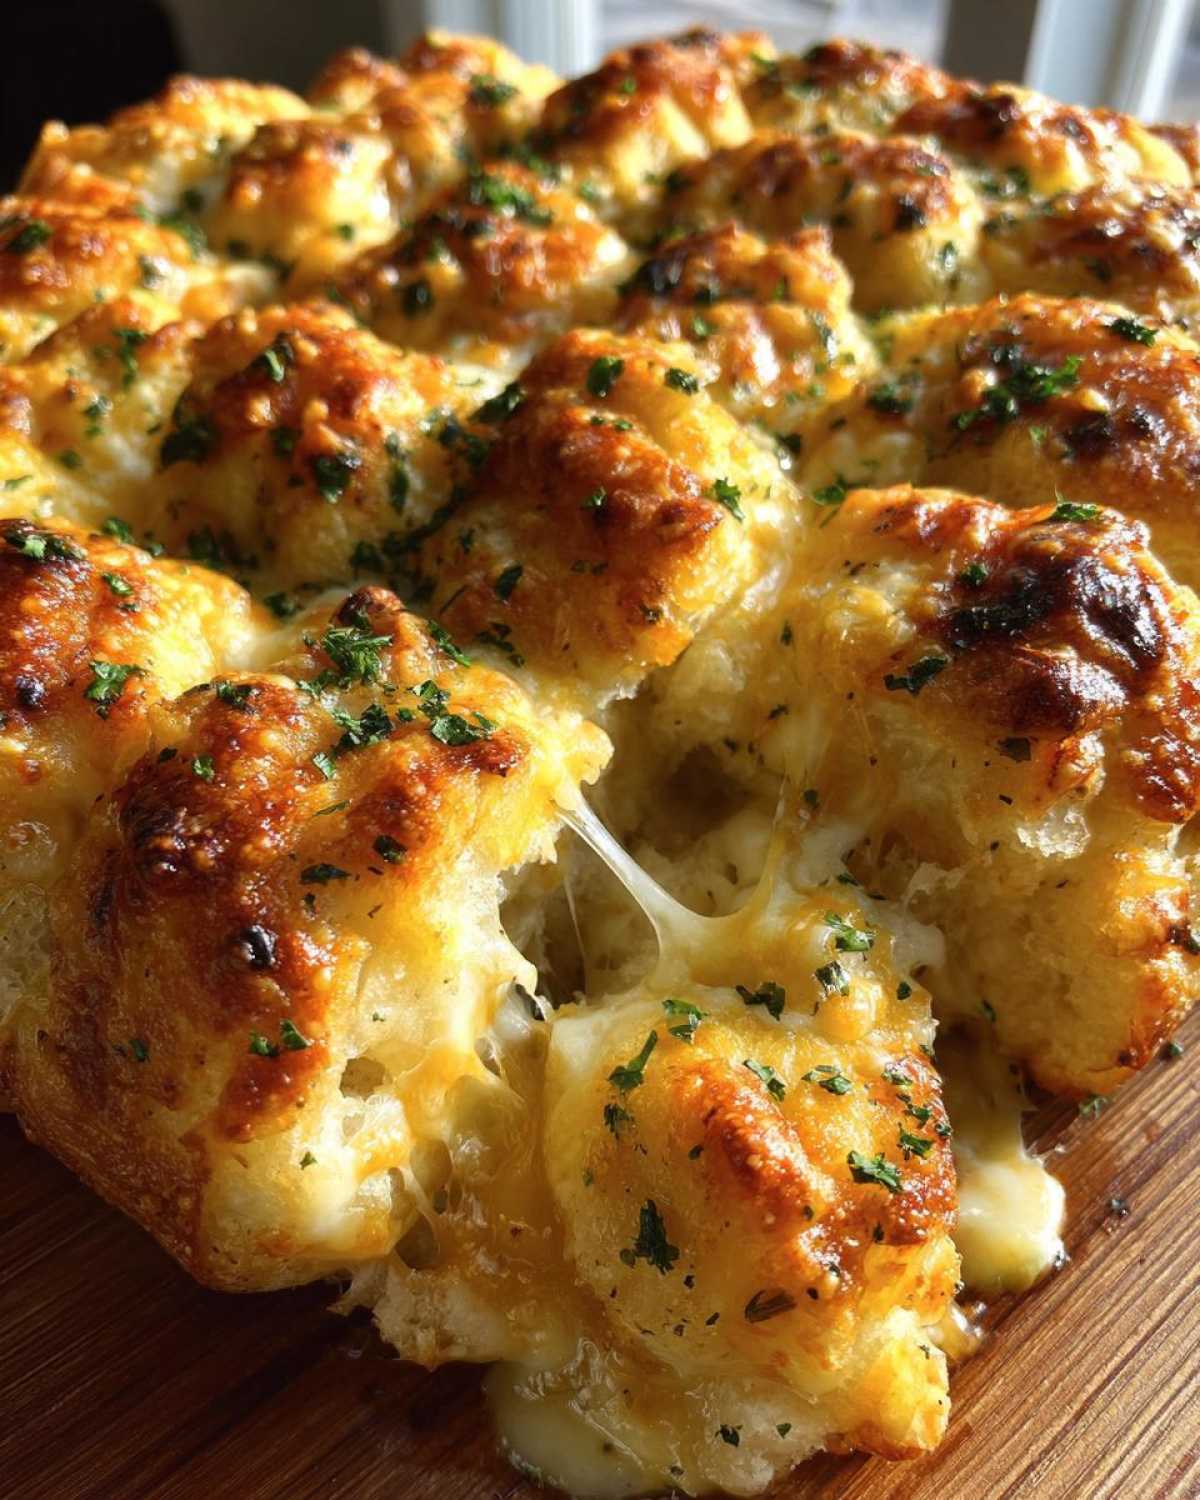
This recipe delivers on texture like crazy. It’s soft and fluffy on the inside, completely saturated with that buttery garlic bath, and the cheese pools beautifully. It’s honestly the definition of a party appetizer bread that people dive into the second it leaves the oven. We always have extra when we make it, which is rare for us! If you’re looking for something that disappears fast, this is it. You can even check out how we manage other cheesy appetizers, like our fun Rudolph Cheese Ball.
For another fantastic take on sharing that golden bread perfection, this recipe from the Little Spoon Farm is also wonderful: a classic pull apart garlic cheese bread.
Quick Preparation for Easy Homemade Cheese Bread
Honestly, the prep time on this cheesy garlic bread recipe is almost laughable—ten minutes! You can mix up the butter bath while the oven is humming along to 350 degrees. That means you can stop staring at a recipe, worrying about yeast, and start making something delicious right now. It’s fast enough to whip up as a last-minute dinner side bread when you realize you forgot to plan something for the table. See? Stress gone!
The Secret to Gooey Melted Cheese Bread Texture
The key here isn’t just cheese; it’s the combination! We’re using mozzarella because it stretches like crazy—you know, that satisfying cheese pull you want—and sharp cheddar for that fantastic, savory flavor punch. When you cut the biscuits into quarters and then toss them, you are coating every little surface area. When that hot garlic butter soaks in and the cheeses melt down into the nooks and crannies, you get that perfect gooey melted cheese bread situation. The resulting texture is just heavenly; you get soft bread mingling with those beautiful pockets of melted cheese.
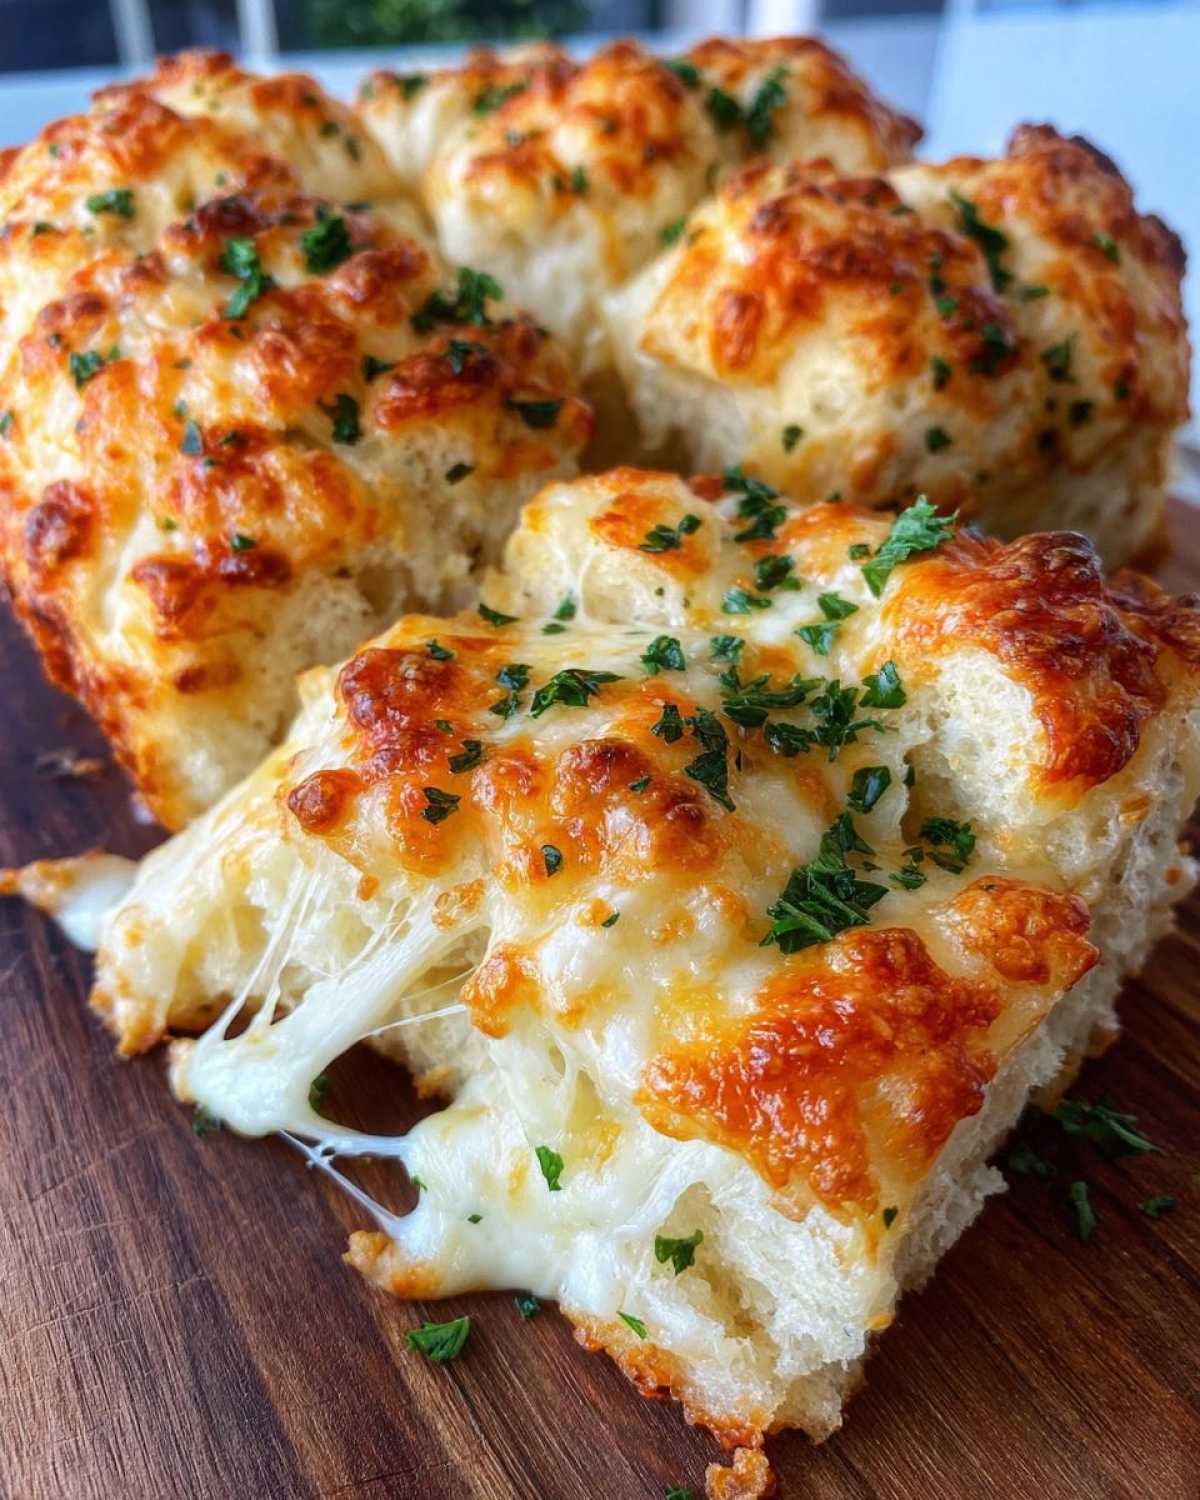
Gathering Ingredients for Irresistible Cheese Bread
Okay, let’s talk stuff! Even though this is an incredibly fast recipe, we still need good bones to build our house of cheese upon. Remember, Liam’s precision means we write down exactly what we need, but I’m the one who insists on making sure that butter is actually soft! Using the right ratio of sharp cheddar to stretchy mozzarella is crucial for the best cheese bread experience. Don’t skimp here; this is where the magic starts to bubble!
Before we get to the oven, we need to gather everything necessary for this fun little baking performance. We aren’t doing any complex infusions here, just simple, high-impact flavors that play nicely together.
Ingredient Clarity for Perfect Buttery Cheese Bread
First up is the base: you need one package of refrigerated biscuit dough—that’s the shortcut Liam learned to appreciate! For our liquid gold, we melt down half a cup, which is one full stick, of unsalted butter. Into that, we press four cloves of garlic that you’ve minced yourself—fresh is non-negotiable here! We mix in our seasonings: one teaspoon of the Italian seasoning blend and just a little quarter teaspoon of salt.
For the cheese situation, which is frankly the best part, you’ll need a generous cup and a half of shredded mozzarella cheese for that glorious stretch, followed by half a cup of shredded sharp cheddar. See? It’s simple components for maximum flavor payoff in this delicious cheese bread. If you’re looking for other cheesy delights to serve alongside, we made a fun Snowman Cheese Ball Trio for a party recently!
Step-by-Step Instructions for Making Soft Fluffy Cheese Bread
Alright, time to put on our aprons! Liam always says to treat this part like conducting the first movement of an orchestra—precision matters, but keep the rhythm fun. Because we are using refrigerated dough, this whole process is super fast, maybe 40 minutes total, so don’t stress about timing too much yet. You’re just moments away from fantastic cheese bread.
Preparing the Dough and Pan for Baking Cheese Bread
First things first: tell your oven to get ready! Preheat it to 350 degrees F (that’s 175 C). While it warms up, quickly grease whatever pan you chose—I usually go for a simple 9×5 loaf pan since it keeps everything nicely contained for that perfect pull-apart effect. Now, open that biscuit package. You need to cut every single biscuit into four little pieces, like tiny pillows. Drop all those dough quarters into your prepared pan and just let them hang out there for a second.
Creating the Flavor Base for Your Garlic Cheese Bread Recipe
This is my favorite part: the garlic bath! Grab a small bowl and whisk together that melted butter we prepped, the minced fresh garlic—don’t be shy!—the Italian seasoning, and the salt. Give it a good swirl until it looks slightly fragrant and emulsified. Now, pour that glorious mixture evenly all over your biscuit pieces in the pan. You have to use a spoon or a spatula to gently toss everything around. Trust me, you want all those raw dough edges coated in that garlicky goodness. Do a thorough job so every future bite tastes amazing!
Baking and Finishing Your Warm Comfort Food Bread
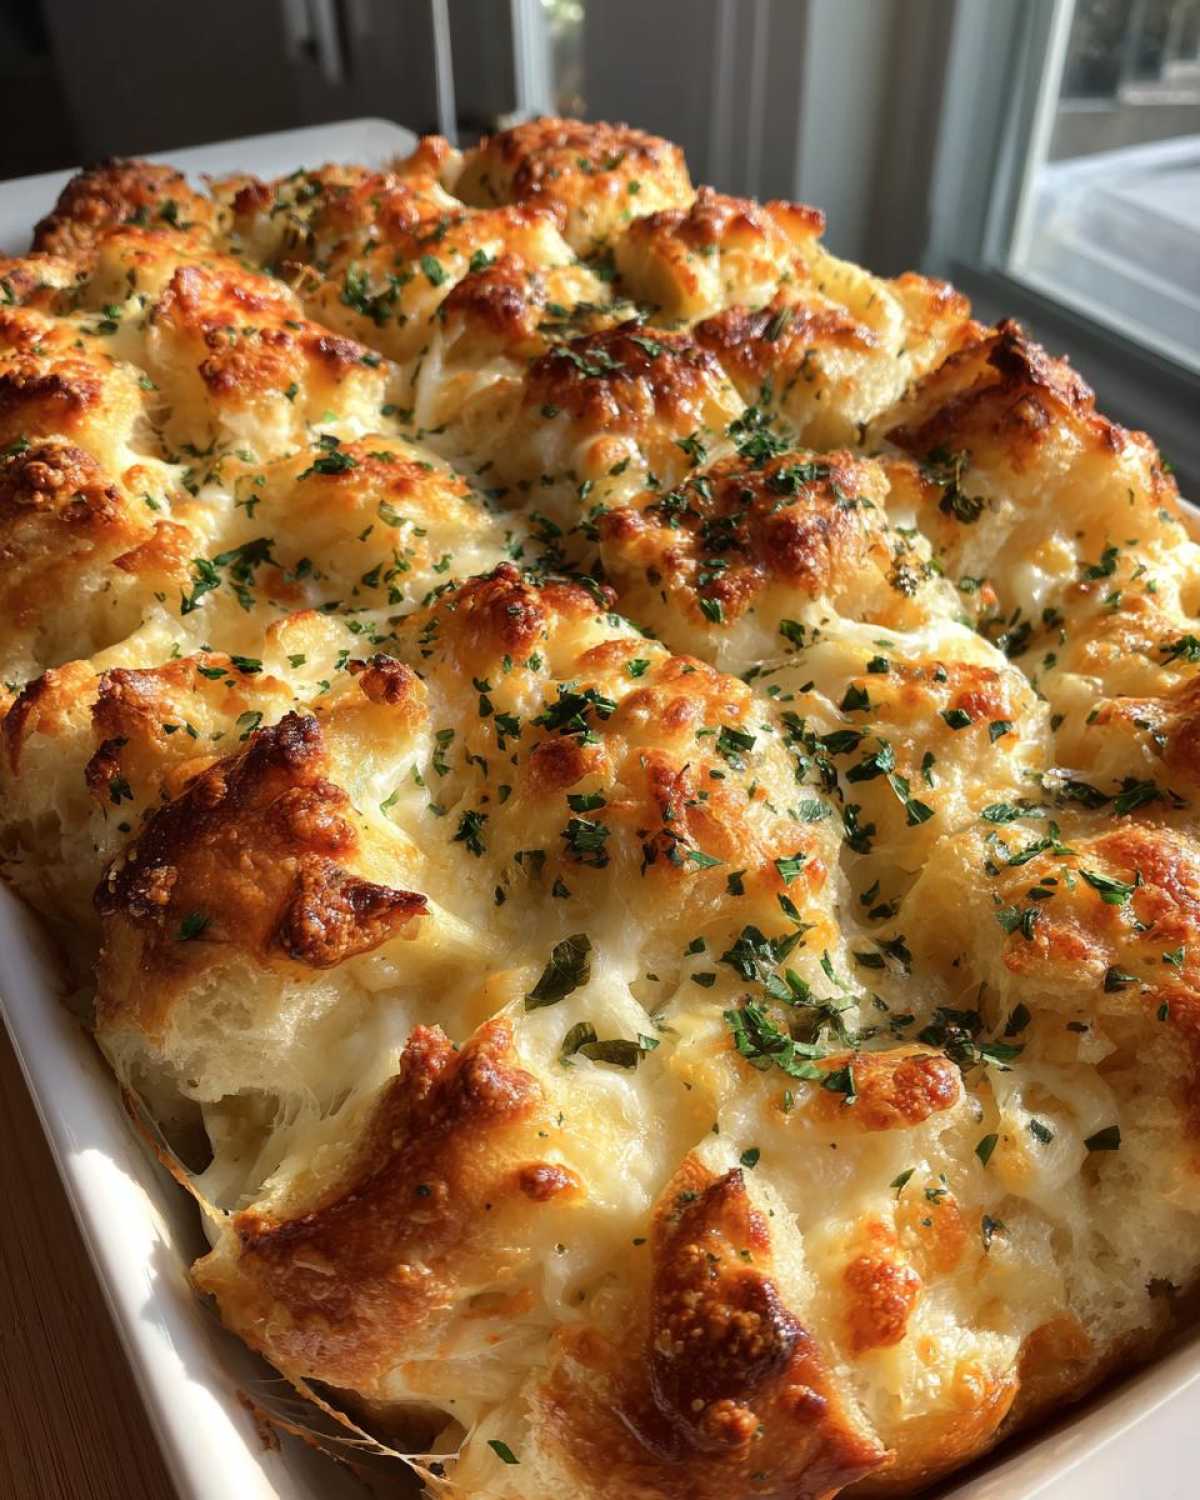
Once everything is nicely coated, sprinkle both the mozzarella and cheddar cheeses right over the top. Just press them down lightly so they stick into the dough trenches. Pop it into the preheated oven for about 25 to 30 minutes. You’re looking for golden brown on top and cheese that is absolutely bubbling and melted. Once it’s out—and this is important—let it sit in the pan for about five minutes to settle. Then, sprinkle on your fresh parsley for color and serve immediately while it’s still wonderfully warm. For the very best results on this dinner side bread, grab a piece right away!
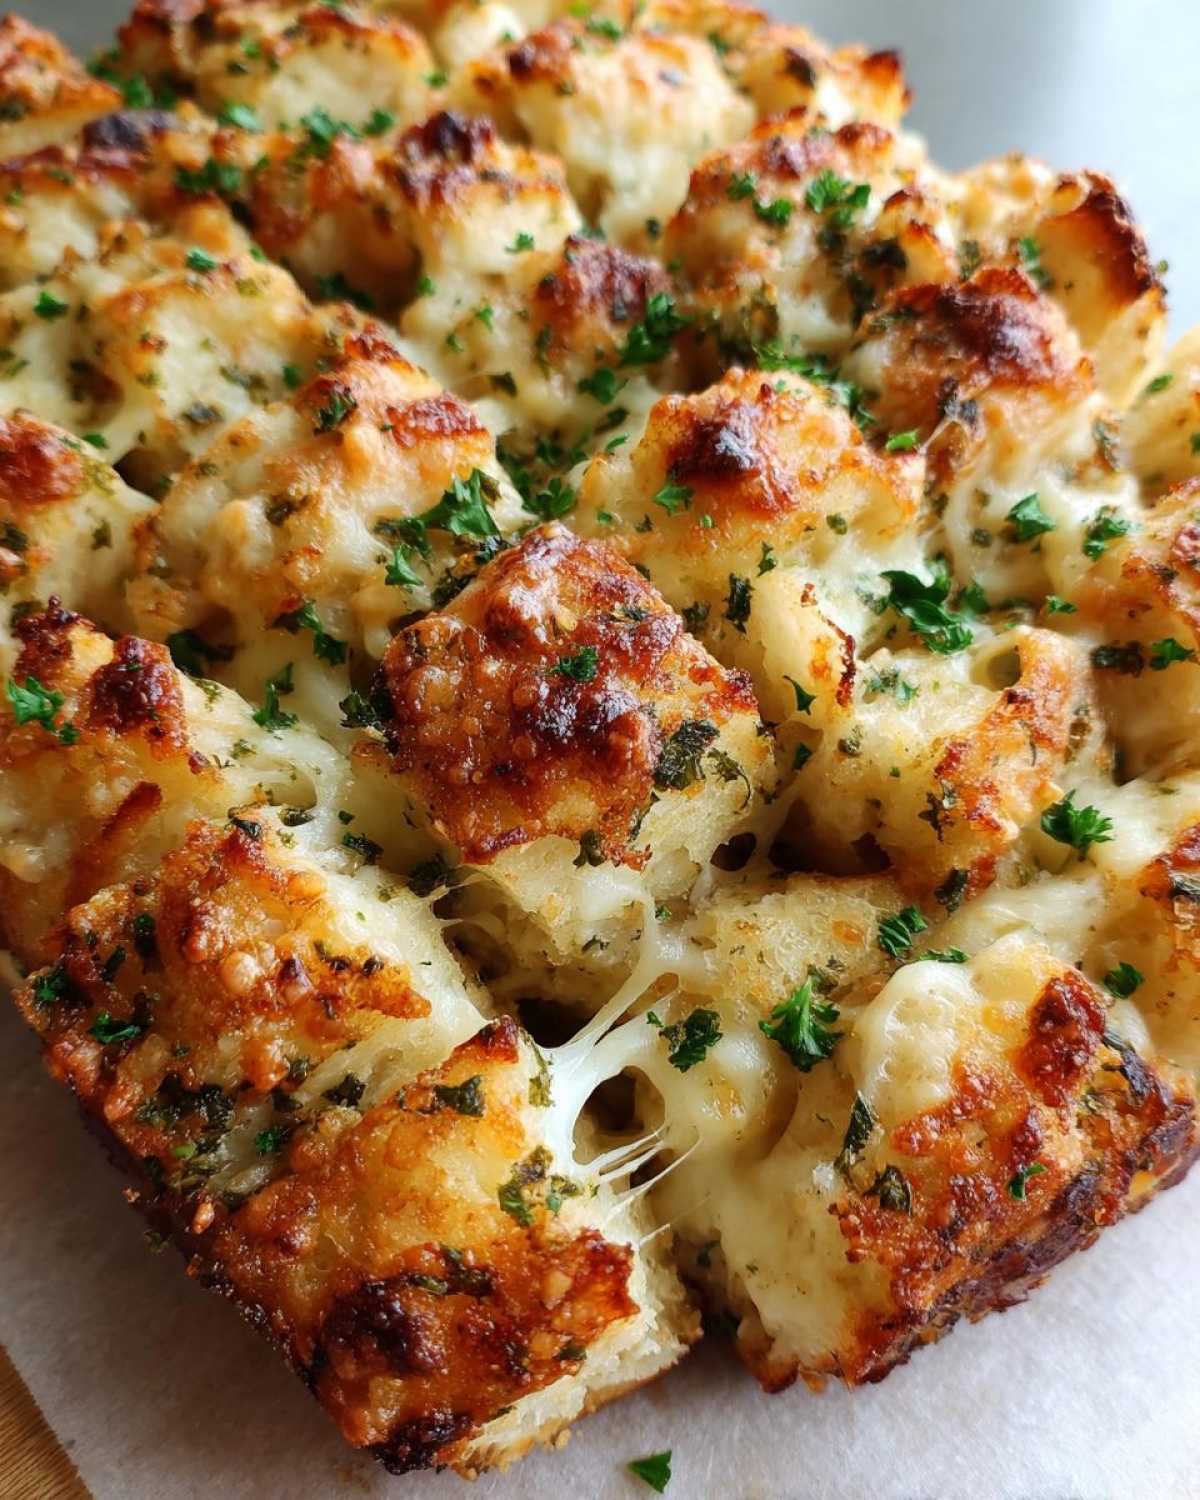
If you want a taste of another incredibly flavorful, savory baked good, check out our recipe for the Spinach Artichoke Bread Wreath. And if you are looking for more incredible garlic flavor inspiration, this outrageous recipe is a must-see: Absolutely Outrageous Garlic Cheese Bread.
Expert Tips for the Best Cheese Bread Success
Okay, now that you know the basic steps for this incredibly fun cheese bread, Liam and I want to share a few little secrets we learned through trial (and delicious error!) to make sure your bake is perfection every single time. Honestly, if you just follow the technique and use the refrigerated dough, you’re already winning, but these tweaks take it from great to *show-stopping*!
Ingredient Swaps and Flavor Boosts for Cheese Bread
If you want to turn the savory notes up to eleven, listen closely: add a quarter cup of grated Parmesan cheese! Mix it right in with the mozzarella and cheddar. Parmesan brings that salty, nutty depth that elevates the whole experience. Also, if you’re serving this on something that isn’t a paper plate at a picnic, consider swapping your pan. We used a loaf pan to keep it cozy, but if you want a much crispier exterior on the outside edges, baking it in a round cake pan helps spread the dough out a bit more evenly under the heat.
Make-Ahead Instructions for Your Pull Apart Cheese Bread
Life gets crazy, right? Sometimes you want the oven ready to go, but you don’t have 30 minutes to babysit rising dough before dinner. Here’s the trick: you can totally prep this! Go ahead and cut up those biscuits, coat them in the buttery mixture, and throw the cheese on top. Cover the whole dish tightly—plastic wrap is your friend here—and pop it into the fridge. You can leave it covered for up to four hours! When you’re ready to bake, just add maybe five to ten extra minutes to the cooking time since it’s starting out cold. It’s such a lifesaver for party prep! If you need a great main course to go with this side dish, check out these Honey Sriracha Lil’ Smokies; they are always a huge hit!
Serving Suggestions for Your Cheesy Garlic Bread Recipe
You’ve made this gorgeous, golden cheese bread, and frankly, it’s so good it could be its own main event! But if you are serving it up as part of a bigger spread, it shines brightest next to something that needs a little cheesy scooping action.
It is the ultimate dinner side bread. Seriously, forget plain rolls. This gooey goodness is fantastic paired right alongside a big bowl of hearty soup—we usually make a huge pot of Minestrone and just use hunks of this for dipping. It’s also amazing accompanying any pasta dish, especially those with lighter sauces, because who doesn’t want extra garlic and cheese on their plate?
If you’re looking for more ways to serve savory breadsticks or slices, these cheesy breadsticks inspiration points are fun: Cheesy Breadsticks from Countryside Cravings give you another great way to serve this kind of flavor profile.
Storage and Reheating Instructions for Leftover Cheese Bread
Now, I know this amazing cheese bread is tempting to devour completely in one sitting—Liam certainly tries! But if you happen to have any left over (maybe you showed restraint, good job!), you need to store it properly to keep that fluffy texture intact.
Once it’s completely cooled down, tuck your leftovers into an airtight container. You don’t want it sitting on the counter for more than two days, though; the refrigerated biscuits don’t age gracefully. If you want that gooey texture back, don’t even think about the microwave! Pop the portion you want onto a baking sheet and warm it in a 350-degree oven for about 5 to 8 minutes. That little heat burst will reactivate the butter and melt that cheese right back to its prime state. It’ll taste just as good as when it came out of the oven the first time!
If you’re looking for something hearty to serve with those leftovers the next day, you can always turn them into a crunchy topping for our Holiday Leftover Minestrone Soup!
Frequently Asked Questions About This Cheese Bread
We get so many messages about adapting recipes—which is exactly what we love! It means you are playing in the kitchen, which is half the fun. Here are a few things folks ask most often about making this soft, fluffy cheese bread happen successfully at home! If you need to get in touch about anything else, you can always find our contact info right here.
Can I use fresh biscuit dough instead of refrigerated for this pull apart cheese bread?
That’s a great question for anyone who likes to bake from scratch! Yes, you absolutely could use homemade biscuit dough, but you must realize it will change the texture slightly. Refrigerated dough is already pre-leavened and has a certain density. If you use your own fresh dough, the pieces might rise a bit more dramatically, and you might lose some of that satisfying ‘squish’ that makes this pull apart cheese bread so comforting. You would also need to make sure your dough pieces are small enough to nestle together nicely!
What is the best way to achieve a crispier exterior on my cheesy garlic bread?
If you love that contrast—super gooey in the middle, a little bit crispy and golden on the edges—we have a couple of tricks! First, if you use an 8×8 inch baking dish instead of that deeper 9×5 loaf pan, the dough pieces spread out more, meaning more surface area hits the oven heat directly before melting into each other. Secondly, make sure your oven rack is set a little higher than the middle position. That puts the top closer to the heating element for a quick blast of color during the last five minutes of baking, giving you that perfect crust!
Is this recipe adaptable for Pão de Queijo or Brazilian Cheese Bread Recipe?
Ah, the wonderful world of Brazilian Cheese Bread! What a delicious tangent! You’ll notice that this recipe, while amazing, relies on a standard refrigerator biscuit base. Pão de Queijo is a completely different beast because it uses tapioca flour (or cassava starch), which makes it naturally gluten-free and gives it that iconic chewy-bouncy texture. So, no, you can’t directly substitute ingredients here to morph it into true Pão de Queijo. If you’re craving that wonderfully unique chewy bread, let me know, and I bet Liam and I can whip up a proper recipe for you to try next time!
Nutritional Estimate for Your Homemade Cheese Bread
I always try to keep the focus on the fun, the flavor, and the connection food brings, but I know some of you planners out there want the facts! So, for those who need a quick reference, here is a general nutritional estimate for one serving of this rich, gooey cheese bread based on the ingredients listed above. Now, remember what Liam always says: these are just guideposts, not rigid laws! Since we are using pre-made dough and mixing cheeses, your exact numbers might wiggle a little bit.
- Serving Size: 1 piece (Based on 8 servings)
- Calories: Around 280
- Fat: About 17g
- Saturated Fat: Roughly 10g
- Carbohydrates: Approximately 22g
- Protein: About 9g
This isn’t exactly a light salad, is it? But honestly, when you’re serving up something this warm and comforting, a little bit of decadence is part of the joy. Don’t worry about the numbers—just worry about getting the most cheese pull possible!
Share Your Culinary Performance of This Cheese Bread
Now that you’ve baked this amazing cheese bread, we absolutely want to see your performance! Did the cheese pull stretch across the whole living room? Did you manage to sneak an extra piece before everyone else arrived? Rate this recipe with five stars if it brought you joy, and don’t forget to tag us when you share photos of your masterpiece!
We love seeing how our scripts inspire your kitchens. Happy cooking and sharing!
Bravo,
Sara & Liam
To learn more about how we bake with joy, you can read all about our philosophy here!
Print
Irresistible Cheesy Garlic Pull Apart Bread
- Total Time: 40 min
- Yield: 8 servings 1x
- Diet: Vegetarian
Description
Make this soft, buttery pull apart cheese bread loaded with gooey melted cheese and rich garlic flavor. It is a perfect party appetizer or dinner side dish.
Ingredients
- 1 (13.8 ounce) package refrigerated biscuit dough
- 1/2 cup (1 stick) unsalted butter, melted
- 4 cloves garlic, minced
- 1 teaspoon Italian seasoning blend
- 1/4 teaspoon salt
- 1 1/2 cups shredded mozzarella cheese
- 1/2 cup shredded sharp cheddar cheese
- 2 tablespoons fresh parsley, chopped (for garnish)
Instructions
- Preheat your oven to 350 degrees F (175 degrees C). Lightly grease a 9×5 inch loaf pan or an 8×8 inch baking dish.
- Open the biscuit dough and cut each biscuit into quarters. Place the dough pieces into the prepared pan.
- In a small bowl, whisk together the melted butter, minced garlic, Italian seasoning, and salt. This creates your buttery garlic mixture.
- Pour the butter mixture evenly over the biscuit pieces in the pan. Use a spoon or spatula to gently toss the pieces so they are coated.
- Sprinkle the mozzarella cheese and cheddar cheese evenly over the dough pieces. Press the cheese down lightly.
- Bake for 25 to 30 minutes, or until the bread is golden brown and the cheese is fully melted and bubbly.
- Remove the bread from the oven. Let it cool in the pan for about 5 minutes before serving.
- Garnish with fresh chopped parsley before you pull apart and serve warm.
Notes
- For an extra savory flavor, add 1/4 cup of grated Parmesan cheese with the mozzarella and cheddar.
- If you want a crispier exterior, bake it in a round cake pan instead of a loaf pan.
- You can prepare the dough pieces and cheese mixture ahead of time; cover and refrigerate for up to 4 hours before baking.
- Prep Time: 10 min
- Cook Time: 30 min
- Category: Appetizer
- Method: Baking
- Cuisine: American
Nutrition
- Serving Size: 1 piece
- Calories: 280
- Sugar: 2
- Sodium: 550
- Fat: 17
- Saturated Fat: 10
- Unsaturated Fat: 7
- Trans Fat: 0.5
- Carbohydrates: 22
- Fiber: 1
- Protein: 9
- Cholesterol: 35