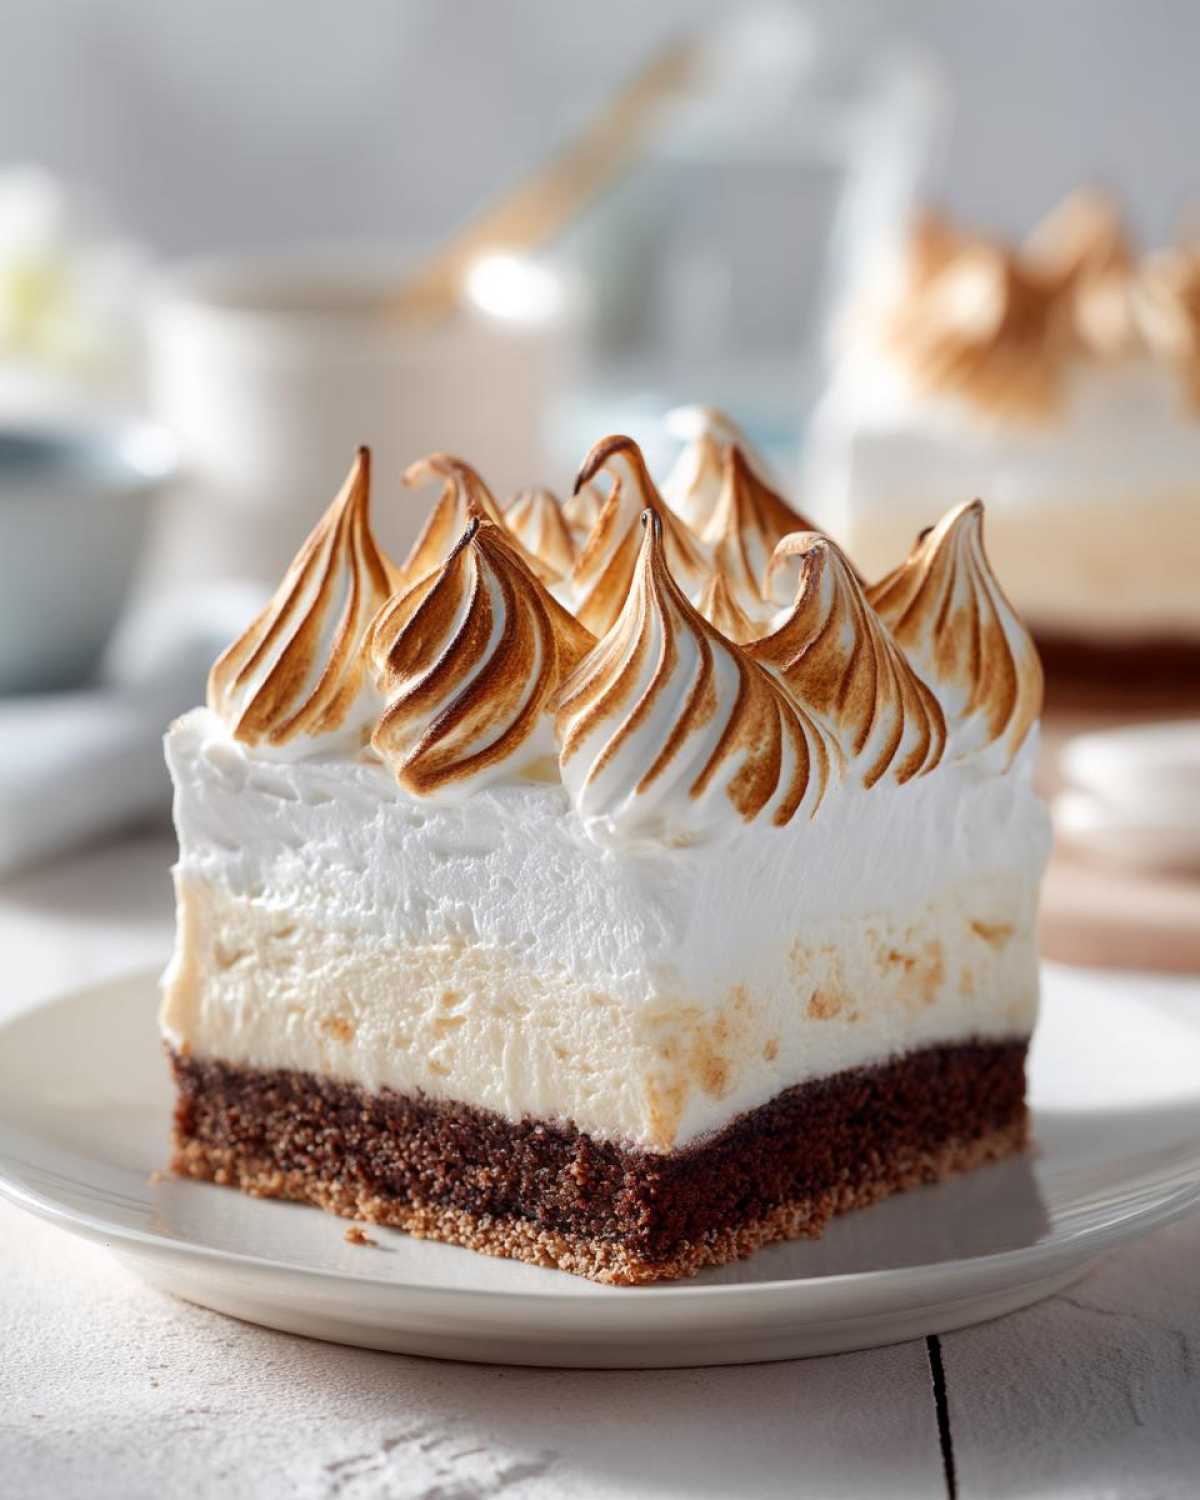
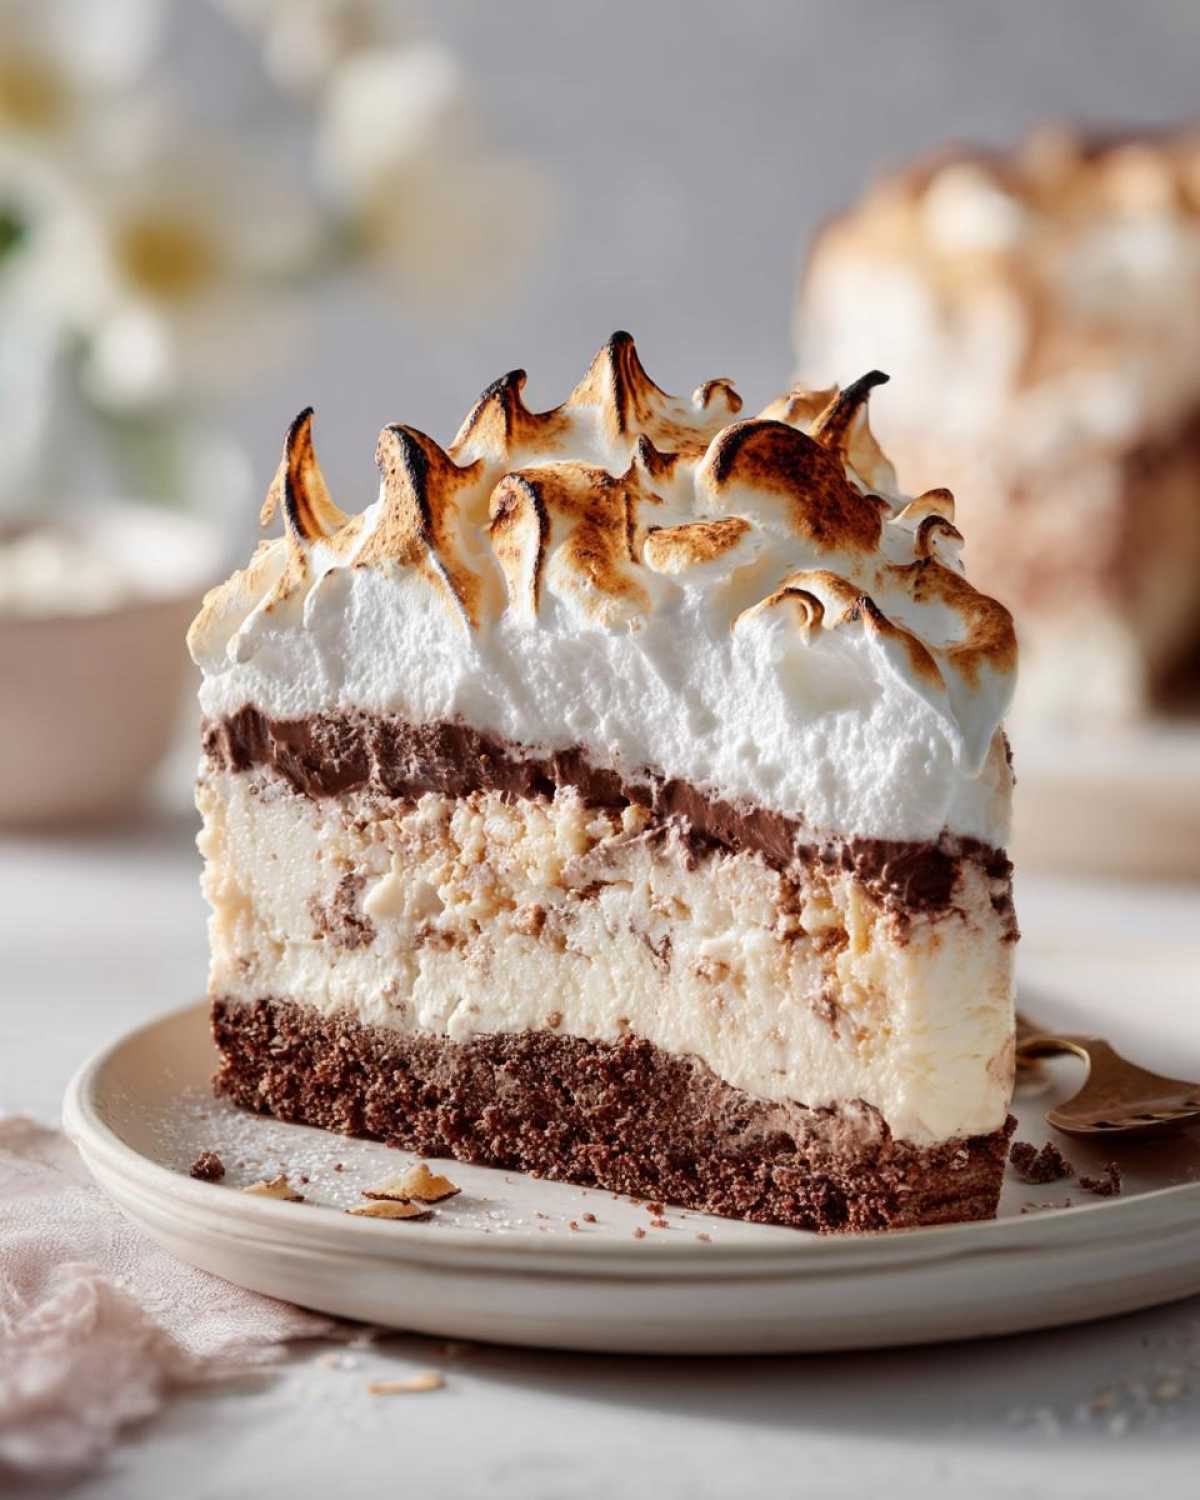
Remember those dessert menus from childhood? Some treats just scream “special occasion.” The Baked Alaska Ice Cream Cake (Retro Dessert) is one of them. It’s a real showstopper. Imagine a fluffy cloud of toasted meringue hugging a cool ice cream and cake center. It’s pure magic! My husband Liam and I love bringing these old-school delights back. For us, food is about connection, a feeling that sparks joy. It’s like a culinary hug that reminds us of happy times and inspires us to create something wonderful together.
Why You’ll Love This Baked Alaska Ice Cream Cake (Retro Dessert)
- It looks absolutely stunning.
- You get amazing textures—cake, ice cream, and fluffy meringue.
- It’s a trip down memory lane.
- Perfect for birthdays or any big celebration.
- This Baked Alaska Ice Cream Cake (Retro Dessert) is truly unforgettable.
A Culinary Love Story: From Quiet Precision to Joyful Creation
When I first met Liam, his cooking was incredibly precise. He’d follow recipes perfectly. His food was good, but it felt a bit… serious. My kitchen style is the opposite. I’m more about happy accidents and spontaneous fun. By trade, I’m a kindergarten teacher, so my days are filled with laughter and unexpected moments. My cooking is just like that—free-spirited and a little messy.
Somehow, I became Liam’s muse. He started cooking not just to be perfect, but to create a feeling, a memory. Our kitchen went from a quiet lab to a lively stage. He’d put on music and conduct a delicious symphony. My role? To be his biggest fan, to cheer him on, and to help reveal his amazing creations. That’s the spirit we bring to desserts like this Baked Alaska Ice Cream Cake (Retro Dessert). It’s about making food that makes you feel alive.
Gathering Your Ingredients for Baked Alaska Ice Cream Cake (Retro Dessert)
To create this show-stopping Baked Alaska Ice Cream Cake (Retro Dessert), you’ll need a few key players. First, grab a 9-inch round chocolate cake that’s already baked and completely cooled. This forms the sturdy base for our icy masterpiece. Next, you’ll need about 1 quart of vanilla ice cream. Make sure it’s just slightly softened so you can spread it easily, but not so much that it’s soupy.
For that dreamy, cloud-like meringue, we’ll use 4 large egg whites. It’s important they are at room temperature for the best volume. You’ll also need 1/2 cup of granulated sugar for the meringue, plus an extra 1/4 cup for the cake itself if you’re baking it from scratch and want that extra sweetness. A pinch of cream of tartar helps stabilize the egg whites, and a teaspoon of vanilla extract adds a lovely background flavor to our fluffy topping. Having all these ready makes assembling your Baked Alaska Ice Cream Cake a breeze!
Crafting Your Showstopping Baked Alaska Ice Cream Cake (Retro Dessert)
Now for the fun part – bringing this amazing Baked Alaska Ice Cream Cake (Retro Dessert) to life! It’s a process that feels a bit like a science experiment and a bit like an art project. Don’t worry if it seems a little intimidating; I’ll walk you through every step.
Step 1: Building the Foundation
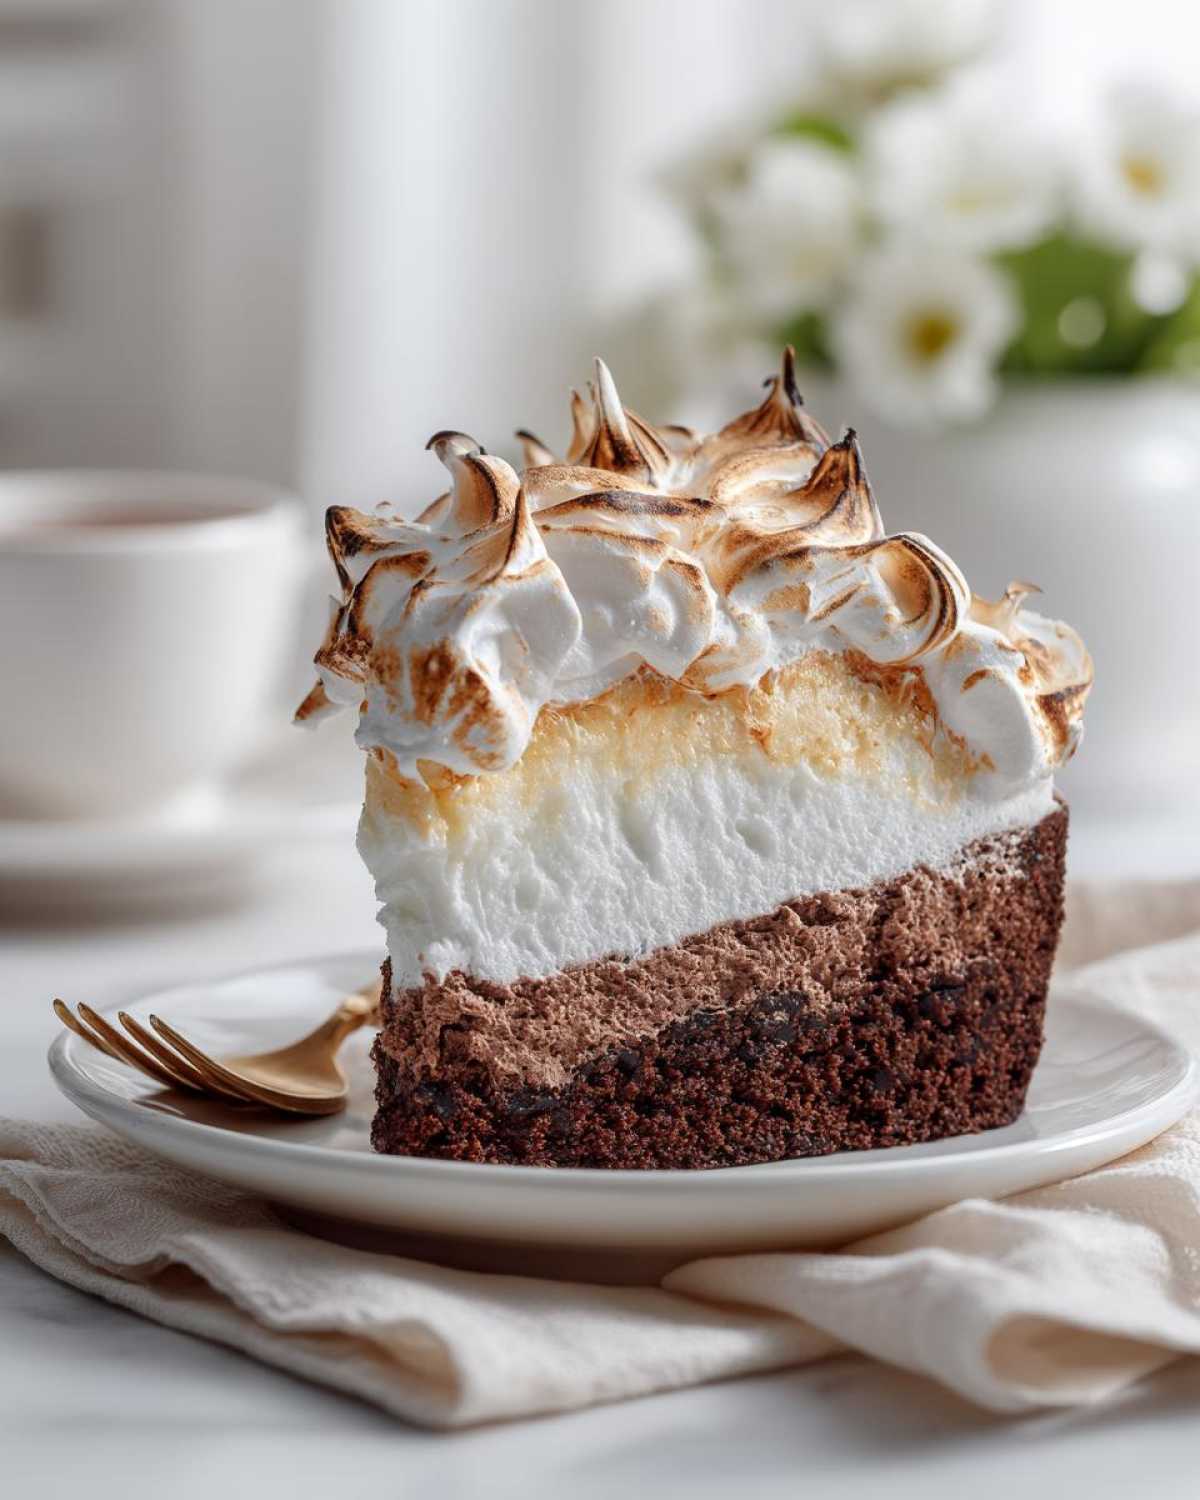
Start with your cooled chocolate cake. Place it right onto your serving plate or a sturdy cake stand. Now, take that slightly softened vanilla ice cream and spread it all over the top of the cake. Try to make it like a lovely, smooth dome. This creates the perfect icy center for our creation.
Step 2: Freezing for Firmness
This step is super important! Pop the cake and ice cream into the freezer for at least an hour. You want that ice cream to be really firm. This stops it from melting everywhere when we add the warm meringue later.
Step 3: Whipping the Perfect Meringue
Grab a clean, dry bowl. Seriously, no grease at all! Add your room-temperature egg whites and the cream of tartar. Beat them with an electric mixer until they look like soft, fluffy clouds. Then, slowly add the 1/2 cup of sugar, a little bit at a time, while still beating. Keep going until you have stiff, glossy peaks. These peaks should stand straight up when you lift the beater. Finally, beat in the vanilla extract. This fluffy mixture is key to the Baked Alaska.
Step 4: The Grand Finale: Broiling and Serving
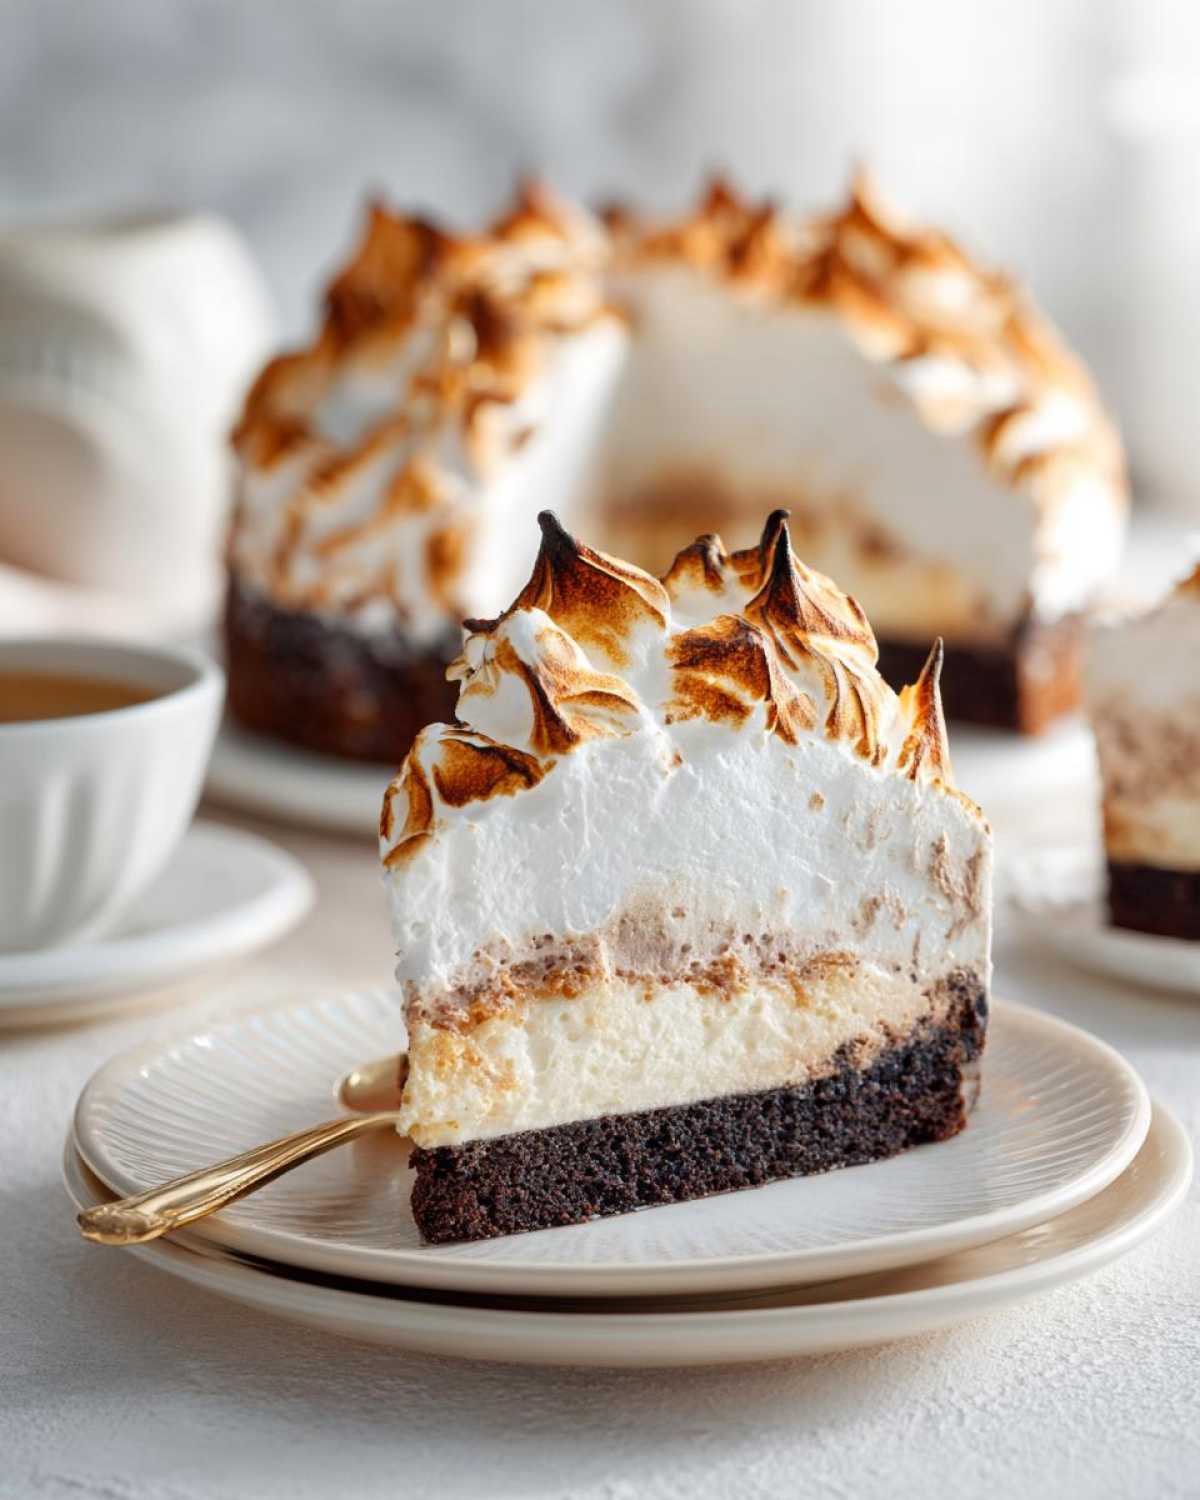
Get your oven broiler ready and preheated. Now, quickly spread that beautiful meringue all over the ice cream and cake. Make sure there are no gaps. Use your spatula to create swirls and peaks – make it look fancy! Carefully place your Baked Alaska Ice Cream Cake under the broiler. Watch it like a hawk! It only takes a minute or two for it to get golden brown. Rotate it if needed. As soon as it’s beautifully toasted, pull it out and serve it right away. That immediate serving is part of the magic of this Retro Dessert!
Essential Equipment for Your Baked Alaska Ice Cream Cake
To make this stunning Baked Alaska Ice Cream Cake, you’ll want a few trusty kitchen companions. A serving plate or cake stand is essential for presentation. You’ll need a few mixing bowls, especially a large, clean one for whipping up that glorious meringue. An electric mixer will be your best friend for achieving those stiff, glossy peaks. A good spatula is perfect for spreading the ice cream and frosting the meringue.
Finally, you’ll need an oven with a broiler setting, or a culinary torch for toasting that beautiful meringue outer layer. Having these tools ready makes the whole process smoother for your Retro Dessert adventure!
Tips for a Perfect Baked Alaska Ice Cream Cake (Retro Dessert)
Making a fantastic Baked Alaska Ice Cream Cake (Retro Dessert) is totally doable with a few little tricks. First, for that fluffy meringue, make sure your mixing bowl and beaters are super clean and totally grease-free. Even a tiny bit of fat can stop those egg whites from whipping up properly.
Work quickly when you’re assembling and frosting. The faster you go, the less chance the ice cream has to melt. If your oven doesn’t have a broiler, or you’re nervous about using it, a simple kitchen torch is a great alternative for toasting the meringue to golden perfection. These little tips help ensure your Retro Dessert is a smashing success!
Frequently Asked Questions About Baked Alaska Ice Cream Cake
Got questions about this show-stopping Baked Alaska Ice Cream Cake? I’ve got answers! Many people wonder about meringue stability. If whipped correctly and kept cold until the last minute, it holds up well. The key is the sugar and beating those egg whites to stiff, glossy peaks.
What about the ice cream melting? That’s why we freeze it solid before adding the meringue and broil it super fast. Speed is your friend here! Can you make parts ahead? Yes! You can bake the cake a day or two in advance and freeze it. You can also make the meringue and store it covered in the fridge for a few hours, but assemble just before broiling.
Wondering about cake flavors? While chocolate is classic, a dense vanilla or even a red velvet cake works too for this fun ice cream dessert. Feel free to experiment with different ice cream flavors too, like strawberry or mint chip, for a unique twist on this beloved meringue cake.
Estimated Nutritional Information
When you’re enjoying a slice of this delightful Baked Alaska Ice Cream Cake, here’s a general idea of what you’re getting. Each serving (about 1/8th of the cake) is roughly 450 calories. It contains about 20g of fat, with 12g being saturated, and around 65g of carbohydrates. You’ll also get about 5g of protein.
Keep in mind these numbers are just estimates. They can change based on the specific cake you use, the brand of ice cream, and how much meringue you pile on. It’s a treat, after all!
Print
Spectacular Baked Alaska 1 Hour Dessert
- Total Time: 1 hour 25 minutes (including freezing time)
- Yield: 8-10 servings 1x
- Diet: Vegetarian
Description
A show-stopping retro dessert that combines a moist cake, creamy ice cream, and a cloud of perfectly toasted meringue. This Baked Alaska Ice Cream Cake is perfect for special occasions and brings a touch of nostalgic fun to your table.
Ingredients
- 1 (9-inch) round chocolate cake, baked and cooled
- 1 quart vanilla ice cream, slightly softened
- 1/4 cup granulated sugar for meringue
- 4 large egg whites, room temperature
- 1/2 teaspoon cream of tartar
- 1/2 cup granulated sugar for meringue
- 1 teaspoon vanilla extract
Instructions
- Place the cooled chocolate cake on a serving plate or cake stand.
- Spread the slightly softened vanilla ice cream evenly over the top of the cake, forming a dome shape.
- Freeze the cake and ice cream for at least 1 hour until firm.
- Preheat your oven broiler.
- In a clean, dry bowl, beat the egg whites with cream of tartar until soft peaks form.
- Gradually add the 1/2 cup of granulated sugar, one tablespoon at a time, beating until stiff, glossy peaks form.
- Beat in the vanilla extract.
- Carefully spread the meringue over the entire ice cream and cake, ensuring there are no gaps. Create decorative swirls and peaks with a spatula.
- Place the cake under the broiler for 1-2 minutes, rotating as needed, until the meringue is golden brown. Watch carefully to prevent burning.
- Serve immediately.
Notes
- Ensure your bowl and beaters are completely clean and free of any grease for the meringue to whip properly.
- Work quickly when assembling and frosting with meringue to prevent the ice cream from melting.
- If you don’t have a broiler, you can use a kitchen torch to toast the meringue.
- Prep Time: 20 minutes
- Cook Time: 5 minutes
- Category: Dessert
- Method: Baking and Broiling
- Cuisine: American
Nutrition
- Serving Size: 1 slice
- Calories: Approximately 450
- Sugar: Approximately 50g
- Sodium: Approximately 150mg
- Fat: Approximately 20g
- Saturated Fat: Approximately 12g
- Unsaturated Fat: Approximately 8g
- Trans Fat: Approximately 0.5g
- Carbohydrates: Approximately 65g
- Fiber: Approximately 2g
- Protein: Approximately 5g
- Cholesterol: Approximately 60mg