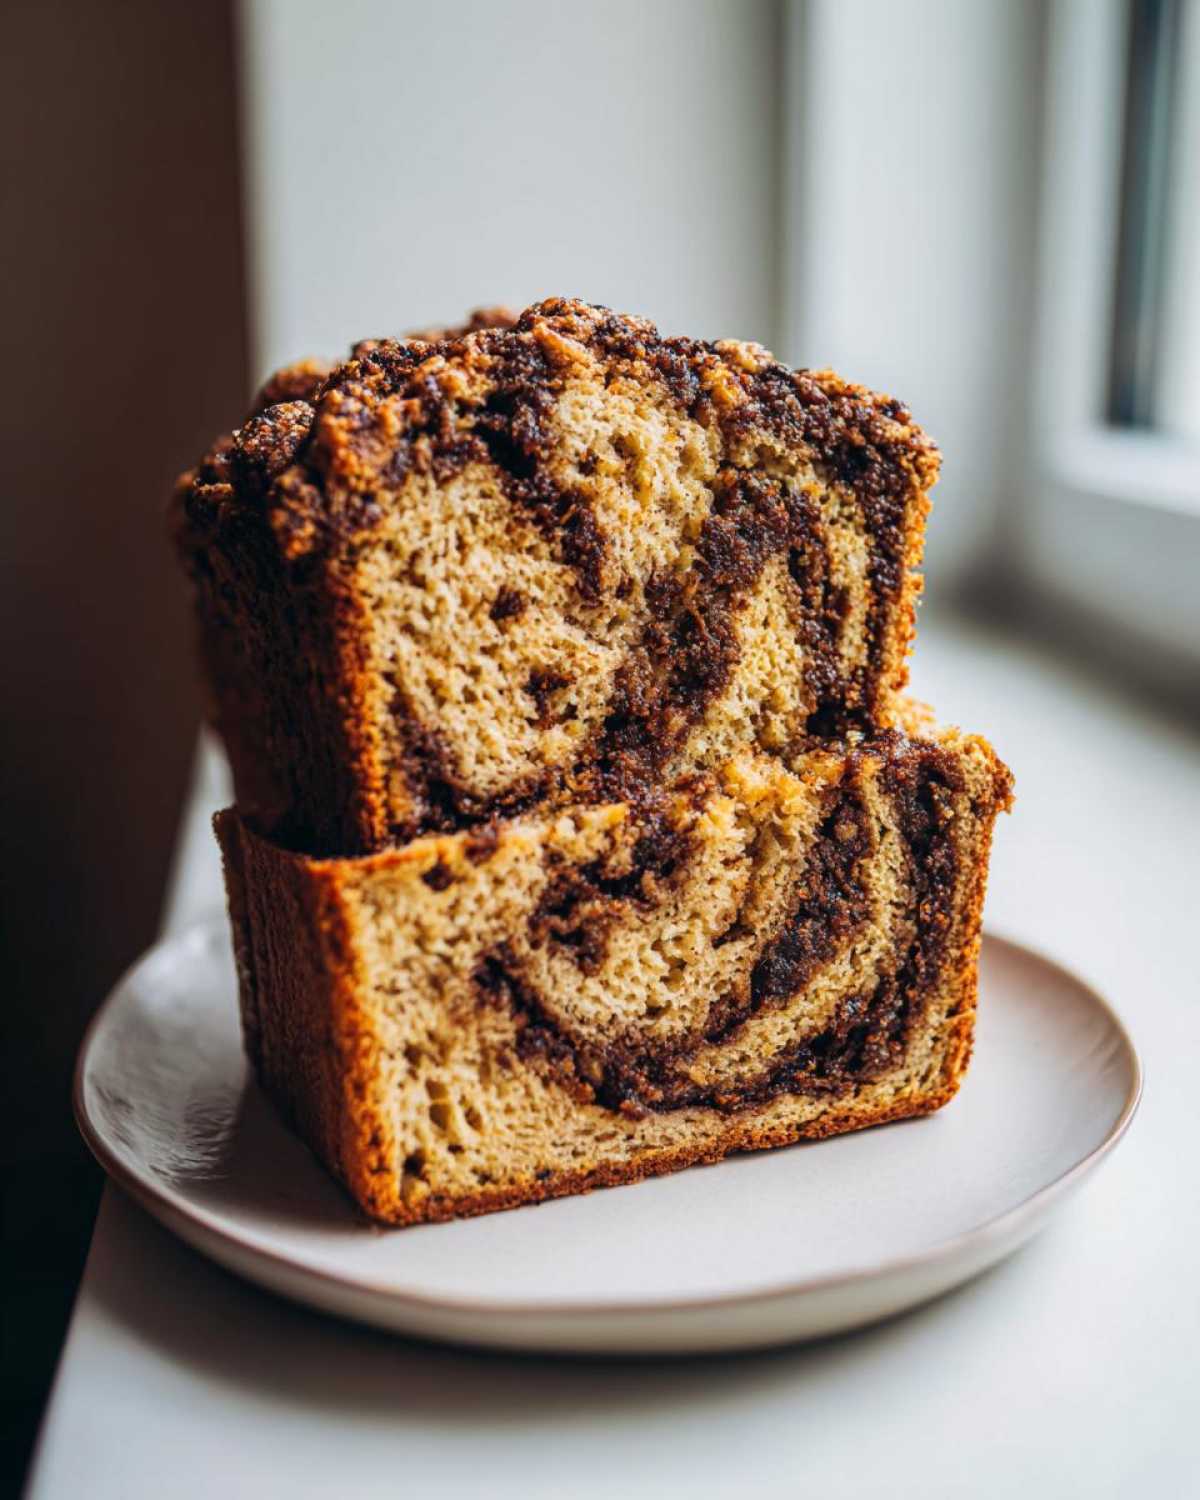
Oh my gosh, there is absolutely nothing that beats pulling a loaf of fresh bread out of the oven. Seriously, the smell floods my entire house and the neighbors probably think I’m running some kind of artisanal bakery! If you’ve ever been disappointed by a dry, crumbly store-bought loaf, then you are in the right spot. I’m giving you my ultimate recipe for **Cinnamon Raisin Bread**, and I mean it when I say this is the softest, fluffiest one you will ever make at home.
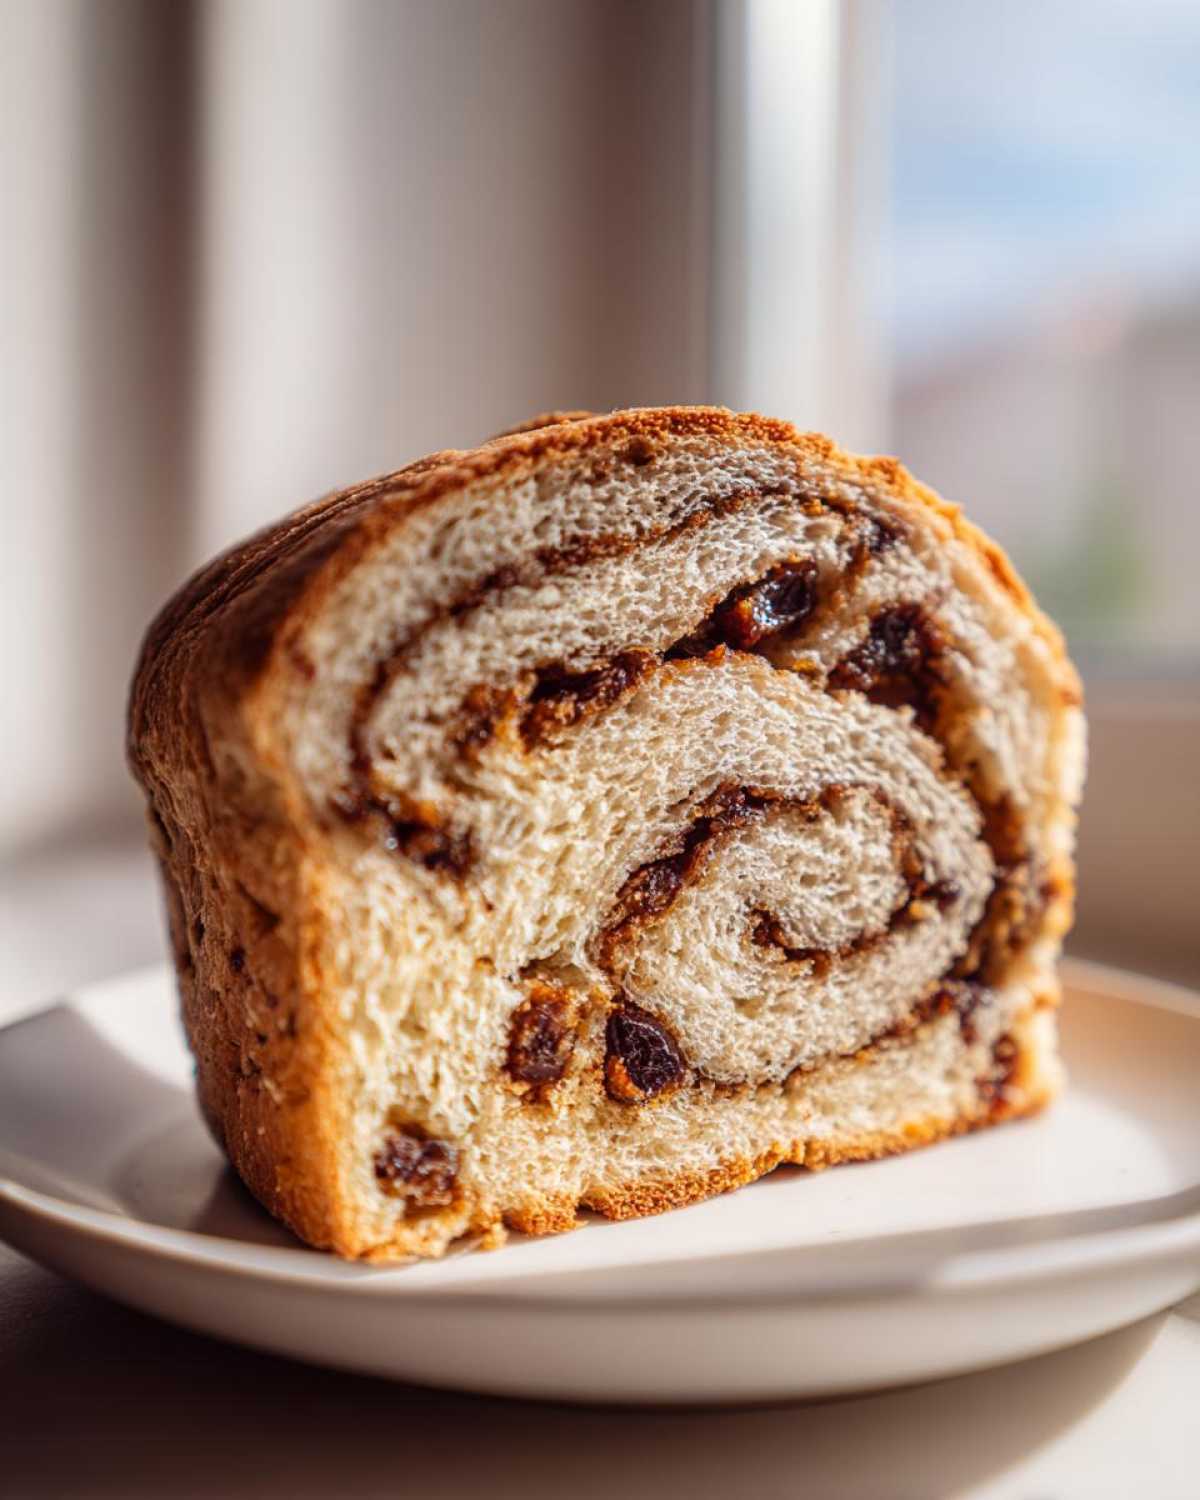
I’ve tweaked this **raisin bread** recipe hundreds of times, trying everything from quick yeast methods to long, complicated proofings. What I landed on gives you that gorgeous, thick cinnamon swirl without tearing the dough apart, and it stays unbelievably tender for days. Trust me, once you taste this homemade version, you won’t look back!
Why This Soft & Swirled Cinnamon Raisin Bread Recipe Stands Out
I know there are a million **raisin bread** recipes out there, but frankly, most of them result in something kind of dense, right? My goal with this version was to deliver unbelievably soft results with zero fuss. This truly is the **Soft Raisin Bread Recipe** you’ve been searching for. It’s so good, it reminds me of some of the elaborate pastry pulls I’ve tried to master, only this is much simpler!
The secret to the perfect texture and that gorgeous ripple effect is actually how we treat the cinnamon sugar butter. We don’t just sprinkle it on top; we spread it edge-to-edge before rolling tightly. This guarantees a beautiful, visible **Best Cinnamon Swirl Bread** every single time. If you’ve ever tried to make something like this before, you’ll appreciate how much structure this particular technique lends the final loaf. We even found a way to make it great for bakers who aren’t ready to commit to long kneading sessions!
Achieving the Fluffiest Texture in Your Raisin Bread
Texture is everything in a breakfast loaf like this. You absolutely must make sure your egg is room temperature and your milk is just warm enough to wake up the yeast—too hot and you kill it, too cold and nothing happens! That perfect warming step gets those air bubbles going, which is important whether you are making this loaf or, say, a fancy cinnamon roll pull apart.
When it comes to kneading, don’t overdo it, but definitely don’t underdo it! Five to seven minutes by hand develops just enough gluten structure. This careful balance of moisture and kneading is what gives you that incredibly **Fluffy Cinnamon Bread** when it finally comes out of the oven.
Gathering Ingredients for Homemade Cinnamon Raisin Bread
Baking bread from scratch demands accuracy, and that’s true even for my favorite comfort recipes like this one. When you’re making a **Sweet Yeast Bread**, precision in your measurements really helps the yeast do its job, which leads to a better rise and that gorgeous final texture. Don’t worry, I’ve written out every single thing you need below. If you love spiced breakfast bakes, you might also want to bookmark my recipe for gingerbread banana bread—it’s perfect for colder mornings!
Ingredient Notes and Raisin Preparation
Before you even look at the flour, you have to deal with those raisins! They tend to be dry, and dry raisins will steal moisture right out of your beautiful dough while it bakes. You must plump them up first. I just soak mine in a little hot water for about ten minutes, drain them well, and then pat them dry with a paper towel. Trust me, this is non-negotiable for a soft final product.
Also, pay close attention to that milk temperature when you start. It needs to be warm, around 105 to 115 degrees F, to wake up the yeast properly. If it’s too cool, the yeast just sleeps, and you’ll end up with a pancake instead of a glorious loaf!
Step-by-Step Instructions for Perfect Raisin Bread
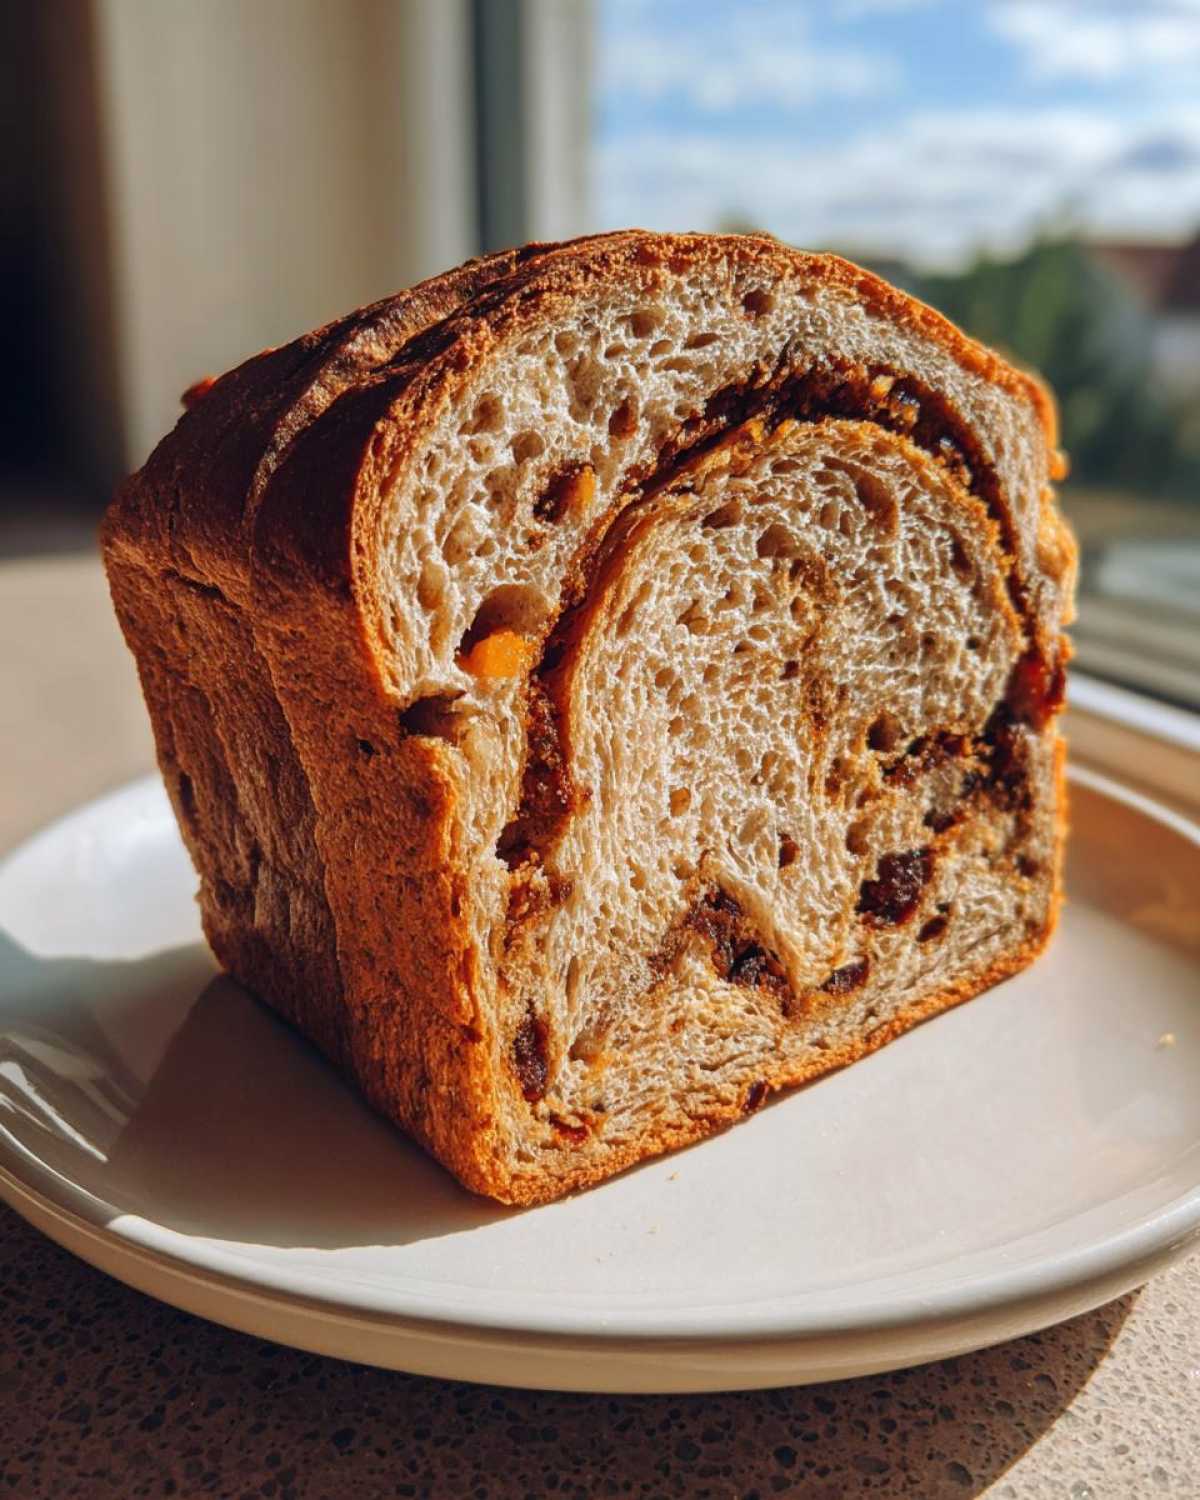
Alright, let’s get our hands dirty! This is where we turn simple pantry items into that stunning **Homemade Cinnamon Raisin Bread**. Don’t feel intimidated by yeast; it’s actually pretty forgiving if you pay attention to the temperature. We are aiming for that textbook rise that guarantees a beautiful **Homestyle Raisin Loaf**. Because this is a standard kneaded dough, it’s a fantastic place to start your journey into **Baking Bread from Scratch**.
Mixing the Dough and First Rise for Your Raisin Bread
First things first, activate the yeast in your warm milk and one teaspoon of sugar. It should get foamy in about five to ten minutes, which means your yeast is alive and ready to party! Once it looks like a tiny foam cap formed on top, mix in the rest of your sugar, the egg, melted butter, and salt.
Now, start adding the flour gradually. You mix until it gets shaggy, dump it onto your counter, and get ready to knead! You’ll need about five to seven minutes of steady work until the dough smooths out and feels elastic—it shouldn’t stick everywhere! After you gently knead in those plumped raisins, toss the dough into an oiled bowl, cover it, and let it chill out in a warm place for about an hour, or until it’s doubled. Patience here is key for structure!
Creating the Cinnamon Sugar Swirl in Your Raisin Bread
While that dough is getting happy, mix up your swirl ingredients: brown sugar and cinnamon. When the dough has risen, punch it down gently and roll it out into a big rectangle, maybe 10 by 16 inches. You want it thin, but don’t stress too much if it’s not mathematically perfect.
Now, this is the fun part! Spread that softened butter all over the surface—don’t leave any dry spots! Then, sprinkle that cinnamon sugar mixture heavily over the butter. You want a really good coating for that amazing visual effect. Roll that rectangle up tightly, starting from the long side, and make sure you pinch that seam closed firmly. You really need a tight roll for a beautiful **Cinnamon Sugar Swirl Bread** design!
Final Proofing and Baking the Raisin Bread
Gently place your rolled log seam-side down into your greased 9×5 pan. Cover it again and let it have its second rest, usually about 30 to 45 minutes. You’ll know it’s ready when it puffs up nicely and crowns about an inch over the top of the pan edge. Preheat your oven to 375°F while it rests!
Bake for about 30 to 35 minutes until it’s golden brown all over. If you have a basic meat thermometer, check the inside; you want it to hit about 200°F for perfect doneness. You can check out some other great baking tips over at easy homemade naan bread if you want to try something different next time!
Tips for Success When Making Artisan Raisin Loaf
Even though this recipe is straightforward, there are a few little tricks that elevate it from great **raisin bread** to something truly special every time. Think of these as my personal pointers for achieving that beautiful, barely-there crust you get sometimes at those fancy bakeries. These tips are what move this from a simple home bake into a bona fide **Artisan Raisin Loaf**!
First, that crust! Don’t let the loaf sit in the hot pan for too long after it comes out of the oven; if you do, the retained heat will steam the bottom and make it gummy. Once it’s out, immediately turn it onto a wire rack. If you want an extra soft, almost pillowy crust, grab a little bit of melted butter—just a teaspoon or so—and lightly brush it over the top while the loaf is still piping hot. It smells incredible!

Also, if you find you absolutely adore the cinnamon ribbon but want to keep the overall sweetness down, you can reduce the brown sugar slightly in the swirl mixture. Just make sure you’re not reducing the cinnamon, though! You need that spice to hold its own against the buttery richness. If you enjoyed this focus on texture, you might like checking out how I handle soft crusts when I make focaccia bread!
Serving Suggestions for Warm Raisin Bread Slices
Seriously, wait until this loaf cools down just a little bit—you don’t want to slice it piping hot, or it will smash, but slicing it when it’s just barely warm is the greatest reward after all that effort! The aroma alone is intoxicating when you have fresh **Warm Raisin Bread Slices** filling your kitchen.
For a breakfast moment, a thick slice toasted until it’s golden brown and slathered with good, salty butter melts everything perfectly. It’s also amazing with a smear of cream cheese, or honestly, even some tangy apricot or orange marmalade works magic against the spice. If you’re having it for dessert or a snack, I sometimes turn leftovers into quick French toast! You absolutely have to try my maple pecan French toast roll-ups using bread this sweet.
It’s the perfect accompaniment to a strong cup of coffee, and it feels miles fancier than just grabbing toast!
Storage and Reheating for Your Homemade Raisin Bread
Now that you’ve made the most perfect, swirly **raisin bread**, the next crucial step is keeping it tasting just as amazing the next day—or the day after that! Luckily, this tender loaf holds up really well, but you have to store it right. If you try to wrap it while it’s still warm, you’re just trapping steam, and that turns into a gummy wreck, which is the last thing we want for our sweet bread.
Once the loaf is totally cool—and I mean completely, stone-cold—wrap it tightly in plastic wrap first, and then slide that whole package into either a gallon-sized zip-top plastic bag or an airtight container. This traps the moisture inside the bread instead of letting it escape into the air. Store it right there on the counter at room temperature. It’s generally good for about three to four days this way.
If you baked a double batch (because honestly, who doesn’t?), you can totally freeze it! Slice the loaf first, and *then* wrap the slices tightly in plastic wrap and foil. Frozen bread thaws beautifully without losing that soft texture you worked so hard to achieve. You can check out some other breads that freeze well, like my chocolate chip zucchini bread, for comparison!
Restoring Softness to Reheated Slices
Reheating is my favorite part because it brings back that fresh-from-the-oven magic!
The easiest way, especially if you’re just grabbing one slice for breakfast, is the toaster. A quick cycle—low to medium—softens the inside while giving the edges a little crisp. It’s the best texture contrast, ever!
If you want that full, warm softness back, I skip the microwave because it sometimes makes the texture rubbery. Instead, I place the slices on a baking sheet and warm them in a 300°F oven for about 5 to 7 minutes. This gentle heat warms the sugars without drying out the crumb. Slice some thick pieces, slather them with butter, and suddenly, you’re eating breakfast all over again!
Frequently Asked Questions About This Raisin Bread Recipe
When you’re baking something special like this sweet loaf, it’s natural to have questions pop up. I’ve gathered the ones I get asked most often to make sure your **Homemade Raisin Bread** turns out perfectly every time. Don’t worry about getting it wrong; bread baking is all about learning the rhythm!
Can I use the Bread Machine for this Cinnamon Raisin Bread Recipe?
That’s a great question! While I usually stick to the hands-on method because I love watching that cinnamon swirl come together, yes, you can adapt this to a **Bread Machine Raisin Bread** cycle. The key is that you can’t just dump everything in on the ‘Basic’ cycle, because the swirl needs to be added after the machine mixes the dough but before the first rise. If your machine lets you pause after the initial kneading cycle but before the first long rise, use that! Otherwise, you might have to manually add the swirl ingredients right before the machine enters the proofing cycle. You’ll need to watch it closely!
What if I want a No Knead Raisin Bread version?
Oh, I love the idea of a truly hands-off bake sometimes! If you want to turn this into a proper **No Knead Raisin Bread**, it requires patience, but the payoff is big. You’ll need to increase your liquid slightly, maybe an extra tablespoon or two of milk, because no-knead doughs are usually wetter. Instead of kneading for 5–7 minutes, you just mix everything really well—shaggy is fine—and then let it sit, covered on the counter, for about 12 to 18 hours instead of just one hour for the first rise. After that long, slow ferment, you shape it, add the swirl, and proceed with the second rise and bake as written!
Why is my Cinnamon Raisin Bread dough not rising?
This is almost always down to the yeast, honestly. The biggest reason the dough won’t rise is that your water was too hot and actually killed the yeast before you added it to the bowl. Remember, it needs to be warm, between 105 and 115 degrees F, which feels warm to the touch but won’t burn you.
The second reason? Old yeast! If your yeast is past its expiration date, it loses its power. Always test it first in warm water with a pinch of sugar—if it doesn’t get foamy in ten minutes, toss it out and buy a fresh packet. A sluggish or non-existent rise means the yeast isn’t producing the carbon dioxide needed to make your **Cinnamon Raisin Bread** nice and lofty!
Estimated Nutritional Data for Soft Raisin Bread Slices
Now, I want to be super clear before we dive into the numbers here. Since we are **Baking Bread from Scratch**, the nutritional breakdown can shift a tiny bit depending on where you buy your flour or how much butter you decide to spread during that swirl step! These numbers are my best estimate based on the recipe ingredients provided, so think of this as a guide for enjoying your pumpkin spice latte oatmeal bake twin!
This is calculated per single, nice-sized slice. Remember, because this is sweetened **raisin bread**, it has a little bit more sugar than your average dinner loaf, but that swirl is worth every single carb, trust me!
- **Serving Size:** 1 slice
- **Calories:** 220
- **Fat:** 5g
- **Carbohydrates:** 40g
- **Sugar:** 12g (Yes, those sugary swirls add up!)
- **Protein:** 5g
See? Not bad at all for a loaf this rich and comforting. It makes a fantastic weekend breakfast or an afternoon snack when you need that little boost of energy!
Share Your Homemade Bread Baking Journey
That’s it! You’ve done the work, you’ve waited patiently through the rises, and now you have this stunning, pillow-soft **Cinnamon Raisin Bread** cooling on your counter. I truly hope the process was relaxing and that your kitchen smells heavenly right now. If you made it through this recipe for the first time, give yourself a huge pat on the back!
Now, I really, *really* want to hear from you. Did that swirl turn out perfectly? What did you serve it with? My favorite way to enjoy a slice is straight-up, slightly warm, with way too much cold salted butter. But maybe you tried dipping it in coffee, or maybe you went all out and used it for a decadent French toast!
Please leave a star rating for this recipe right below—it helps other home bakers see that this is the best **raisin bread** method out there! And if you managed to snag a photo of your beautiful, golden loaf, please share it on social media and tag me. I love seeing your successes! If you’re looking for something different to tackle next, maybe something savory after all that sweetness, you absolutely have to try my recipe for easy creamy chicken taco soup!
Happy baking, friends!
Print
Soft and Swirled Cinnamon Raisin Bread
- Total Time: 1 hr 55 min
- Yield: 1 loaf (12 slices) 1x
- Diet: Vegetarian
Description
A recipe for homemade, soft cinnamon raisin bread featuring a distinct cinnamon swirl, suitable for breakfast or snacking.
Ingredients
- 1 cup warm milk (105-115°F)
- 2 1/4 teaspoons active dry yeast
- 1/4 cup granulated sugar plus 1 teaspoon for yeast
- 1 large egg, room temperature
- 1/4 cup unsalted butter, melted
- 1 teaspoon salt
- 3 1/2 cups all-purpose flour, plus more for dusting
- 1 cup raisins, plumped in hot water and drained
- For the Swirl: 1/2 cup packed brown sugar
- For the Swirl: 2 tablespoons ground cinnamon
- For the Swirl: 4 tablespoons unsalted butter, softened
Instructions
- Combine the warm milk, 1 teaspoon of sugar, and yeast in a large bowl. Let stand for 5 to 10 minutes until foamy.
- Add the remaining 1/4 cup sugar, egg, melted butter, and salt to the yeast mixture. Stir well.
- Gradually add the flour, mixing until a shaggy dough forms. Turn the dough out onto a lightly floured surface and knead for 5 to 7 minutes until smooth and elastic.
- Gently knead in the drained raisins until evenly distributed. Place the dough in a lightly oiled bowl, turning to coat. Cover and let rise in a warm place for 1 to 1.5 hours, or until doubled in size.
- While the dough rises, prepare the swirl mixture: In a small bowl, mix the brown sugar and cinnamon until combined.
- Punch down the risen dough. Turn it out onto a lightly floured surface. Roll the dough into a large rectangle, about 10 by 16 inches.
- Spread the softened butter evenly over the dough surface. Sprinkle the cinnamon-sugar mixture over the butter.
- Starting with the long side, tightly roll the dough into a log. Pinch the seam closed.
- Place the log into a greased 9×5 inch loaf pan. Cover loosely and let rise again for 30 to 45 minutes, or until the dough has crowned about 1 inch over the rim of the pan.
- Preheat your oven to 375°F (190°C).
- Bake for 30 to 35 minutes, or until the top is golden brown and the internal temperature reaches 200°F (93°C).
- Remove the loaf from the pan immediately after baking and cool completely on a wire rack before slicing.
Notes
- To plump the raisins, soak them in hot water for 10 minutes, then drain and pat them dry before adding them to the dough.
- For an extra soft crust, brush the top of the loaf with melted butter immediately after removing it from the oven.
- If you prefer a less intense swirl, reduce the cinnamon sugar mixture slightly.
- Prep Time: 25 min
- Cook Time: 35 min
- Category: Breakfast
- Method: Baking
- Cuisine: American
Nutrition
- Serving Size: 1 slice
- Calories: 220
- Sugar: 12
- Sodium: 250
- Fat: 5
- Saturated Fat: 3
- Unsaturated Fat: 2
- Trans Fat: 0
- Carbohydrates: 40
- Fiber: 2
- Protein: 5
- Cholesterol: 25