If you’re like me, you’ve been burned before by bran muffins. You know the kind—dry, crumbly hockey pucks that taste more like cardboard than a wholesome breakfast treat. I spent years searching for the perfect recipe because I refuse to eat a muffin that needs a gallon of coffee just to swallow it!
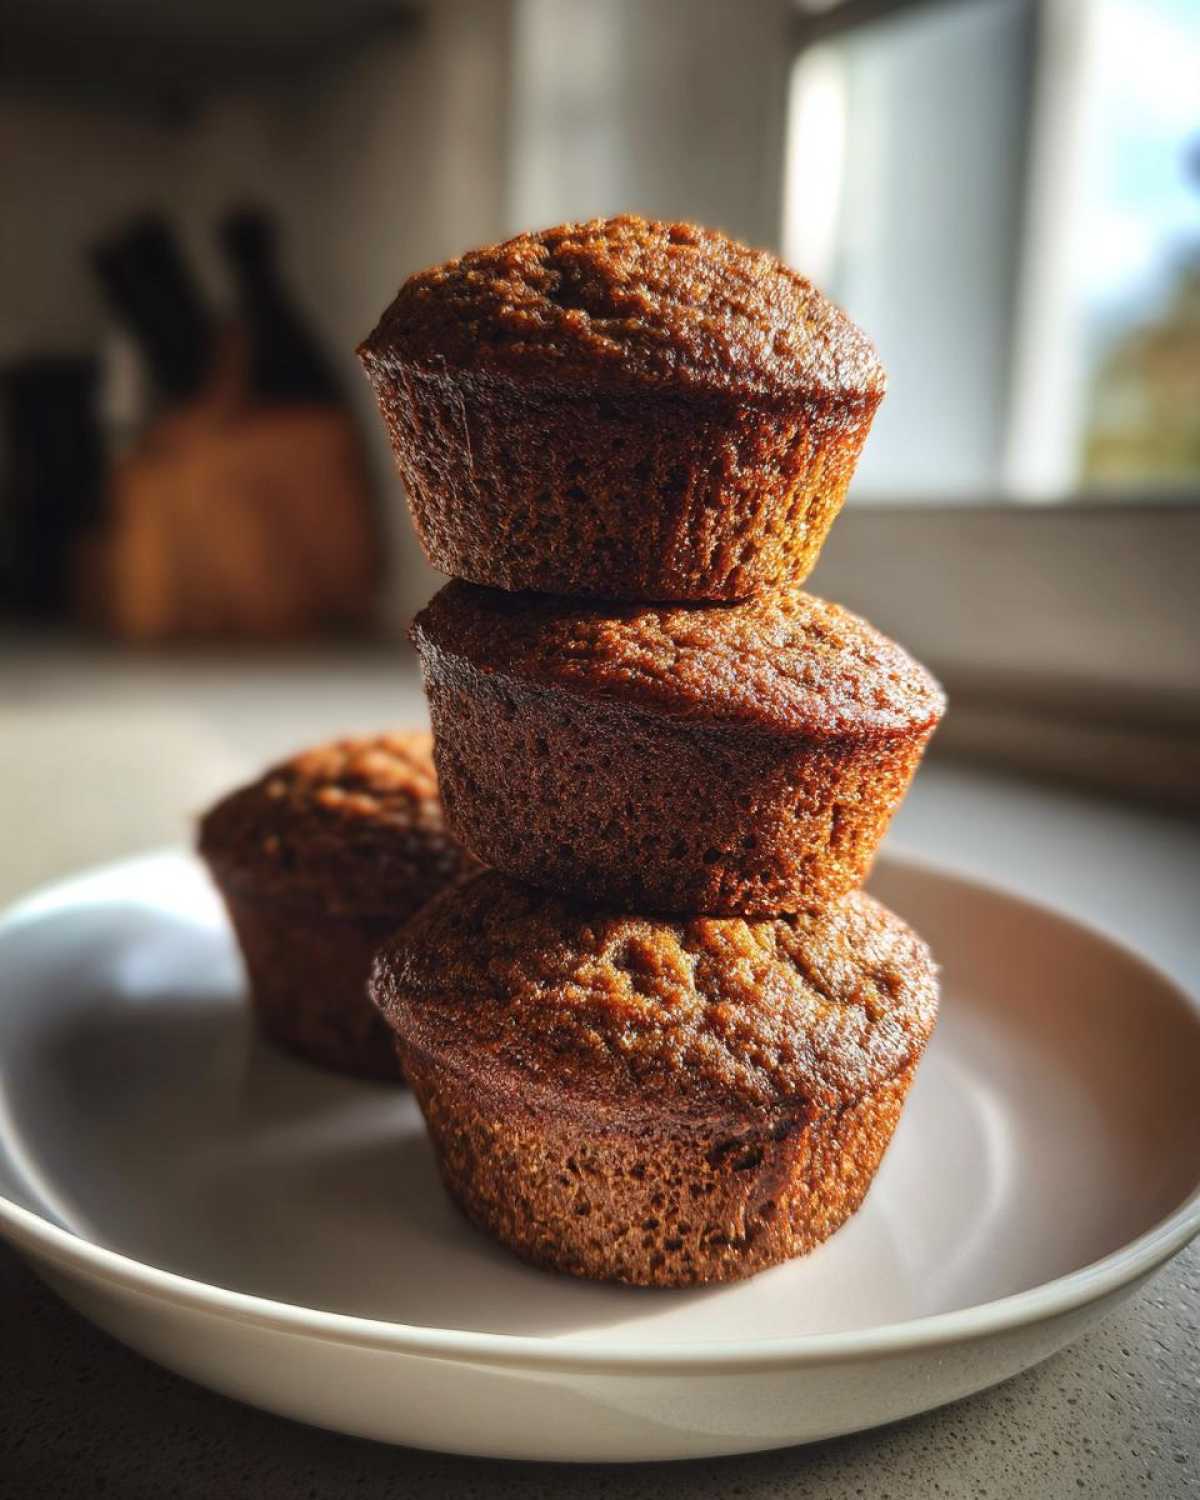
Well, stop searching! I’ve finally perfected my version of truly **Moist Bran Muffins**, and they’re going to change the way you think about this staple. This isn’t a new, experimental thing; this recipe has been tested through countless early mornings and freezer-stocking sessions. Trust me, these **bran muffins** stay soft, even days later. We’re talking about a rich, high-fiber bite that tastes like it came straight from a classic bakery, not a health food aisle.
Why You Will Make These Moist Bran Muffins Every Week
I want you to feel confident opening your oven door, knowing exactly what you’re going to get: perfection. These aren’t just good; they solve all the problems I used to have with this type of muffin!
- They are seriously **Moist Bran Muffins**—that’s the promise!
- Perfect for a **Grab And Go Breakfast** when you’re running out the door.
- Packed with fiber, making these truly **High Fiber Muffins**.
- The best part? They are so easy to make ahead because they are wonderfully **Freezer Friendly Muffins**. If you want another easy recipe to try next week, check out my banana oatmeal ones here: banana oatmeal muffins!
Essential Ingredients for Perfect Bran Muffins
These are the heroes of the recipe, and honestly, they are mostly pantry staples, which is why these are such easy muffin recipes to pull off on a busy Tuesday morning! We use simple things, but the technique makes all the difference.
When you gather your ingredients, pay attention to the bran. I always try to find a good quality, coarse wheat bran—it holds up the best during the soaking process and really delivers on that high-fiber promise. Don’t skimp here; it’s what gives these the body they need.
Here is exactly what you need for a dozen **Homemade Bran Muffins**:
- 1 1/2 cups wheat bran cereal (the foundation!)
- 1 cup boiling water (don’t skip the boiling part, this softens everything!)
- 1/2 cup milk (I use whole milk, but whatever you have works)
- 1 large egg, room temperature is best
- 1/4 cup vegetable oil (keeps these wonderfully moist)
- 1/3 cup pure maple syrup (our natural sweetener choice)
- 1 teaspoon vanilla extract
- 1 1/2 cups whole wheat flour
- 1 teaspoon baking soda
- 1/2 teaspoon salt
- 1/2 cup raisins OR finely chopped apple (optional, but I love the sweet bursts!)
Ingredient Notes and Healthy Bran Muffins Substitutions
I know what you’re thinking! What if I don’t have exactly what’s listed? That’s okay! These are adaptable, which helps them become fantastic **Healthy Breakfast Muffins** you can rely on. My goal is always to give you texture and moisture, regardless of what you swap.
For the milk, if you want to boost the richness and moisture even further, you can absolutely swap it out for plain, unsweetened yogurt. Just make sure the yogurt isn’t too thick, or use a splash more water if needed to keep the batter flowing right. Yogurt also adds a nice little tang!
Making Oat Bran Muffins Idea Variations
Sometimes I run out of wheat bran cereal, or maybe you just prefer the slightly nuttier flavor of oat bran. You can totally swap the wheat bran for oat bran in this recipe. It’s a great way to switch things up!
The only difference is the soaking time. Since oat bran is a little different structurally, I’ve found you need to let it sit in that boiling water for about 15 minutes instead of just 10. This gives it time to fully absorb the liquid so your final muffin isn’t dry. It’s a tiny extra wait, but totally worth it for those **Oat Bran Muffins Idea** variations.
Step-by-Step Guide to Making Easy Muffin Recipes for Bran Muffins
Okay, here’s the best part—turning those simple ingredients into delicious **bran muffins**! This whole process moves really fast once you get started, so make sure you’ve got your muffin tin already lined. This is one of those easy muffin recipes that feels special but takes almost no time at all. You want to preheat your oven to 400 degrees Fahrenheit right away. Get those liners in, or grease those cups well!
Then, we start with the soaking step. Combine your wheat bran cereal with that cup of boiling water. This step is non-negotiable for moisture! Let that sit and get happy for a full 10 minutes. Don’t rush it!
Mixing the Batter for Moist Bran Muffins
Once the bran has soaked, pour in your milk, oil, egg, vanilla, and maple syrup. Give that a quick stir. In a separate bowl—always separate your wet and dry, it keeps things neat—whisk the flour, baking soda, and salt together. When you combine them, just mix until everything *just* comes together. I mean it: **do not overmix**! Seriously, a few streaks of flour remaining are fine. If you mix too much, the gluten activates, and bye-bye moisture!
If you decided to add those lovely raisins or chopped apple pieces, fold those in gently right at the very end. Divide the batter evenly into your 12 cups, filling them about two-thirds full.
Baking Time and Doneness Test for Bran Muffins
Pop those beauties into that hot 400°F oven. They bake fast because of the oven temperature, usually taking just 15 to 18 minutes. You need to watch them closely!
When testing for doneness, the toothpick is your best friend. Stick one right into the center of a muffin—if it comes out with moist crumbs clinging to it, they are done! If you see wet batter, give them two more minutes. If the stick comes out spotless and dry, pull them out immediately so they don’t overbake!
Tips for Success When Baking Bran Muffins
We’ve covered the recipe, but sometimes the difference between a great muffin and an absolutely legendary muffin comes down to small things you only learn by making the recipe five, ten, twenty times. I want you to have legendary results right off the bat!
First, and this is something my mom always drilled into me: check your oven temperature! If your oven runs hot, those 15-18 minutes will turn into scorched tops and dry centers before you know it. If you don’t have an oven thermometer, grab one—they are cheap and they save so many baked goods from disaster. A sudden blast of high heat is what we want for a quick rise, but if it’s too hot past that initial blast, we dry out the bran.
Another little trick for supreme moisture when using optional add-ins like apples or raisins: toss them gently in about a teaspoon of extra flour before adding them to the batter. This tiny bit of coating stops the fruit bits from sinking straight to the bottom of the cup. Nobody wants a naked muffin top with a fruit swamp underneath, right? It keeps the distribution even.
Finally, if you’re using muffin liners, absolutely peel them off as soon as they’re cool enough to handle before storing them in your container. Liners trap steam, and steam equals sogginess eventually, even in the best-made **Moist Bran Muffins**!
Make-Ahead & Freezer Friendly Muffins Storage
This is seriously one of the best things about this recipe. If you’re baking these on a Sunday afternoon, you’re set for the entire work week! These **bran muffins** are fantastic when they are fresh, but they hold up beautifully to freezing, which makes them the ultimate **Grab And Go Breakfast** solution.
The absolute first rule? They have to be completely cooled. I repeat: completely cool. If you bag up warm muffins, all that trapped steam turns into messy condensation, and we end up with soggy bottoms, which is the opposite of what we are aiming for with these **Moist Bran Muffins**!
Once they are totally cooled down to room temperature, you can pop them straight into an airtight freezer bag. I usually fit about six to eight in one standard Ziploc bag. Stored this way, they stay fantastic for up to three months—that’s right, three months of ready-made breakfast!
When you need one for a quick breakfast, you have two easy options:
- The patient method: Take one out the night before and let it thaw overnight on the counter in its bag. It comes to the perfect temperature by morning.
- The urgent method: Pop that frozen muffin, still in the bag if you didn’t have time to pre-bag, into the microwave for just 15 to 20 seconds. It comes out soft and warm, ready to go.
You can also bake a big batch and keep leftovers on the counter in an airtight container for about three days, but frankly, they never last that long in my house! If you are interested in another great make-ahead breakfast idea that saves time in the morning, you should really look at my recipe for overnight peppermint mocha oats. It’s a total game-changer!
Serving Suggestions for Your Homemade Bran Muffins
Now that you have a perfect batch of **High Fiber Muffins**, how should you eat them? Honestly, they are great plain because they are so naturally moist, but I never stop there! Of course, if you need a quick **Grab And Go Breakfast**, just grab one and go—that’s the beauty of these **Healthy Breakfast Muffins**.
For a slightly more civilized morning moment, try slicing one in half when it’s slightly warm and spreading on a thin layer of salted butter. So good! A little cream cheese works wonders too, especially if you’ve added those optional raisins.
And if you’re looking for a cozy pairing, these muffins go perfectly alongside a warm cup of coffee or tea. Speaking of cozy flavor pairings, you might want to try my absolute favorite fall treat recipe next time: the pumpkin spice latte oatmeal bake. It’s just as wholesome!
Frequently Asked Questions About Bran Muffins Recipe
It’s natural to have questions when you are trying a new staple recipe! Even though these are meant to be some of the **Best Bran Muffins** you’ve ever had, I want to make sure you feel totally comfortable tweaking things for your pantry. Below are the questions I get most often about these **Homemade Bran Muffins**!
Are these bran muffins truly High Fiber Muffins?
Yes, absolutely they are! The main ingredient that drives the nutritional profile here is the wheat bran cereal itself. Just by using that ingredient as directed, you are packing a huge punch of fiber. When you look at the nutrition panel, you’ll see that 5 grams of fiber per muffin comes directly from that bran and the whole wheat flour base. They are fantastic for supporting digestion and keeping you full!
Can I make these Naturally Sweetened Muffins without maple syrup?
That’s a great question about keeping these **Naturally Sweetened Muffins** pure! Maple syrup is my choice because it adds moisture along with that lovely, subtle flavor, but you can totally swap it. My next favorite option is using honey—just use the same amount, 1/3 cup. Be warned, honey is a bit sweeter than maple syrup, so you might want to reduce it slightly, maybe to 1/4 cup plus 1 tablespoon.
Another option is using an equal amount of packed dark brown sugar instead of the liquid syrup. If you use brown sugar, reduce the milk slightly, maybe by 1 tablespoon, since you’re removing liquid from the recipe. It might change the final crumb just a tiny bit, but you’ll still get delicious results!
If you’re looking to branch out beyond bran into other simple quick breads, you absolutely have to check out my recipe for Irish Soda Bread Muffins next time!
What if I don’t have whole wheat flour? Can I use All-Purpose Flour?
I totally get it; sometimes the whole wheat flour bag is empty! You can substitute an equal amount of all-purpose flour, but I do want to warn you: the texture will change slightly. Whole wheat flour is heavier and absorbs more moisture, which is part of what makes these so sturdy. If you use all-purpose flour, your **bran muffins** might come out a touch lighter and less dense, but they should still be moist because we drenched the bran in liquid!
Can I skip the boiling water step?
Oh, please don’t skip that! That boiling water is crucial. Wheat bran is tough, and it needs that high heat to soften up really quickly—it’s what ensures you get soft, fluffy **Moist Bran Muffins** instead of gritty, hard bits in your bite. If you don’t have a kettle, just heat the water on the stove until it’s steaming hot or use the microwave. Just make sure it’s hot enough to really hydrate that bran before you add the other liquids!
Reader Feedback and Next Steps for Wholesome Baked Goods
Seriously, I want to hear how these turned out for you! Did you use the chopped apple or stick to raisins? Let me know in the comments below, and don’t forget to give the recipe a star rating!
If you loved how easy and wholesome these turned out, you have to check out my full collection of wholesome baked goods recipes. Happy baking!
Print
Moist High-Fiber Bran Muffins
- Total Time: 33 min
- Yield: 12 muffins 1x
- Diet: Vegetarian
Description
A simple recipe for making moist, high-fiber bran muffins perfect for a make-ahead breakfast or snack.
Ingredients
- 1 1/2 cups wheat bran cereal
- 1 cup boiling water
- 1/2 cup milk
- 1 large egg
- 1/4 cup vegetable oil
- 1/3 cup maple syrup
- 1 teaspoon vanilla extract
- 1 1/2 cups whole wheat flour
- 1 teaspoon baking soda
- 1/2 teaspoon salt
- 1/2 cup raisins or chopped apple (optional)
Instructions
- Preheat your oven to 400 degrees Fahrenheit (200 degrees Celsius). Line a 12-cup muffin tin with paper liners or grease the cups.
- In a large bowl, combine the wheat bran cereal and boiling water. Let this mixture stand for 10 minutes to soften the bran.
- Add the milk, egg, vegetable oil, maple syrup, and vanilla extract to the bran mixture. Stir until just combined.
- In a separate medium bowl, whisk together the whole wheat flour, baking soda, and salt.
- Add the dry ingredients to the wet ingredients. Mix briefly until just moistened. Do not overmix. If using, fold in the raisins or apple pieces now.
- Divide the batter evenly among the prepared muffin cups, filling each about two-thirds full.
- Bake for 15 to 18 minutes, or until a toothpick inserted into the center comes out clean.
- Let the muffins cool in the pan for a few minutes before transferring them to a wire rack to cool completely.
Notes
- For extra moisture, you can substitute plain yogurt for the milk.
- These muffins freeze well. Cool completely, then place them in an airtight freezer bag for up to three months. Thaw overnight on the counter or reheat briefly in the microwave.
- If you prefer oat bran, substitute oat bran for the wheat bran cereal, but you may need to increase the soaking time to 15 minutes.
- Prep Time: 15 min
- Cook Time: 18 min
- Category: Breakfast
- Method: Baking
- Cuisine: American
Nutrition
- Serving Size: 1 muffin
- Calories: 180
- Sugar: 10
- Sodium: 150
- Fat: 6
- Saturated Fat: 1
- Unsaturated Fat: 5
- Trans Fat: 0
- Carbohydrates: 30
- Fiber: 5
- Protein: 5
- Cholesterol: 20