


Hey there, fellow parents! Sarah here, and I’m so excited to share one of my absolute favorite go-to recipes for busy weeknights: these incredible kid-friendly veggie sushi hand rolls. If you’re anything like me, you’re always on the hunt for meals that are quick, healthy, and actually get eaten without a fuss. Well, let me tell you, these hand rolls tick all those boxes and more!
I still remember the first time I tried making sushi at home. It felt like such a huge, complicated task. But after a lot of trial and error (and a few messy kitchen adventures with Leo and Mia!), I cracked the code. Now, these kid-friendly veggie sushi hand rolls are a regular star in our dinner rotation. They’re fun to make, even more fun to eat, and packed with good-for-you veggies.
My kids, Leo and Mia, absolutely adore them. It’s truly a mealtime win when they ask for seconds!
Why You’ll Love These Kid-Friendly Veggie Sushi Hand Rolls
- They are super quick to whip up. As a busy parent, I know every minute counts!
- Making them is easy peasy. No fancy culinary skills needed here.
- These rolls are packed with good nutrition. It’s a great way to get veggies in.
- Kids find them so fun to eat. Mia loves rolling her own little creations.
- They are perfect for picky eaters. Leo will actually eat his carrots this way!
- You can customize fillings endlessly. This keeps mealtime exciting.
Essential Equipment for Kid-Friendly Veggie Sushi Hand Rolls
You don’t need a lot of fancy gadgets for these kid-friendly veggie sushi hand rolls. Most likely, you have these items already!
- Medium Saucepan: For cooking that perfect sushi rice.
- Large Mixing Bowl: Great for cooling and seasoning your rice.
- Wooden Spoon: It helps gently mix the rice without mashing it.
- Sharp Knife: Essential for slicing your veggies and finished rolls. A damp knife prevents sticking.
- Cutting Board: Always use one for safe, easy chopping.
See? Simple tools for a fun, delicious meal!
Ingredients for Kid-Friendly Veggie Sushi Hand Rolls
Gathering your ingredients is the first step to making these yummy kid-friendly veggie sushi hand rolls. Here’s what you’ll need:
- 1 cup sushi rice: This rice is sticky, making it perfect for rolling.
- 1½ cups water: For cooking our rice just right.
- 1 tablespoon rice vinegar: It gives the sushi rice that classic, tangy flavor.
- 1 teaspoon sugar: Balances the vinegar in the rice seasoning.
- ½ teaspoon salt: Enhances all the flavors in your rice.
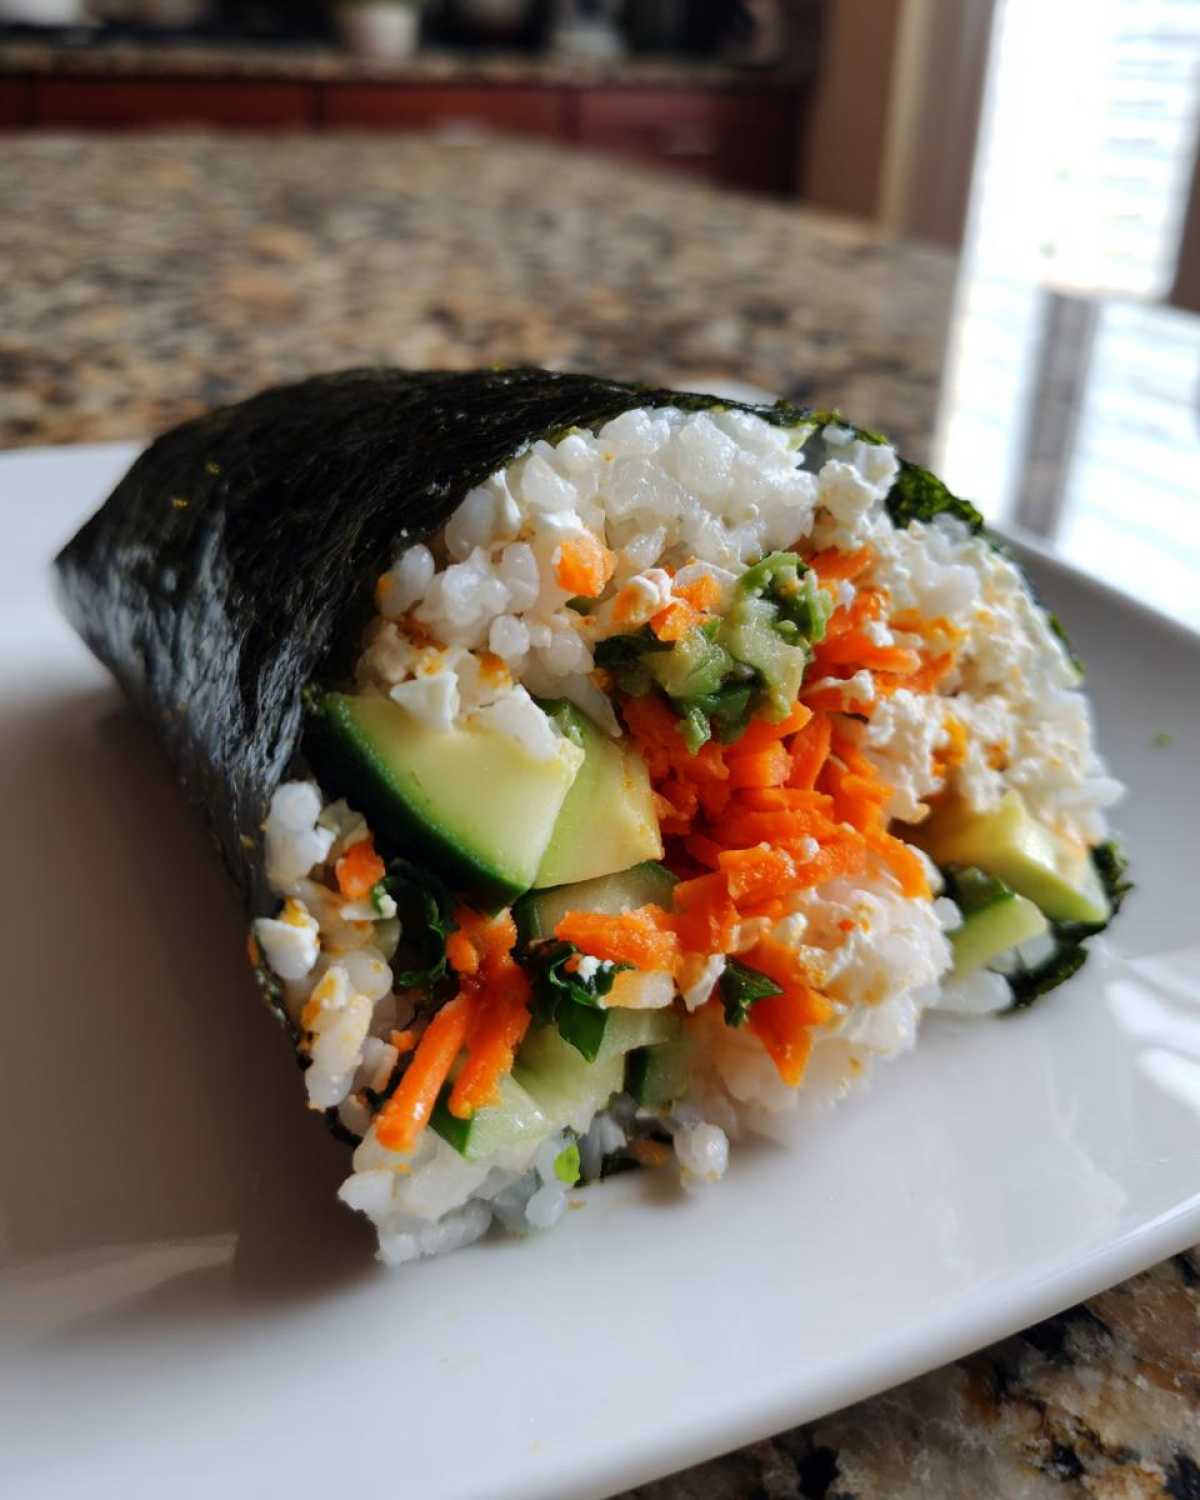
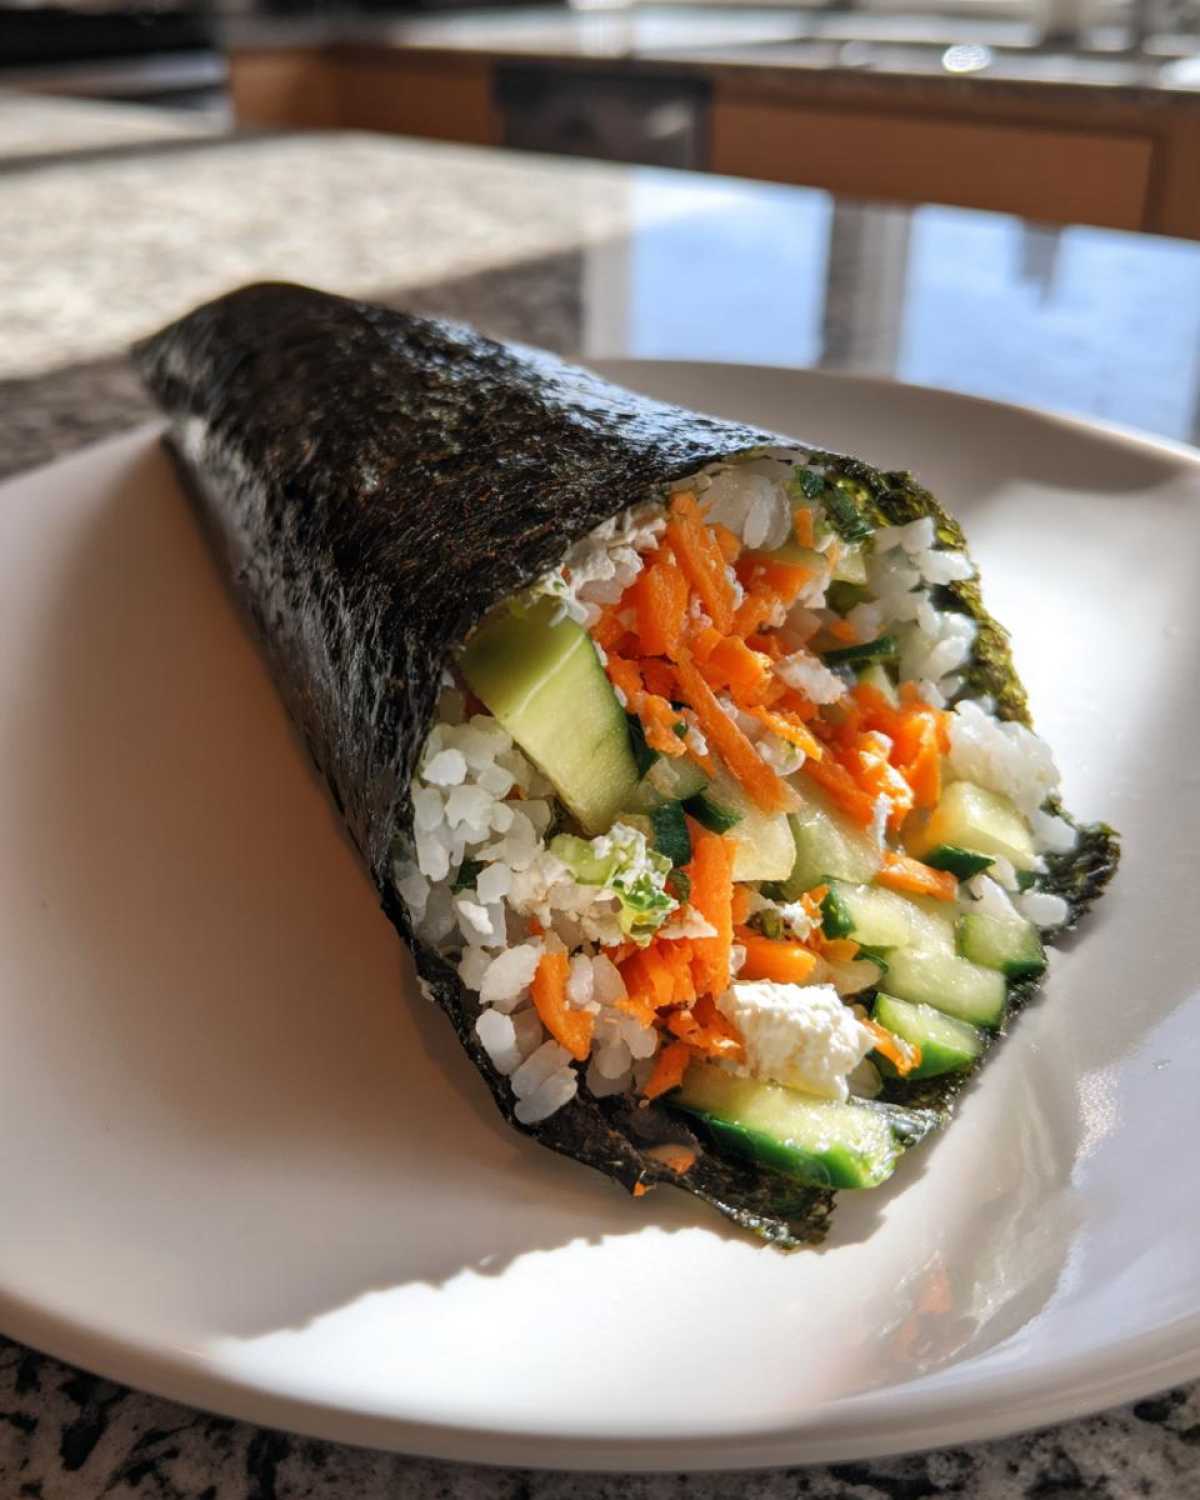
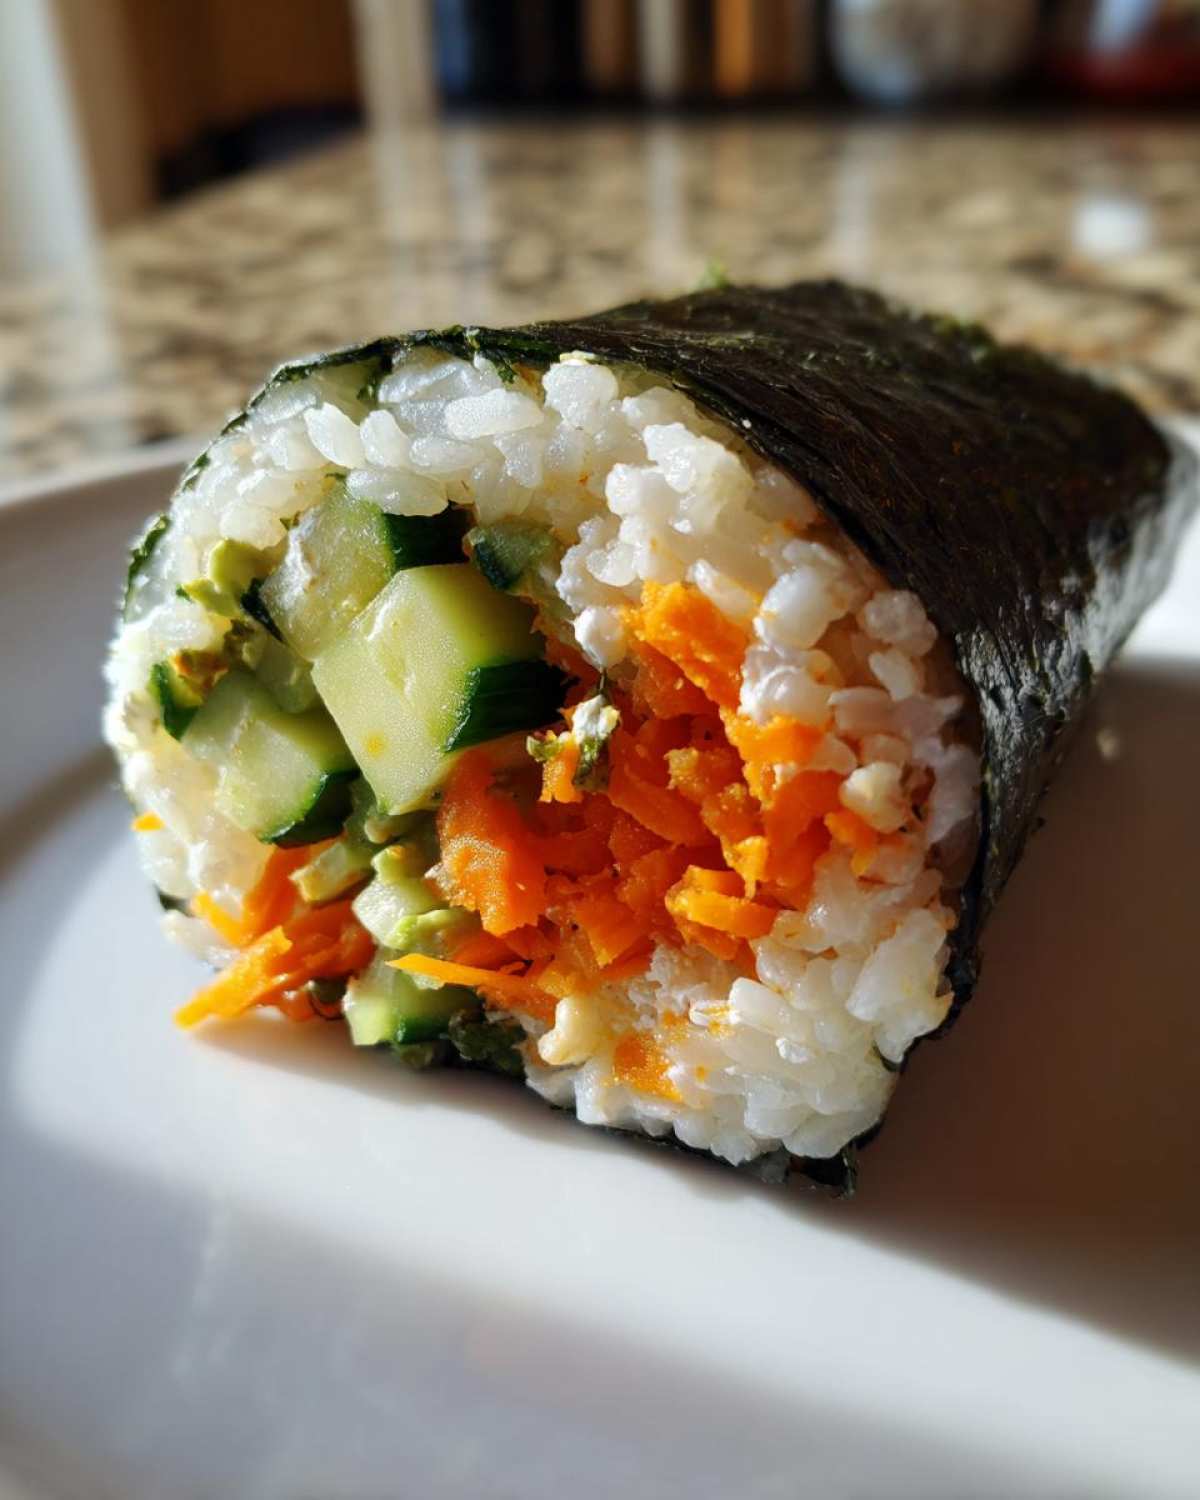
- 4 sheets nori: These seaweed sheets hold everything together.
- ½ cup finely grated carrots: Adds a sweet crunch and bright color.
- ½ cup finely diced cucumber: Brings a refreshing, cool crispness.
- ¼ cup thinly sliced avocado: For a creamy texture and healthy fats.
- 2 tablespoons cream cheese or hummus: This acts as our delicious “glue” and adds flavor.
Always pick fresh veggies. They make such a difference in taste!
Ingredient Notes and Smart Substitutions for Kid-Friendly Veggie Sushi Hand Rolls
Making these kid-friendly veggie sushi hand rolls adaptable is key! If you need to swap things out, no problem.
- Veggies: Try finely chopped bell peppers or cooked sweet potato sticks. Leo loves sweet potato in his!
- Spread: Nut-free butter can work instead of cream cheese. Just use a thin layer.
- Rice: While sushi rice is best, short-grain white rice can also work.
- Nori: If your child dislikes nori, wrap fillings in thin cucumber slices. You can also make rice balls.
These changes keep the rolls fun and tasty for all kids!
How to Prepare Your Kid-Friendly Veggie Sushi Hand Rolls
Making these kid-friendly veggie sushi hand rolls is simpler than you think! Just follow these steps.
- Rinse the rice: Put the sushi rice in a sieve. Rinse it under cold water. Keep rinsing until the water runs clear. This removes extra starch.
- Cook the rice: Combine the rinsed rice and water. Use a medium saucepan. Bring it to a boil. Then, lower the heat to low. Cover the pot tightly. Simmer for 15 minutes. All the water should be absorbed.
- Rest the rice: Take the pan off the heat. Keep it covered. Let it sit for 10 minutes. This steaming makes the rice perfect.
- Make the seasoning: In a small bowl, whisk rice vinegar, sugar, and salt. Stir until everything dissolves.
- Season the rice: Transfer the cooked rice to a large bowl. Pour the vinegar mixture over it. Gently fold it in with a wooden spoon. Don’t mash the rice. Let it cool completely. Room temperature is best. This cooling step is important.
- Prepare to roll: Lay one sheet of nori flat. Use a clean surface. Slightly dampen your hands. This stops rice from sticking.
- Spread the rice: Spread about ½ cup of rice onto the nori. Leave a ½ inch border on one end. That border helps seal the roll.
- Add the spread: Spread a thin layer of cream cheese or hummus. Put it across the center of the rice.
- Place the fillings: Arrange carrots, cucumber, and avocado. Make a neat line over the spread. Don’t overfill!
- Roll it up: Start rolling from the end closest to you. Roll the nori tightly. Moisten the far edge with water. Press to seal the roll.
- Repeat: Do the same with your remaining nori and fillings.
- Slice or serve: Slice each roll into 6-8 pieces. Use a sharp, damp knife. Or, leave them whole as hand rolls. Mia likes to hold her own!
- Enjoy: Serve your delicious rolls right away.
Tips for Perfect Kid-Friendly Veggie Sushi Hand Rolls
I’ve learned a few tricks to make these kid-friendly veggie sushi hand rolls even better. They really help.
- Dampen your hands: Keep a small bowl of water nearby. Wetting your hands prevents rice from sticking.
- Don’t overfill: Too many fillings make rolling hard. A little goes a long way.
- Roll tightly: A firm roll stays together. This prevents crumbling.
- Use a damp knife: Wipe your knife with water before slicing. It gives cleaner cuts.
- Involve the kids: Let them choose fillings. Leo loves placing the cucumber! This makes them more likely to eat it.
Creative Variations for Kid-Friendly Veggie Sushi Hand Rolls
These kid-friendly veggie sushi hand rolls are super versatile. Get creative with fillings!
- Protein boost: Add cooked chicken, tofu, or scrambled egg strips.
- Different veggies: Try finely chopped bell peppers or blanched asparagus.
- Sweet rolls: Use fruit like mango or banana. A little cream cheese works well.
- Crunchy additions: Toasted sesame seeds or crumbled corn chips add texture.
Have fun experimenting with your family’s favorites!
Serving and Storing Your Kid-Friendly Veggie Sushi Hand Rolls
These kid-friendly veggie sushi hand rolls are great on their own. But you can serve them with some soy sauce, if your kids like it. A small bowl of edamame or fruit salad makes a nice side. For leftovers, store any extra rice and fillings separately. Put them in airtight containers. Keep them in the fridge for up to two days. Always check for freshness before serving again. We want everyone to stay safe!
Common Questions About Kid-Friendly Veggie Sushi Hand Rolls
I get lots of questions about these kid-friendly veggie sushi hand rolls. Here are some common ones:
Can I make these ahead of time?
You can prep everything! Cook the rice and chop your veggies. Store them separately in the fridge. Assemble the hand rolls just before serving. This keeps them fresh and tasty.
What if my child doesn’t like nori?
That’s totally fine! You can skip the nori. Make rice balls instead. Just mix the rice with the fillings. Form them into small, bite-sized balls. Mia likes them this way some days.
How do I make them gluten-free?
These veggie sushi hand rolls are naturally gluten-free. Just make sure your rice vinegar is gluten-free. Some brands can contain gluten. Check the label to be safe.
Can I add cooked protein?
Absolutely! Thin strips of cooked chicken work well. You could also use cooked shrimp. Just make sure it’s plain and diced small. This adds extra protein to your kid-friendly meal.
Estimated Nutritional Information for Kid-Friendly Veggie Sushi Hand Rolls
I know many of you care about nutrition. So, here’s an estimated look at what one serving of these kid-friendly veggie sushi hand rolls offers. Remember, these are approximate values.
- Calories: About 250
- Fat: Around 7g
- Carbohydrates: Roughly 40g
- Protein: Approximately 6g
- Sugar: About 5g
- Sodium: Around 300mg
It’s a great, balanced meal for your little ones!
Share Your Kid-Friendly Veggie Sushi Hand Rolls Success!
I hope your family loves these kid-friendly veggie sushi hand rolls as much as mine does! I’d love to hear how they turn out for you. Did your kids try new veggies? What were their favorite fillings? Please share your stories in the comments below. You can also rate the recipe. Or, share your creations on social media! Tag ChildRecipe.com. Happy rolling!
Print
Amazing Kid-Friendly Veggie Sushi Hand Rolls: 1 Genius Family Trick
- Total Time: 45 minutes
- Yield: 4 servings 1x
- Diet: Vegetarian
Description
These kid-friendly veggie sushi hand rolls are perfect for busy parents. They are easy to make, nutritious, and fun for children to eat.
Ingredients
- 1 cup sushi rice
- 1½ cups water
- 1 tablespoon rice vinegar
- 1 teaspoon sugar
- ½ teaspoon salt
- 4 sheets nori (seaweed sheets)
- ½ cup finely grated carrots
- ½ cup finely diced cucumber
- ¼ cup thinly sliced avocado
- 2 tablespoons cream cheese or hummus
Instructions
- Rinse the sushi rice under cold water until the water runs clear.
- Combine the rice and water in a medium saucepan. Bring to a boil, then reduce heat to low, cover, and simmer for 15 minutes, or until all water is absorbed.
- Remove from heat and let stand, covered, for 10 minutes.
- In a small bowl, whisk together the rice vinegar, sugar, and salt until dissolved.
- Transfer the cooked rice to a large bowl. Pour the vinegar mixture over the rice and gently fold it in with a wooden spoon until combined. Let the rice cool to room temperature.
- Lay one sheet of nori on a clean surface. Dampen your hands slightly to prevent sticking.
- Spread about ½ cup of the cooled sushi rice evenly over the nori, leaving a ½ inch border at one end.
- Spread a thin layer of cream cheese or hummus across the center of the rice.
- Arrange a small amount of carrots, cucumber, and avocado in a line over the cream cheese/hummus.
- Starting from the end closest to you, carefully roll the nori tightly into a cylinder. Moisten the far edge of the nori with a little water to seal the roll.
- Repeat with the remaining nori and fillings.
- Slice each roll into 6-8 pieces using a sharp, damp knife. Alternatively, leave them as hand rolls for younger children to hold.
- Serve immediately.
Notes
- For picky eaters, involve them in choosing the fillings.
- You can use other finely chopped vegetables like bell peppers or cooked sweet potato.
- If your child doesn’t like nori, you can make rice balls with the fillings inside.
- Store leftover rice and fillings separately in airtight containers in the refrigerator for up to 2 days.
- Prep Time: 20 minutes
- Cook Time: 25 minutes
- Category: Main Dish
- Method: Rolling
- Cuisine: Japanese
Nutrition
- Serving Size: 1 roll
- Calories: 250
- Sugar: 5g
- Sodium: 300mg
- Fat: 7g
- Saturated Fat: 3g
- Unsaturated Fat: 4g
- Trans Fat: 0g
- Carbohydrates: 40g
- Fiber: 3g
- Protein: 6g
- Cholesterol: 10mg

