Hey there, fellow parents! Are you juggling a million things, trying to whip up something tasty, and then facing a tiny human who declares, “I don’t like that!” My kitchen often feels like a beautiful, chaotic whirlwind. Finding quick, easy, and genuinely kid-approved recipes can feel like a superpower. That’s exactly why I started Child Recipe – to share those kitchen wins with you!
Today, I’m so excited to share one of our absolute family favorites: Kid-Friendly No-Bake Mini Fruit Tartlets. These little gems are a lifesaver on busy days. They need zero baking, which is a huge win when time is short. Plus, they are incredibly customizable. You can use whatever fruits your little ones love most.
I remember when Leo was going through a phase where he’d only eat red fruits. These tartlets were perfect! I could load his with strawberries and raspberries. Mia, on the other hand, loves all sorts of colors, so her tartlets are always a rainbow. Watching them happily munch on something I made, with their own fruit choices, just makes my heart sing.
This recipe isn’t just easy; it’s a fun activity to do together. It turns dessert into a delightful experience. Trust me, these Kid-Friendly No-Bake Mini Fruit Tartlets will become a staple in your home too!
Why You’ll Love These Kid-Friendly No-Bake Mini Fruit Tartlets
The Joy of Kid-Friendly No-Bake Mini Fruit Tartlets
I get it. Life with kids is busy. That’s why these Kid-Friendly No-Bake Mini Fruit Tartlets are a dream come true! They are so simple to make. You won’t need to turn on your oven. This saves you time and keeps your kitchen cool. Plus, they are quick to put together. In less than an hour, you’ll have a delightful treat ready. It really cuts down on mealtime stress. These tartlets make dessert fun. They add a little bit of joy to our day.
Perfect for Picky Eaters
One of the best things about these Kid-Friendly No-Bake Mini Fruit Tartlets is how flexible they are. Every child has their own fruit preferences, right? With these, they pick their own fruit toppings. This makes them feel like part of the process. It also makes them more likely to eat it all up!
I remember Leo went through a phase. He would only eat blueberries. I could load his tartlets with just blueberries. Mia, my little explorer, loves trying new things. Her tartlets are always a mix of colors. This recipe truly helps avoid those mealtime battles. It’s a win-win for everyone.
Essential Ingredients for Your Kid-Friendly No-Bake Mini Fruit Tartlets
Gathering Your Kid-Friendly No-Bake Mini Fruit Tartlets Supplies
Before we dive into the fun part, let’s gather everything we need. Having all your ingredients ready makes the process smooth. It feels less chaotic, which is always a plus. For these Kid-Friendly No-Bake Mini Fruit Tartlets, you’ll need a few simple things. We start with one 8-ounce package of cream cheese. Make sure it’s softened!
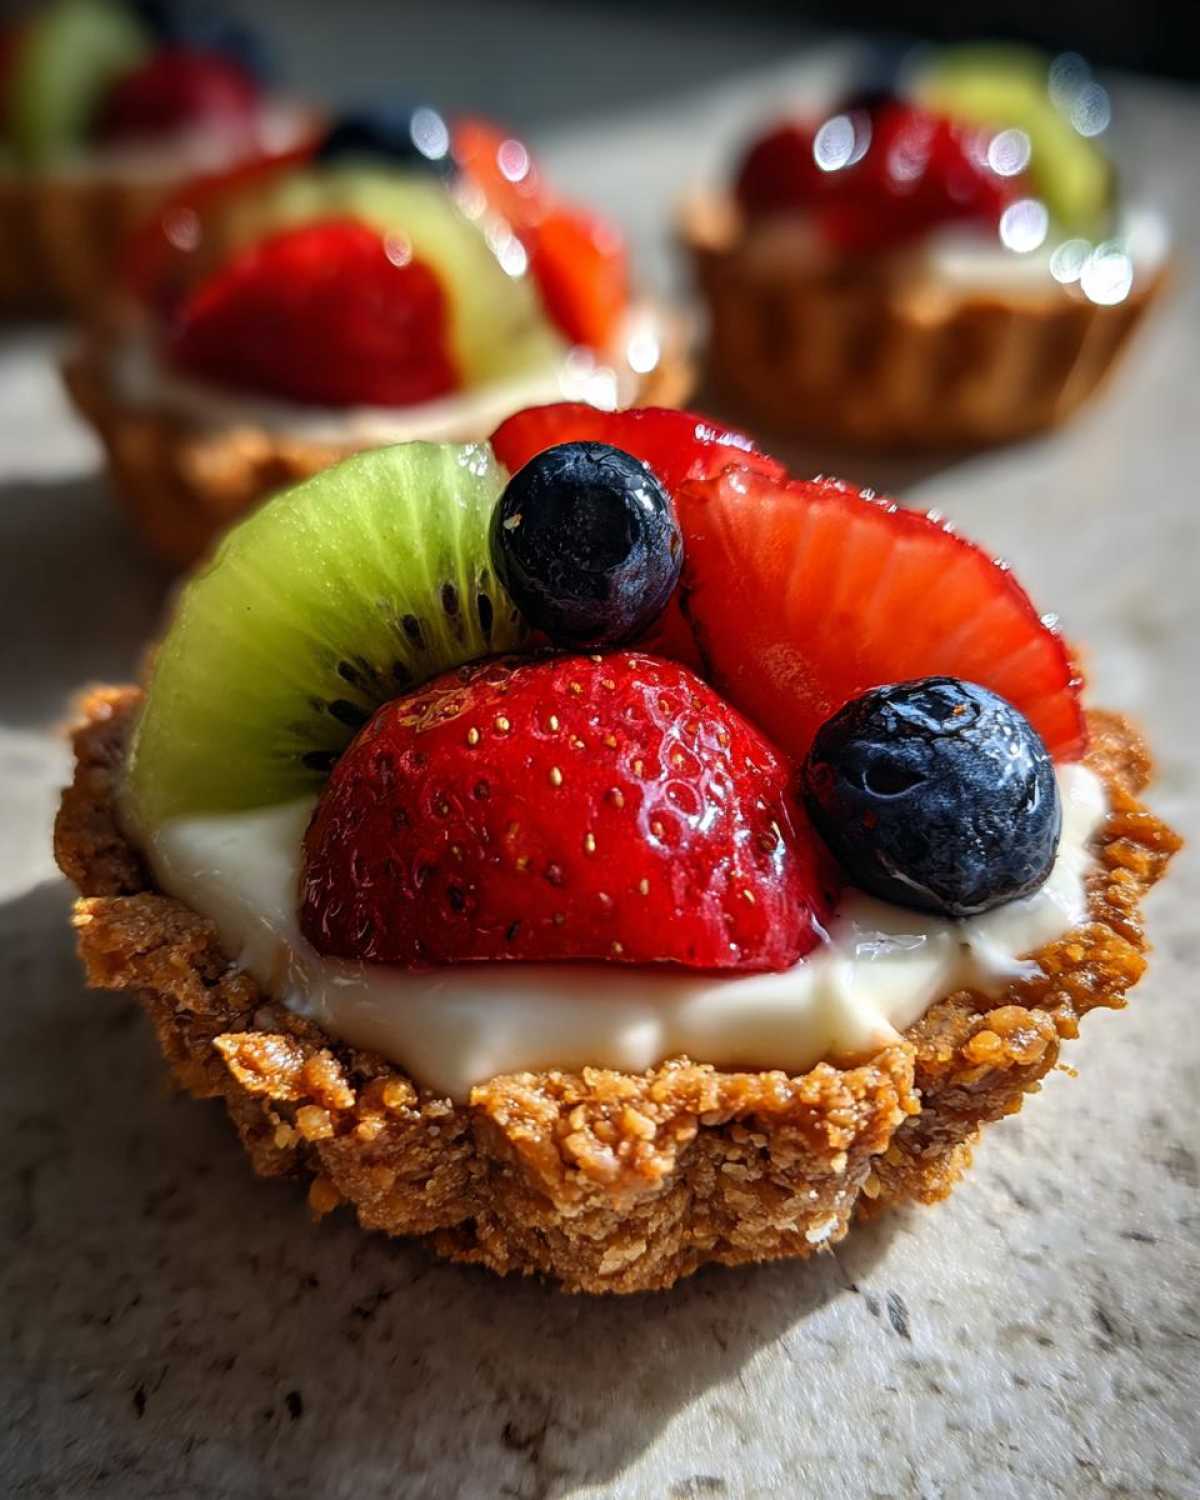
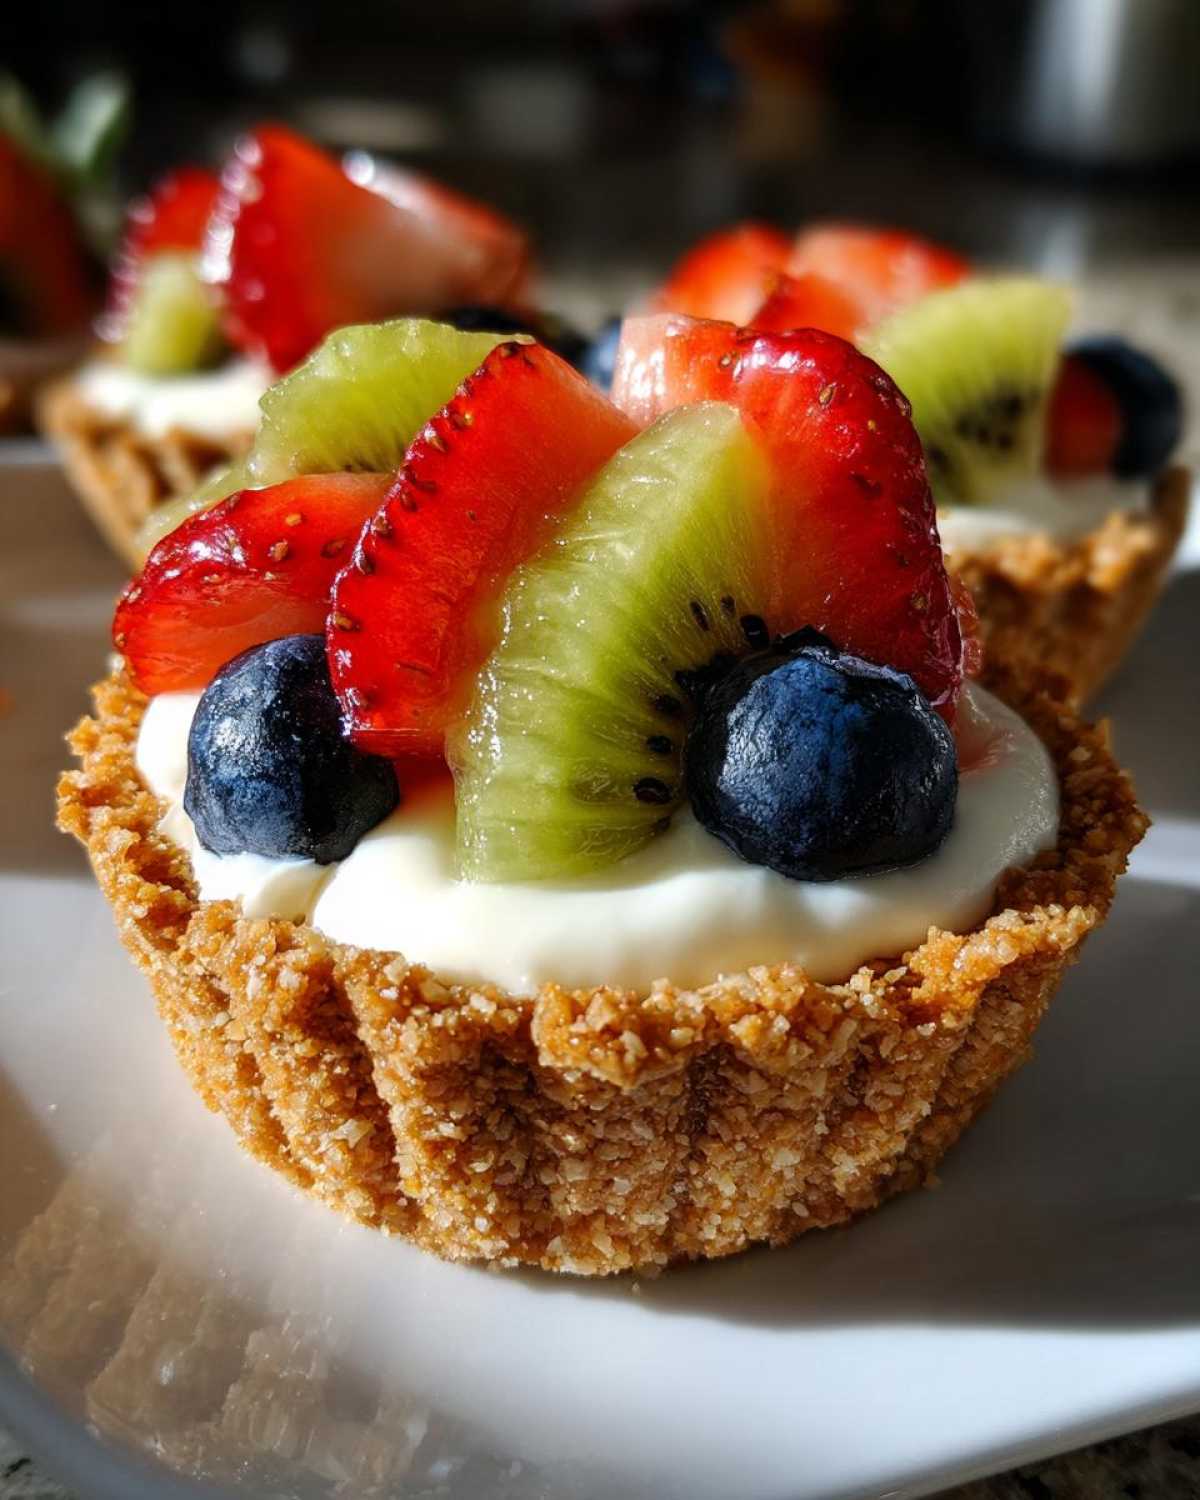
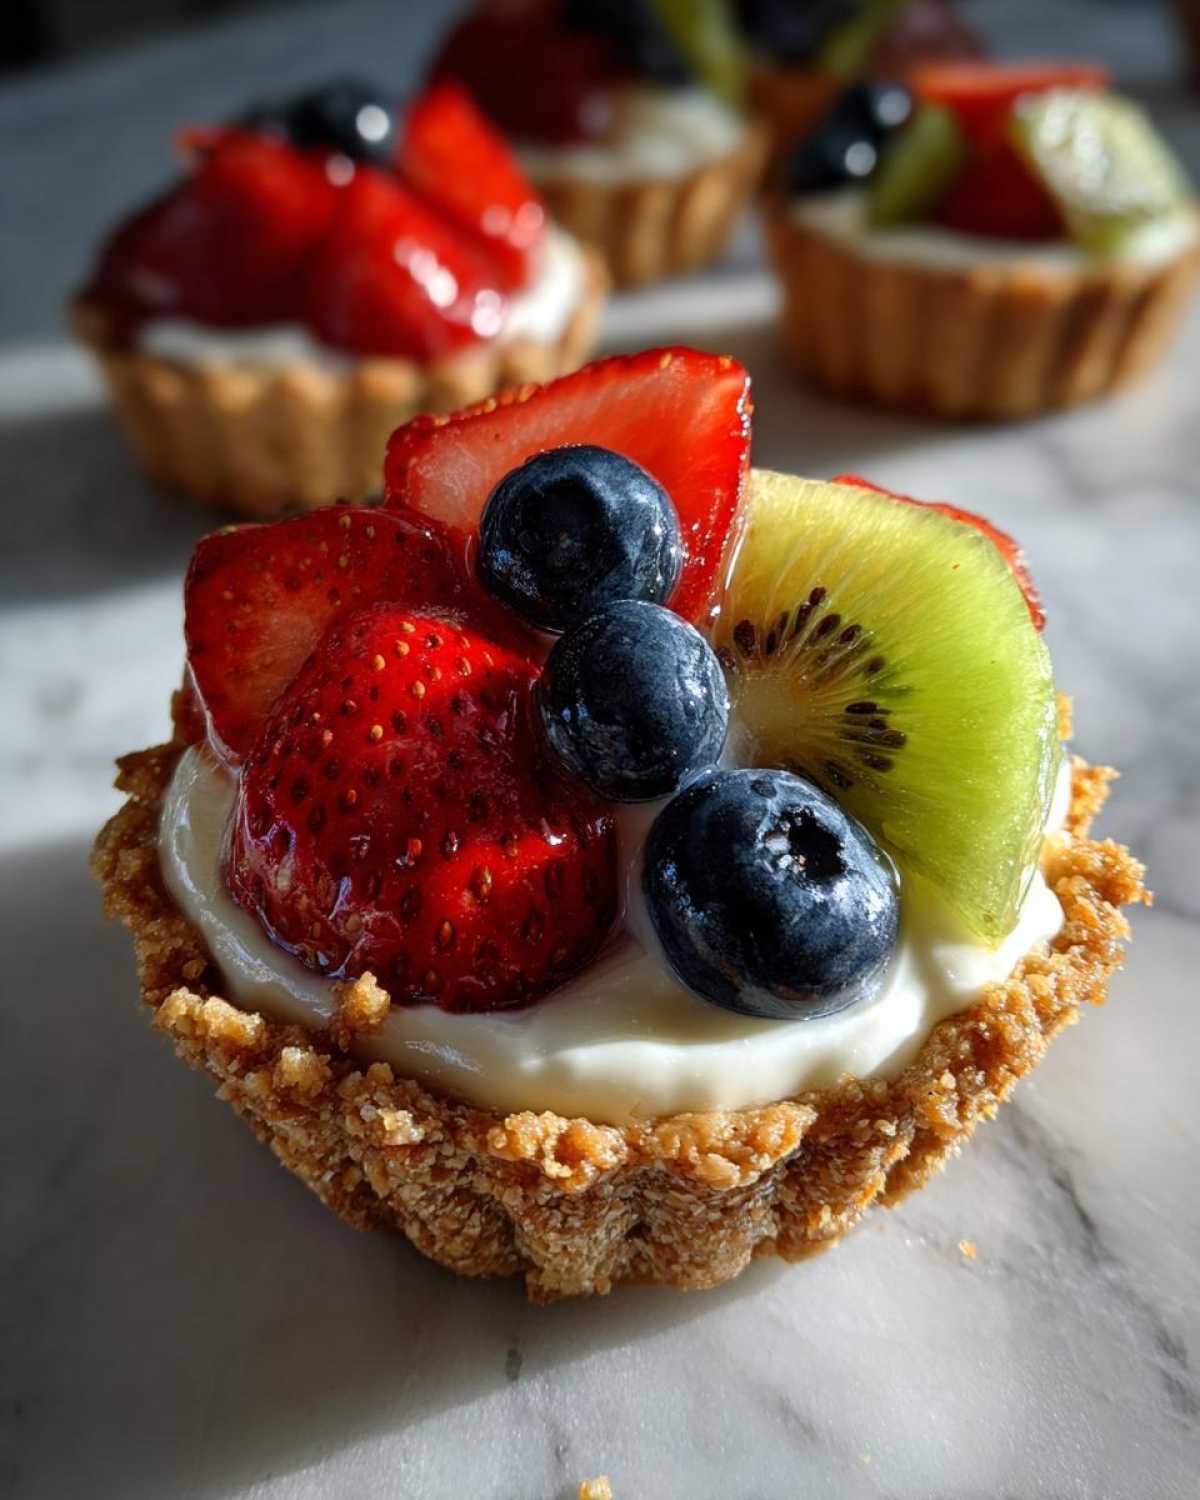
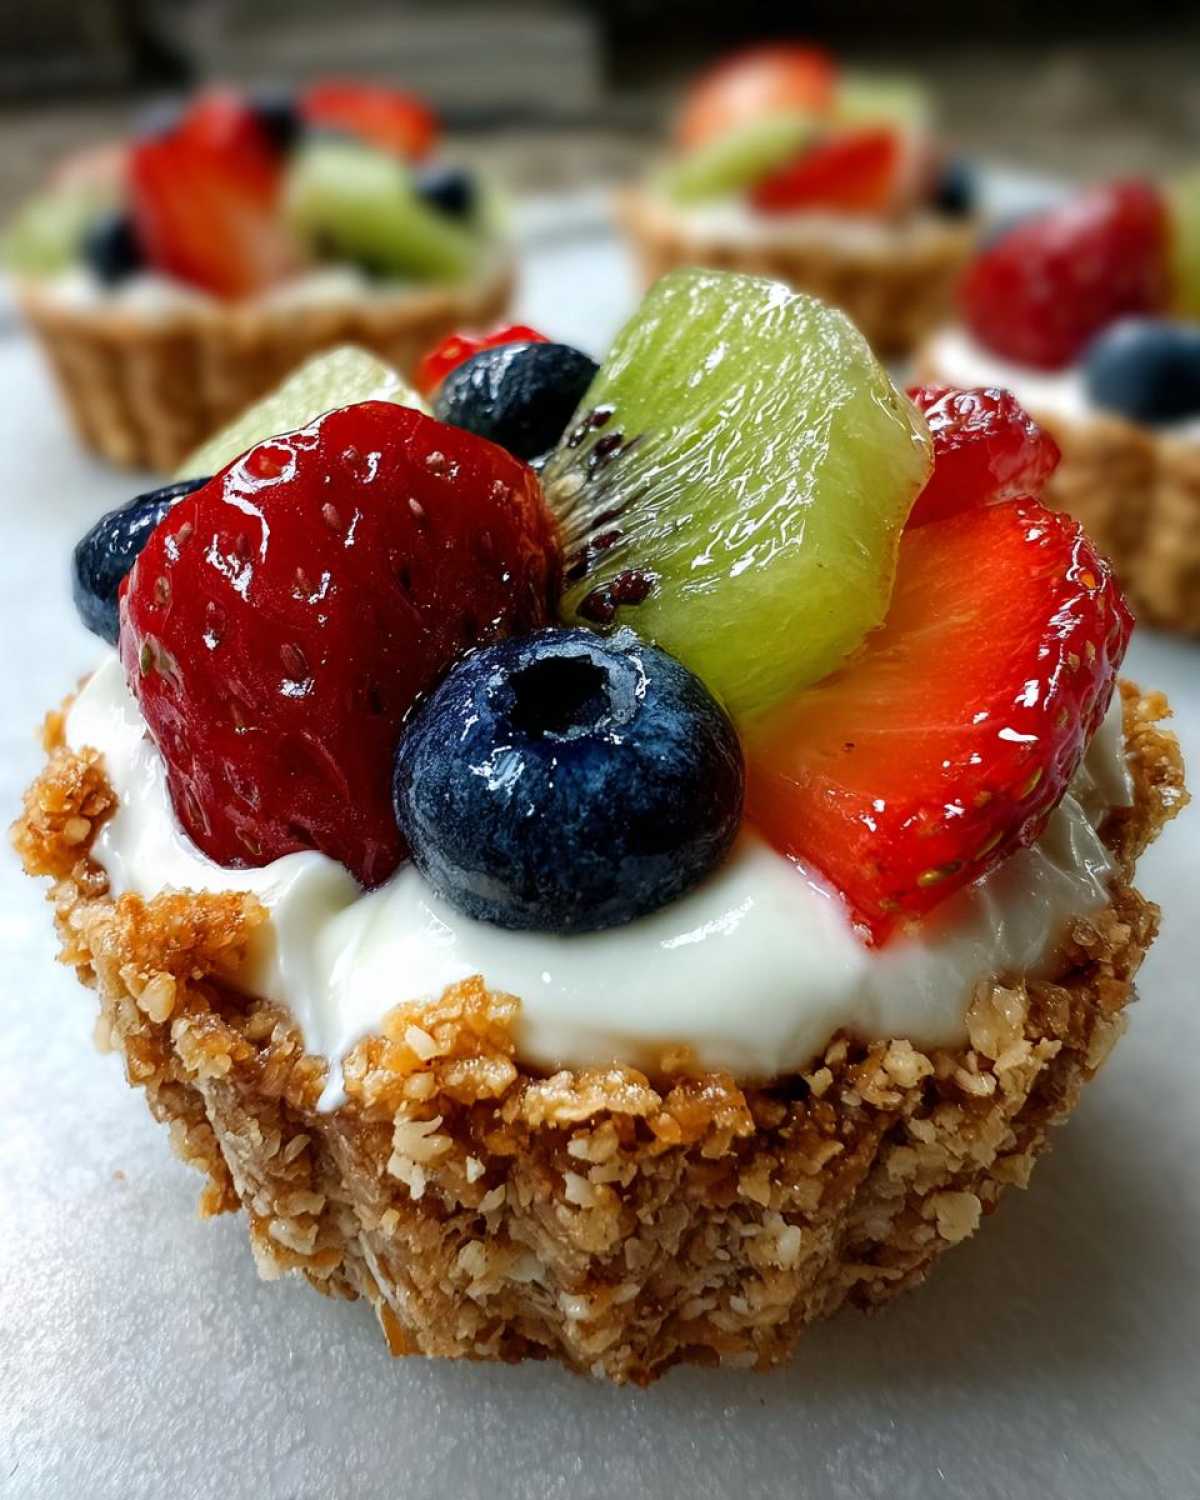
You’ll also need half a cup of granulated sugar. A teaspoon of vanilla extract adds that lovely flavor. Then, one 8-ounce container of whipped topping, thawed, is essential. This creates our creamy, dreamy filling. Don’t forget two 4-ounce packages of mini phyllo shells. These are our crispy little bases. Finally, grab your kids’ favorite assorted fresh fruit. Think sliced strawberries, blueberries, or kiwi. Having these ready makes assembly a breeze!
Step-by-Step Guide to Making Kid-Friendly No-Bake Mini Fruit Tartlets
Preparing Your Creamy Filling for Kid-Friendly No-Bake Mini Fruit Tartlets
Making the creamy filling for your Kid-Friendly No-Bake Mini Fruit Tartlets is easy. First, get a medium-sized bowl ready. Add your softened cream cheese to it. Next, pour in the granulated sugar. Now, beat these two together. Use an electric mixer or a whisk. You want it smooth and creamy. Make sure there are no lumps in it. Then, stir in the vanilla extract. Mix it until everything is well combined. Finally, gently fold in the thawed whipped topping. Do this carefully. You want to keep the mixture light and airy. Keep folding until no white streaks of whipped topping remain. This makes the filling perfect.
Assembling Your Kid-Friendly No-Bake Mini Fruit Tartlets
Now comes the fun part: assembling your Kid-Friendly No-Bake Mini Fruit Tartlets! Take your creamy filling. You can spoon it into each mini phyllo shell. Or, if you have one, use a piping bag. This makes it look really neat. Mia loves helping with this step. She carefully spoons the filling into each shell. She’s getting really good at it!
Once the shells are filled, it’s time for the fruit. Arrange assorted fresh fruit on top. Be creative! You can make patterns or just pile it high. Leo’s favorite part is placing the fruit. He likes to make little designs. This is where your kids can truly make them their own. It’s a great way to get them involved.
Chilling for Perfect Kid-Friendly No-Bake Mini Fruit Tartlets
After assembling, your Kid-Friendly No-Bake Mini Fruit Tartlets need to chill. This step is super important. It helps the filling set properly. Place all your tartlets in the refrigerator. Let them chill for at least 30 minutes. This makes them firm and delicious. It also keeps the phyllo shells nice and crispy. A good chill ensures they hold their shape. Then they will be ready to enjoy!
Tips for Perfect Kid-Friendly No-Bake Mini Fruit Tartlets
Making Your Kid-Friendly No-Bake Mini Fruit Tartlets Shine
You’ve made these lovely Kid-Friendly No-Bake Mini Fruit Tartlets. Now, let’s make them truly sparkle! For an extra special touch, try a simple glaze. This adds both shine and a bit more sweetness. You can warm up some apricot jam. Just a spoonful or two in a small pot. Brush it lightly over the fruit. Or, make a quick glaze. Mix powdered sugar with a tiny bit of milk. Stir it until smooth. Drizzle this over the fruit. It makes them look so professional! It really elevates the presentation.
Getting Kids Involved with Kid-Friendly No-Bake Mini Fruit Tartlets
One of the best parts of making Kid-Friendly No-Bake Mini Fruit Tartlets is getting the kids involved. It’s such a fun activity! Mia loves to help spoon the cream cheese mixture. She’s careful not to overfill them. Leo, my little artist, takes charge of the fruit. He carefully places each berry. Sometimes he even makes little faces! It’s a great way to bond. It also teaches them about cooking. Plus, they are more likely to eat what they helped make. Remember, these tartlets are best fresh. Try to eat them the same day. The phyllo shells can soften over time.
Common Questions About Kid-Friendly No-Bake Mini Fruit Tartlets
Can I Make Kid-Friendly No-Bake Mini Fruit Tartlets Ahead of Time?
You can definitely prepare the filling for your Kid-Friendly No-Bake Mini Fruit Tartlets a day in advance. Just keep it covered in the fridge. However, I always recommend assembling the tartlets right before serving. The phyllo shells are super delicate. They can get a bit soggy if filled too early. For the best texture, aim to serve them within a few hours of making them. This keeps those shells wonderfully crisp.
What are the Best Fruits for Kid-Friendly No-Bake Mini Fruit Tartlets?
The best fruits for your Kid-Friendly No-Bake Mini Fruit Tartlets are truly up to your kids! My little ones love berries. Blueberries, raspberries, and sliced strawberries are always a hit. Mandarin orange segments work well too. Kiwi slices add a nice green pop. The key is to use fresh, ripe fruit. This makes the tartlets extra delicious. Let your child pick their favorites. This makes them even more eager to eat them!
How Long Do Kid-Friendly No-Bake Mini Fruit Tartlets Last?
Kid-Friendly No-Bake Mini Fruit Tartlets are best enjoyed the same day you make them. The phyllo shells are prone to absorbing moisture. This makes them soft over time. If you do have leftovers, store them in an airtight container. Keep them in the refrigerator. They might last a day or two. But the shells won’t be as crisp. Trust me, they usually disappear quickly in our house!
Estimated Nutritional Information for Kid-Friendly No-Bake Mini Fruit Tartlets
I know many of us parents like to keep an eye on nutrition. For these Kid-Friendly No-Bake Mini Fruit Tartlets, each serving is about 90 calories. Please remember, these numbers are estimates. They can change based on the specific brands you use. Fruit sizes also play a role. It’s a sweet treat to enjoy in moderation!
Share Your Kid-Friendly No-Bake Mini Fruit Tartlets Creations!
I absolutely adore seeing your kitchen creations! Have you tried making these Kid-Friendly No-Bake Mini Fruit Tartlets? I would love to hear all about it! Did your little ones enjoy helping? What fruits did they choose? Please share your experiences in the comments below. You can even upload a photo of your beautiful tartlets! Your feedback helps me and other parents. Let’s build a community of happy little eaters!
Print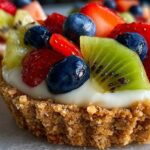
Horror! 1 of 2 picky eaters craved Kid-Friendly No-Bake Mini Fruit Tartlets
- Total Time: 1 hour (includes chilling time)
- Yield: 18-24 mini tartlets 1x
- Diet: Vegetarian
Description
These Kid-Friendly No-Bake Mini Fruit Tartlets are a simple, fun, and delicious dessert perfect for little hands and picky eaters. They feature a buttery graham cracker crust filled with a creamy, sweet cream cheese mixture and topped with fresh, colorful fruit.
Ingredients
- 1 ½ cups graham cracker crumbs (about 10–12 full graham cracker sheets)
- ½ cup unsalted butter, melted
- ¼ cup granulated sugar
- 8 ounces cream cheese, softened
- ½ cup powdered sugar
- 1 teaspoon vanilla extract
- ½ cup heavy cream, cold
- Assorted fresh fruit for topping (strawberries, blueberries, raspberries, kiwi, mandarin oranges, etc.)
Instructions
- In a medium bowl, combine the graham cracker crumbs, melted butter, and granulated sugar. Mix until well combined and the crumbs are moistened.
- Press about 1-2 tablespoons of the graham cracker mixture firmly into the bottom and up the sides of mini muffin tins or tartlet molds. You can use a small glass or your fingers to help press it down.
- Chill the crusts in the refrigerator for at least 15-20 minutes to set.
- While the crusts are chilling, prepare the filling. In a large bowl, beat the softened cream cheese until smooth and creamy.
- Add the powdered sugar and vanilla extract to the cream cheese and beat until fully incorporated and smooth.
- In a separate cold bowl, whip the cold heavy cream until soft peaks form.
- Gently fold the whipped cream into the cream cheese mixture until no streaks remain and the filling is light and fluffy.
- Spoon or pipe the cream cheese filling into the chilled graham cracker crusts.
- Arrange an assortment of fresh fruit on top of each tartlet.
- Chill the finished tartlets for at least 30 minutes before serving. This helps the filling set and makes them easier to handle.
Notes
- For extra fun, let your kids help press the crusts and decorate with their favorite fruits.
- These tartlets are best eaten the same day, but can be stored in an airtight container in the refrigerator for up to 2 days.
- If you don’t have mini muffin tins, you can use paper cupcake liners in a regular muffin tin, or even make a larger tart in a pie dish.
- Adjust the amount of sugar in the filling to your preference.
- You can use a variety of fruits based on what’s in season and your family’s favorites.
- Prep Time: 30 minutes
- Cook Time: 0 minutes
- Category: Dessert
- Method: No-Bake
- Cuisine: American
Nutrition
- Serving Size: 1 tartlet
- Calories: 150-200
- Sugar: 10-15g
- Sodium: 70-100mg
- Fat: 10-15g
- Saturated Fat: 6-9g
- Unsaturated Fat: 3-6g
- Trans Fat: 0g
- Carbohydrates: 15-20g
- Fiber: 1-2g
- Protein: 2-3g
- Cholesterol: 30-40mg