")
Okay, fellow parents, let’s talk about the morning rush. Or the after-school snack scramble. Finding something healthy, quick, and that our little ones will actually eat can feel like a superpower we just don’t have time to unlock, right?
I’ve been there, believe me. Many times. My kids, Leo and Mia, have gone through so many food phases. They’ve loved something one day and suddenly declared it “yucky” the next.
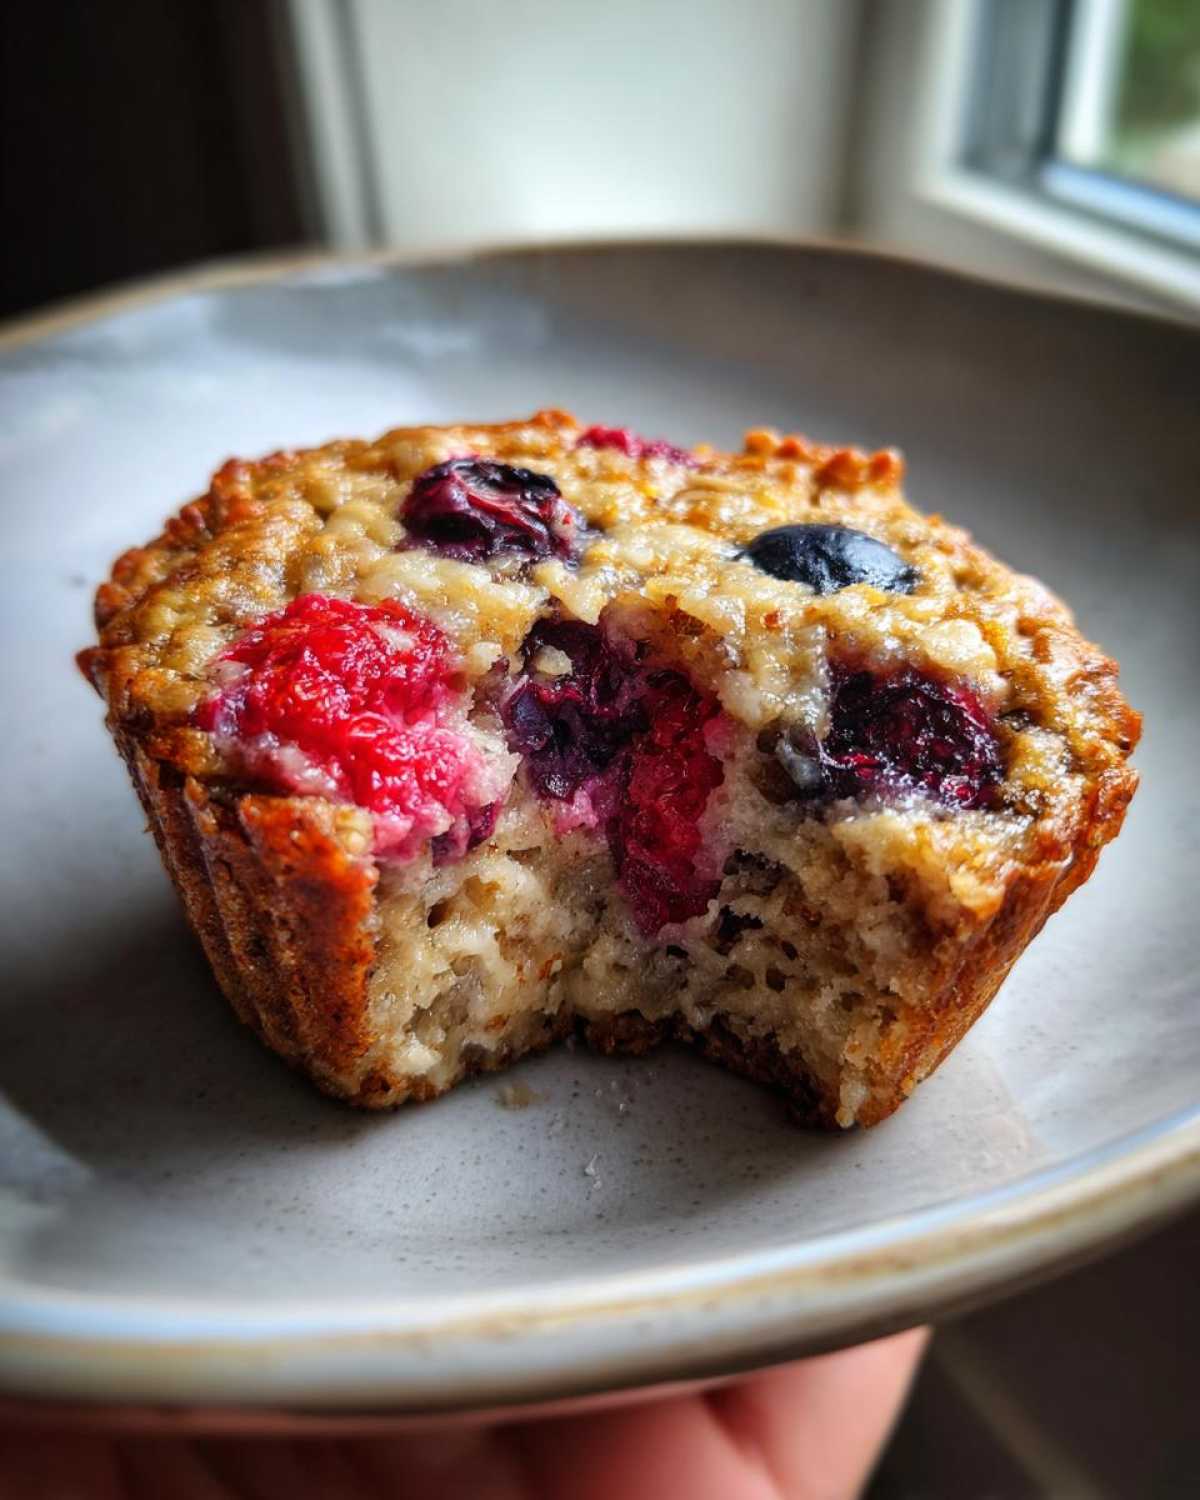
That’s why I’m so excited to share these Kid-Friendly Berry Oatmeal Cups (Gluten-Free) with you. They’ve become a total lifesaver in my house! I first whipped these up when I needed a grab-and-go breakfast that was also gluten-free for a friend’s visit.
Leo and Mia gobbled them right up. They didn’t even realize they were eating something good for them!
These little cups are seriously easy to make. They’re packed with yummy berries, naturally gluten-free if you use the right oats, and perfect for little hands. They really embody what Child Recipe is all about: making food that’s simple, tasty, and kid-approved, so you can stress less and enjoy those precious moments more.
Why You’ll Love These Kid-Friendly Berry Oatmeal Cups (Gluten-Free)
As a busy parent, I know you need recipes that work hard for you. These berry oatmeal cups totally fit the bill! They’re not just another recipe; they’re a little bit of sanity wrapped up in a delicious bite.
Here’s why I think you’ll fall in love with making these for your kiddos:
- They’re super quick to prep. Seriously, you can mix these up in under 10 minutes!
- Perfect for those crazy busy mornings when everyone is rushing. Just grab and go!
- They make amazing snacks too. Way better than reaching for something less healthy.
- Naturally gluten-free, making them a great option if you’re avoiding gluten.
- Packed with juicy berries, which are full of good stuff.
- Kids absolutely adore the taste. Mia calls them “berry cakes”!
- Their size is perfect for little hands to hold and munch on.
See? So many reasons to give these a try!
Simple Ingredients for Your Kid-Friendly Berry Oatmeal Cups (Gluten-Free)
One of the best things about these berry oatmeal cups is how simple the ingredients are. You likely have most of them in your pantry already! We’re keeping things straightforward, which is key when cooking for kids and busy schedules.
Using certified gluten-free oats is important if you need these to be truly gluten-free. This just means they were processed in a way that avoids cross-contamination.
Let’s get our ingredients ready!
Gathering Your Ingredients
- 2 cups certified gluten-free rolled oats
- 1 teaspoon baking powder
- 1/4 teaspoon salt
- 1/2 teaspoon ground cinnamon (optional, but lovely!)
- 1 large egg
- 1 cup milk (use dairy or your favorite non-dairy milk)
- 1/4 cup maple syrup or honey
- 2 tablespoons melted coconut oil or butter
- 1 teaspoon vanilla extract
- 1 cup fresh or frozen mixed berries (either works great!)
Make sure your measurements are clear. This helps everything come together just right.
Equipment You’ll Need
You won’t need any fancy gadgets for these kid-friendly berry oatmeal cups. Just the basics you likely have in your kitchen drawers!
Here’s what you’ll want to gather:
- A couple of mixing bowls (one large, one medium)
- A whisk or a fork
- A standard 12-cup muffin tin
- Measuring cups and spoons
See? Nothing complicated. Just simple tools for a simple, yummy recipe!
How to Make These Kid-Friendly Berry Oatmeal Cups (Gluten-Free)
Alright, let’s get to the fun part – making these delicious oatmeal cups! It’s a really simple process, perfect for getting little helpers involved too if you like. I often have Leo and Mia help with measuring or stirring. Just be ready for a little mess!
Follow these steps and you’ll have a batch of warm, berry-filled goodness ready in no time.
- First things first, preheat your oven. Set it to 375°F (that’s 190°C). While it’s heating up, get your muffin tin ready. I like to grease mine well or use paper liners. This makes sure those yummy cups pop out easily.
- In your large mixing bowl, toss together all the dry stuff. That’s your certified gluten-free oats, the baking powder, salt, and cinnamon if you’re using it. Give it a quick stir to combine everything evenly.
- Now, grab that medium bowl. Crack your large egg into it. Add the milk, maple syrup or honey, melted coconut oil or butter, and the vanilla extract. Whisk these wet ingredients together until they are nicely combined.
- Pour the wet mixture into the bowl with the dry ingredients. Stir gently until everything is just mixed. It’s important not to overmix here; a few dry spots are okay and will bake out. Overmixing can make them tough.
- Time for the stars – the berries! Gently fold your fresh or frozen mixed berries into the batter. You want them spread out but try not to smoosh them too much.
- Spoon the batter evenly into the prepared muffin cups. Fill them almost to the top.
- Pop the tin into your preheated oven. Bake for about 20 to 25 minutes. You’ll know they’re done when the edges look golden and the centers feel set, not jiggly.
- Once they’re baked, take the muffin tin out of the oven. Let the cups cool in the tin for a few minutes. This helps them hold their shape. Then, move them to a wire rack to cool completely before serving.
See? Super easy! Your kitchen will smell amazing, and you’ll have a batch of healthy treats ready for happy little faces.
Tips for Perfect Kid-Friendly Berry Oatmeal Cups (Gluten-Free)
Making these berry oatmeal cups is pretty straightforward, but a few little tricks I’ve learned along the way can make them turn out even better. I want you to have perfect results every time, just like I do now after a few batches!
- Don’t skip greasing the muffin tin well, even if using liners. It gives me perfect release every time.
- Remember that gentle mixing step? It really matters! Overmixing can make the cups tough instead of tender.
- When you fold in the berries, try to distribute them evenly so every cup gets some fruity goodness.
- Keep an eye on them towards the end of the baking time. Ovens can vary! They’re done when a toothpick inserted into the center comes out mostly clean.
- Letting them cool in the tin for a few minutes before moving them helps them firm up. It stops them from falling apart as you take them out.
Following these simple tips means you’ll have a batch of delicious, perfectly baked oatmeal cups ready for snack time or breakfast!
Customizing Your Kid-Friendly Berry Oatmeal Cups (Gluten-Free)
One of the best things about these oatmeal cups is how easy they are to change up! Kids love variety, and a few simple tweaks can make them feel brand new. It’s fun to experiment and see what your little ones like best.
Here are a few ideas I’ve tried that Leo and Mia have enjoyed:
- Add a sprinkle of mini chocolate chips with the berries. Everything is better with a little chocolate, right?
- Swap the cinnamon for a pinch of nutmeg or cardamom for a different spice flavor.
- Instead of mixed berries, try just blueberries, raspberries, or even chopped apples or peaches. Just make sure fruit pieces aren’t too big.
- A little zest from an orange or lemon can add a bright touch.
Don’t be afraid to get creative! These customizations keep things interesting and help tailor the oatmeal cups to your family’s tastes.
Frequently Asked Questions About Kid-Friendly Berry Oatmeal Cups (Gluten-Free)
I get lots of questions from parents about tweaking recipes to fit their family’s needs. It’s totally normal! These berry oatmeal cups are really flexible, which is another reason I love them. Here are some common questions I hear and my best answers based on making these countless times.
If you have another question, feel free to reach out! We’re all in this together.
Can I make these Kid-Friendly Berry Oatmeal Cups dairy-free?
Absolutely! Making these oatmeal cups dairy-free is super simple. Just swap the regular milk for your favorite non-dairy alternative. Almond milk, soy milk, oat milk, or even coconut milk beverage all work great. Make sure it’s unsweetened or plain so it doesn’t change the flavor too much. Also, use melted coconut oil or a dairy-free butter alternative instead of regular butter.
How long do these Kid-Friendly Berry Oatmeal Cups last?
These little berry oatmeal bites store really well! Once they’ve cooled completely, you can keep them in an airtight container on the counter for about 2 to 3 days. If you pop them in the refrigerator, they’ll stay fresh for up to a week. They also freeze beautifully! Just cool them, then put them in a freezer-safe bag or container. They’ll be good for up to 3 months.
Can I use quick oats instead of rolled oats?
You can use quick oats, but the texture will be different. Rolled oats give the cups a nice chewiness and hold their shape better. Quick oats will make the cups softer and perhaps a bit mushy. If you’re in a pinch and only have quick oats, they will still be edible, but I definitely prefer the texture with rolled oats for these berry oatmeal cups.
Storing and Enjoying Your Kid-Friendly Berry Oatmeal Cups
Okay, so you’ve made a batch or two of these delicious berry oatmeal cups. Now, how do you keep them fresh so you can enjoy them all week? It’s super easy!
Once your cups are completely cool, you have a few options. For quick snacks over the next couple of days, just pop them into an airtight container and leave them on the counter.
If you want them to last longer, stash them in the fridge. They’ll stay good for about a week there.
Need them for later? They freeze perfectly! Just put cooled cups in a freezer bag or container. They keep well for up to three months.
To reheat, you can microwave them for a few seconds or warm them gently in the oven.
Estimated Nutritional Information
As a home cook, I focus on using wholesome ingredients and making food my family loves. When it comes to nutritional information, it can vary quite a bit depending on the exact ingredients and brands you use.
Things like the type of milk, the sweetness of your maple syrup, or even the specific oats can make a difference.
Because of this, any nutritional breakdown would really just be an estimate. I’m not a registered dietitian, and giving specific numbers isn’t something I can accurately do.
Just know that these kid-friendly berry oatmeal cups are made with good stuff like oats and fruit!
Print
Joyful 10 min Kid-Friendly Berry Oatmeal Cups (Gluten-Free)
- Total Time: 35 minutes
- Yield: 12 cups 1x
- Diet: Gluten Free
Description
Easy gluten-free oatmeal cups packed with berries. Perfect for busy mornings or quick snacks. Kids love these simple, tasty bites.
Ingredients
- 2 cups certified gluten-free rolled oats
- 1 teaspoon baking powder
- 1/4 teaspoon salt
- 1/2 teaspoon ground cinnamon (optional)
- 1 large egg
- 1 cup milk (dairy or non-dairy)
- 1/4 cup maple syrup or honey
- 2 tablespoons melted coconut oil or butter
- 1 teaspoon vanilla extract
- 1 cup fresh or frozen mixed berries
Instructions
- Preheat oven to 375°F (190°C). Grease a 12-cup muffin tin or line with paper liners.
- In a large bowl, mix together the certified gluten-free oats, baking powder, salt, and cinnamon (if using).
- In a separate medium bowl, whisk together the egg, milk, maple syrup or honey, melted oil or butter, and vanilla extract.
- Pour the wet ingredients into the dry ingredients and stir until just combined. Do not overmix.
- Gently fold in the mixed berries.
- Divide the mixture evenly among the prepared muffin cups.
- Bake for 20-25 minutes, or until the edges are golden and the centers are set.
- Let cool in the muffin tin for a few minutes before transferring to a wire rack to cool completely.
Notes
- These cups can be stored in an airtight container at room temperature for 2-3 days or in the refrigerator for up to a week.
- They freeze well. Cool completely, then store in a freezer-safe bag or container for up to 3 months.
- Reheat gently in the microwave or oven.
- Let your kids help measure ingredients or add berries to the batter.
- Prep Time: 10 minutes
- Cook Time: 25 minutes
- Category: Breakfast
- Method: Baking
- Cuisine: American