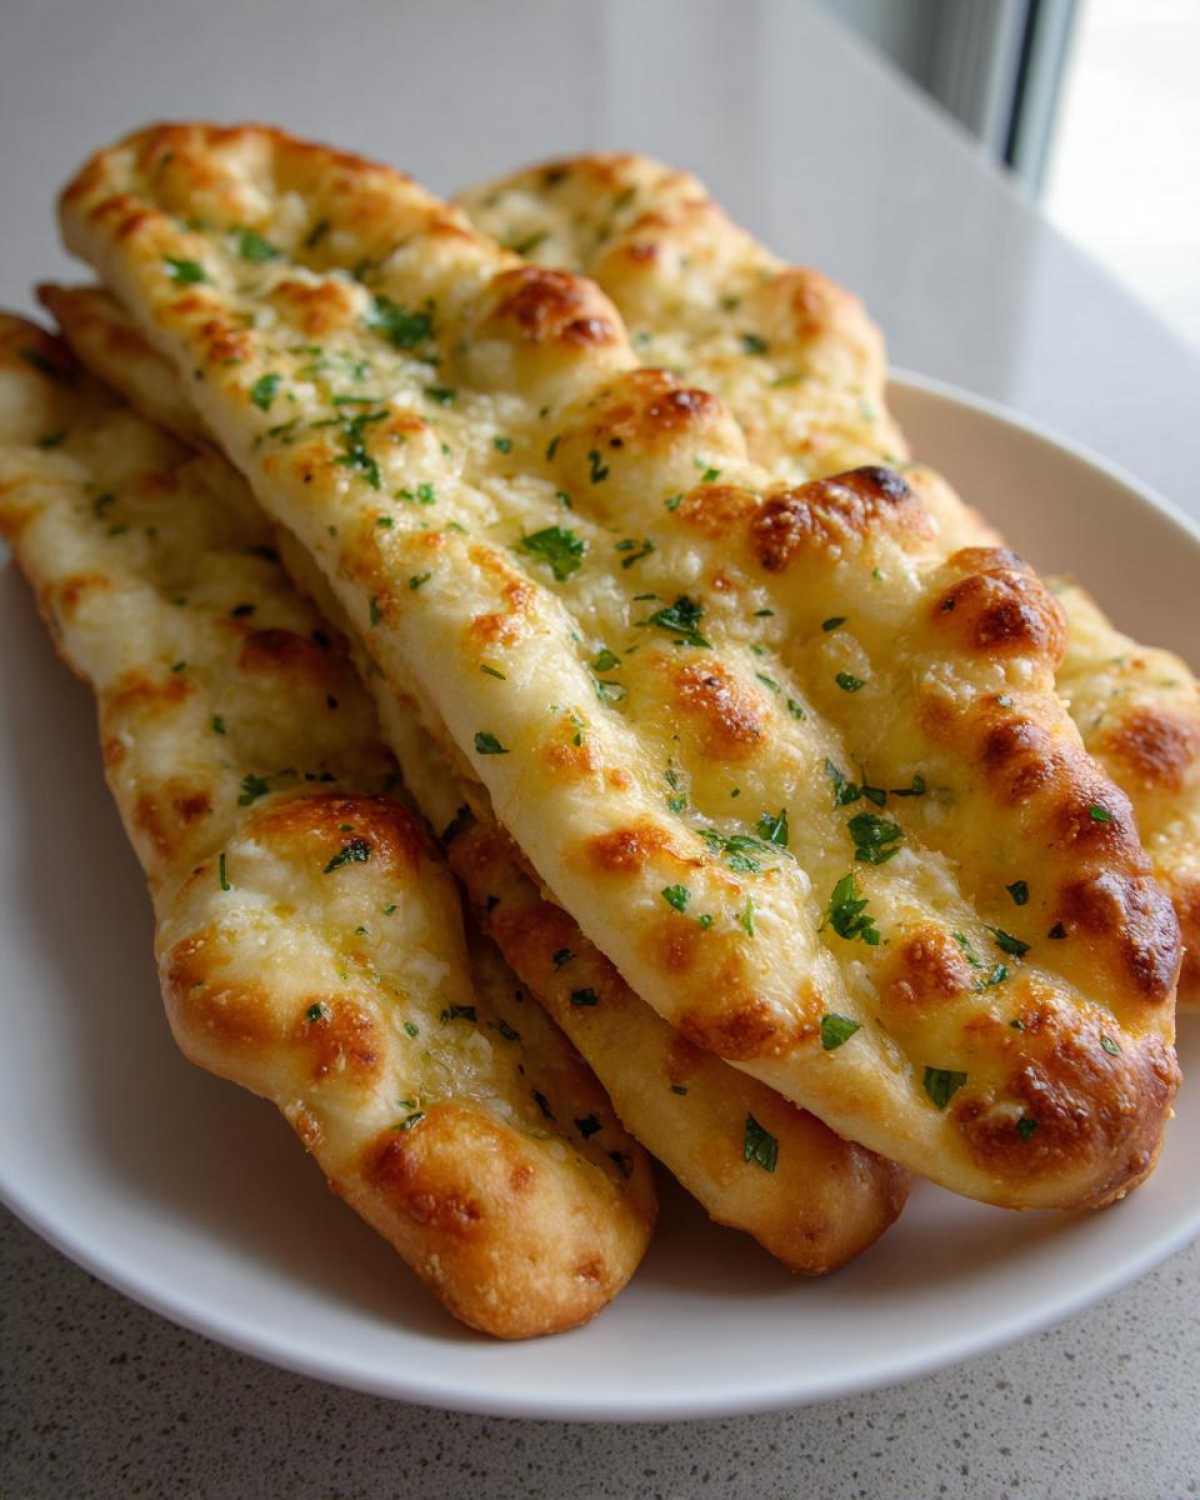
Oh my gosh, are you ever sitting on the couch wishing you had that basket of piping hot, unbelievably soft, buttery breadsticks sitting right next to you? I know I was! For years, I tried every recipe under the sun, and they all ended up too dry or too dense. But hold on to your mixing bowls, because after years of testing and minor kitchen catastrophes, I finally cracked the code. I’m sharing my recipe for The Ultimate Soft & Chewy Olive Garden Copycat Breadsticks with Garlic Parmesan Butter. Trust me, these homemade breadsticks are so incredibly light and pillowy, and that garlic butter? Forget about it! It’s my favorite dipping sauce, honestly.
Why These Soft Breadsticks Are Your New Favorite Dinner Side Dish Bread
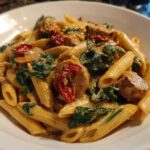
If you thought you needed a professional pizza oven to get that perfect texture, think again! These are the soft breadsticks dreams are made of. They’re unbelievably light, perfectly chewy, and absolutely swimming in flavor thanks to that fresh topping. Forget the frozen stuff; these restaurant style breadsticks are your new go-to for any meal. They make the best Dinner Side Dish Bread you can imagine. Pair them perfectly with some creamy buttery garlic mashed potatoes!
- They match that popular chain restaurant taste—that’s why I call them my copycat version!
- The final product is rich and wonderfully Buttery Breadsticks.
- They freeze like a dream, meaning you can have them any night of the week.
Achieving Restaurant Style Breadsticks Texture
The secret, honestly, is twofold. First, you need your water temperature spot on—not too hot, or you kill your yeast! We want that beautiful, slow rise that develops the structure. Second, you need to take your time kneading. Don’t rush it! When you knead for that full 5 to 7 minutes, you are building the gluten network specifically designed to give you that pull-apart chewiness instead of a dense, tough loaf. It’s all about technique with this Homemade Dough Recipe, and it pays off big time!
Ingredients for the Ultimate Olive Garden Breadsticks Copycat
Okay, gathering your supplies is the easy part, but choosing the *right* ones makes all the difference between good breadsticks and the best Homemade Breadsticks Recipe ever. We are breaking this down because we need ingredients for the dough, and then we need the stuff that turns them into those famous savory sticks.
If you’re looking for other easy bready things, you absolutely have to check out my recipe for soft fluffy skillet naan—it uses similar dough concepts!
Here’s what you need for about 12 incredible sticks:
- 1 cup warm water (Must be between 105-115 degrees F—test it with your finger, it should feel warm, not hot!)
- 2 1/4 teaspoons active dry yeast
- 1 tablespoon granulated sugar
- 2 1/2 cups all-purpose flour, plus more for dusting
- 1 teaspoon salt
- 2 tablespoons olive oil, plus more for greasing
And for that glorious finish:
- 1/2 cup (1 stick) unsalted butter, melted
- 4 cloves garlic, minced (Don’t even think about using jarred, please!)
- 1/2 cup grated Parmesan cheese
- 2 tablespoons fresh parsley, chopped
Ingredient Notes and Substitutions for Homemade Breadsticks Recipe
A quick word on your yeast: I specify active dry yeast because it needs that initial proofing time with the sugar and water to wake up. If you’re using instant yeast, you can cut out that first 5-minute wait and just mix it right in with the flour, but I find the active dry gives the dough a little more structure for these Chewy Breadsticks.
For the butter, always use real, unsalted butter in the topping. Margarine just won’t melt and emulsify the garlic and cheese the same way. And while dried parsley is fine in a pinch, fresh parsley melts into that gorgeous green color and the flavor is just so much brighter when mixed into the warm butter. You won’t regret taking the extra step here!
—
Step-by-Step Instructions for Easy Breadsticks Dough
Alright, let’s get this dough going! This is where the magic starts, and it’s surprisingly simple, even if you’re new to making your own Quick Bread Recipe from scratch. First up, we need to wake up that yeast. In a large bowl—make sure it’s big enough for all that flour later—combine your warm water, sugar, and active dry yeast. Resist the urge to poke it! Just let it sit there undisturbed for 5 to 10 minutes. You’re looking for it to get foamy and smell faintly yeasty. That foam means the yeast is alive and ready to work its bread-lifting wonders!
Once you have that beautiful foam, toss in your flour and salt, plus that little bit of olive oil. Mix it just until everything comes together into what I seriously call “shaggy dough.” Don’t worry if it looks messy; that’s exactly what you want before you start the hard work. This prevents you from adding too much flour right away. Then, turn that shaggy mess out onto a lightly floured counter. Now we knead! For these Easy Breadsticks, you need to push and fold it for a solid 5 to 7 minutes until you have a smooth, elastic ball—like a lovely, soft stress ball, but for eating!
If you love making doughs, check out how quick it is to whip up stovetop naan; it’s a great warm-up for mastering this Homemade Dough Recipe.
The Crucial First Rise for Chewy Breadsticks
Once your dough is perfectly smooth, give a clean bowl a light slick of olive oil and place your dough ball inside, turning it so it’s lightly coated all over. Then, cover that bowl up tight with plastic wrap or a clean kitchen towel. Now, you need to find it a cozy spot in your kitchen. Not too hot, not too cold—just a warm, draft-free area. We usually let ours hang out for anywhere from 60 to 90 minutes. The goal? The dough needs to double in size! You’ll know it’s ready when you peek under the towel and see it looking puffy and huge. Patience during this step guarantees those fantastic, Chewy Breadsticks later on.
Shaping and Baking Your Restaurant Style Breadsticks
Once your dough is perfectly risen, it’s time to get those sticks ready for the oven! First thing, crank that heat up! Preheat your oven to a nice, hot 400 degrees F (200 degrees C). While it heats up, grab a baking sheet and line it with parchment paper—this keeps those yummy bottoms from sticking, which is a lifesaver.
Gently punch the risen dough down to release the air—don’t punch it too hard, we don’t want to deflate all that hard work! Then, use a knife or bench scraper to divide the dough into 12 equal pieces. Take each piece and gently roll it out into a long, thin shape, about 8 to 10 inches long. They don’t need to be perfectly uniform; that’s part of the charm of making these Restaurant Style Breadsticks at home!
Now for the sneaky part that really boosts the texture: the second rise. Arrange your shaped sticks on the parchment-lined sheet, cover them loosely with a towel, and let them rest for about 15 minutes while the oven finishes heating. This small rest helps them puff up beautifully in the heat. If you love other soft doughs, you should definitely try my rosemary focaccia next!
Into the oven they go! Bake for just 10 to 12 minutes until they look lightly golden brown. They bake quickly, so keep an eye on them so they don’t get too dark!
Creating the Signature Garlic Parmesan Breadsticks Topping
Okay, this is the best part! Baking your breadsticks is just practice for the grand finale—drenching them in that glorious, savory, Garlic Butter Topping. Seriously, this is where the Olive Garden magic really happens! You need to start this right when the breadsticks go into the oven, because the timing has to be perfect; we want to brush the butter on them the second they come out.
Just melt that whole stick of butter in a small saucepan over low heat. Don’t rush this part! Once it’s liquid, stir in your finely minced garlic, your grated Parmesan cheese, and the fresh parsley. I like to gently warm this mixture just until you can really smell that sweet garlic aroma—we’re talking maybe 60 seconds. The most important warning I can ever give you about this Garlic Breadsticks Recipe is this: DO NOT let that garlic brown! Browned garlic gets bitter fast, and that’s just a tragedy when you have such beautiful dough waiting.
As soon as those hot breadsticks are out of the oven, grab your pastry brush and just slather that garlicky goodness all over every single stick. Don’t be stingy! If you’re making my garlic parmesan roasted broccoli, you can use that same butter measurement trick!
Tips for Extra Cheesy Breadsticks Finish
If you are making these for someone who is truly passionate about cheese—and who isn’t?—I have a little trick for those extra Cheesy Breadsticks!
Right after you apply the hot garlic butter, sprinkle just a tiny extra tablespoon of extra Parmesan right over the tops. The residual heat will melt it just enough so it clings beautifully, giving you those famous little cheesy spots without burning anything in the oven. That little extra flourish makes all the difference when you are diving into these Appetizer Bread Sticks!
Tips for Success with Homemade Breadsticks
Okay, so you’ve followed the steps, but maybe one of your breadsticks came out a little denser than the other, or perhaps you’re worried about making the dough on a super busy weeknight. Don’t stress! These are my tried-and-true fixes that I’ve learned over the years to guarantee perfection every time you make these breadsticks.
If your dough seems heavy after the first rise, that usually means you added too much flour during the kneading process. Remember, we want that dough to be slightly tacky—sticky enough to leave a shadow on your hand but not so sticky you can’t handle it. If you suspect you added too much flour, try adding just a tiny splash of warm water (maybe half a teaspoon at a time) during the kneading phase to rescue it. Don’t overcorrect, though!
Another thing: uneven baking! If your sheet pan is crowded, the breadsticks on the edges will cook way faster than the ones in the middle. Always give your sticks plenty of elbow room on that parchment paper. They need space to breathe and brown evenly across the whole surface. We want all 12 sticks to look—and taste—like glorious restaurant-quality pieces!
Now, let’s talk about the ultimate cheat code for when you’re craving this flavor but don’t have 90 minutes for rising. You can absolutely skip the entire dough-making process! Seriously! If you happen to have some pre-made Homemade Pizza Dough Recipe sitting in the fridge, use that. Just bring the dough to room temperature first, which makes it easier to work with. Roll it out just like my recipe states and follow steps 5 through 9. It’s a fantastic time saver when you need Appetizer Bread Sticks fast, and you can bake them up in about 15 minutes flat! For the best pizza dough tutorial, always check out my guide for foolproof pizza dough.
Just remember, with yeast baking, room temperature is your best friend. Make sure your butter for the topping is melted but not hot, and that your oven racks are centered for the best heat distribution. Happy baking!
Storage and Reheating Instructions for Buttery Breadsticks
These Buttery Breadsticks are best eaten moments after they come out of the oven, but leftovers are fantastic too! Store any extras in an airtight container at room temperature for up to two days. If they start feeling a little firm, the microwave is a quick fix—just stack two or three sticks on a paper towel and microwave for about 10 seconds. That steam gets them soft immediately!
For the best texture, though, skip the microwave! Reheat them in a 350-degree oven or toaster oven for about 4 minutes. That crisps up the outside just a tiny bit while warming the center perfectly. They taste almost as good as fresh!
Frequently Asked Questions About Making Breadsticks
Can I freeze the dough for these homemade breadsticks?
Absolutely! I often make a double batch just so I can freeze some for later breadsticks cravings. After the first rise (Step 4), punch the dough down gently, lightly coat it with olive oil, and place it in a zip-top bag. Press out all the air and flatten it as much as possible—this takes up less freezer space! It freezes beautifully for up to three months. When you’re ready to bake, just thaw it overnight in the fridge, let it warm up on the counter for about 30 minutes, then divide and shape as usual. If you want more tips on prepping ahead, check out my guide on make ahead breadsticks!
How can I make these Chewy Breadsticks spicy?
That’s a fun idea! If you like a little heat with your dinner, you have a couple of options. You can add a pinch of red pepper flakes directly into your dough mixture before the first rise. Or, for a bigger kick, stir about a 1/4 teaspoon of cayenne pepper directly into your melted Garlic Butter Topping when you add the garlic and Parmesan. It infuses the spice right into that buttery flavor—it’s delicious!
Can I use instant yeast instead of active dry yeast for these breadsticks?
Yes, you definitely can use instant yeast, but the process just changes slightly for this Homemade Breadsticks Recipe. If you use instant yeast, you can skip Step 1 entirely—you don’t have to wait for it to foam! Just mix the instant yeast directly into your bowl with the flour and the salt, and then add your warm water and olive oil, mixing until shaggy. Remember, instant yeast is pre-activated, so you might see a slightly faster rise time, but the texture should remain just as soft and wonderful.
Are these the same as Olive Garden Breadsticks Copycat recipes that use milk?
That’s a great question! Some popular copycat versions use milk instead of water to get a slightly richer texture, leaning more towards a soft dinner roll than a true breadstick. My recipe uses warm water exclusively because I find it keeps the breadsticks lighter and creates that signature stretchier, chewier texture that distinguishes those famous Italian-American appetizer sticks. If you want that slight richness though, you *can* swap out half the water for whole milk in Step 1, but you might need to knead just a minute longer!
Serving Suggestions for These Appetizer Bread Sticks
Now that you have a huge basket of the best homemade breadsticks in the neighborhood, what do you serve them with? Honestly, you could just eat them plain standing over the sink—I’ve certainly done it! But they truly shine as the absolute perfect companion for so many dishes.
Since these are clearly our favorite Appetizer Bread Sticks, my number one suggestion is always a big bowl of dipping sauce. A vibrant, warm marinara sauce is a non-negotiable pairing here. Or, if you’re serving these alongside a hearty meal, they are perfect for soaking up every last drop of broth. You won’t believe how well they go with a big, steaming bowl of Italian minestrone soup or a simple creamy tomato soup.
Beyond dips and soups, these buttery sticks are the ideal counterpart to any Italian-American feast. They are fantastic served alongside lasagna, baked ziti, or even just a big, fresh green salad with Italian dressing. Think of them as your ultimate, glorified dinner roll replacement. They are just so much more fun, right?
Print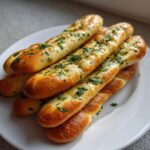
The Ultimate Soft & Chewy Olive Garden Copycat Breadsticks with Garlic Parmesan Butter
- Total Time: 1 hour 22 min
- Yield: 12 breadsticks 1x
- Diet: Vegetarian
Description
Make soft, chewy, restaurant-style breadsticks at home using this easy recipe, topped with a rich garlic parmesan butter.
Ingredients
- 1 cup warm water (about 105–115 degrees F)
- 2 1/4 teaspoons active dry yeast
- 1 tablespoon granulated sugar
- 2 1/2 cups all-purpose flour, plus more for dusting
- 1 teaspoon salt
- 2 tablespoons olive oil, plus more for greasing
- 1/2 cup (1 stick) unsalted butter, melted
- 4 cloves garlic, minced
- 1/2 cup grated Parmesan cheese
- 2 tablespoons fresh parsley, chopped
Instructions
- Activate the yeast: In a large bowl, combine the warm water, yeast, and sugar. Let stand for 5 to 10 minutes until foamy.
- Mix the dough: Add the flour, salt, and 2 tablespoons of olive oil to the yeast mixture. Mix until a shaggy dough forms.
- Knead the dough: Turn the dough out onto a lightly floured surface. Knead for 5 to 7 minutes until the dough is smooth and elastic.
- First rise: Lightly grease a clean bowl with olive oil. Place the dough in the bowl, turning to coat. Cover the bowl with plastic wrap or a clean towel and let it rise in a warm place for 60 to 90 minutes, or until doubled in size.
- Preheat and shape: Preheat your oven to 400 degrees F (200 degrees C). Line a baking sheet with parchment paper. Punch down the risen dough. Divide the dough into 12 equal pieces. Roll each piece into a long, thin stick, about 8 to 10 inches long. Place the breadsticks on the prepared baking sheet.
- Second rise: Cover the shaped breadsticks loosely and let them rest for 15 minutes while the oven finishes preheating.
- Bake: Bake for 10 to 12 minutes, or until lightly golden brown.
- Prepare the topping: While the breadsticks bake, melt the butter in a small saucepan over low heat. Stir in the minced garlic, Parmesan cheese, and parsley. Heat until the garlic is fragrant, about 1 minute. Do not let the garlic brown.
- Finish: Immediately brush the hot breadsticks generously with the garlic butter mixture as soon as they come out of the oven. Serve warm.
Notes
- For extra cheesy breadsticks, sprinkle an additional tablespoon of Parmesan cheese over the tops right after brushing with the garlic butter.
- If you prefer a quicker rise time, place the dough in a slightly warm oven (turned off) to proof.
- You can use store-bought pizza dough to skip steps 1 through 4 for faster preparation.
- Prep Time: 20 min
- Cook Time: 12 min
- Category: Appetizer
- Method: Baking
- Cuisine: Italian-American
Nutrition
- Serving Size: 1 breadstick
- Calories: 185
- Sugar: 1.5
- Sodium: 280
- Fat: 8
- Saturated Fat: 4
- Unsaturated Fat: 4
- Trans Fat: 0.2
- Carbohydrates: 24
- Fiber: 1
- Protein: 5
- Cholesterol: 15