Oh my goodness, let me tell you, nothing screams ‘comfort food’ louder or better than a stack of warm, buttery biscuits piled high on your plate. Forget those sad, dense hockey pucks you sometimes get at restaurants! When I talk about buttermilk biscuits, I’m talking about the real deal—the kind that flake apart into a million tissue-thin layers when you bite into them. This recipe is my absolute secret weapon for those perfect weekend breakfasts or when you just need a hug in bread form.
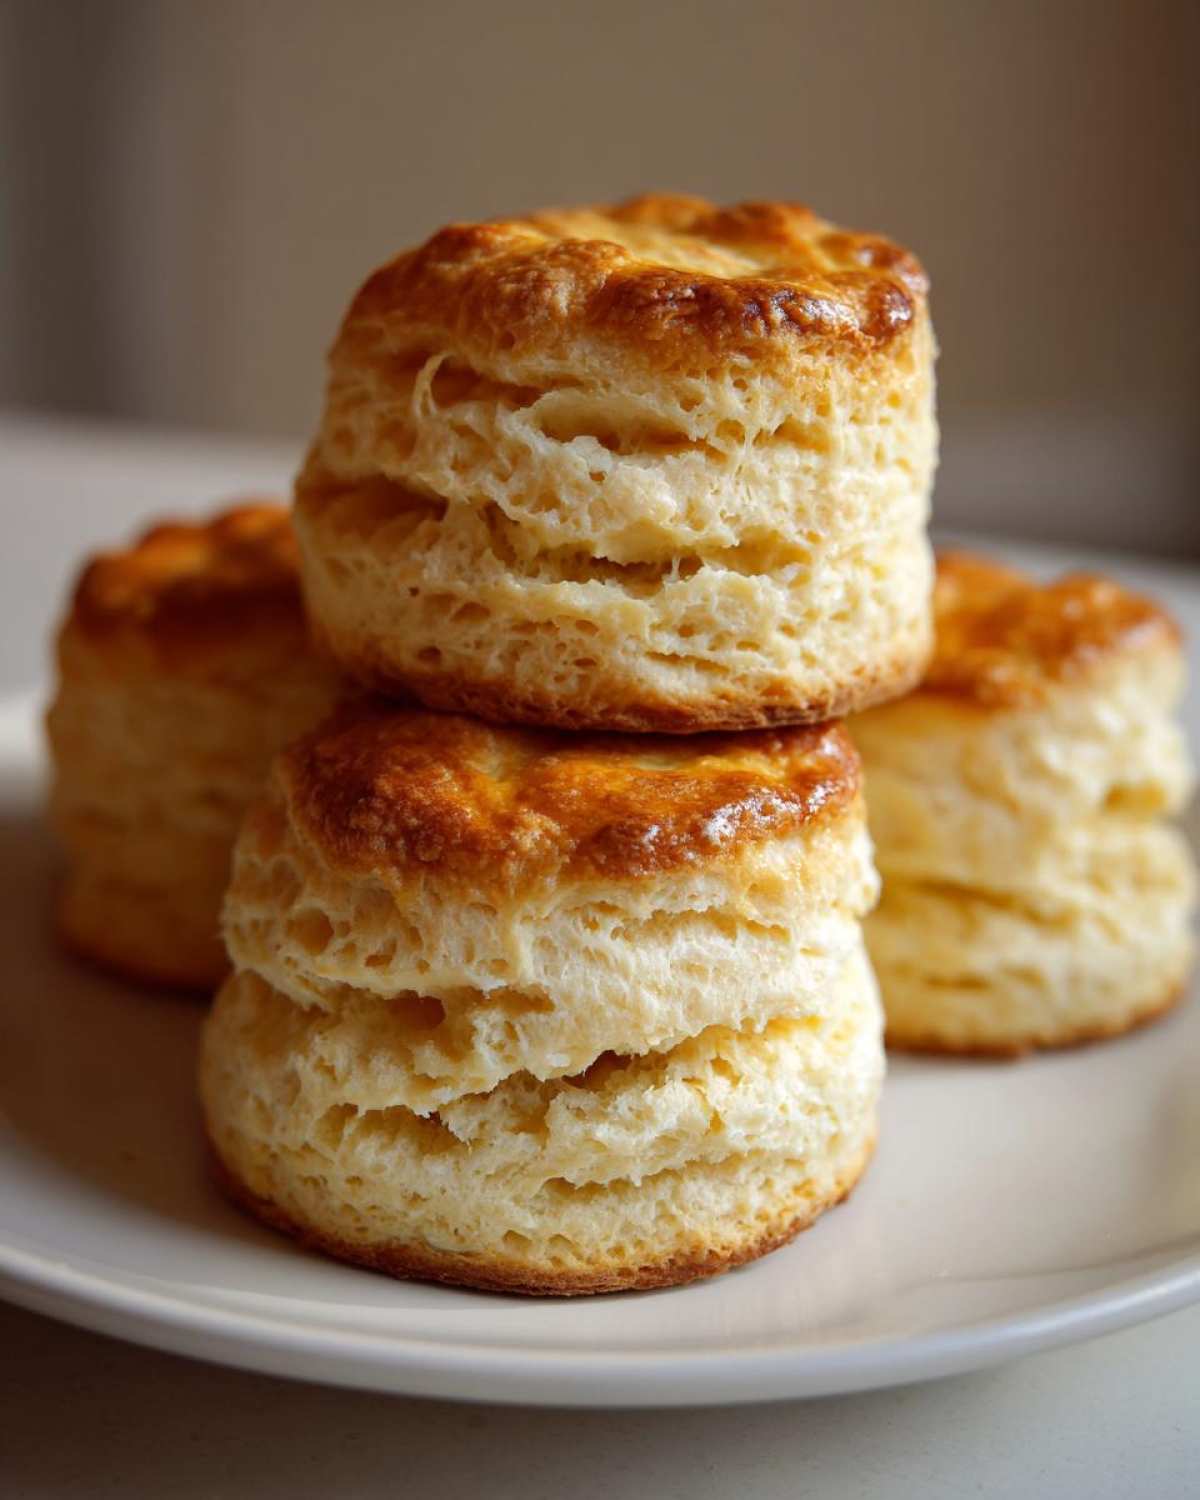
I learned this technique years ago when I first started getting serious about authentic Southern baking. The magic isn’t just in the buttermilk; it’s in the *cold* butter and a special folding trick. Trust me, once you master these ultra flaky and tender beauties from scratch, you’ll never go back to the can. They bake up so tall; it’s honestly a little bit thrilling to pull them out of the oven!
Why Our Classic Buttermilk Biscuits Recipe Guarantees Flaky Layers
If you want those Instagram-worthy, sky-high biscuits, you need to understand exactly why this recipe works. We aren’t just mixing things up here; we’re building structure! These characteristics are non-negotiable when it comes to the best buttermilk biscuits:
- They are unbelievably flaky—maybe even shatteringly so.
- The texture inside is incredibly tender, never tough or dry.
- They are wonderfully buttery, tasting rich and honest.
- They achieve maximum height for the perfect sandwich base.
The real authority behind this recipe comes down to one specific mechanic: the folding and turning we do right before cutting. This technique mimics primitive lamination, trapping those cold pockets of butter inside the dough. When that heat hits, the water in the butter steams, pushing the layers apart. It’s pure science making for perfect, tall layers every single time. If you like this technique, you might also love my sweet potato biscuits recipe over here: sweet potato biscuits recipe.
Essential Ingredients for Perfect Homemade Buttermilk Biscuits
Okay, let’s talk about what goes into these magnificent buttermilk biscuits because the ingredients list itself isn’t long, but *how* you prepare them matters more than anything else here. You need flour, baking powder, baking soda, salt, butter, and, of course, the buttermilk. I always use all-purpose flour, nothing fancy needed!
Now, pay close attention to the butter and the buttermilk. They must be COLD. And I mean refrigerator cold, straight from the back of the fridge cold. If your butter starts getting soft while you’re cutting it into the flour, stop immediately! Put the whole bowl in the freezer for five minutes. Those hard, tiny pieces of butter are what create steam pockets, which are the secret to ultra flaky layers. This is non-negotiable for truly tender buttermilk biscuits.
Ingredient Notes and Substitutions for Buttermilk Biscuits
If you’re staring into your fridge like I have been hundreds of times and realize you’re out of buttermilk, don’t panic and reach for regular milk! You can fake it like a champ. Just put a tablespoon of white vinegar or lemon juice into a measuring cup and fill it up to the 3/4 cup line with regular milk. Let it sit for five minutes until it looks slightly curdled—that sour acidity is what reacts with the baking soda to give you the lift you need. Also, while some folks swear by shortening for softness, I insist on real unsalted butter. You just can’t beat that deep, nutty flavor that butter brings to these homemade buttermilk biscuits.
Step-by-Step Instructions for Tall and Flaky Buttermilk Biscuits
Alright, apron on! This is where we turn those cold ingredients into magic. Don’t rush these steps, especially the mixing and folding. A gentle hand now means you get those beautiful, high-rising buttermilk biscuits later. The oven should already be blasting away at 425 degrees F when we cut these out, so preheat that thing first!
Mixing the Dough for Tender Buttermilk Biscuits
First, whisk your dry stuff—flour, baking powder, soda, and salt—in a big bowl. Now, add those cold butter cubes. You need to work that butter in quickly, either with a pastry blender or just your clean, cool fingertips. You’re aiming for a coarse mixture, like coarse cornmeal, with some larger, pea-sized chunks of butter still visible. Those chunks are crucial! Once it looks right, make a little dip right in the middle and pour in all your cold buttermilk.
Stir it just until everything *barely* comes together. I mean it—stop stirring the second you don’t see dry flour streaks anymore. The moment you see a shaggy, rough mass, that’s your cue to stop. If you overmix here, you develop gluten, and suddenly you’ve made tough crackers instead of fluffy biscuit recipe masterpieces. Don’t worry if it looks messy; that’s exactly what we want for tender buttermilk biscuits.
The Folding Technique for Layered Buttermilk Biscuits
Now, turn that shaggy dough onto a lightly floured surface. Gently pat it into a rough rectangle, about an inch thick. This next part is the game-changer for height! If you want to deep-dive into why turning the dough works, check out my guide on general baking techniques for biscuits. Think about folding a business letter: take the bottom third and fold it over the middle, then fold the top third down over that. You’ve just created layers!
Turn that folded rectangle 90 degrees—so the seam is running sideways from you—and gently pat or roll it back out to that one-inch thickness. We repeat that fold one more time. I know it feels fussy, but this layering process builds the structure that separates your layers. After that second fold, pat it one last time to one-inch thickness, grab your 2-inch biscuit cutter, and press straight down. Never, ever twist that cutter! Twisting seals the edges, and sealed edges stop the biscuits from soaring upwards. Place them close together on the sheet for soft sides, brush the tops with a little extra buttermilk wash, and get them into that hot oven!
Baking Techniques for Golden Brown Buttermilk Biscuits
Getting those biscuits a beautiful, rich golden brown color means you’ve done everything right up to this point! Since we preheated to 425 degrees F, the biscuits should get a great ‘oven spring’ immediately. Remember that optional trick I mentioned? If you really want them to shoot straight up, put the cut biscuits on the tray and pop them into the freezer for about 10 minutes while your oven finishes preheating—that extra blast of cold solidifies the butter one last time before baking.
When placing them on the sheet, you have a choice based on how you like your edges. If you put them close together, even touching, the steam gets trapped between them, resulting in soft, pale sides. But if you space them an inch or two apart, the edges get exposed to the dry heat, and you get those wonderfully crisp, golden brown outer crusts. I usually put mine close together for that classic soft Southern pile, but either way looks gorgeous!
Right before they go in, give the tops a light brush with that leftover cold buttermilk. This wash helps them achieve that fantastic, slightly crinkled, buttery sheen while baking. Bake them for 12 to 15 minutes. You’re looking for them to be puffed up like little clouds and perfectly golden brown on top. Don’t be tempted to open the oven door too early, or they might collapse on you!
Tips for Success When Making Homemade Buttermilk Biscuits
Look, baking these buttermilk biscuits is rewarding, but it’s really all about respecting the temperature of your ingredients. I learned this the hard way way back when I first tried making them without my mother hovering over me. I used butter that was perfectly soft, thinking that would help it mix in better. Oops! They came out flat little disks, not tall, fluffy towers!
The golden rule is this: Keep everything icy cold, and touch the dough as little as humanly possible. When cutting in the butter, work fast. The quicker you get that dough mixed and folded, the less time the butter has to warm up. Minimizing handling keeps the layers intact during baking, which is the whole point!
If you want to branch out a little after mastering this classic, check out how I handle my no-yeast flatbreads; the principles of quick mixing are similar: easy homemade naan bread stovetop. But honestly, stick to these chilly rules, and success with your homemade buttermilk biscuits is virtually guaranteed!
Storage and Reheating Your Fluffy Buttermilk Biscuits
We all know that the absolute best biscuit is the one eaten warm, fresh from the oven, but sometimes you just have leftovers! Don’t worry, these babies store beautifully. For best results, keep any uneaten buttermilk biscuits stored in an airtight container at room temperature. Seriously, avoid the fridge if you can, as the dryness of the fridge will start to turn them harder faster.
When you’re ready to eat them later, the microwave is quick, but it can sometimes change the texture. For the fluffiest biscuit revival, I always wrap them loosely in foil and pop them straight into a moderate oven—say 350 degrees F—for about 5 to 8 minutes. That warmth gets the butter working again and restores that beautiful tenderness we worked so hard to achieve!
Serving Suggestions for Classic Southern Buttermilk Biscuits
What do you do once you have a stunning stack of these tall, buttery biscuit recipe wonders? You serve them! These aren’t just good for any meal; they are the backbone of classic Southern comfort. My absolute favorite way to enjoy the first batch is just split open, swimming in homemade sausage gravy. If you’ve never made gravy without drippings, you absolutely must try my recipe here: homemade brown gravy recipe no drippings.
But they are just as wonderful on the sweet side! Keep a jar of good quality strawberry jam handy, or better yet, make a simple honey butter—just mix softened butter with a drizzle of honey until creamy. Honestly, a little dollop melted butter straight into a hot biscuit hole is heavenly enough on its own!
Frequently Asked Questions About Buttermilk Biscuits
I get so many questions about these biscuits, and honestly, most problems people run into are totally fixable! Don’t sweat it if your first batch isn’t perfect. Here are the top things folks ask me about making great homemade buttermilk biscuits.
Why are my homemade buttermilk biscuits tough instead of tender?
That’s almost always due to one thing: overmixing! When you stir the wet and dry ingredients together too much after adding the buttermilk, you develop the gluten in the flour. Gluten is what makes bread chewy, but it’s the enemy of a tender buttermilk biscuit. Remember what I said? Stop mixing the second that flour disappears and the dough looks messy. Less handling equals ultimate tenderness!
Can I make these easy buttermilk biscuits ahead of time?
You absolutely can! This is a great trick for busy mornings. Mix the dough, do your folds, and cut out all your biscuits just like the recipe says. Then, instead of putting them on the sheet to bake, place them on a baking sheet lined with parchment paper and stick the whole thing in the freezer for 30 minutes until hard. Once they are completely frozen, transfer them to a freezer bag. When you want breakfast, just pop them straight from the freezer into your hot 425 degree oven. They might need an extra two or three minutes of baking time, but they’ll still be wonderfully flaky biscuit recipe winners!
What is the best substitute if I don’t have actual buttermilk?
As I mentioned earlier, don’t panic! The best substitute for making those easy buttermilk biscuits is using regular milk mixed with an acid. Take one cup of regular milk—whole milk or 2% works best—and stir in one tablespoon of white distilled vinegar or fresh lemon juice. Let it sit on the counter for five to ten minutes. It’ll look slightly curdled, and that’s exactly what you want! That acidity does the heavy lifting needed for a good rise.
Nutritional Estimates for These Buttery Biscuit Recipe Servings
When you’re deep in the joy of comfort food baking, calories often take a backseat, and that’s okay sometimes! But just so you know what you’re enjoying, here are the estimated details for one of these wonderful buttermilk biscuits. Keep in mind that these figures are just estimates, and they can swing a bit depending on the exact brand of butter or milk you use. For the full rundown or to see how other recipes stack up, check out my general nutrition chart right here: disclaimer.
- Serving Size: 1 biscuit
- Calories: 280
- Fat: 15g
- Carbohydrates: 32g
- Protein: 5g
The main factors here are the butter and the buttermilk, which give you that lovely richness. But hey, they are totally worth every single crumb!
Print
Ultra Flaky and Tender Southern Buttermilk Biscuits
- Total Time: 30 min
- Yield: 8 biscuits 1x
- Diet: Vegetarian
Description
A recipe for making tall, flaky, and buttery buttermilk biscuits from scratch using classic Southern baking techniques.
Ingredients
- 2 cups all-purpose flour
- 1 tablespoon baking powder
- 1 teaspoon baking soda
- 1 teaspoon salt
- 1/2 cup (1 stick) cold unsalted butter, cut into small cubes
- 3/4 cup cold buttermilk, plus extra for brushing
Instructions
- Preheat your oven to 425 degrees F. Line a baking sheet with parchment paper or lightly grease it.
- In a large bowl, whisk together the flour, baking powder, baking soda, and salt.
- Add the cold butter cubes to the dry ingredients. Use a pastry blender or your fingertips to cut the butter into the flour until the mixture resembles coarse crumbs with some pea-sized pieces of butter remaining.
- Make a well in the center of the flour mixture and pour in the cold buttermilk. Stir gently with a fork until just combined. Do not overmix; the dough will be shaggy.
- Turn the dough out onto a lightly floured surface. Gently pat the dough into a rectangle about 1 inch thick.
- Fold the dough into thirds, like a letter. Turn the dough 90 degrees and gently pat or roll it back to about 1 inch thick. This folding creates layers. Repeat this fold and roll process one more time.
- Using a biscuit cutter (about 2 inches), press straight down into the dough to cut out the biscuits. Do not twist the cutter, as this seals the edges and prevents rising.
- Place the cut biscuits close together on the prepared baking sheet for softer sides, or spaced apart for crispier sides.
- Brush the tops lightly with extra buttermilk.
- Bake for 12 to 15 minutes, or until the biscuits are tall and golden brown on top.
- Serve warm, perhaps with butter or gravy.
Notes
- Keep your butter and buttermilk very cold for the flakiest results.
- For extra height, chill the cut biscuits in the freezer for 10 minutes before baking.
- If you do not have a biscuit cutter, you can cut squares with a sharp knife.
- Prep Time: 15 min
- Cook Time: 15 min
- Category: Breakfast
- Method: Baking
- Cuisine: American
Nutrition
- Serving Size: 1 biscuit
- Calories: 280
- Sugar: 1
- Sodium: 450
- Fat: 15
- Saturated Fat: 9
- Unsaturated Fat: 6
- Trans Fat: 0
- Carbohydrates: 32
- Fiber: 1
- Protein: 5
- Cholesterol: 35